On Fri 28 Jun 2024, twelve members gathered at Worcester Shrub Hill station to visit all the mechanical boxes in the area, except Ledbury, followed the next day by a visit to the SVR boxes (plus the one in Kidderminster Railway Museum) for some of the group. This extravaganza was ably organised by Matt Wingfield, Signal Inspector on the SVR, who receives great thanks. Howard, a Mobile Operations Manager from Network Rail, conducted the visits on the Friday. Those present are indebted to him for both having made the necessary arrangements and given up a day of holiday to take our Society members around. Thanks are also given to the many signallers who received the members on both days.
The group assembled on Worcester Shrub Hill station Down P1, with its fine array of lower quadrant semaphores visible to the north (SH77 and SH78), including an old GWR-style route indicator (the 'cash register') giving either BHAM or HFORD. Along the platform to the south, under the canopy, was seen the famous large disc main signal (SH80) with subsidiary calling-on disc. This large disc is known by rail staff as 'the banjo'; it makes a tremendous 'clunk' when returned to danger by gravity. Originally there were six of them, three in each direction at Shrub Hill, before the major rationalisation of the Worcester area in the early 1970s. There is also an unusual yellow-on-black ground disc shunt signal on the middle road. After admiring all this, those present travelled by car round to Worcester Shrub Hill signal box.
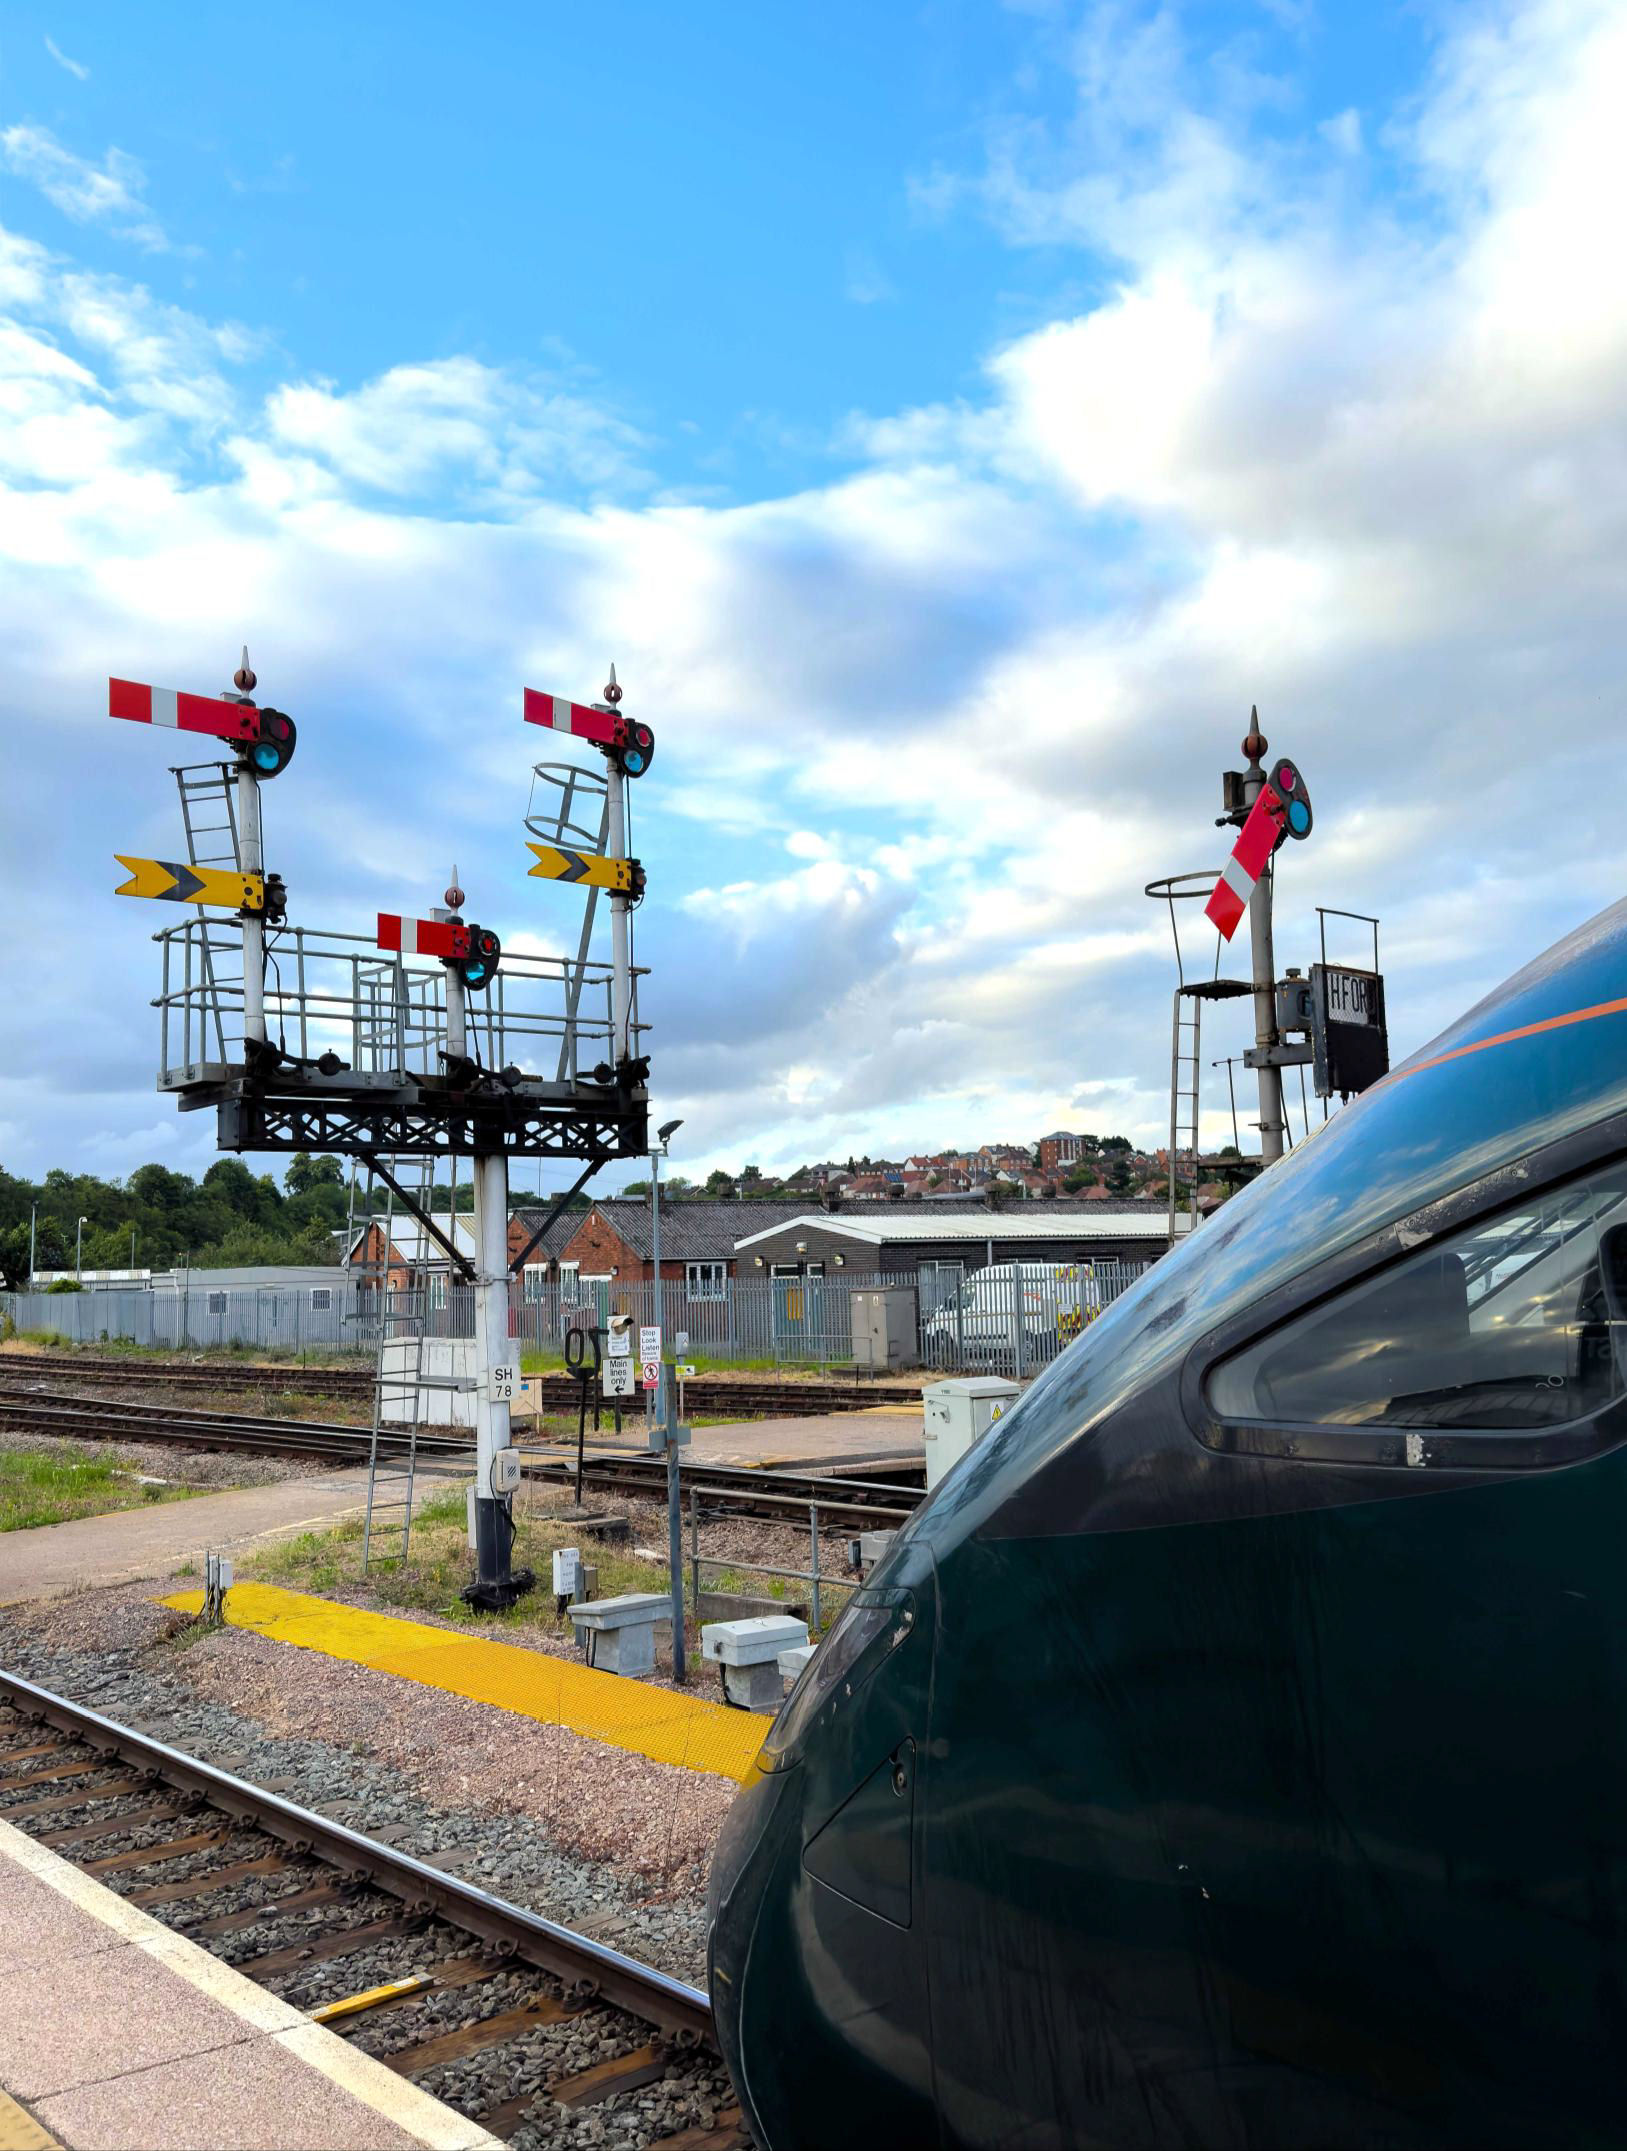
The north end of Worcester Shrub Hill station, the road is set for a train from far P2 to cross in front of this IET, left, towards Hereford (the 'cash register' shows 'HFORD').
[© Mark Shinwell 2024]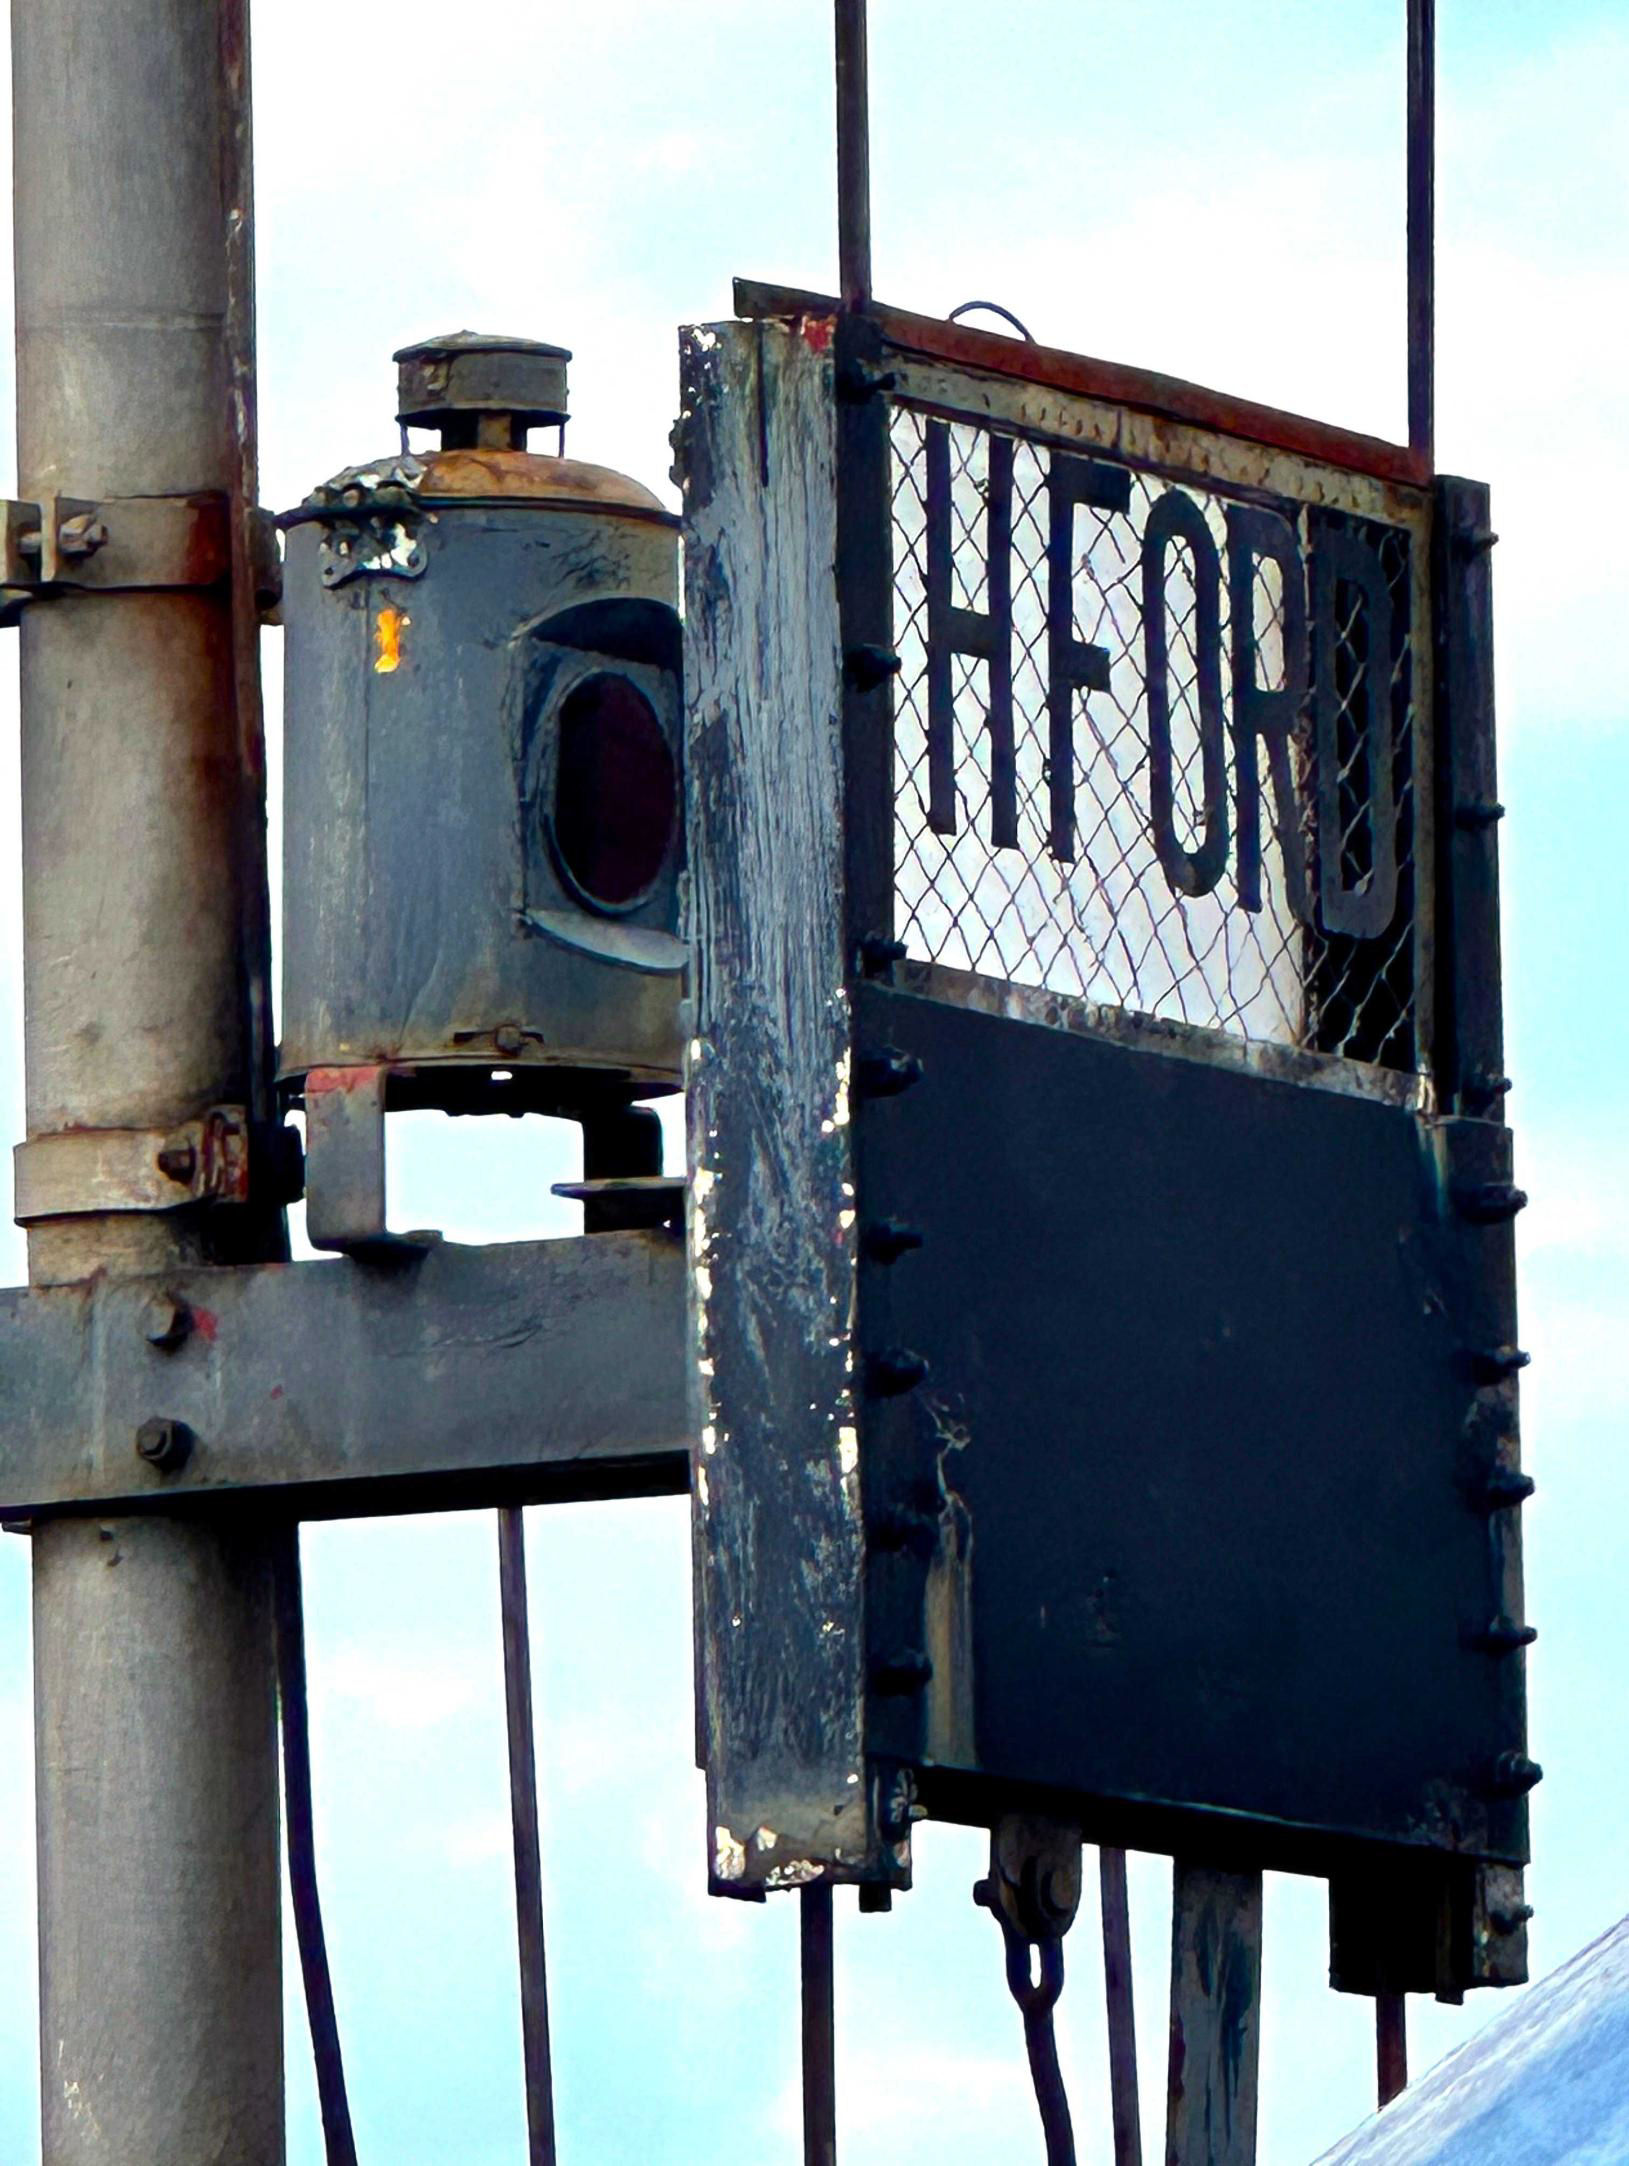
A close up of the 'cash register' showing 'HFORD'
[© Mark Shinwell 2024]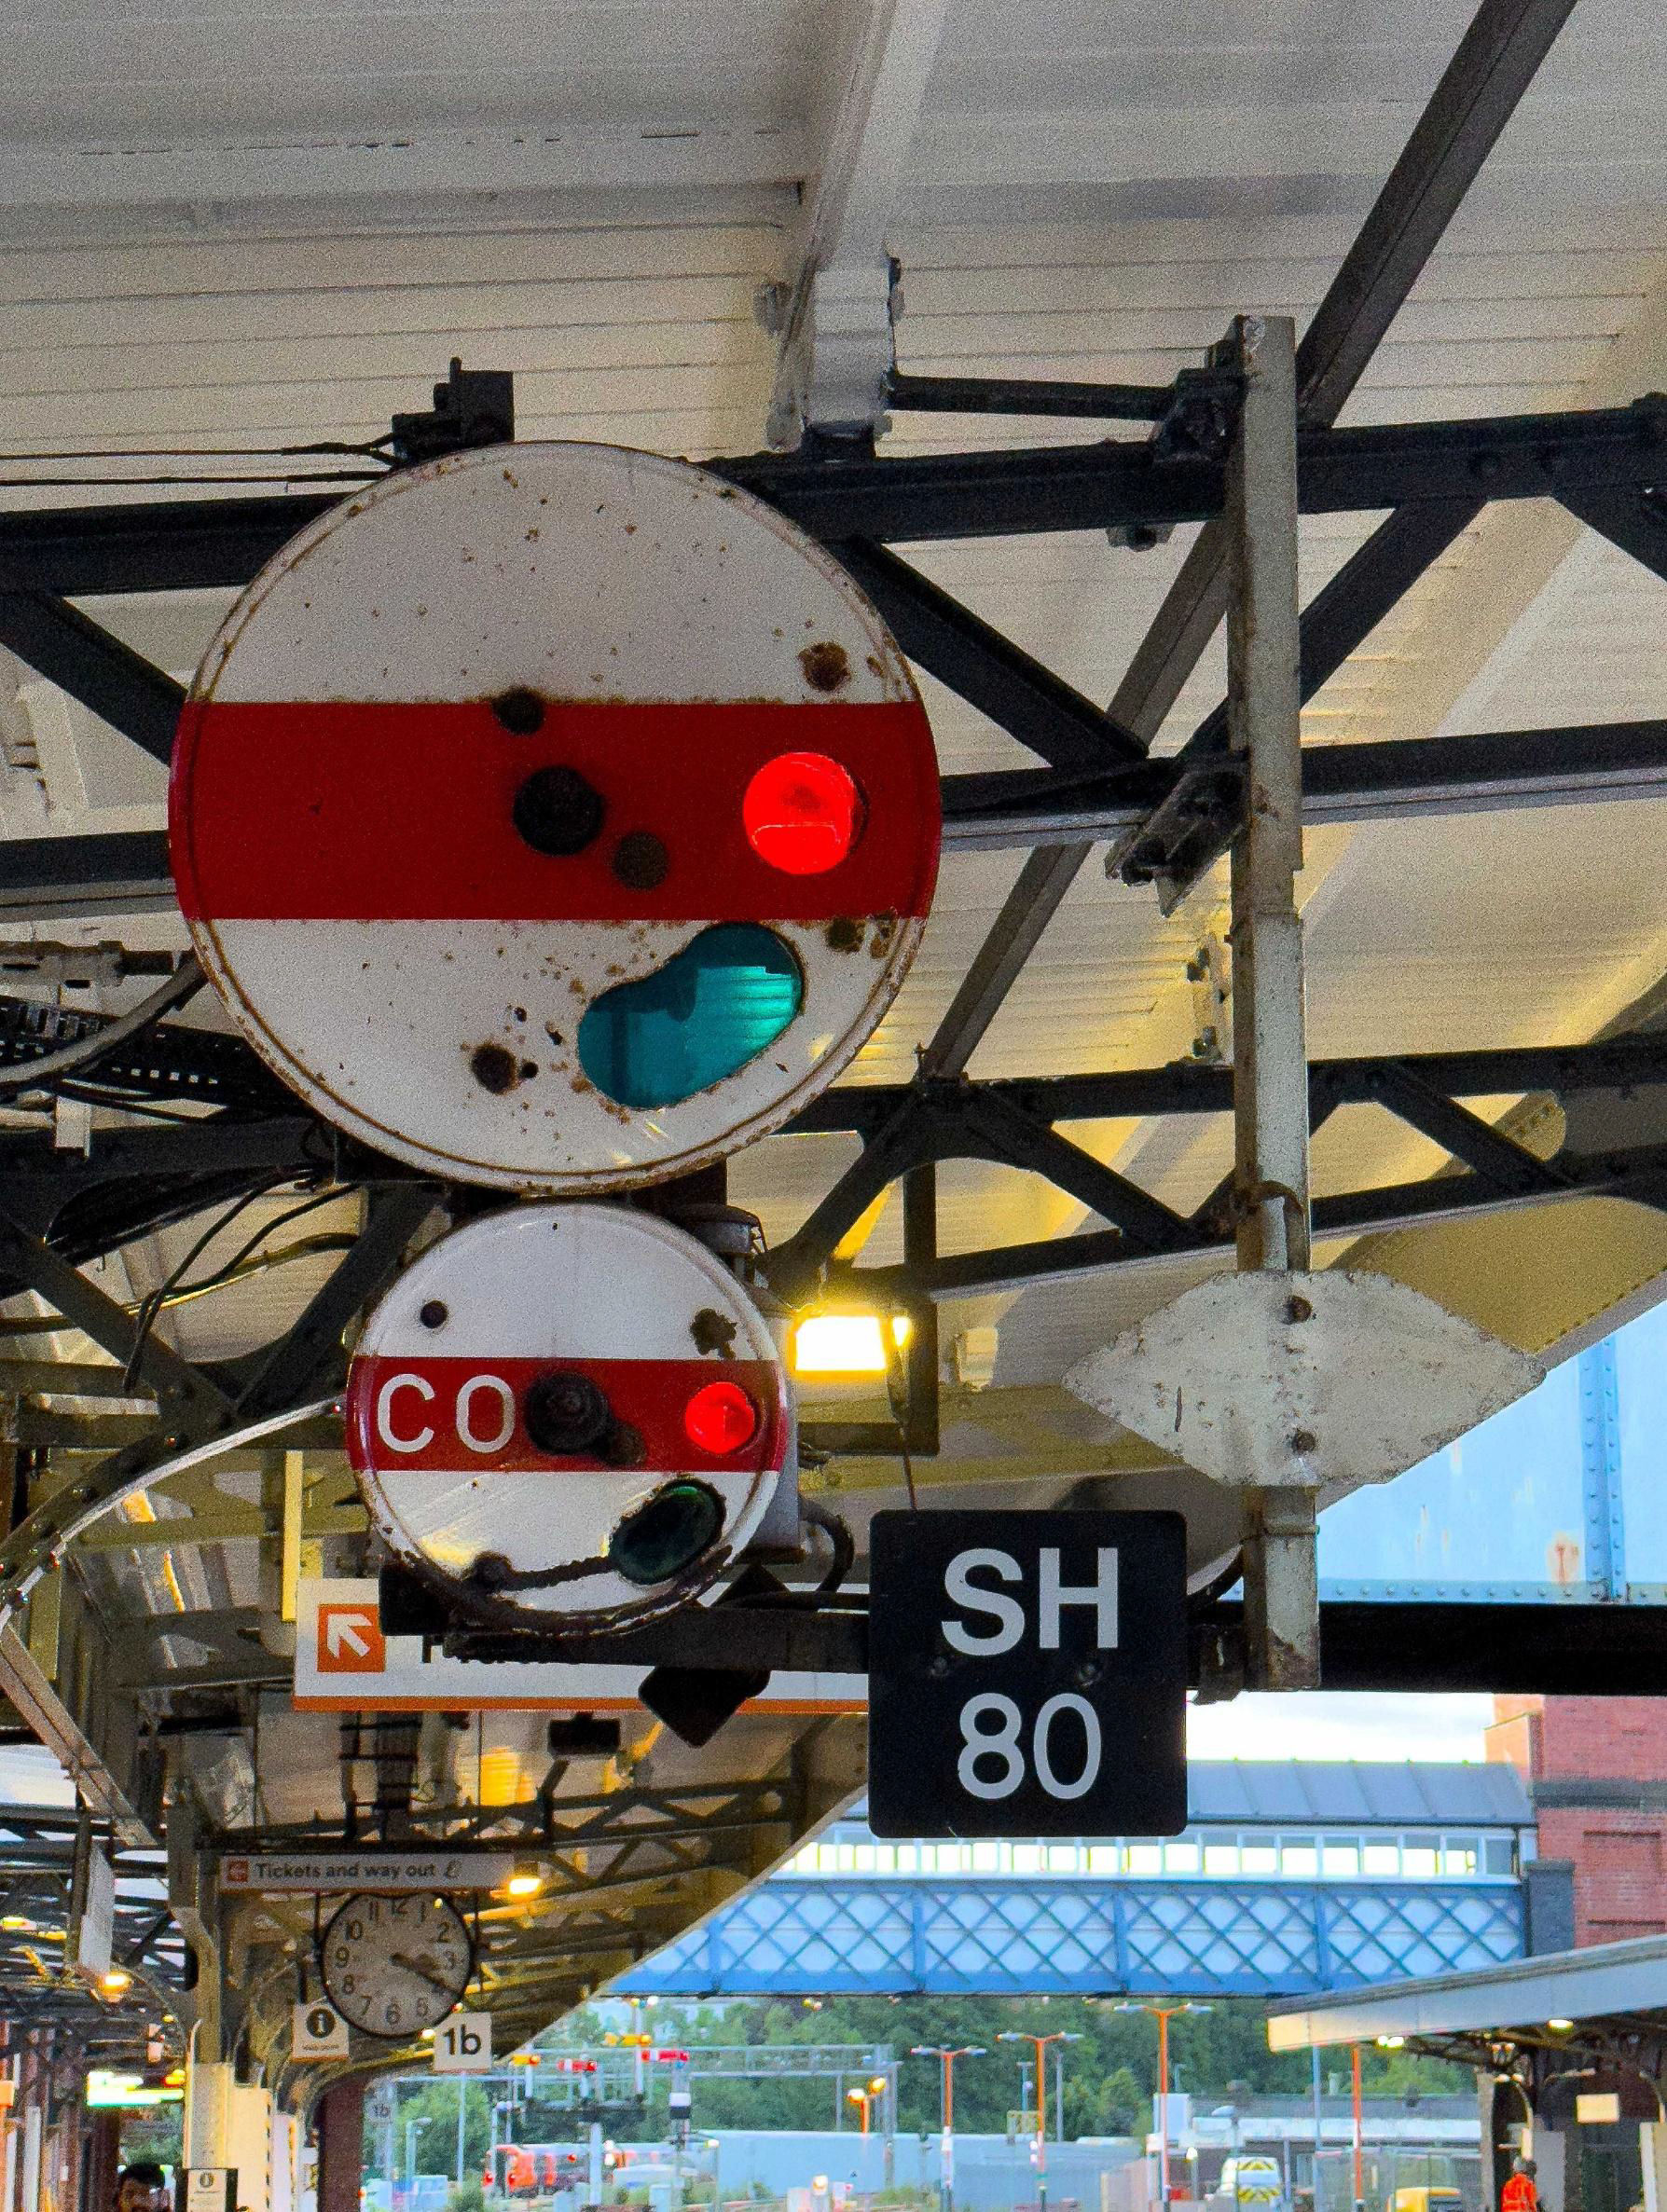
'SH80' The remaining 'banjo' signal, half way along Down P1 facing London with its subsidiary calling on disc. There were once six of these at the station.
[© Mark Shinwell 2024]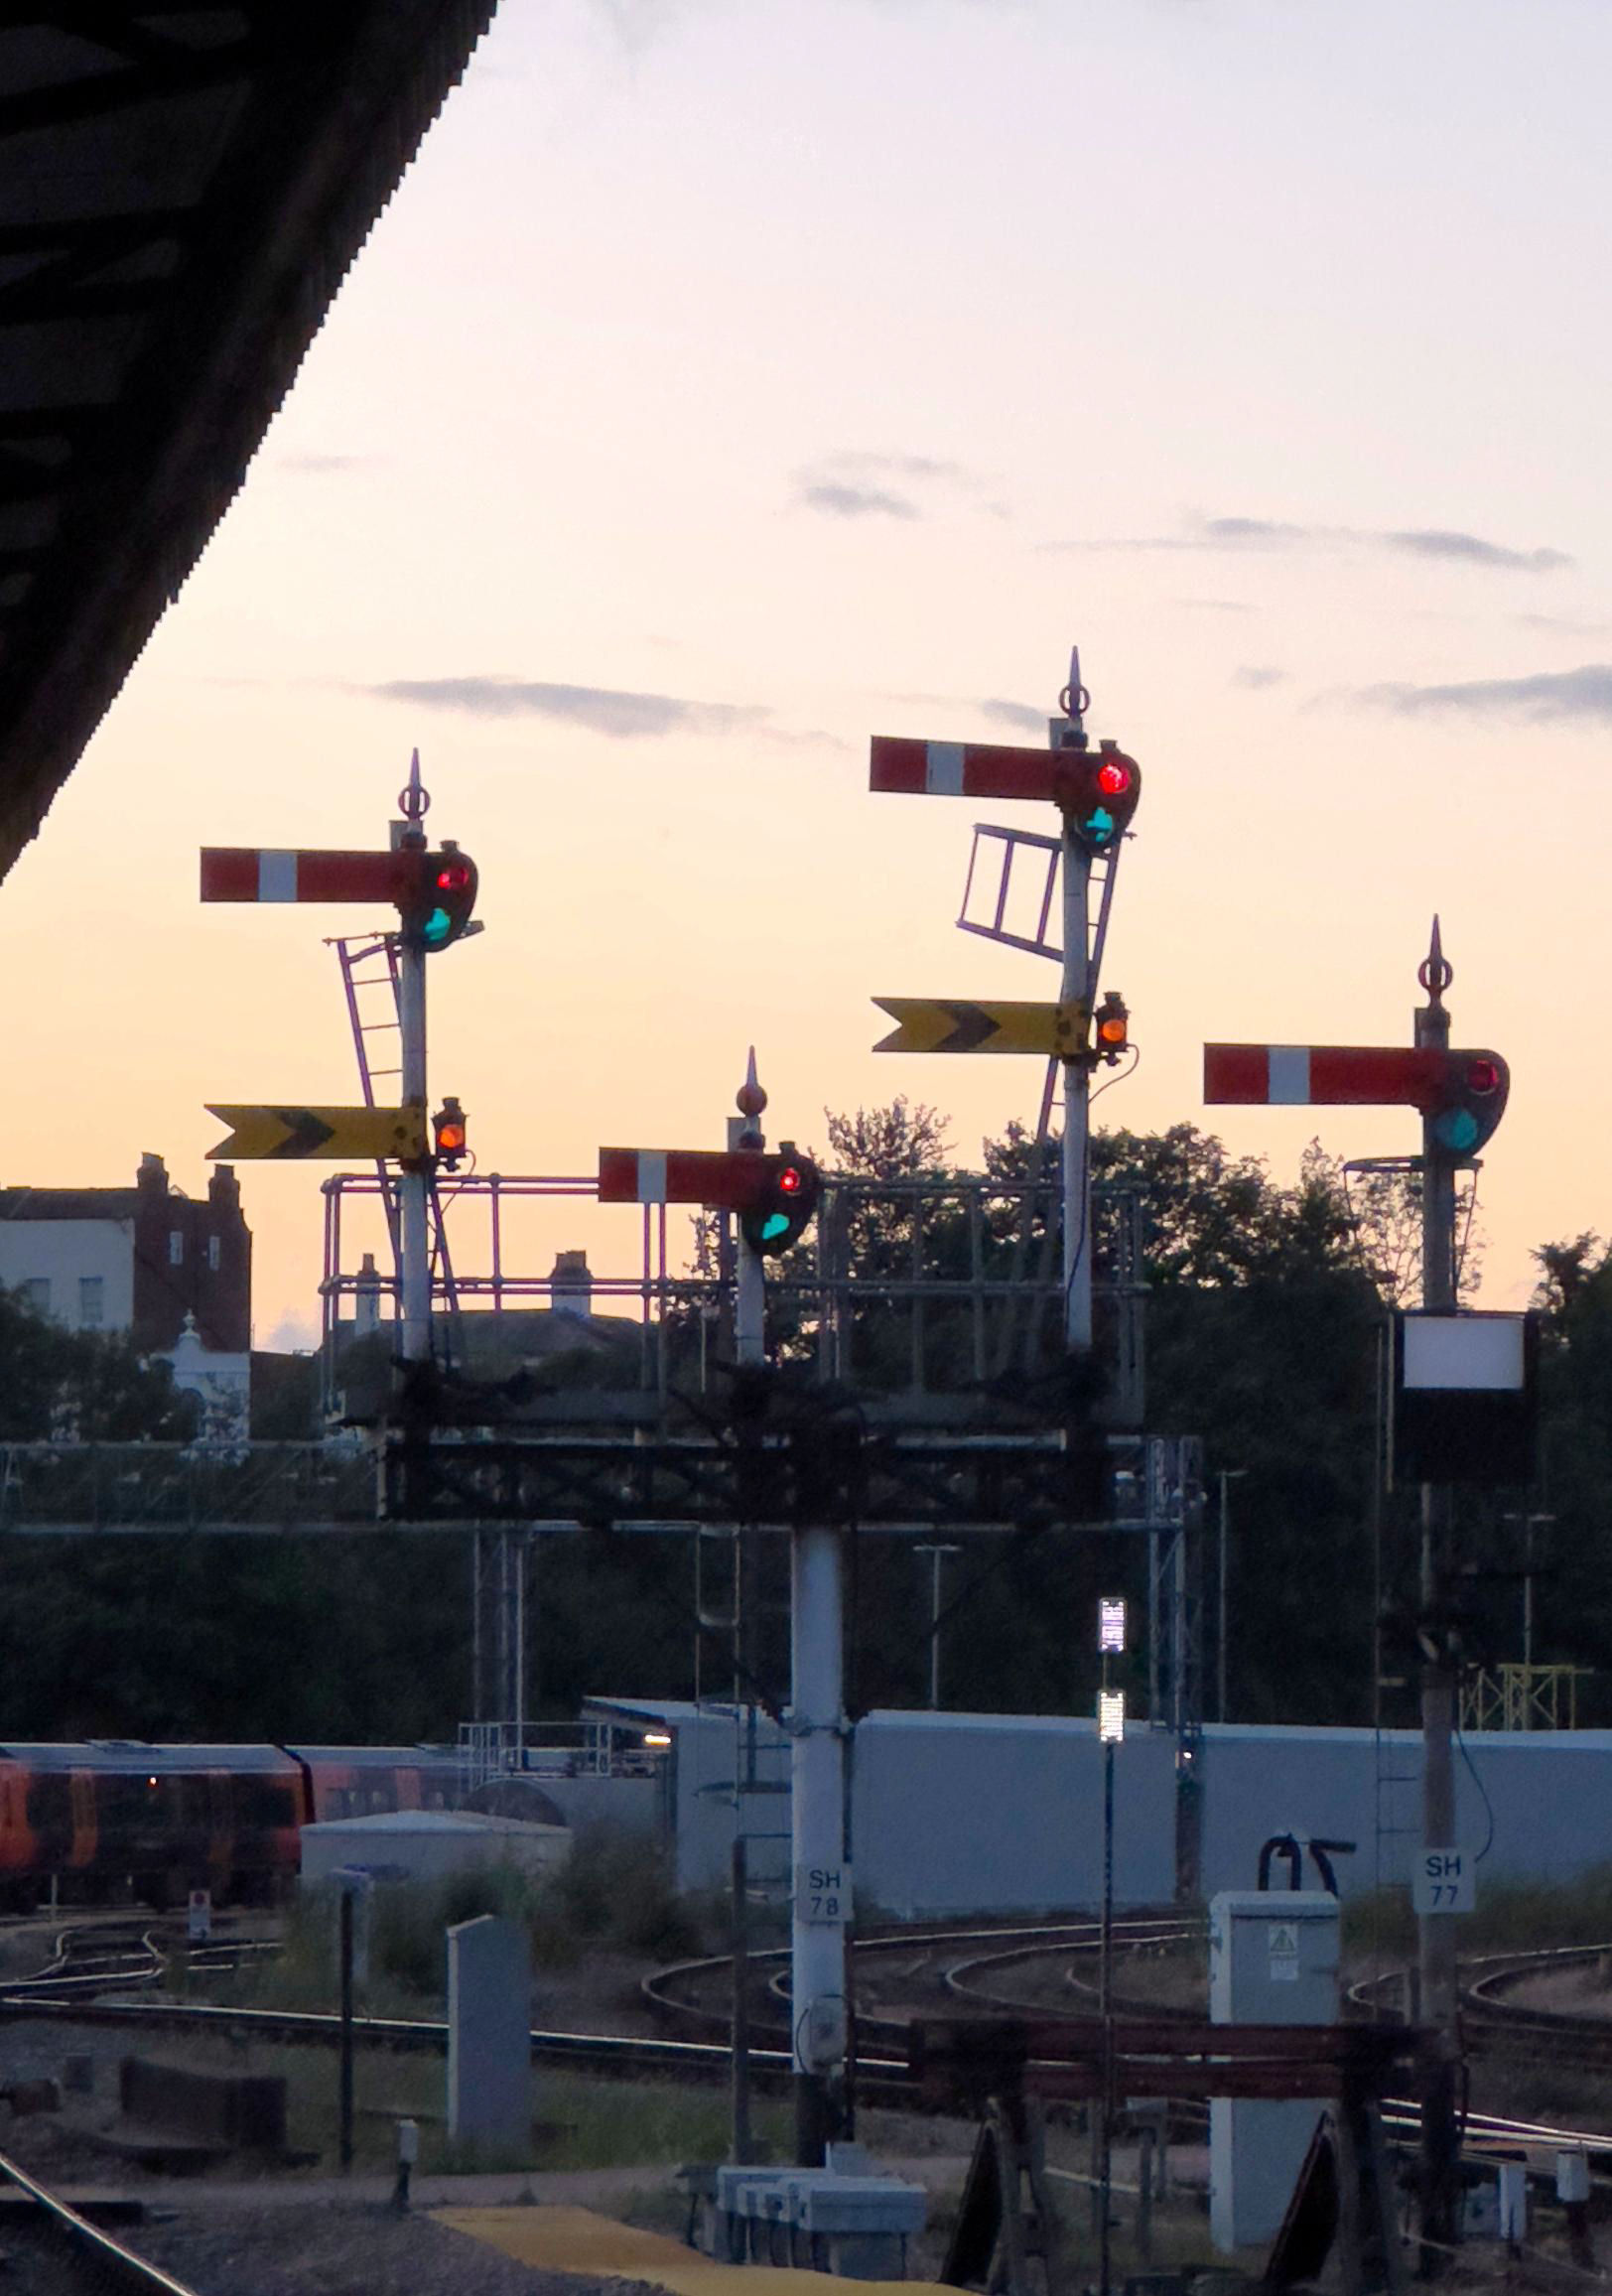
The fine array of lower quadrant semaphores at the north end of Worcester Shrub Hill station,
[© Mark Shinwell 2024]This is on the west (Down) side of the lines, south of the station and has an internal staircase to reach the operating floor. The GWR Type 11 signal box, dating from 1935, is built from dark blue engineering brick, with cast iron soil pipe painted in brown and three possibly original ventilators along the ridge line, at least one of which still has the correct fitting on the inside. Internally, an 84-lever, British Rail (BR) 5-bar vertical tappet frame (4 inch lever spacing) is to be found with GWR 1947 Tyers block instruments in wooden cases above. It works a combination of absolute block, acceptance lever and track circuit block to the adjacent boxes (Henwick, Worcester Tunnel Junction and Norton Junction). 57 operational levers are still present plus 8 white (out of use) levers, a total of 65. Lever number 80 ('Down Main Starting') was noted, which controls the famous disc. Two diagrams are mounted above the frame.
To the left is the current diagram, 'Worcester Shrub Hill Station (SH)' and to the right is an old GWR diagram of the 'Worcester Joint Station'. The latter is rather fine and had been drawn by Kevin Simpson, the signaller on duty during our visit, also a volunteer signaller on the SVR. While in the signal box, a less common bell code was heard: 2-2-2, received from Norton Junction, to instigate a line blockage.
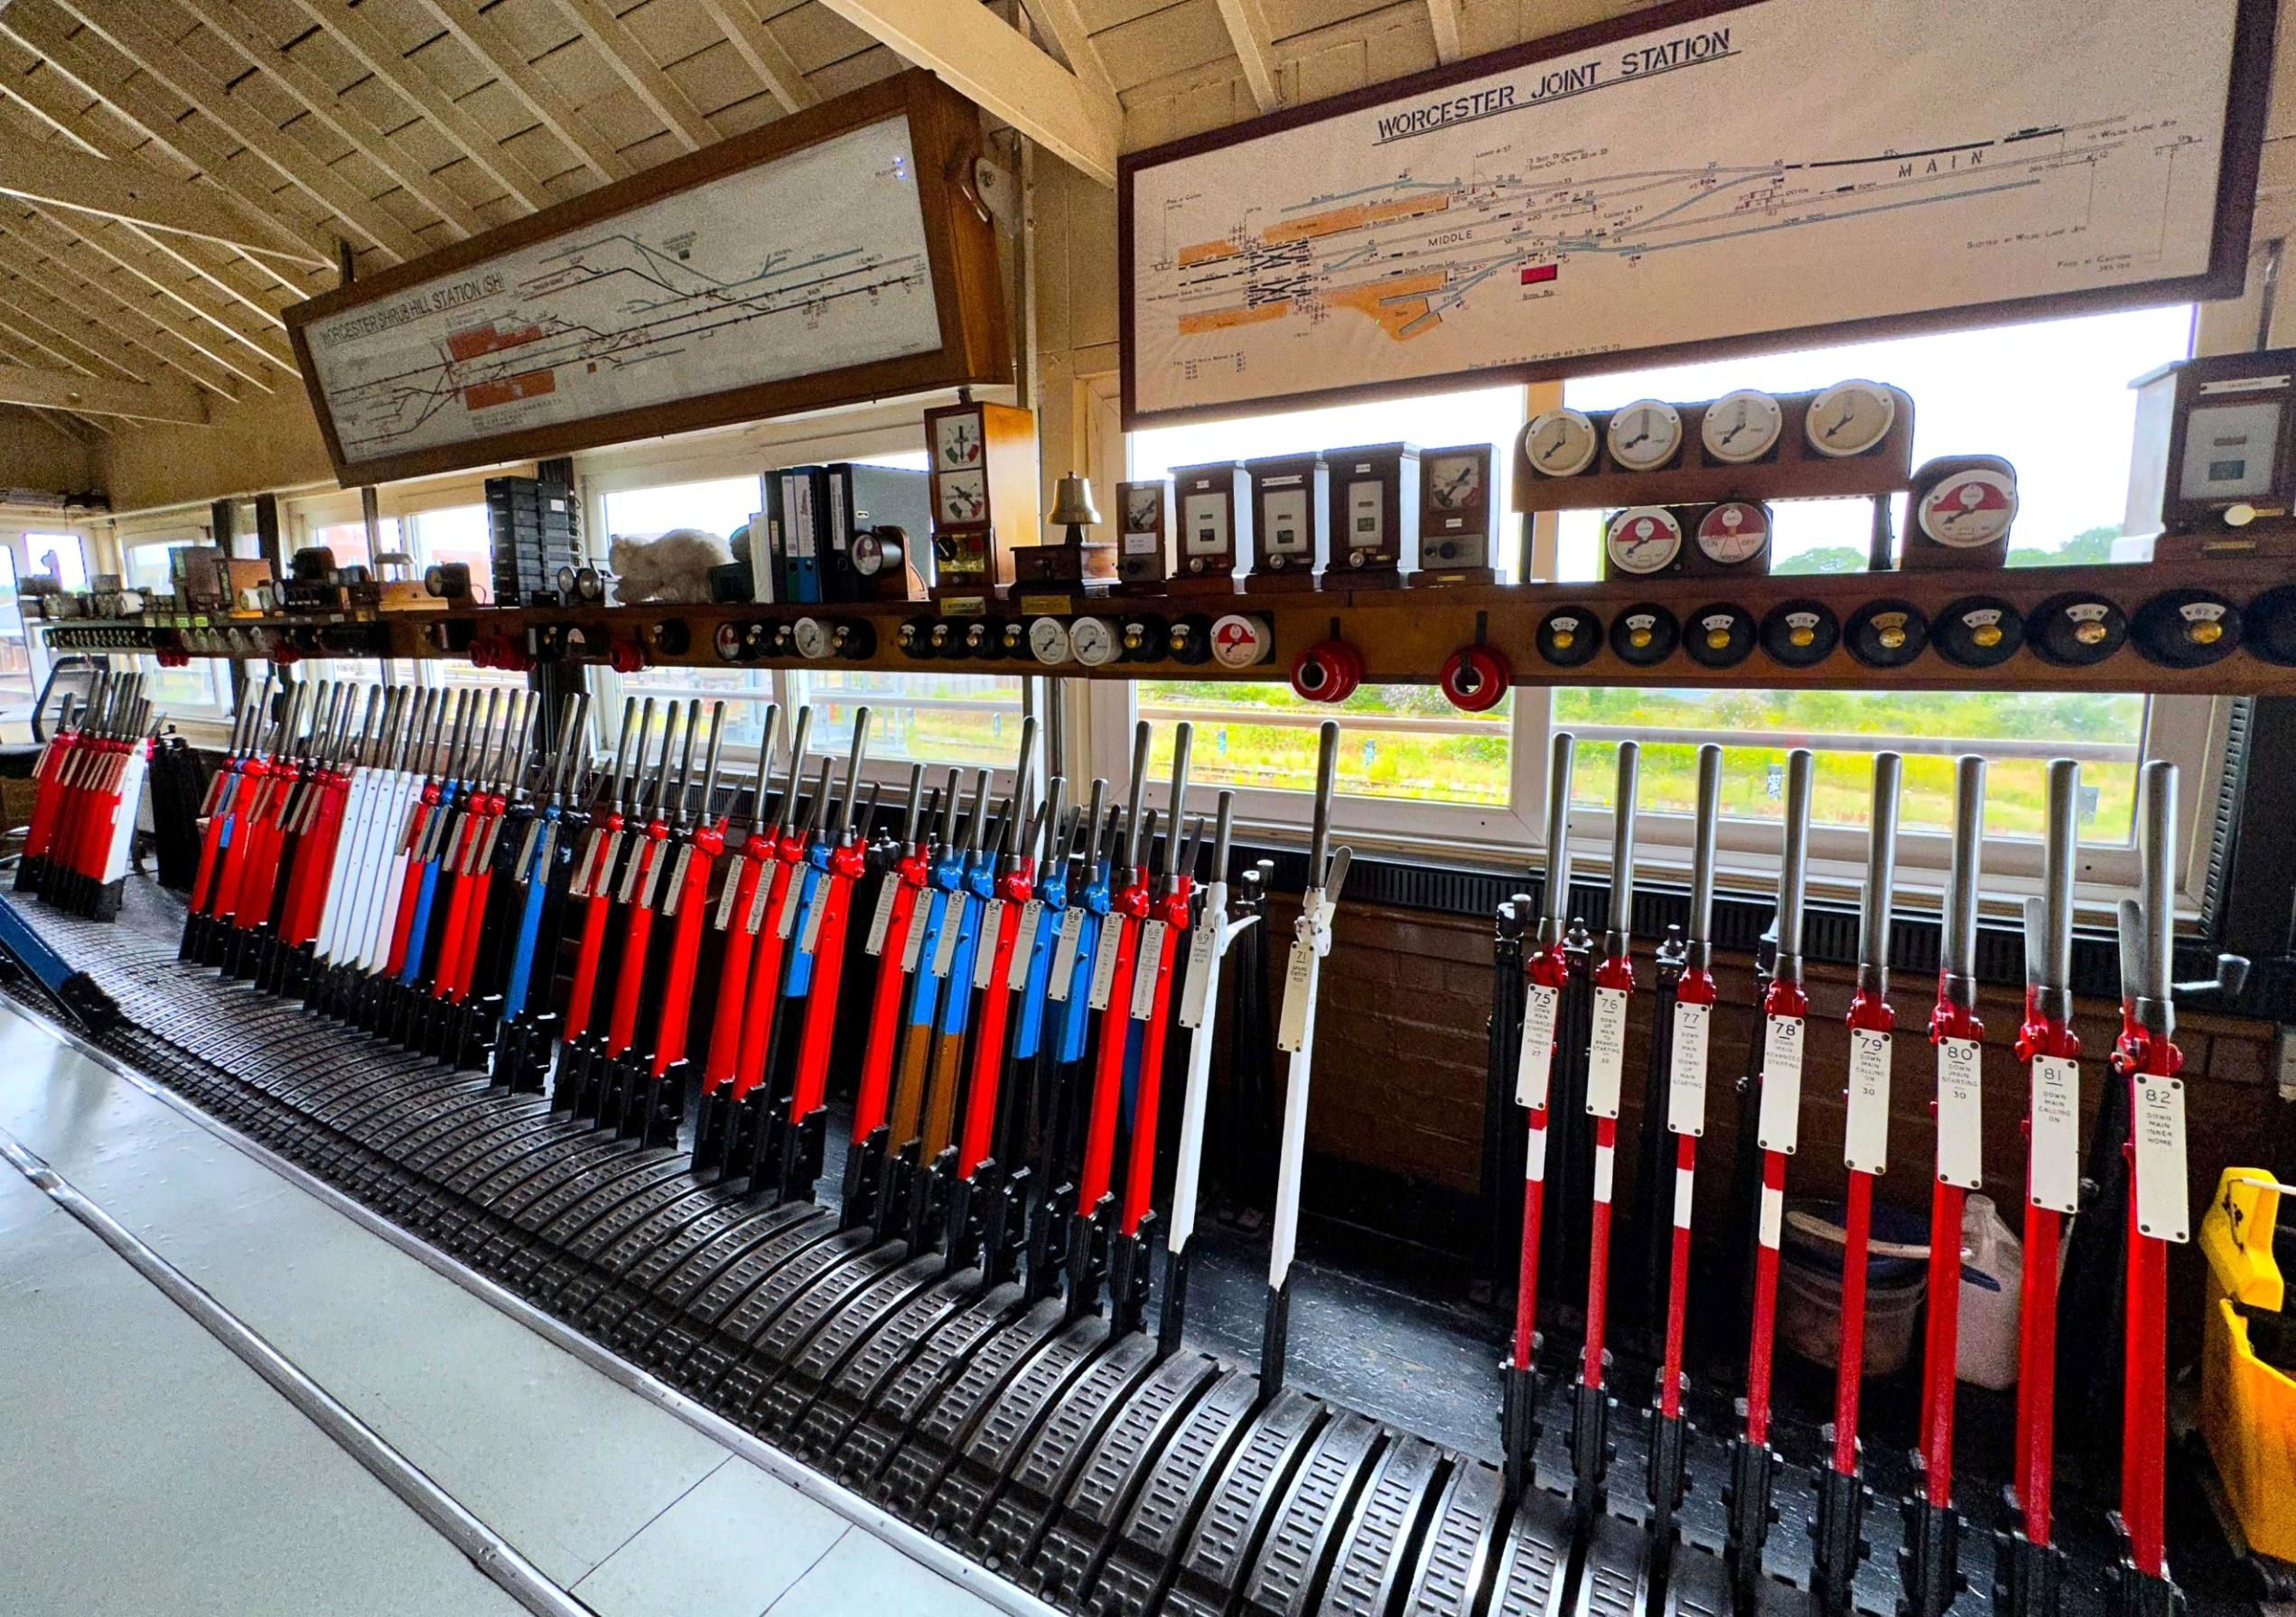
Worcester Shrub Hill signal box lever frame, block instruments and diagrams.
[© Mark Shinwell 2024]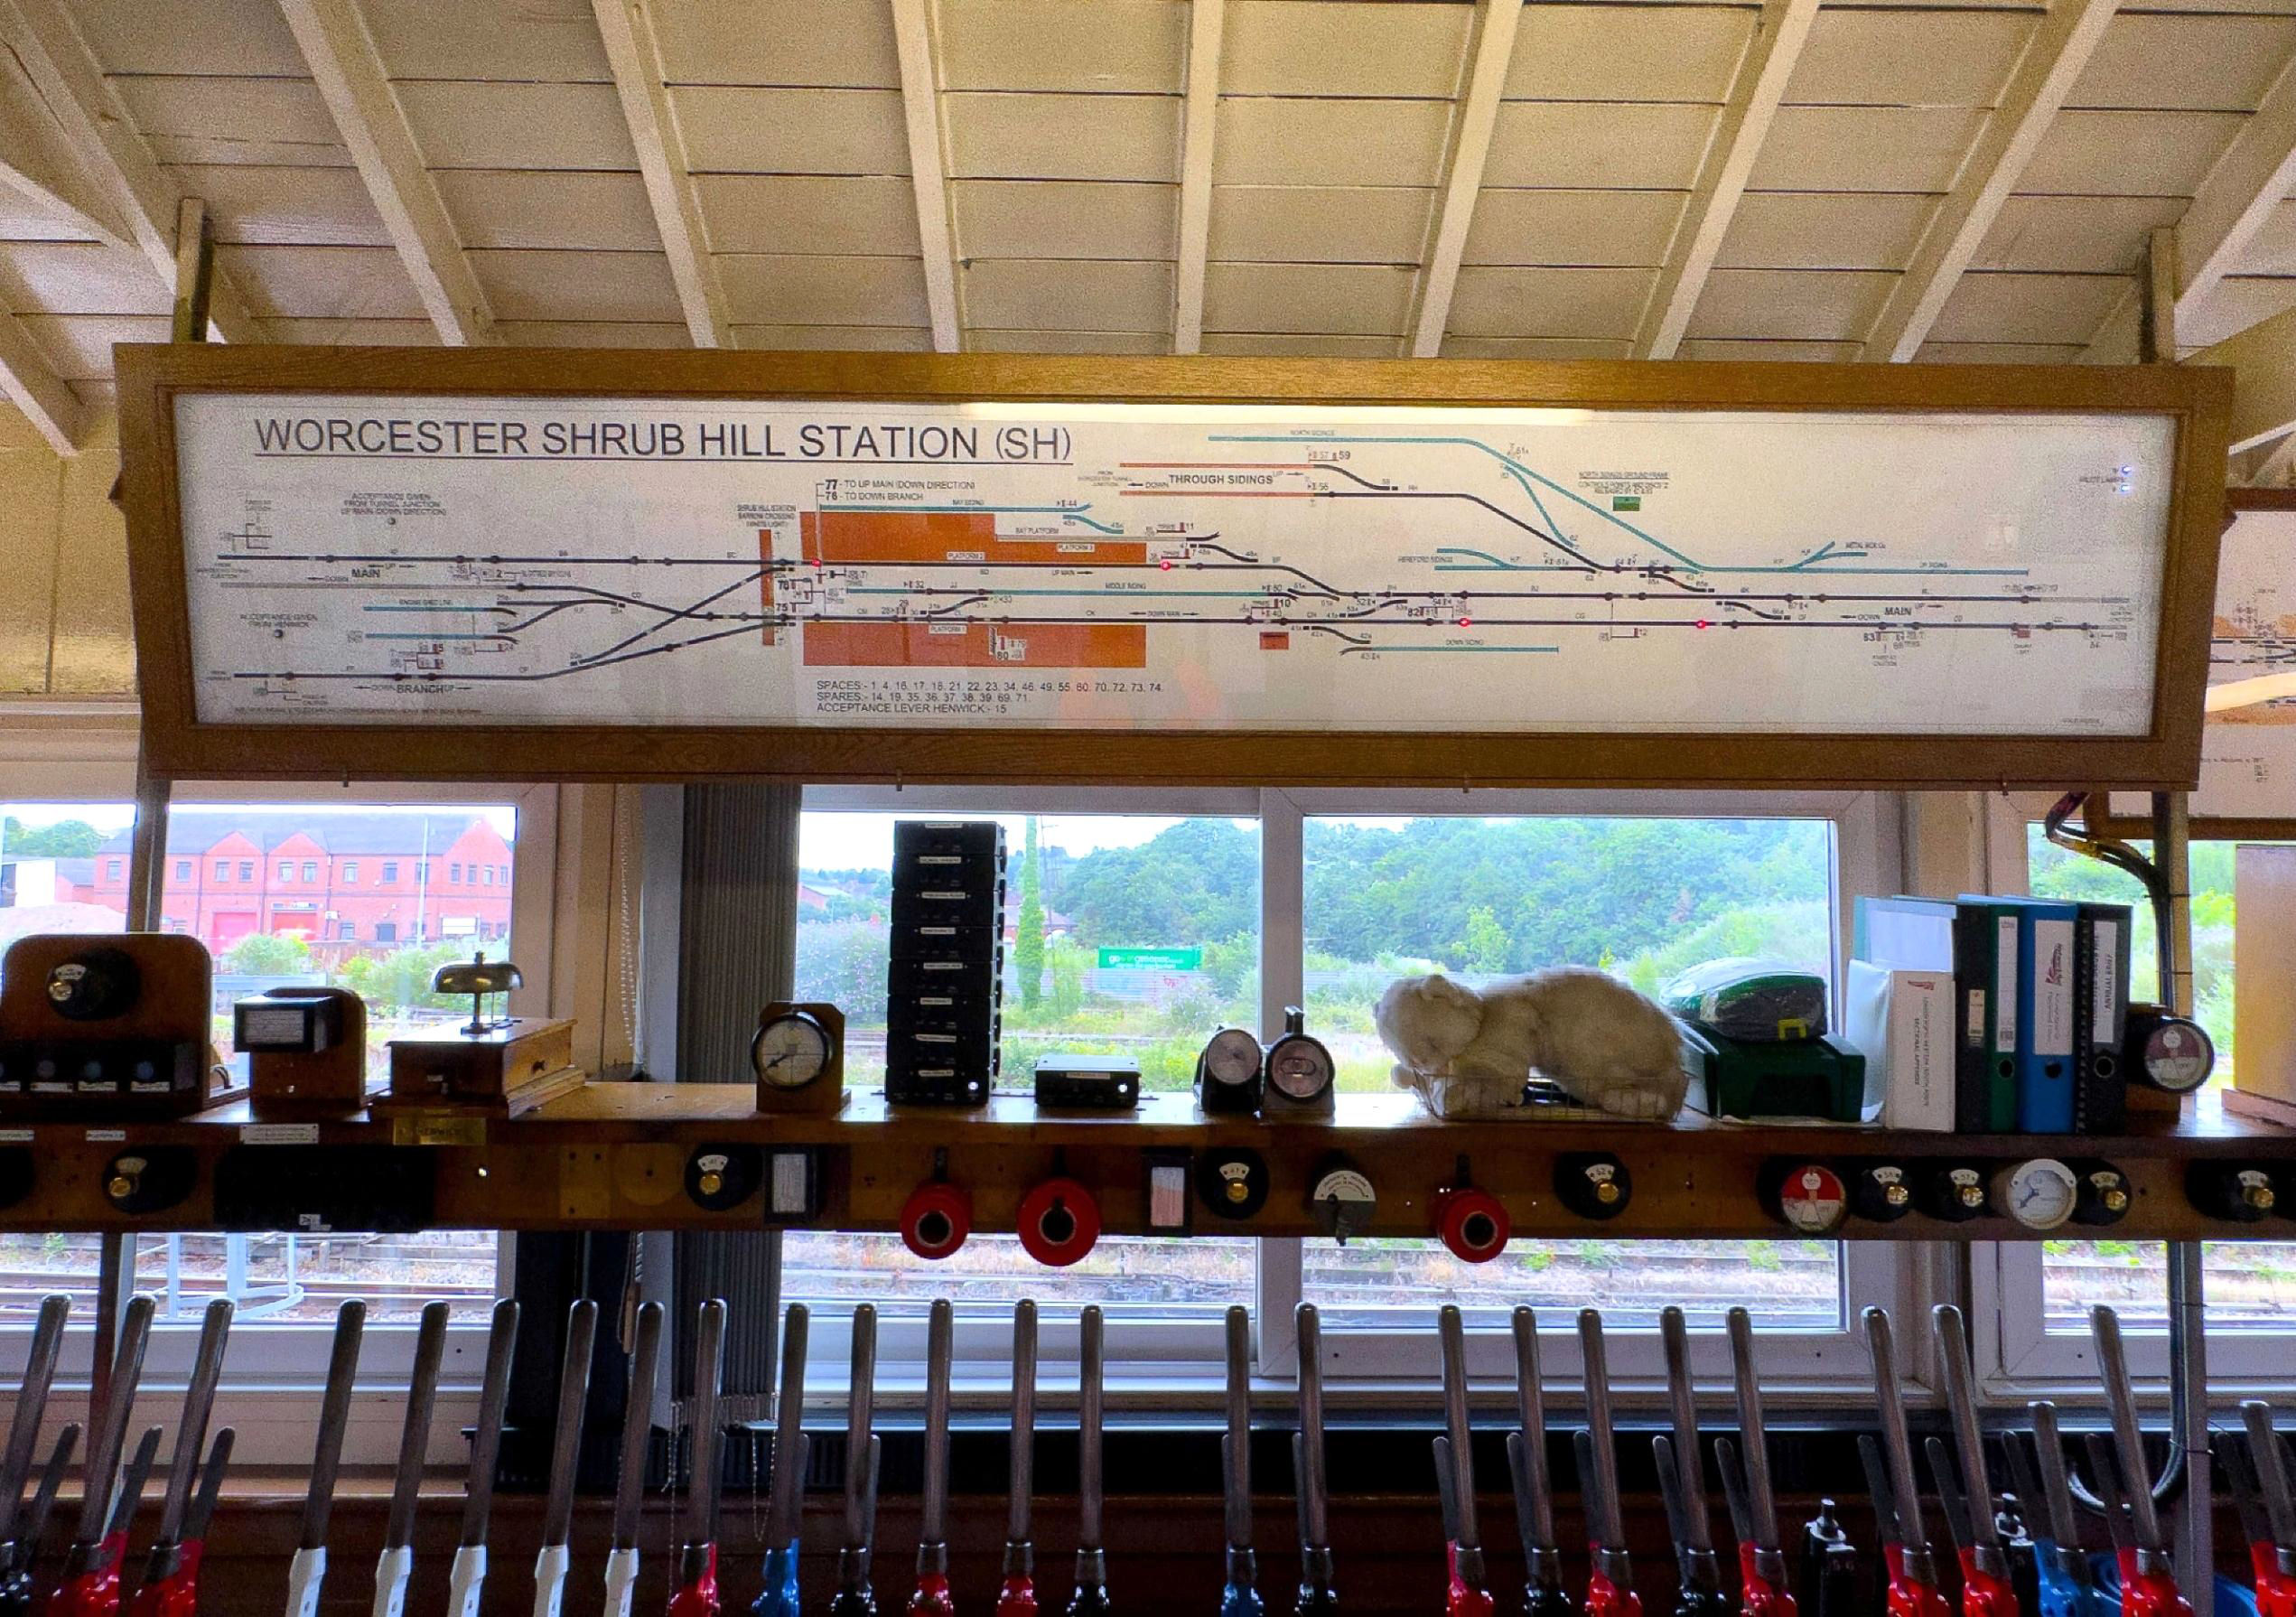
Worcester Shrub Hill signal box current diagram, 'Worcester Shrub Hill Station (SH)'.
[© Mark Shinwell 2024]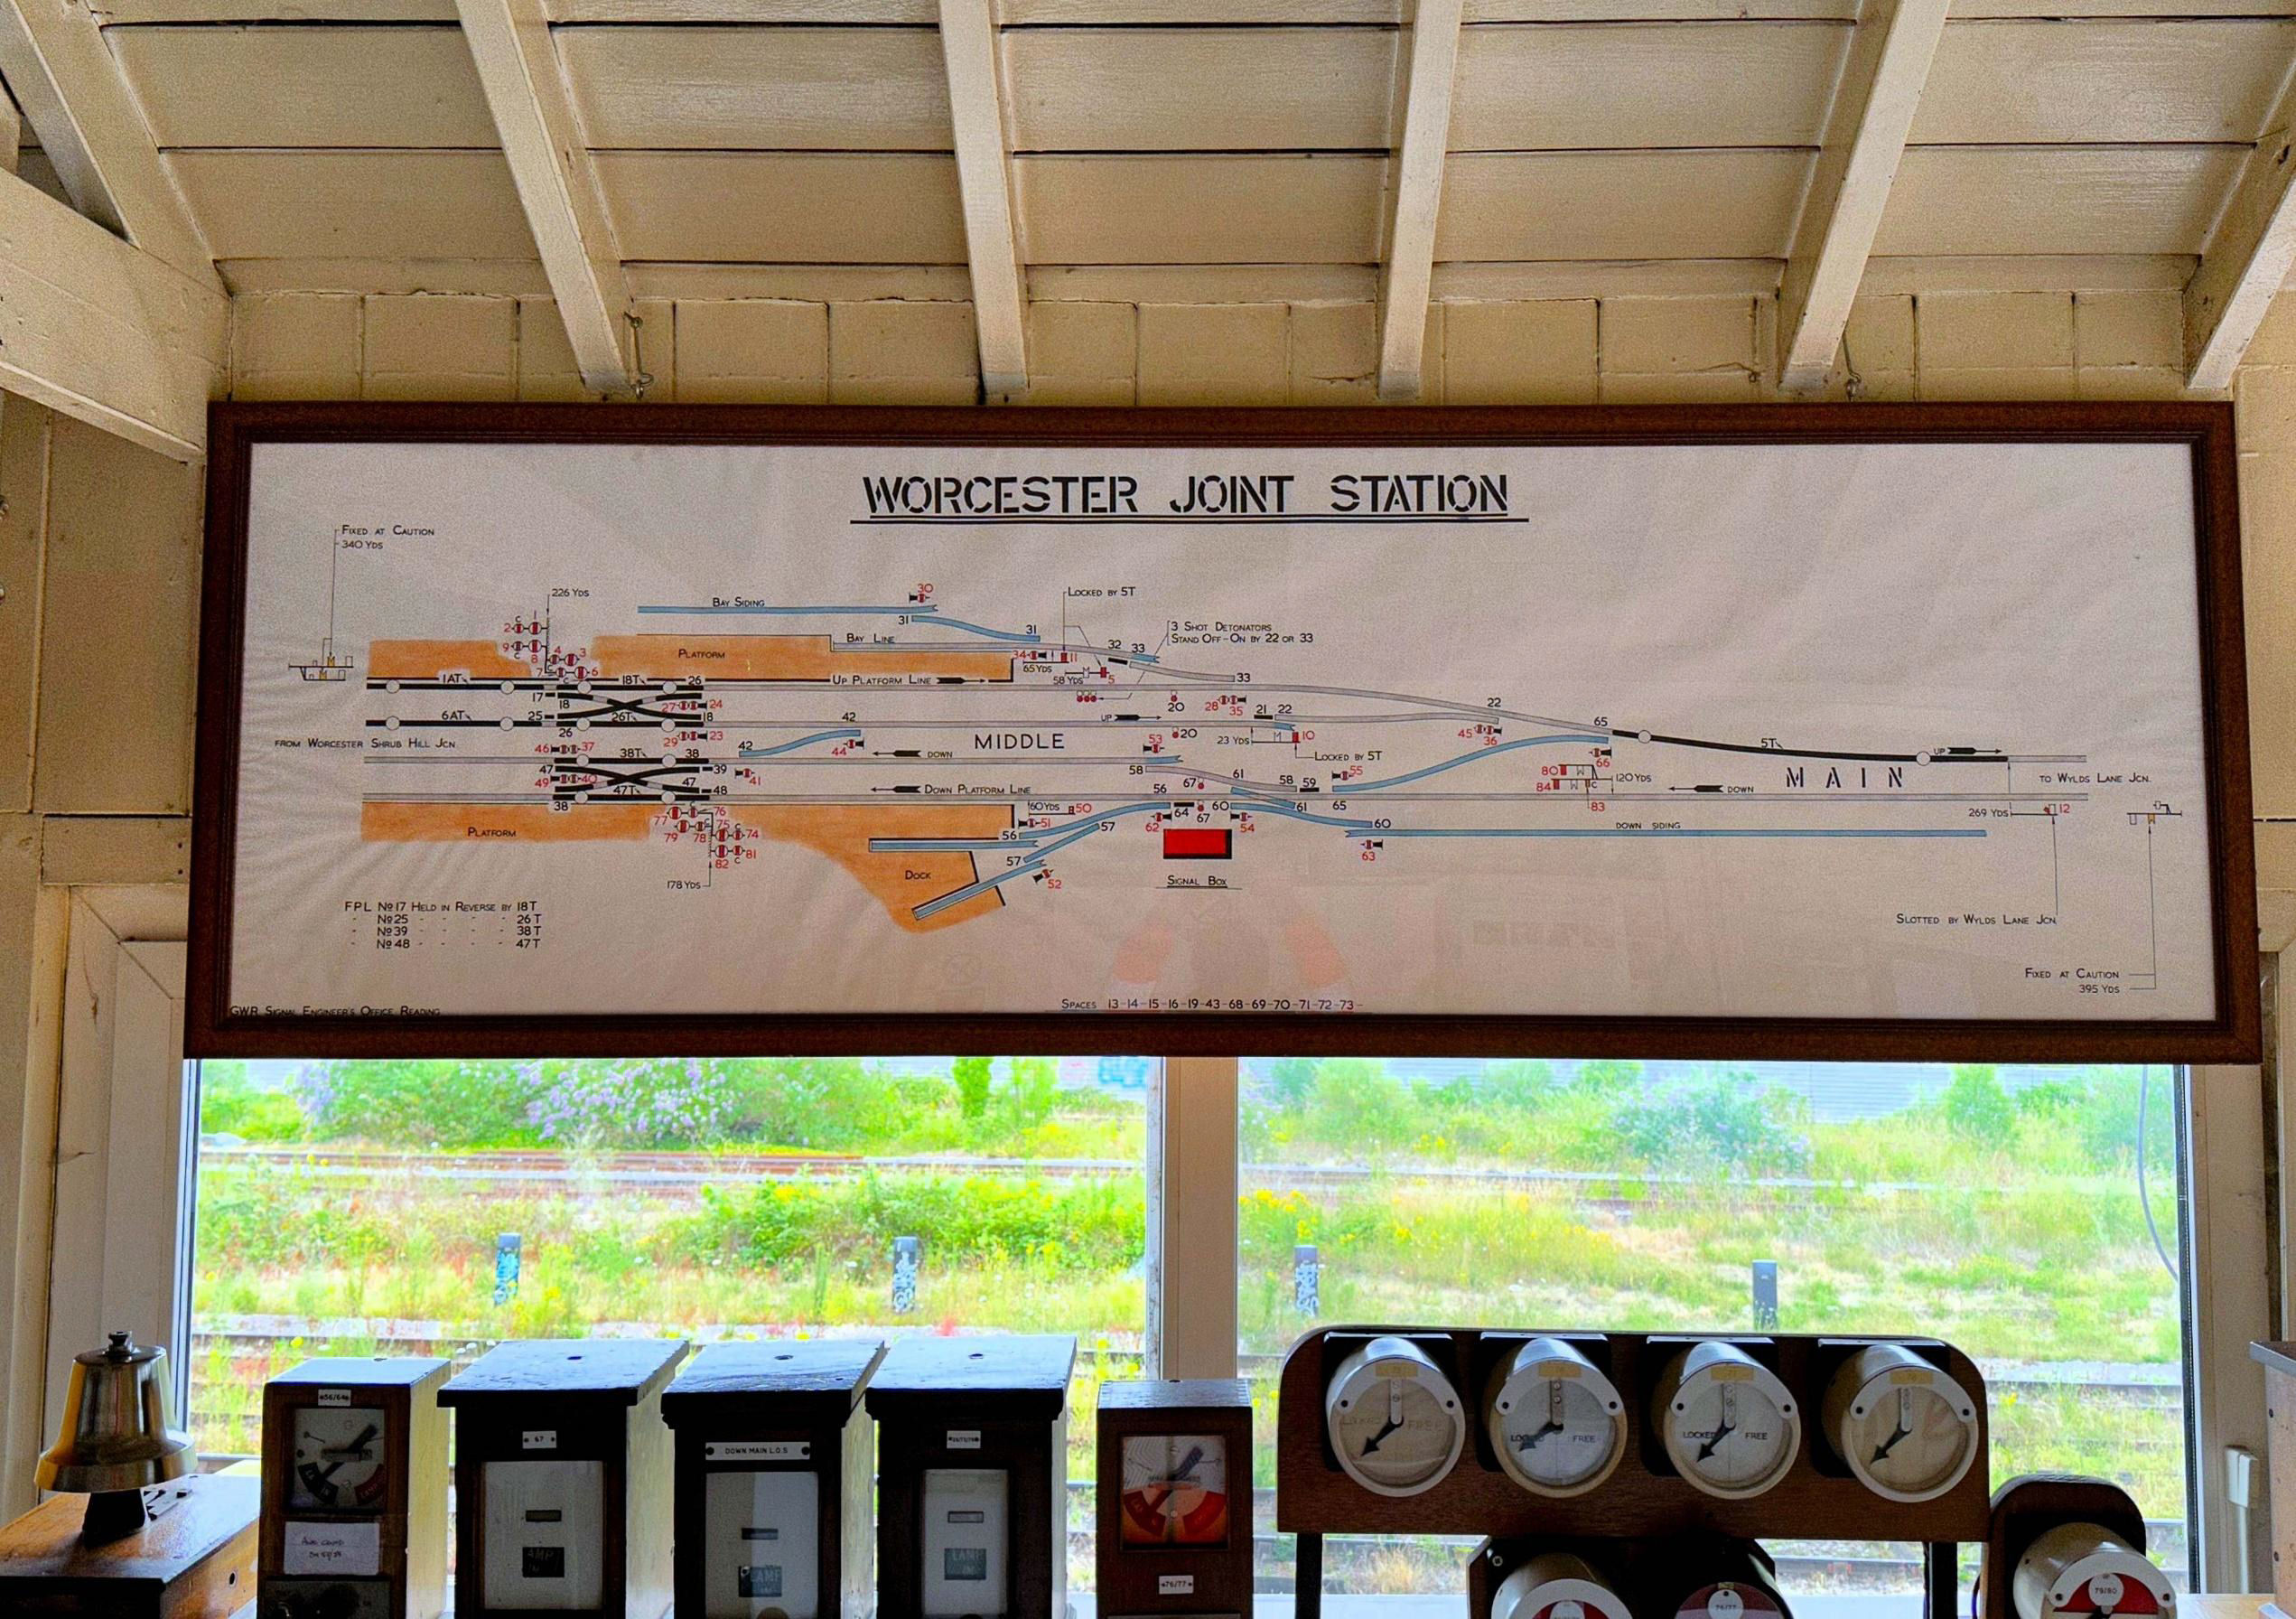
Worcester Shrub Hill signal box the old GWR diagram of the 'Worcester Joint Station'.
[© Mark Shinwell 2024]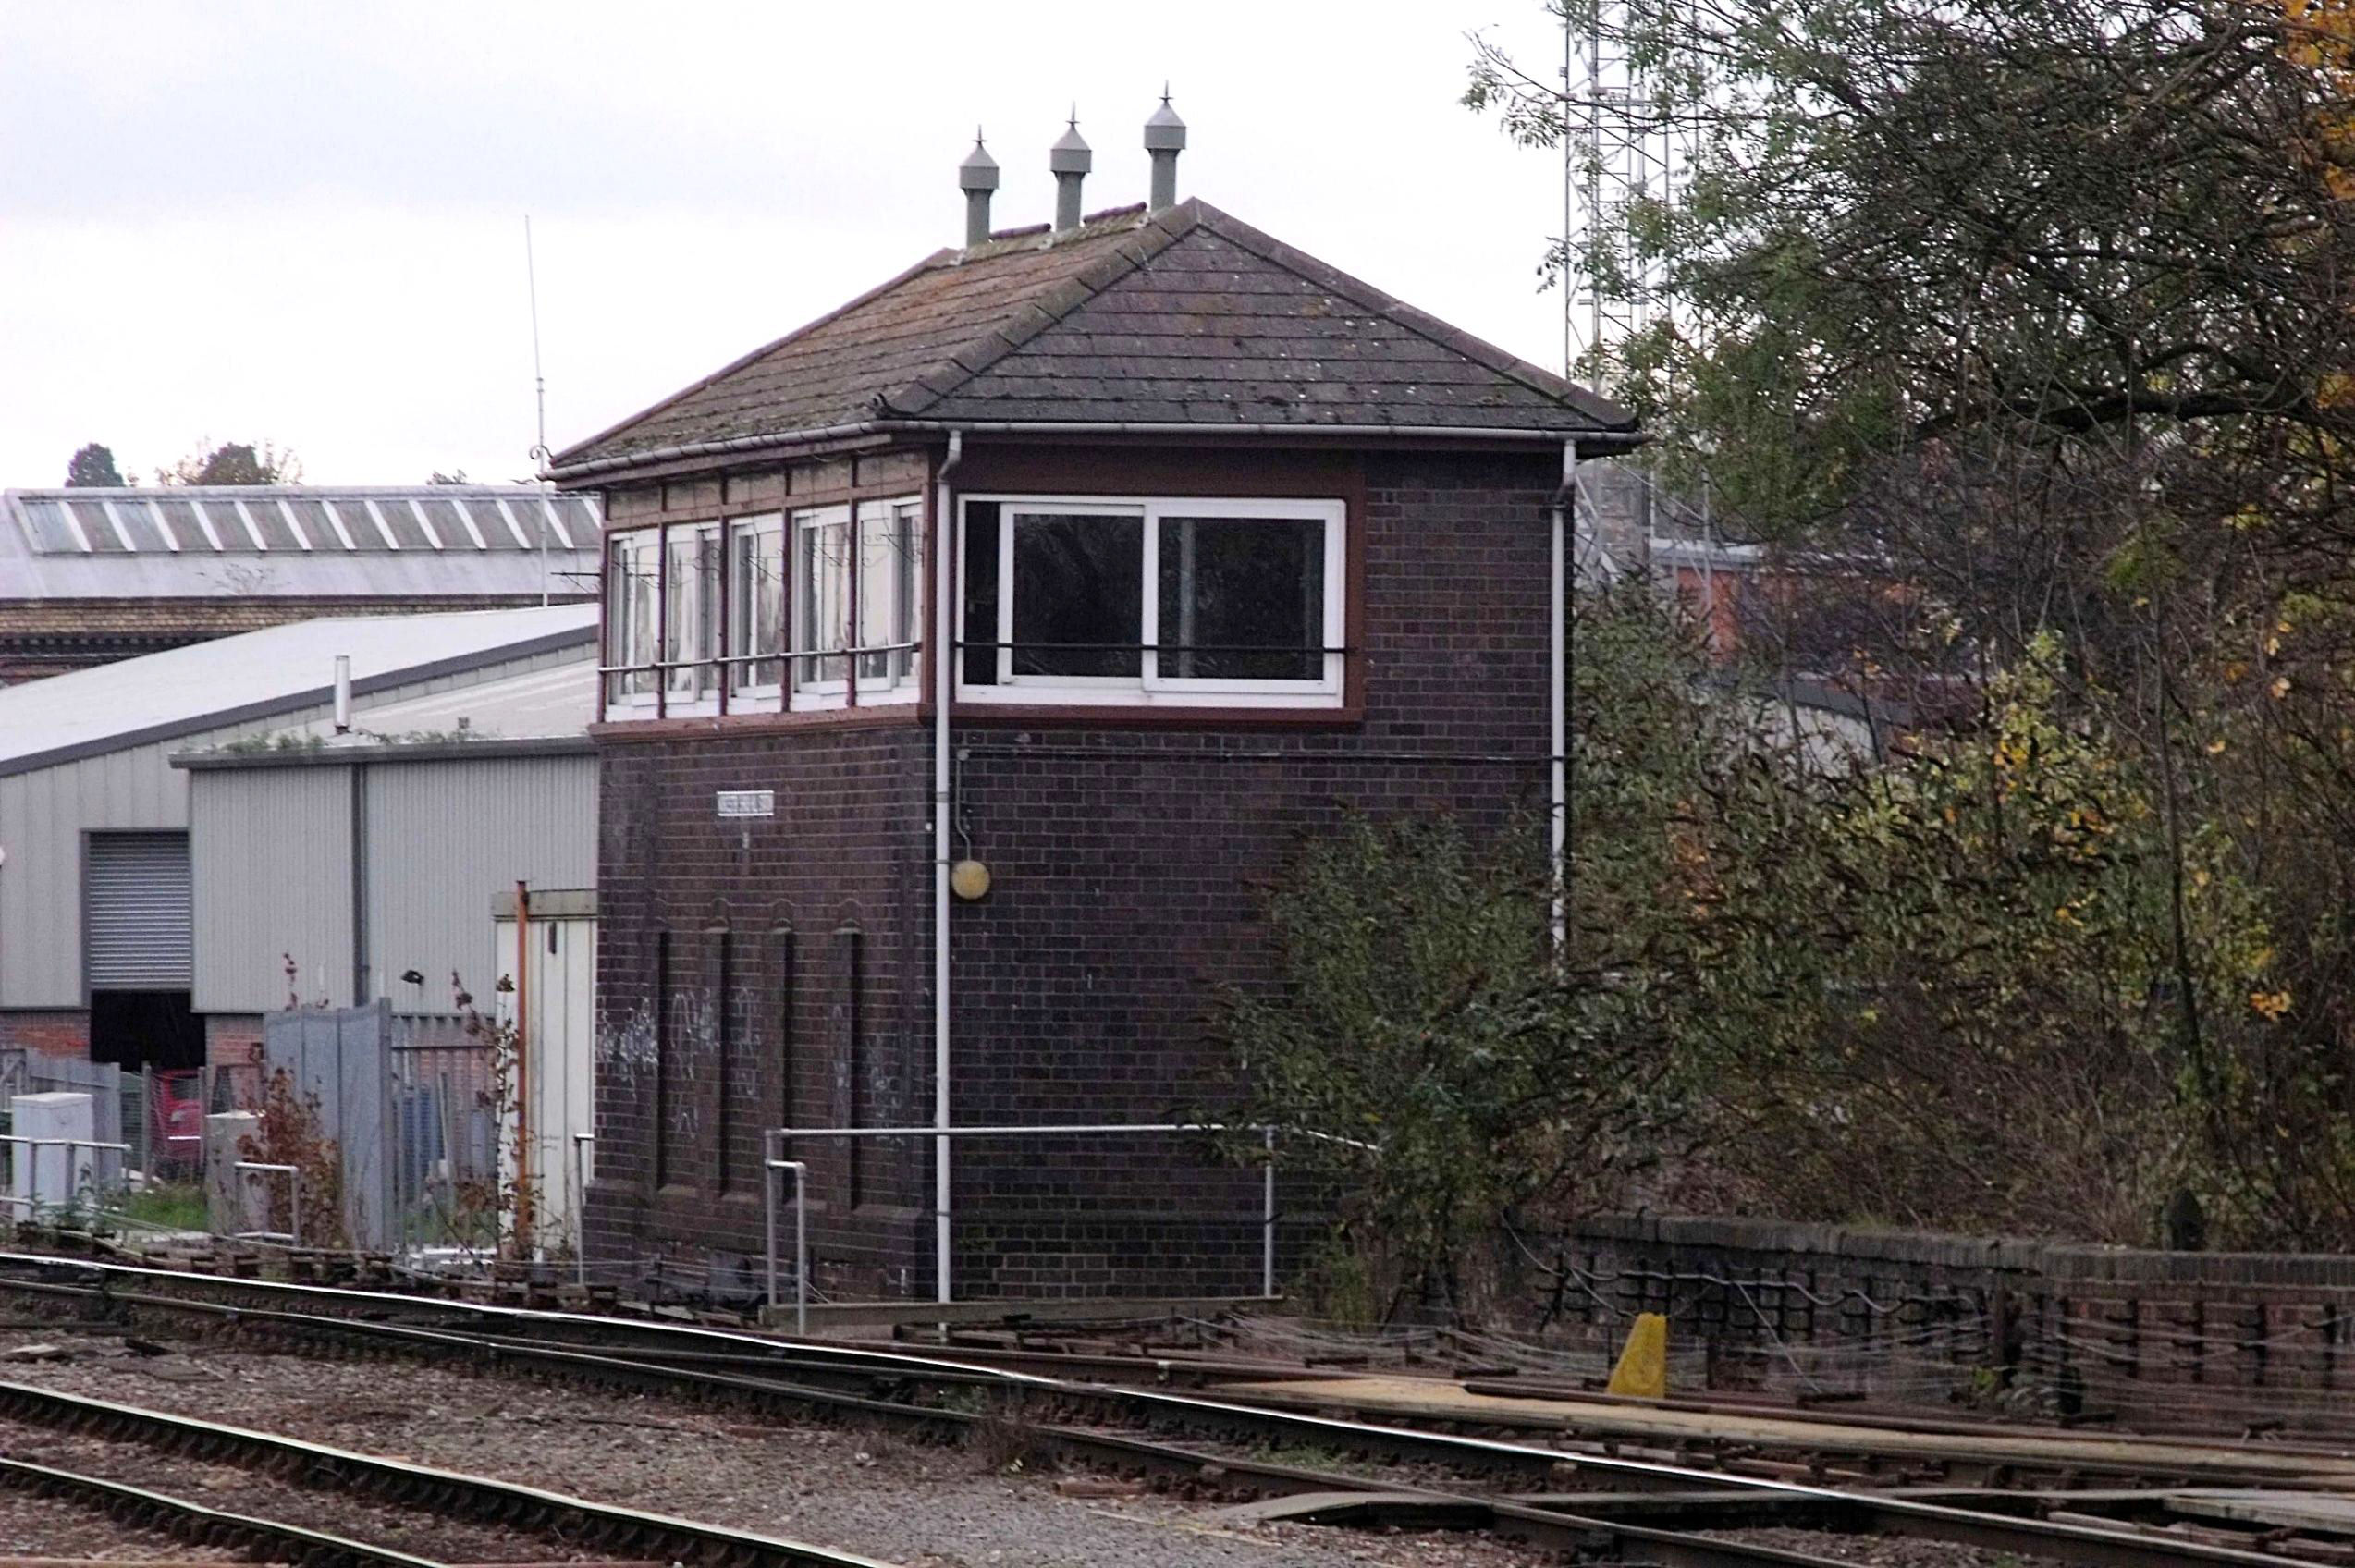
Worcester Shrub Hill Signal Box on 18 Nov 2022.
[© Elliott Brown 2022]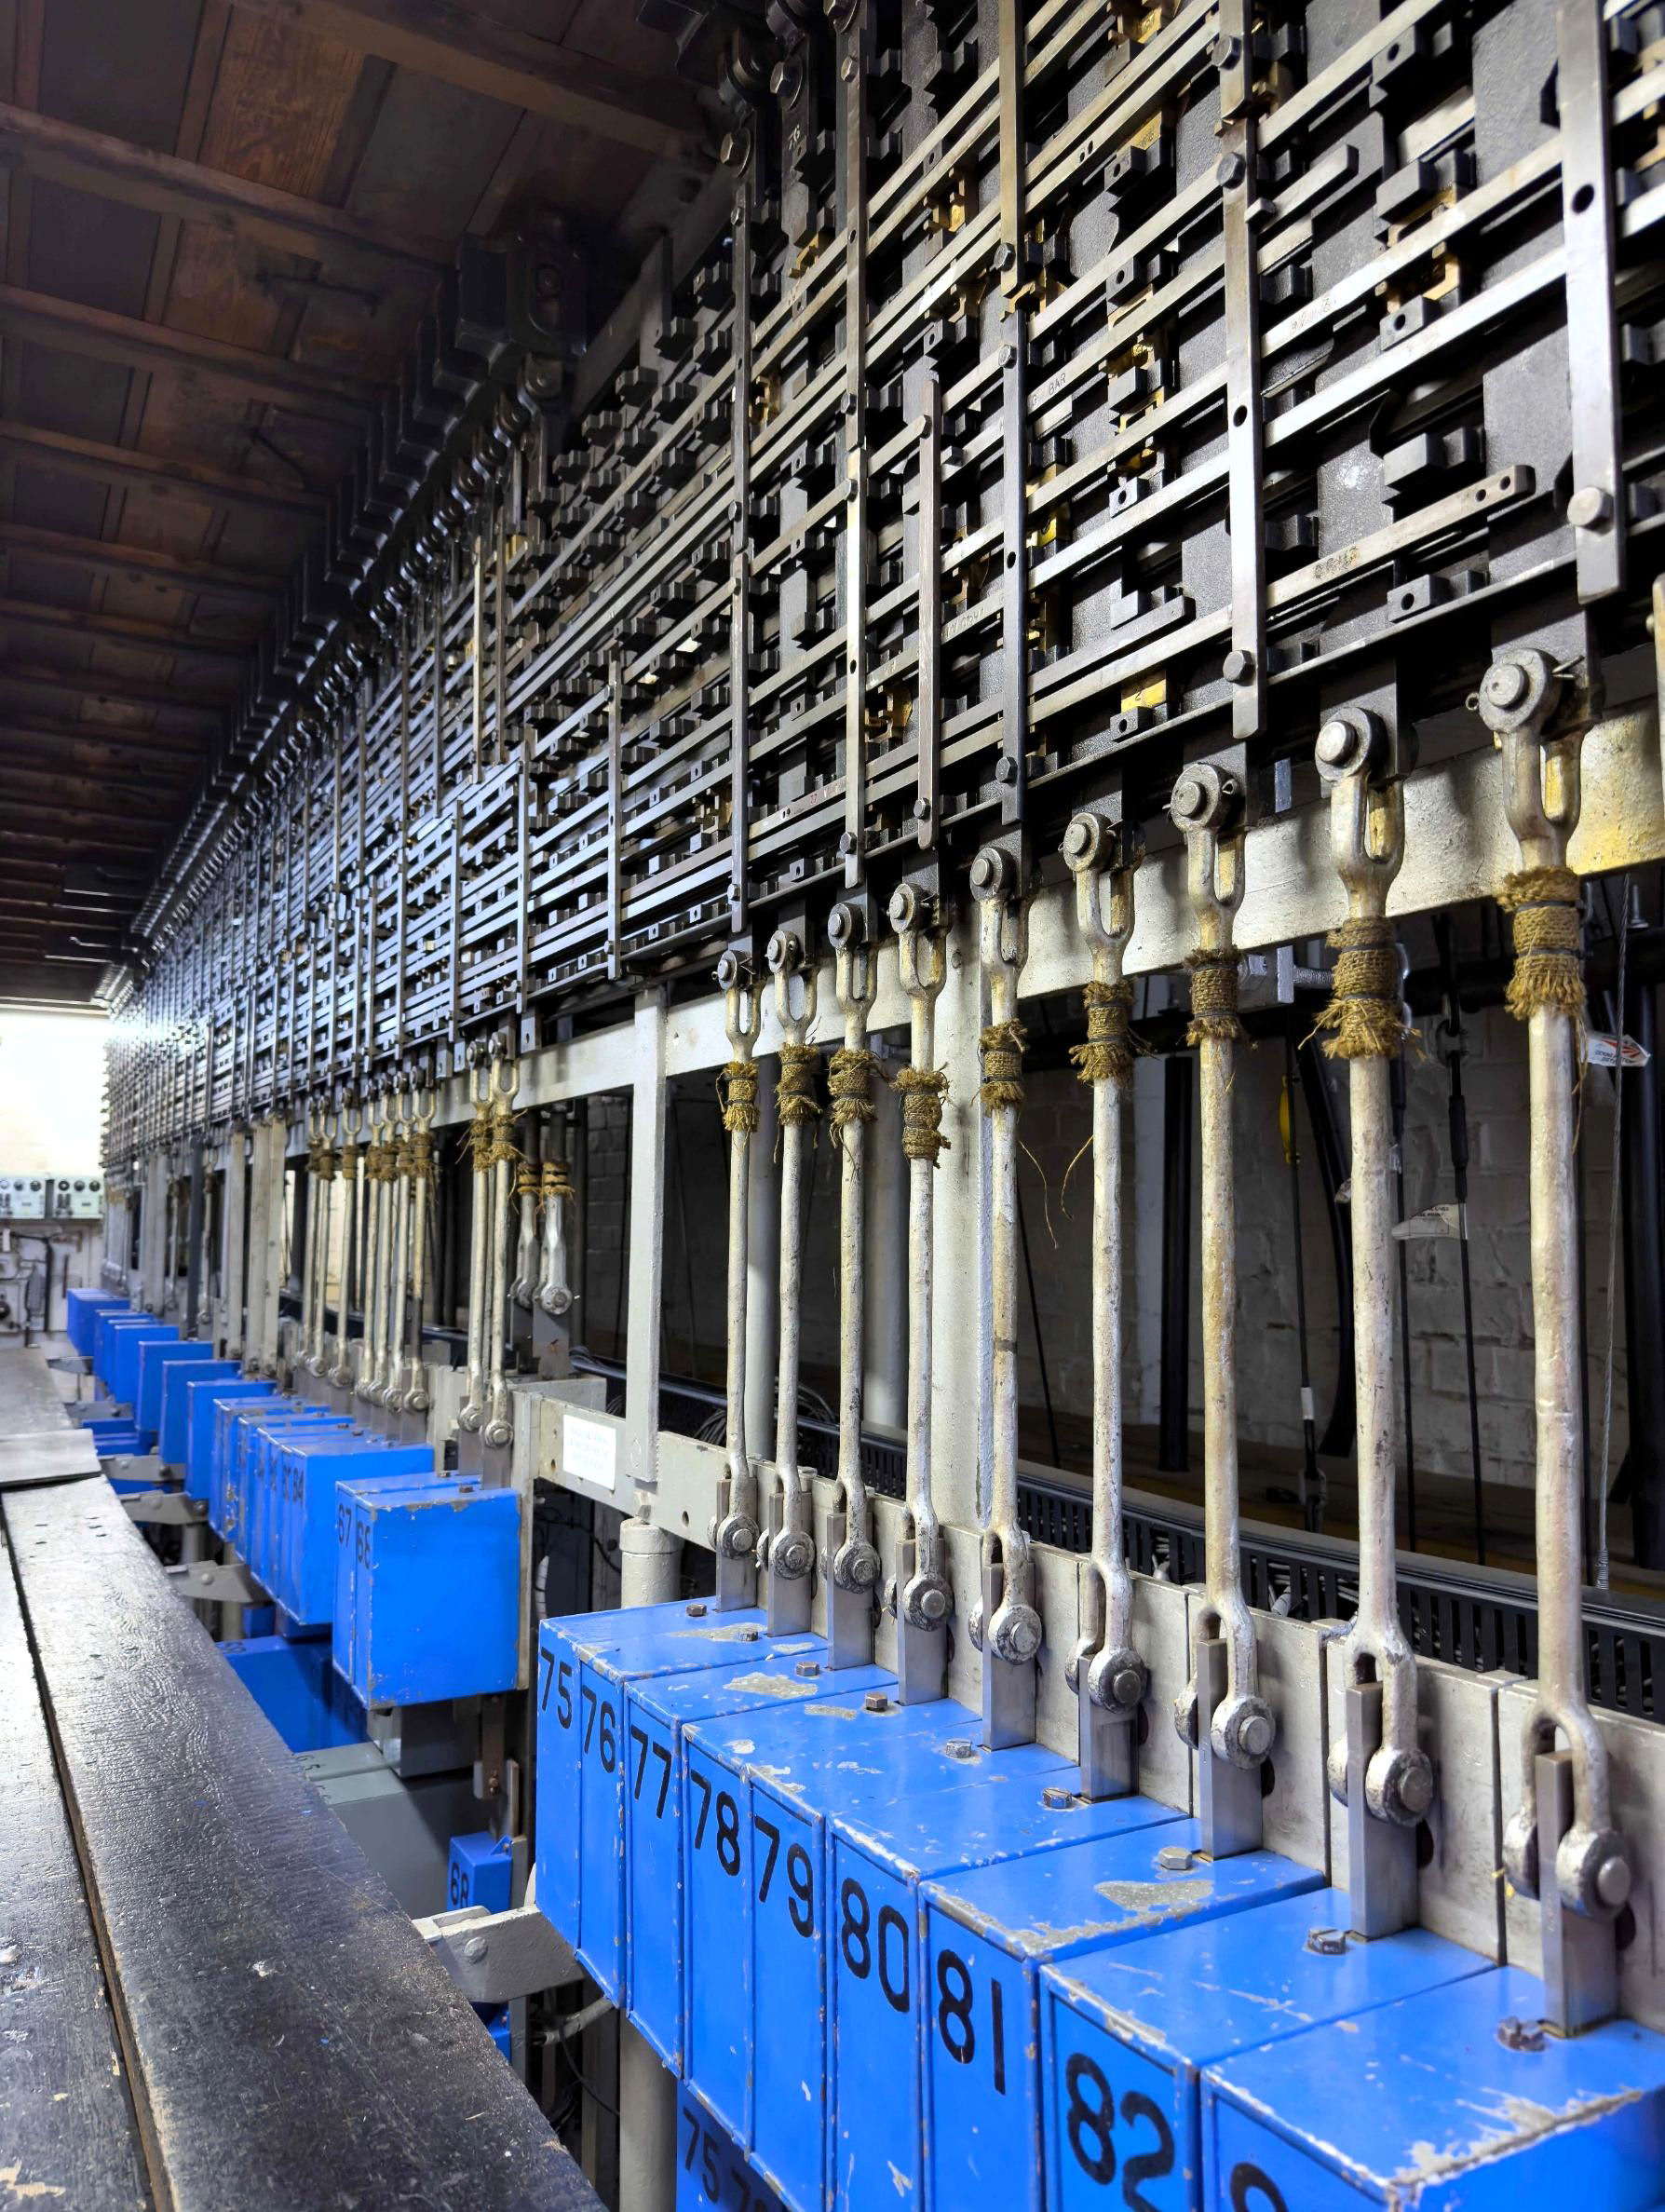
A Victorian computer - the locking room under the operating floor. That sacking cloth tied round
the metal rods is to catch lubricating oil drips preventing them from entering the electrics at the bottom.
[© Mark Shinwell 2024]The Shrub Hill layout is very restrictive (although adequate for the very sparse services in the 1970s). From Droitwich Spa, trains can only arrive into Up P2, from Paddington or Cheltenham they can only arrive into Down P1. P2 is bidirectional for turnbacks from the Droitwich or Worcester Foregate Street direction and for services reversing between these two lines, it also has permissive working for passenger trains. Down P1 is a bidirectional through line, allowing turnbacks in either direction and permissive working for passenger trains. Services from Foregate Street to Droitwich can reverse in P1 but not the other way round. Bay P3 (maximum 3-cars; no booked use) is only signalled for passenger departures.
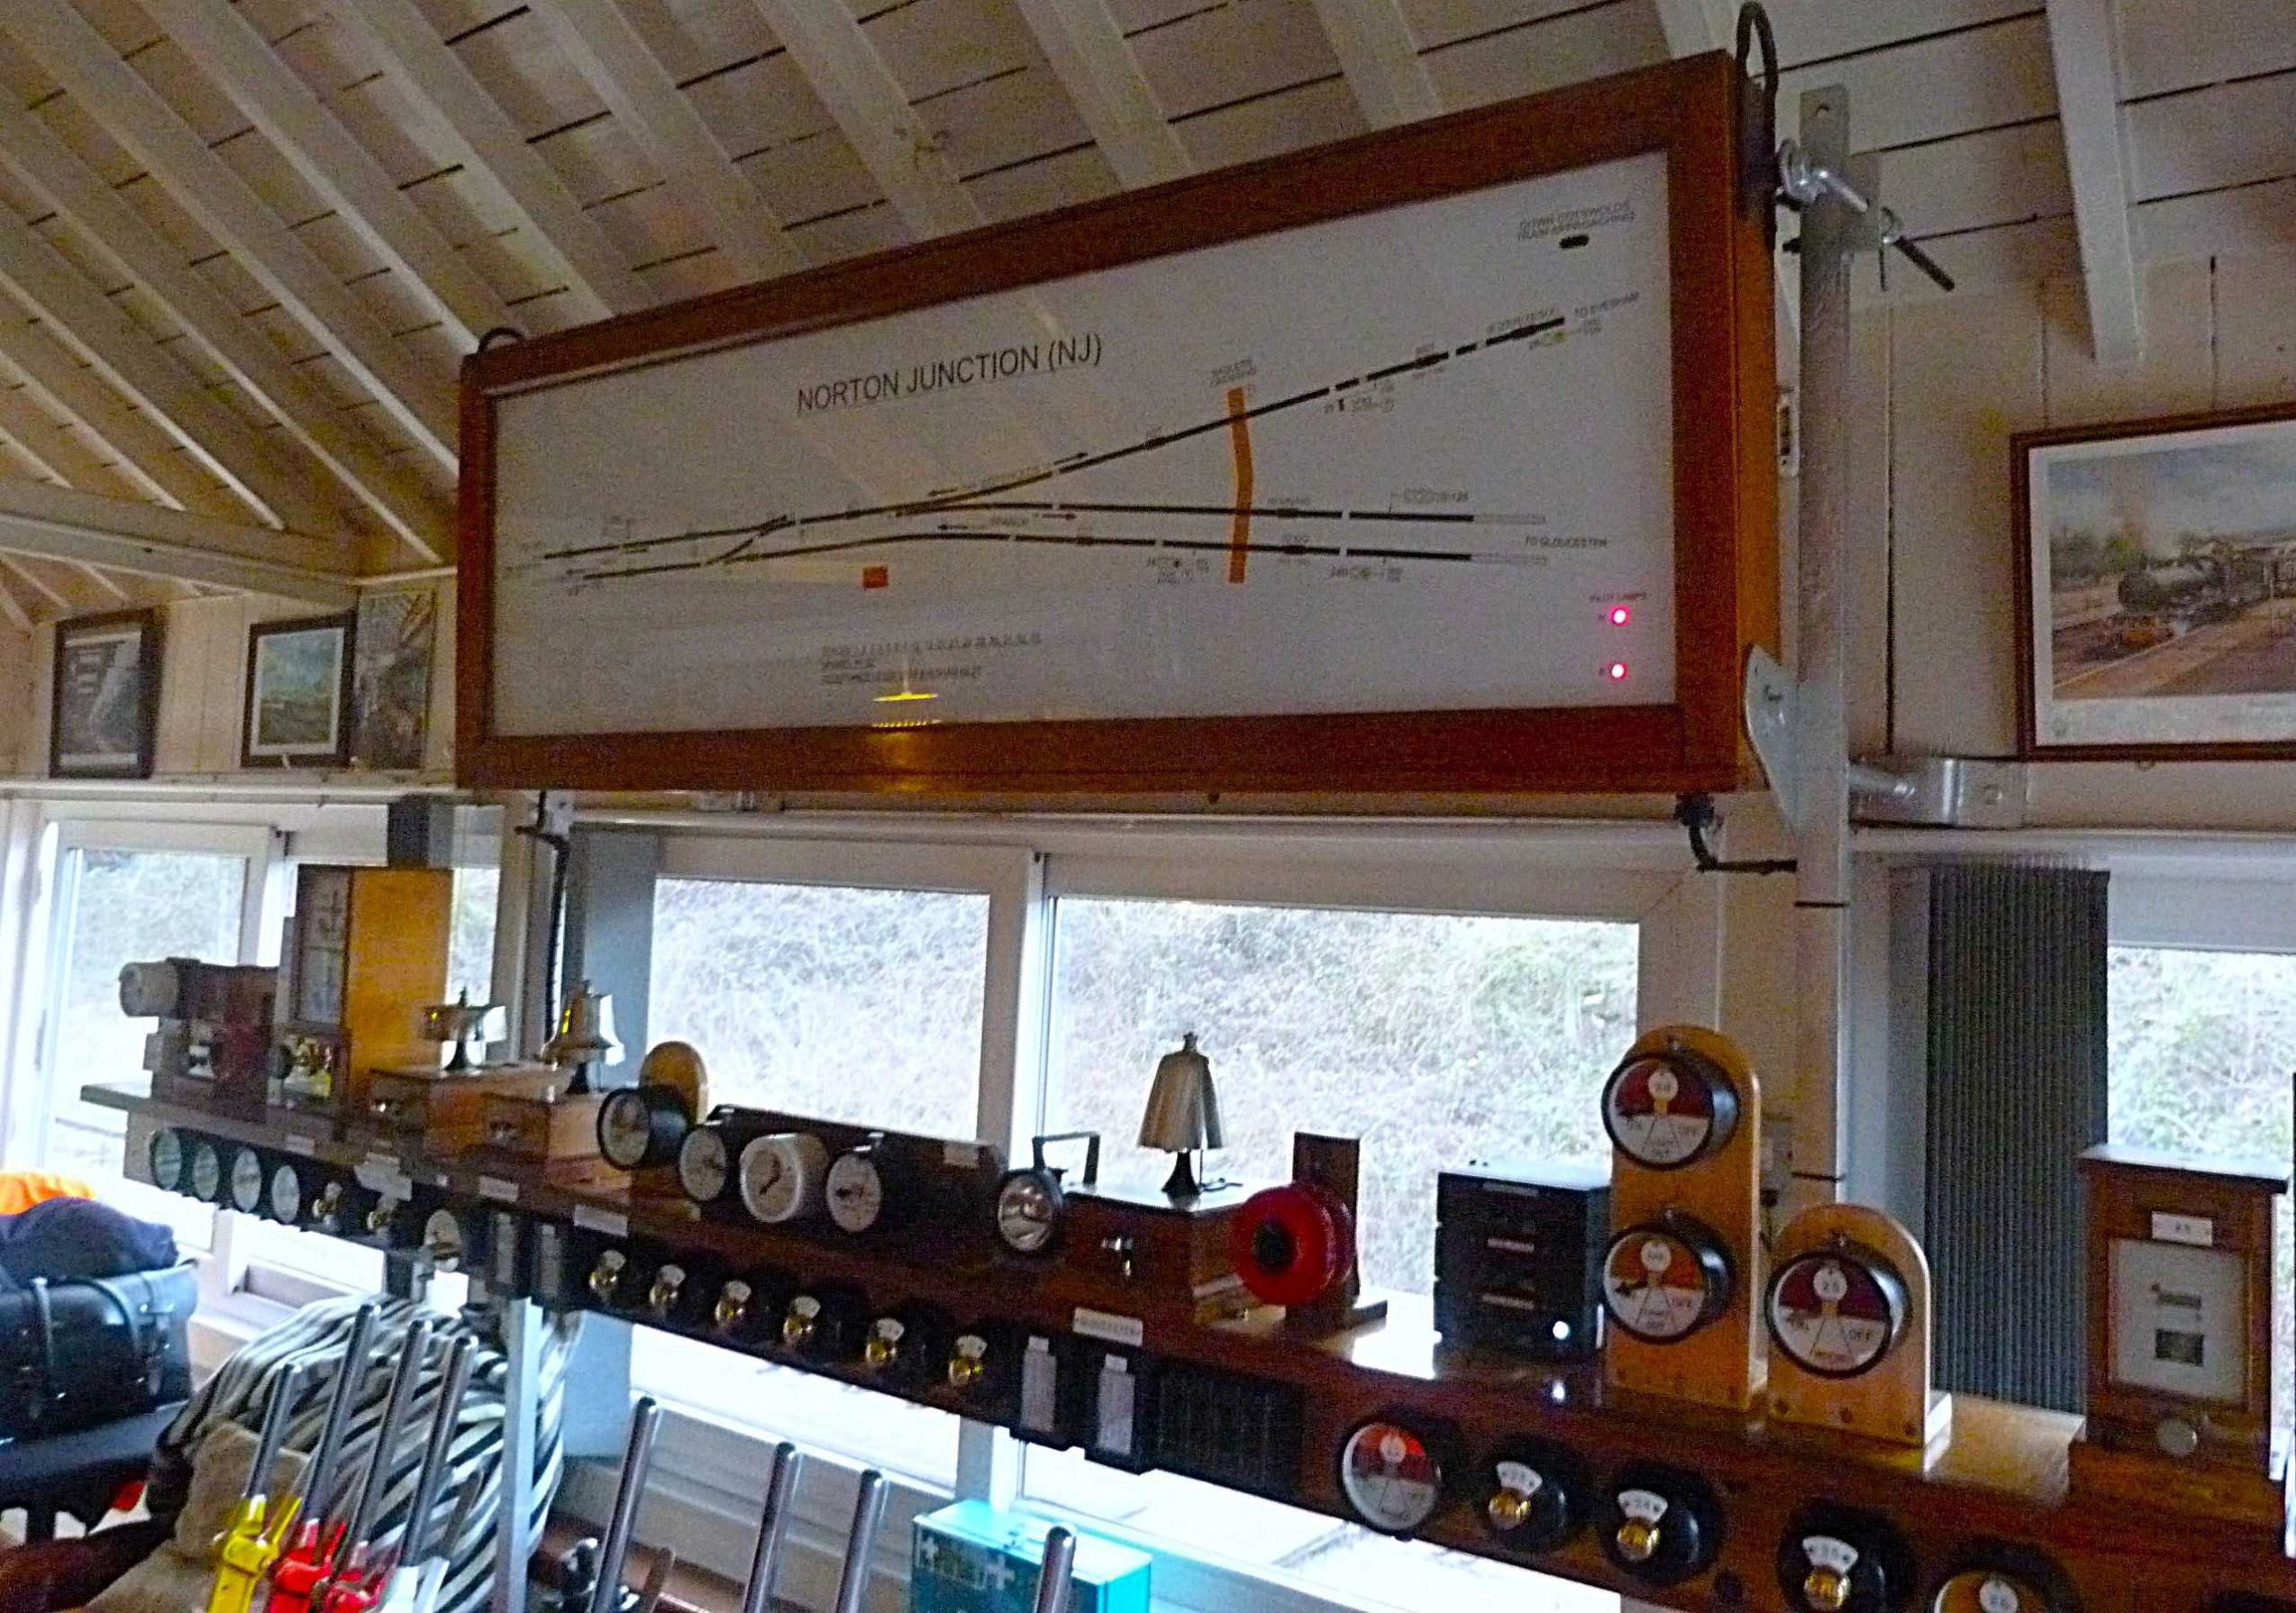
Norton Junction box was next on the agenda, after a 4½ mile drive southeast. This GWR Type 7d signal box is in a cutting just to the northwest of the junction. Here, the single track North Cotswolds line (to Evesham, Oxford, or as we say in Cambridge, 'the other place' and London) diverges from the short double track Abbotswood Curve that joins the Birmingham to Bristol main line further southeast at Abbotswood Jn. The semaphores controlled by this box are again lower quadrant, their height shows that the principal line is towards Cheltenham not London! Norton Junction station, (Norton Halt after 7 Sep 1959) here, CP 3 Jan 1966. Abbotswood Curve, although visible from Worcestershire Parkway, is perhaps a bit too far for a P5 & 6 there, allowing the hourly Worcester to Bristol service to call and create a great interchange! (P4 is reserved North Cotswold Line redoubling.)
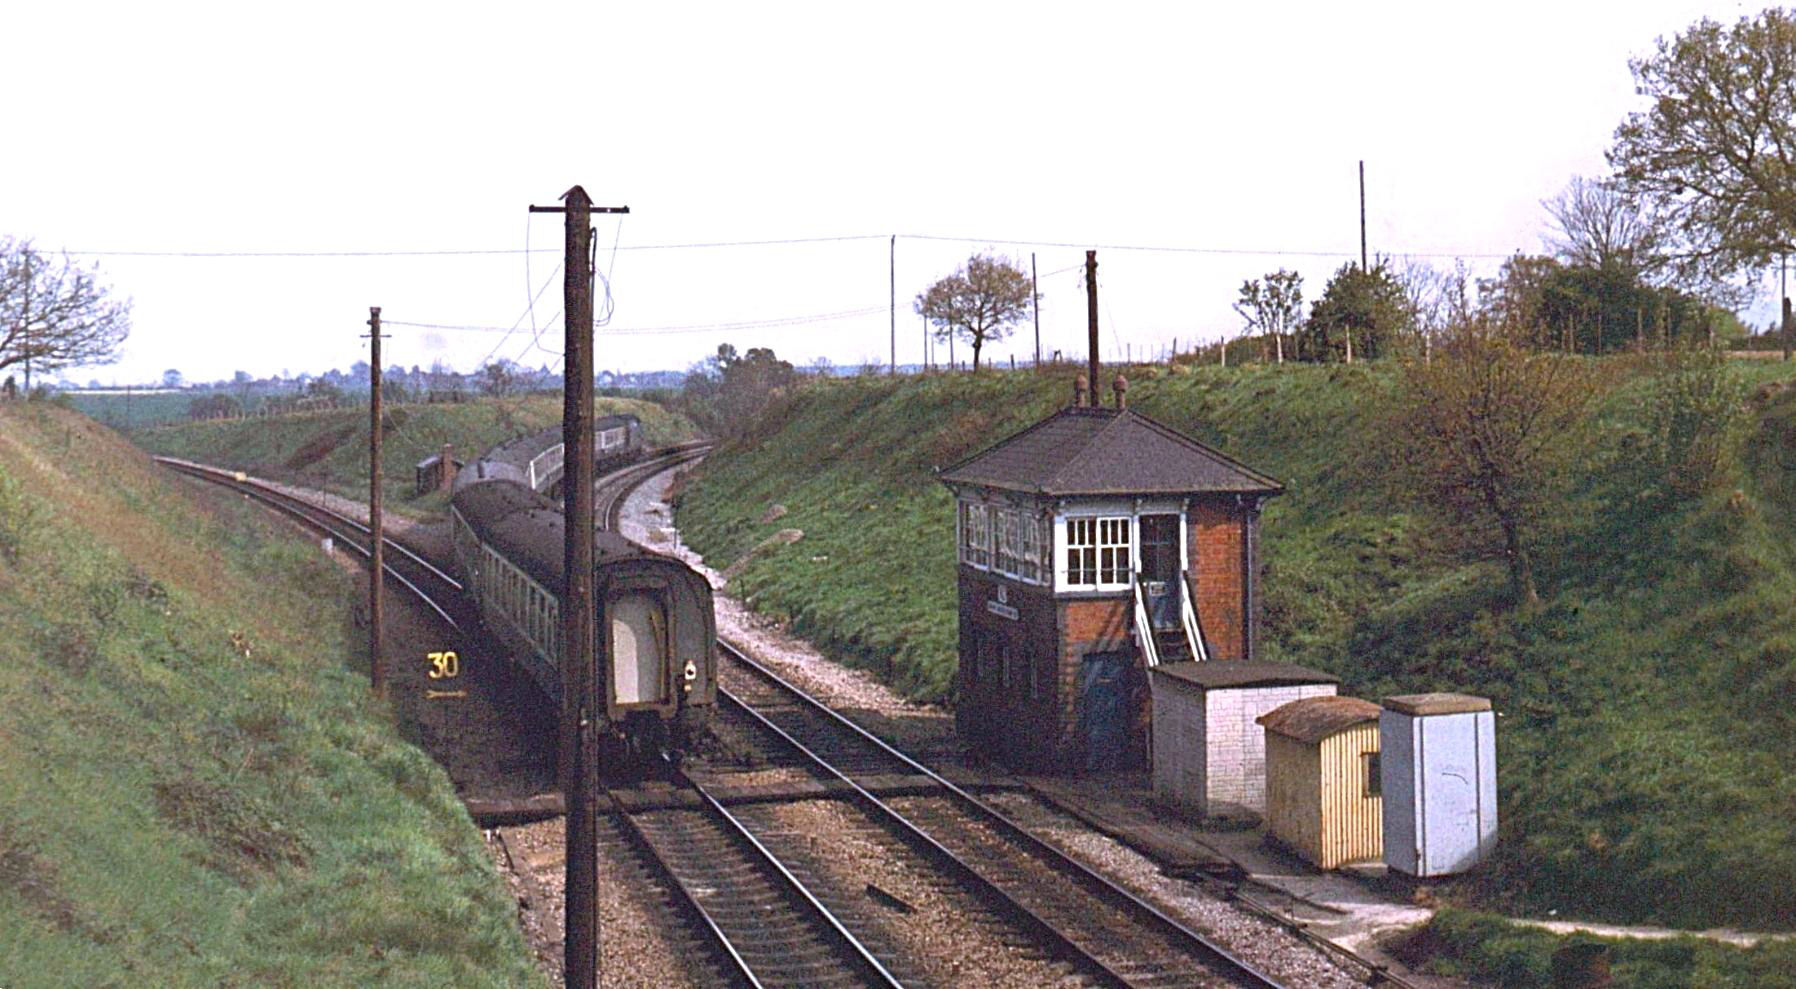
British Rail managed the vegetation 45½+ years ago; Norton Jn on 3 May 1980.
[© Angus McDougall 1980]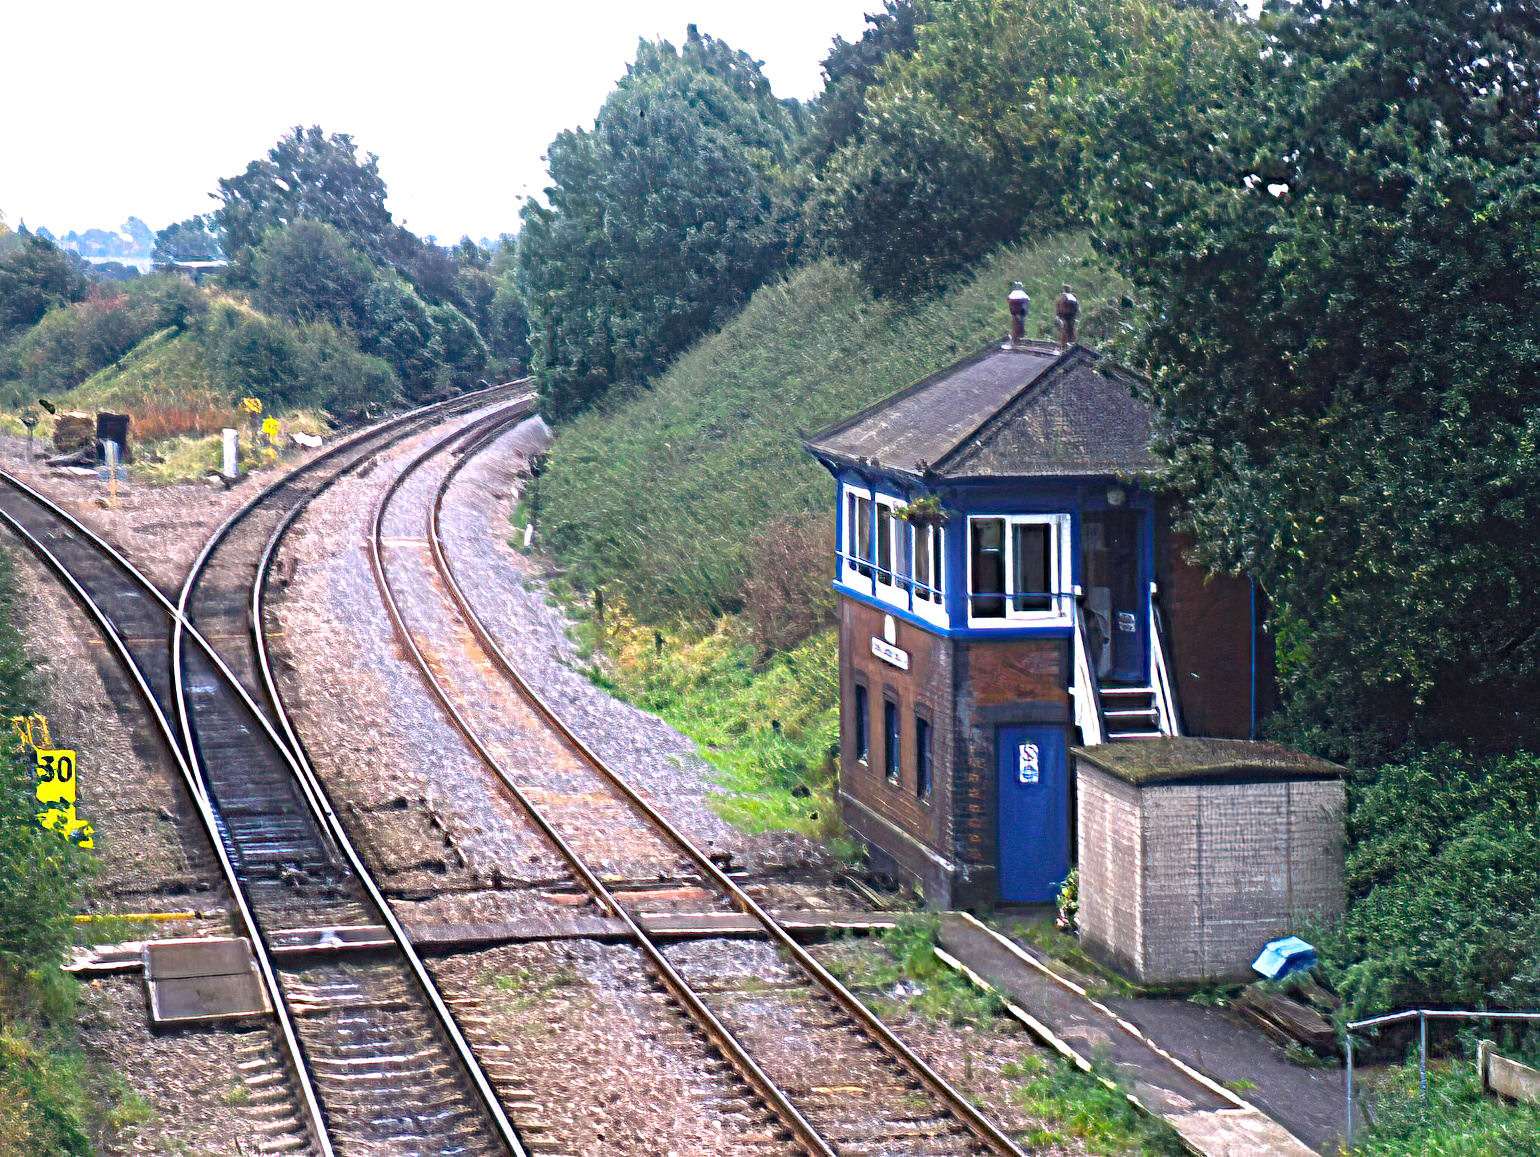
25 years ago, 15 Oct 2000, things were slipping (Railtrack) but at least they painted the signal boxes.
[© Angus McDougall 2000]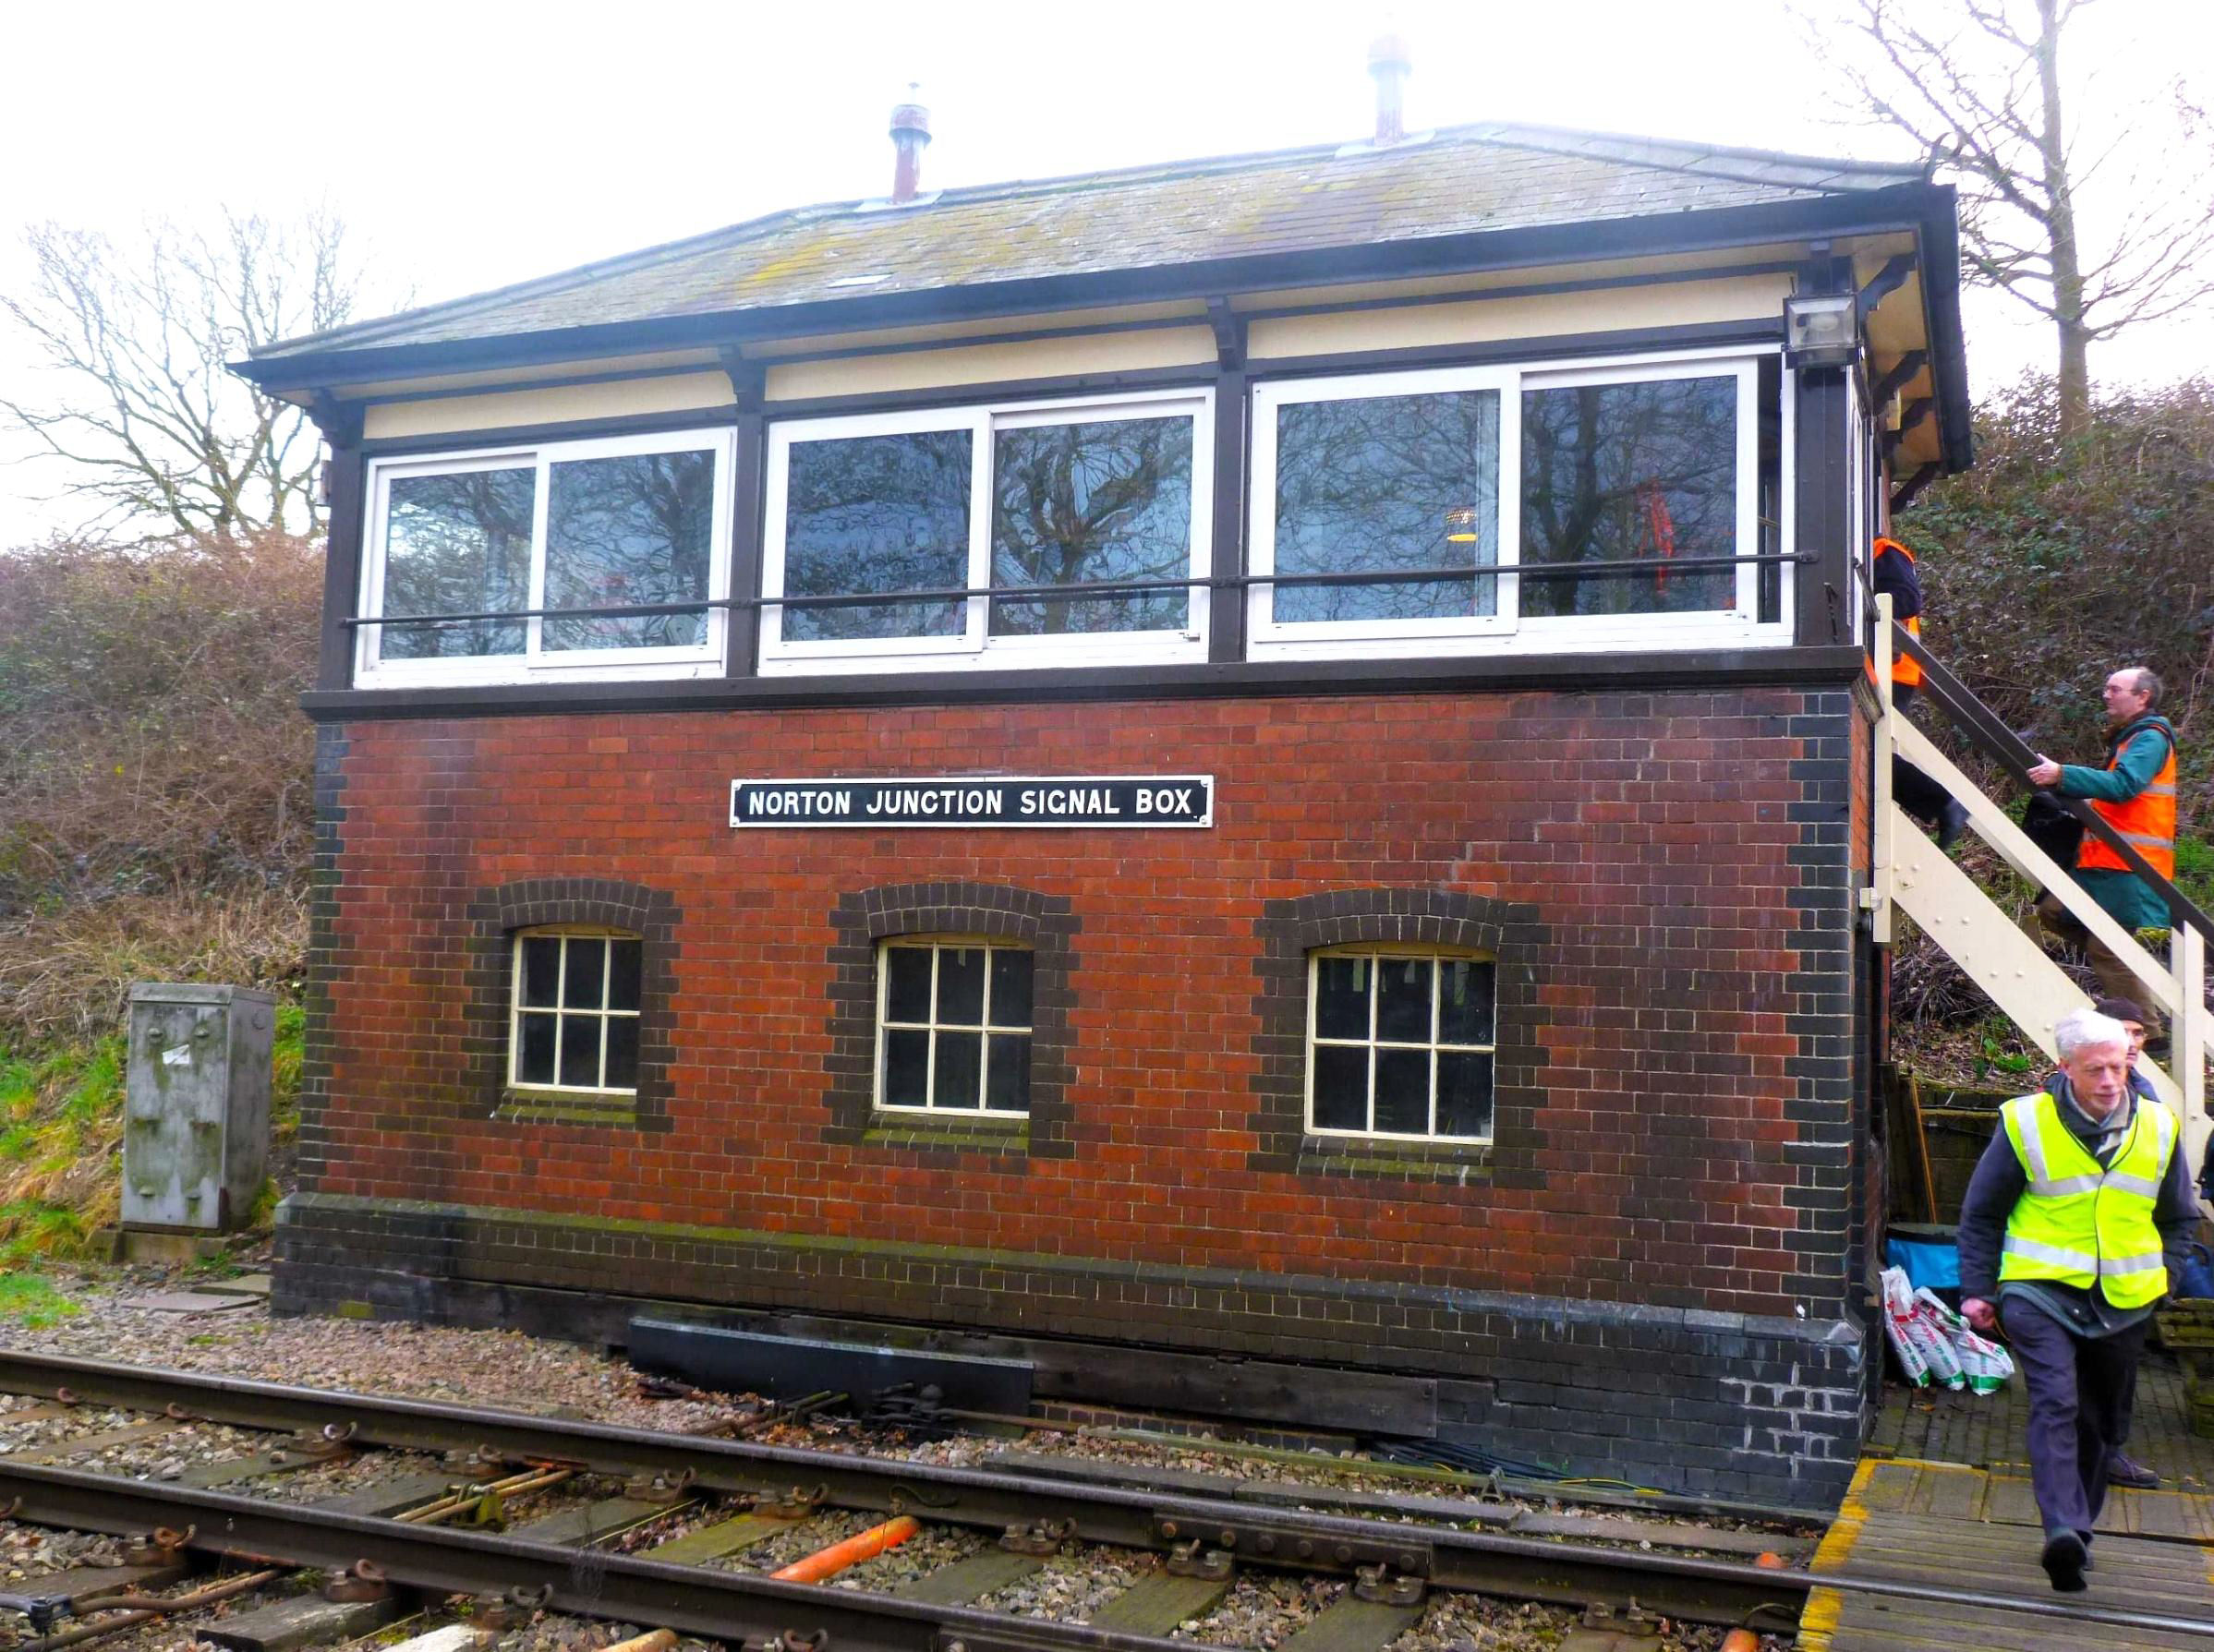
Norton Junction signal box, a 3 Mar 2012 BLS visit; your editor is bottom right. No trains were in section!
[© Angus McDougall 2012]Once, the semaphore distant signal (on the same post as the 'home') to Abbotswood Jn was famously worked from Gloucester Power Box, only a 22 mile pull (no, it was motorised!) but is now an LED A cast iron sign 'Network Rail Western Region - Notice - No Unauthorized (sic) Person Allowed In This Box' adorns the door - apparently a set of these were procured as a parody of the original GWR ones. Were they made in the USA perhaps? Luckily, we were authorised! There is at least one likely original roof ventilator, with the correct internal fitting in the signal box.
The 27-lever frame has 16 operational levers, plus 2 white (spare) levers. Interestingly, lever sections 1-7 and 27-33 have been completely removed from the GWR 3-bar horizontal tappet frame (5¼" lever spacing), suggesting that these changes were carried out many years ago by GWR locking fitters. The box fringes with Evesham box on the North Cotswolds line, Birmingham Rail Operating Centre (BROC) - Bromsgrove Workstation on the Gloucester line and Worcester Shrub Hill. There is a combined Westinghouse train describer system used for communication with Evesham and BROC, under track circuit block, with absolute block being worked to Shrub Hill via a British Railways 1947 Tyers instrument.
Norton Junction signal box block instruments and diagram.
[© Angus McDougall 2012]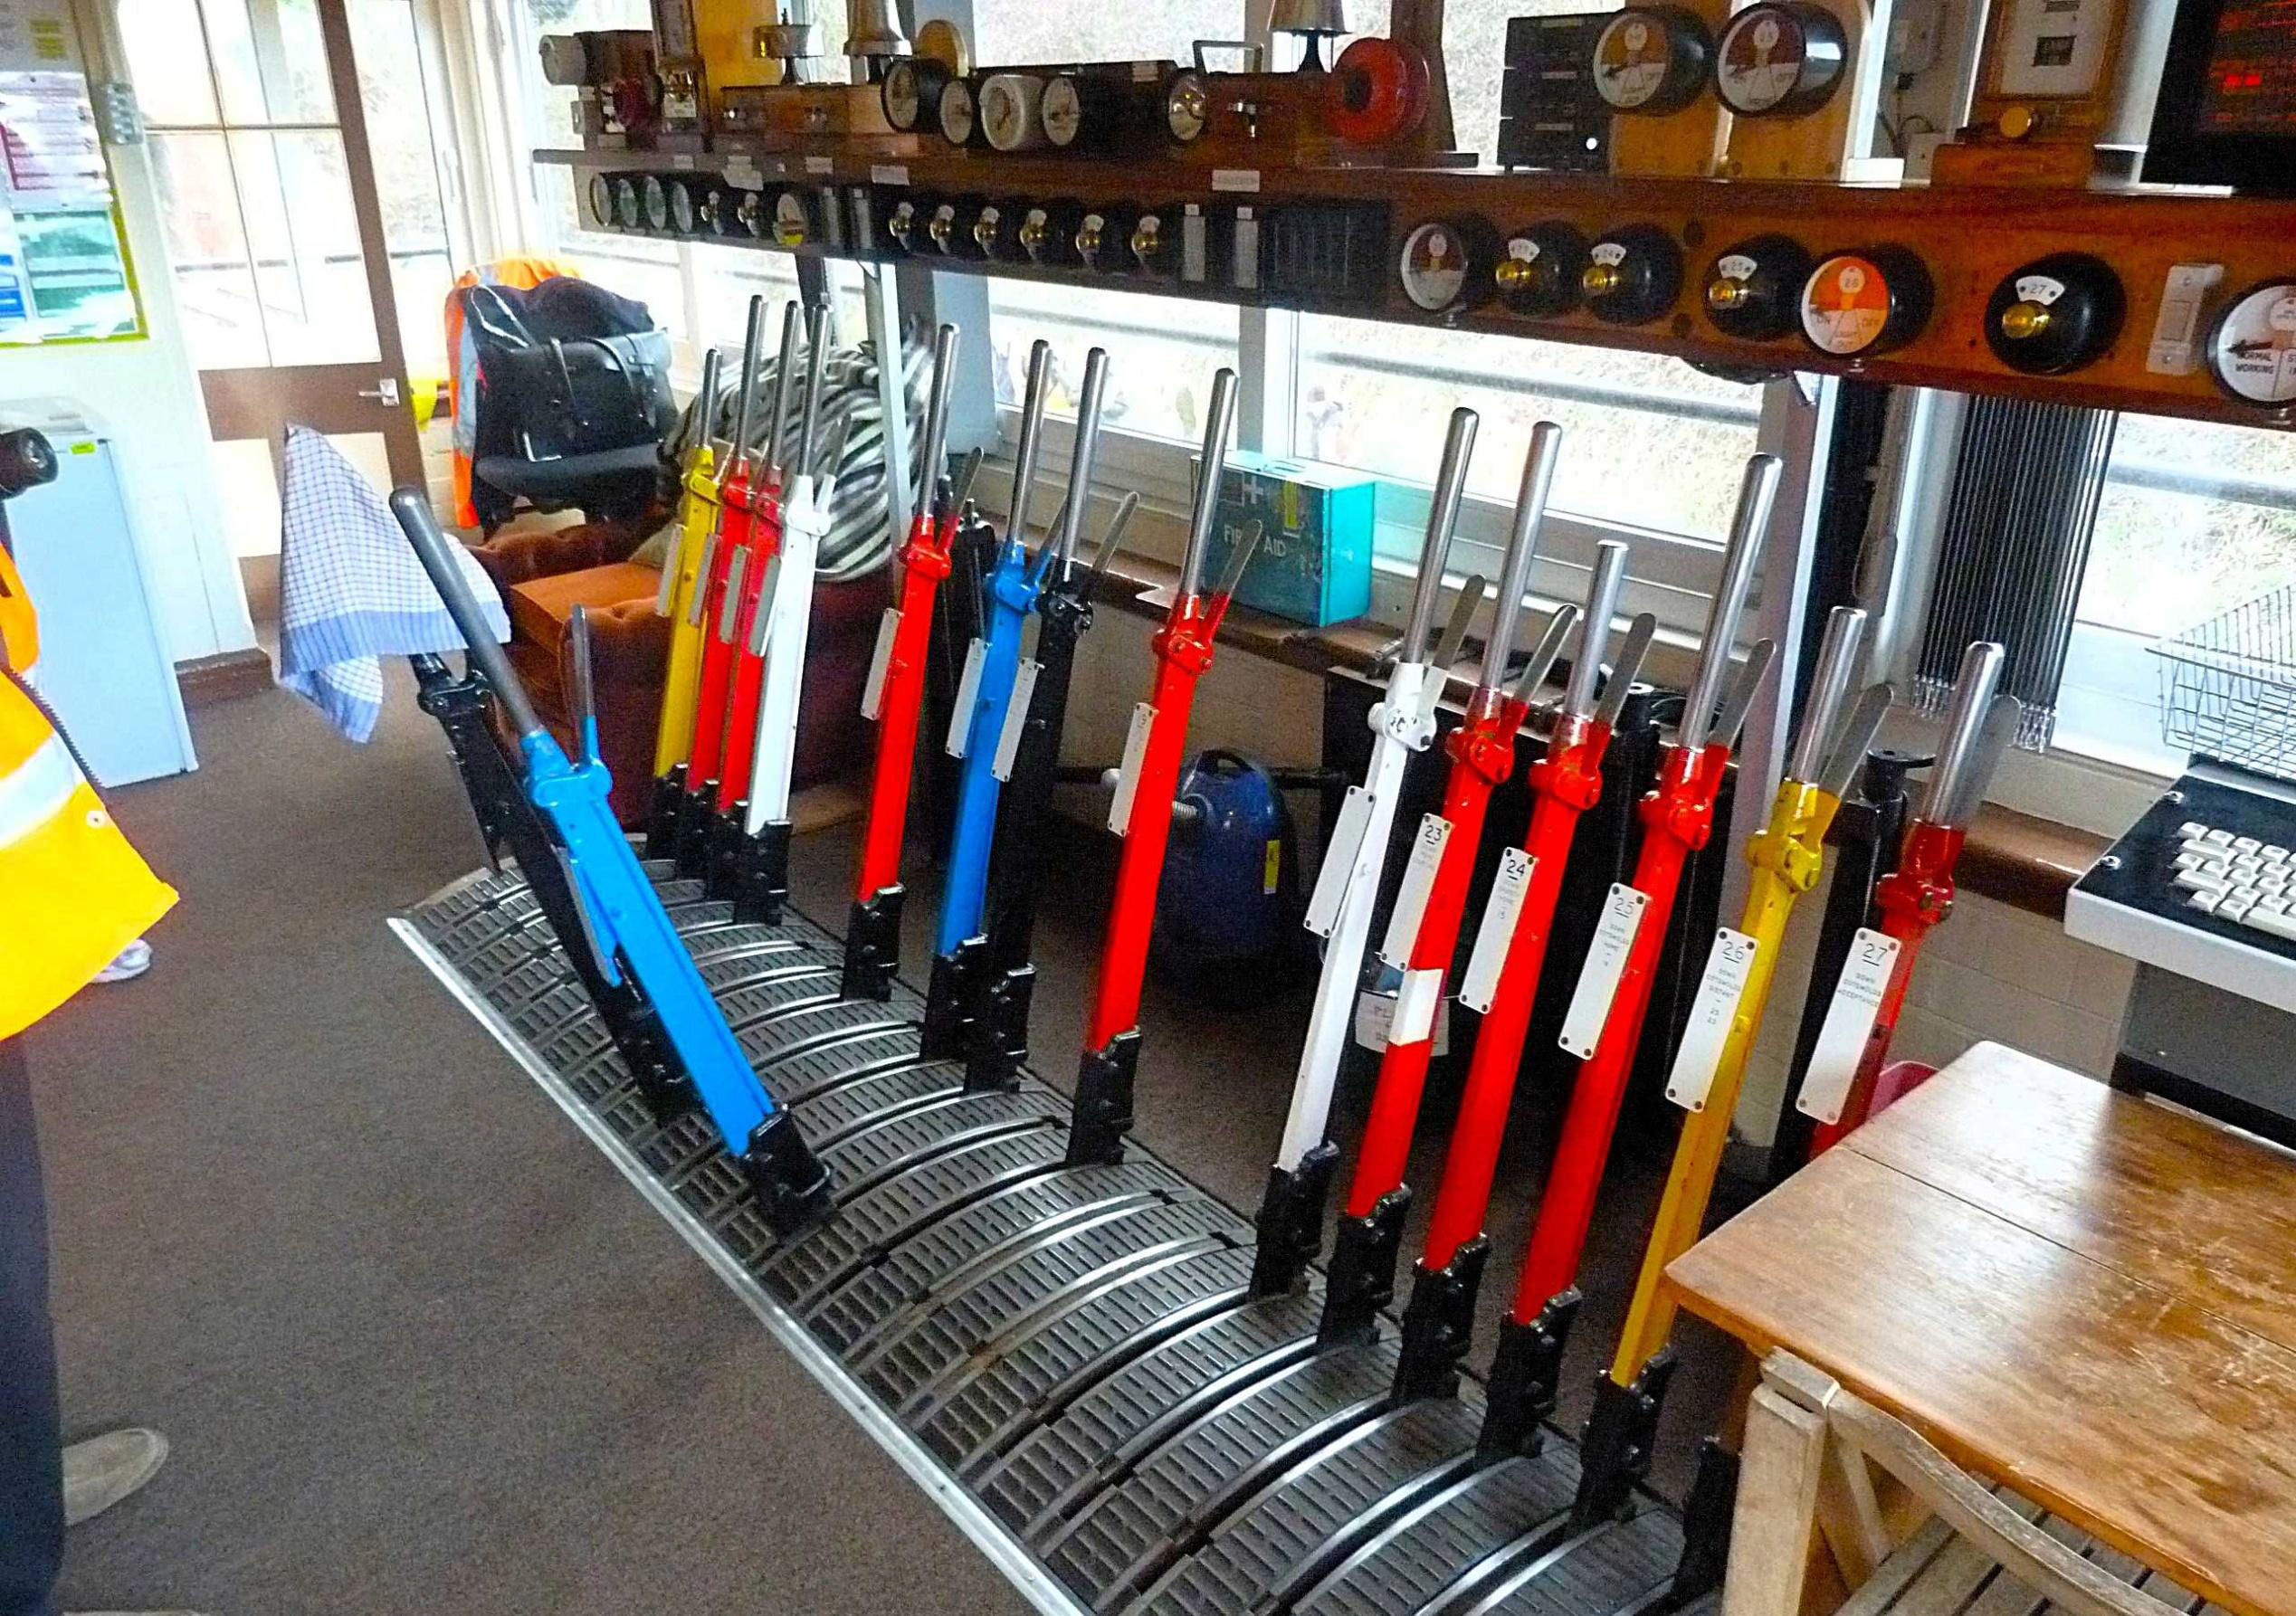
Norton Junction signal box lever frame and block instruments.
[© Angus McDougall 2012]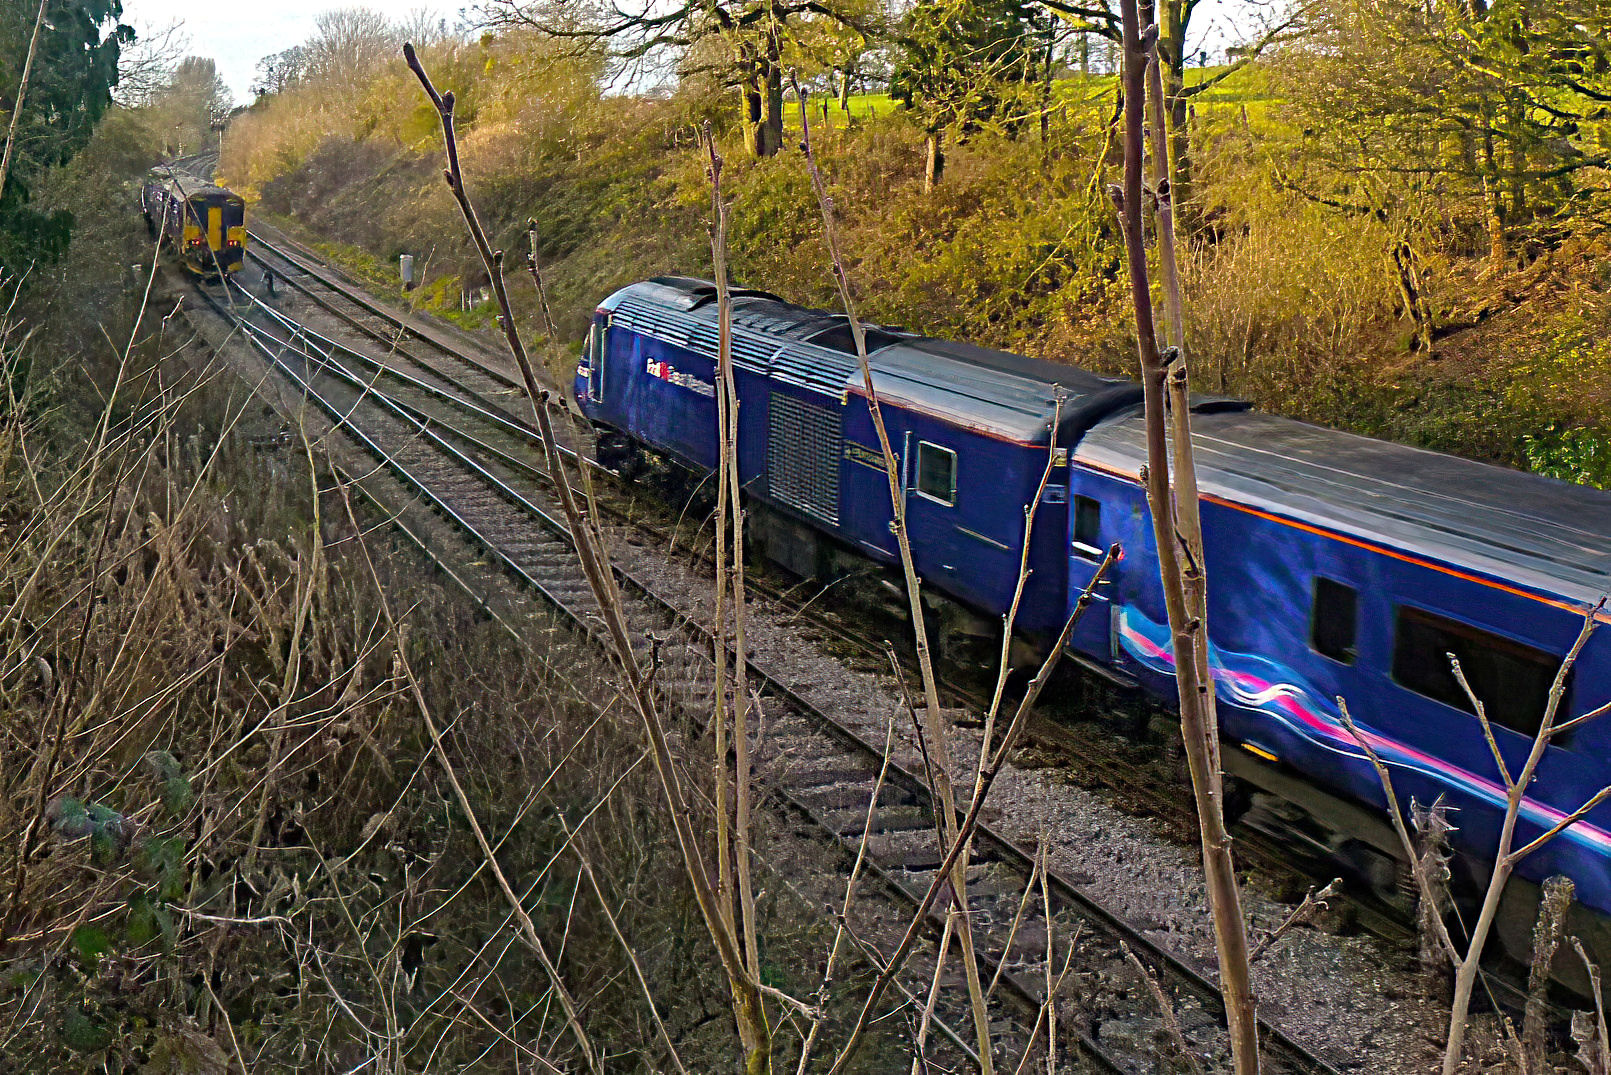
From the signal box, the DMU (from Bristol to Great Malvern) meets an HST to London via the North Cotswold Line and Oxford.
[© Angus McDougall 2012]An interesting feature of the boxes in this area is that GWR bell code suffixes are used, giving information about the direction of an approaching train. For 'is line clear?' the suffix 3-4 means 'left', going to Henwick (Foregate Street and Malvern), whilst 1-5 means 'right', going to Worcester Tunnel Junction (Droitwich and Birmingham). An Appendix to this report will have details. Fortuitously, while in the box, one part of the group also heard the 1-2-2 'line blockage completed' bell code being sent to Shrub Hill.
The next stop was Malvern Wells, where our group had to cross the line under supervision when there were no trains about. It is a last survivor in an area that once had further signal boxes, sidings, a passenger station, two engine sheds, two turntables and a junction for the double track Midland Railway line to Upton-on-Severn, Tewkesbury and Ashchurch.
Some of the area is now a light industrial area. What appeared to be the original, very large, sign for this GWR type 7d signal box, dating from 1919, was seen by the author later in the weekend at Toddington. A sign perhaps from the British Rail era now adorns the box, which is constructed largely in red brick, with engineering brick details around the windows and at the base. The pitched roof is slated with roll-top ridge tiles but the original windows have been replaced. Semaphore MW37 (Down Main Starting) is outside the box, protecting the line to Ledbury. Inside, under the white painted exposed roof timbers, a 40-lever, 3-bar vertical tappet frame (4 inch lever spacing) has 13 spaces and 10 spares, giving 17 operational levers. The box has a special instrument for the single line southwest through Colwall Tunnel towards Ledbury, worked under the Tokenless Block regulations. This has a rotary switch 'Normal / Accept' and two buttons: 'Offer' and 'Train Arrived', which work in an intuitive manner.
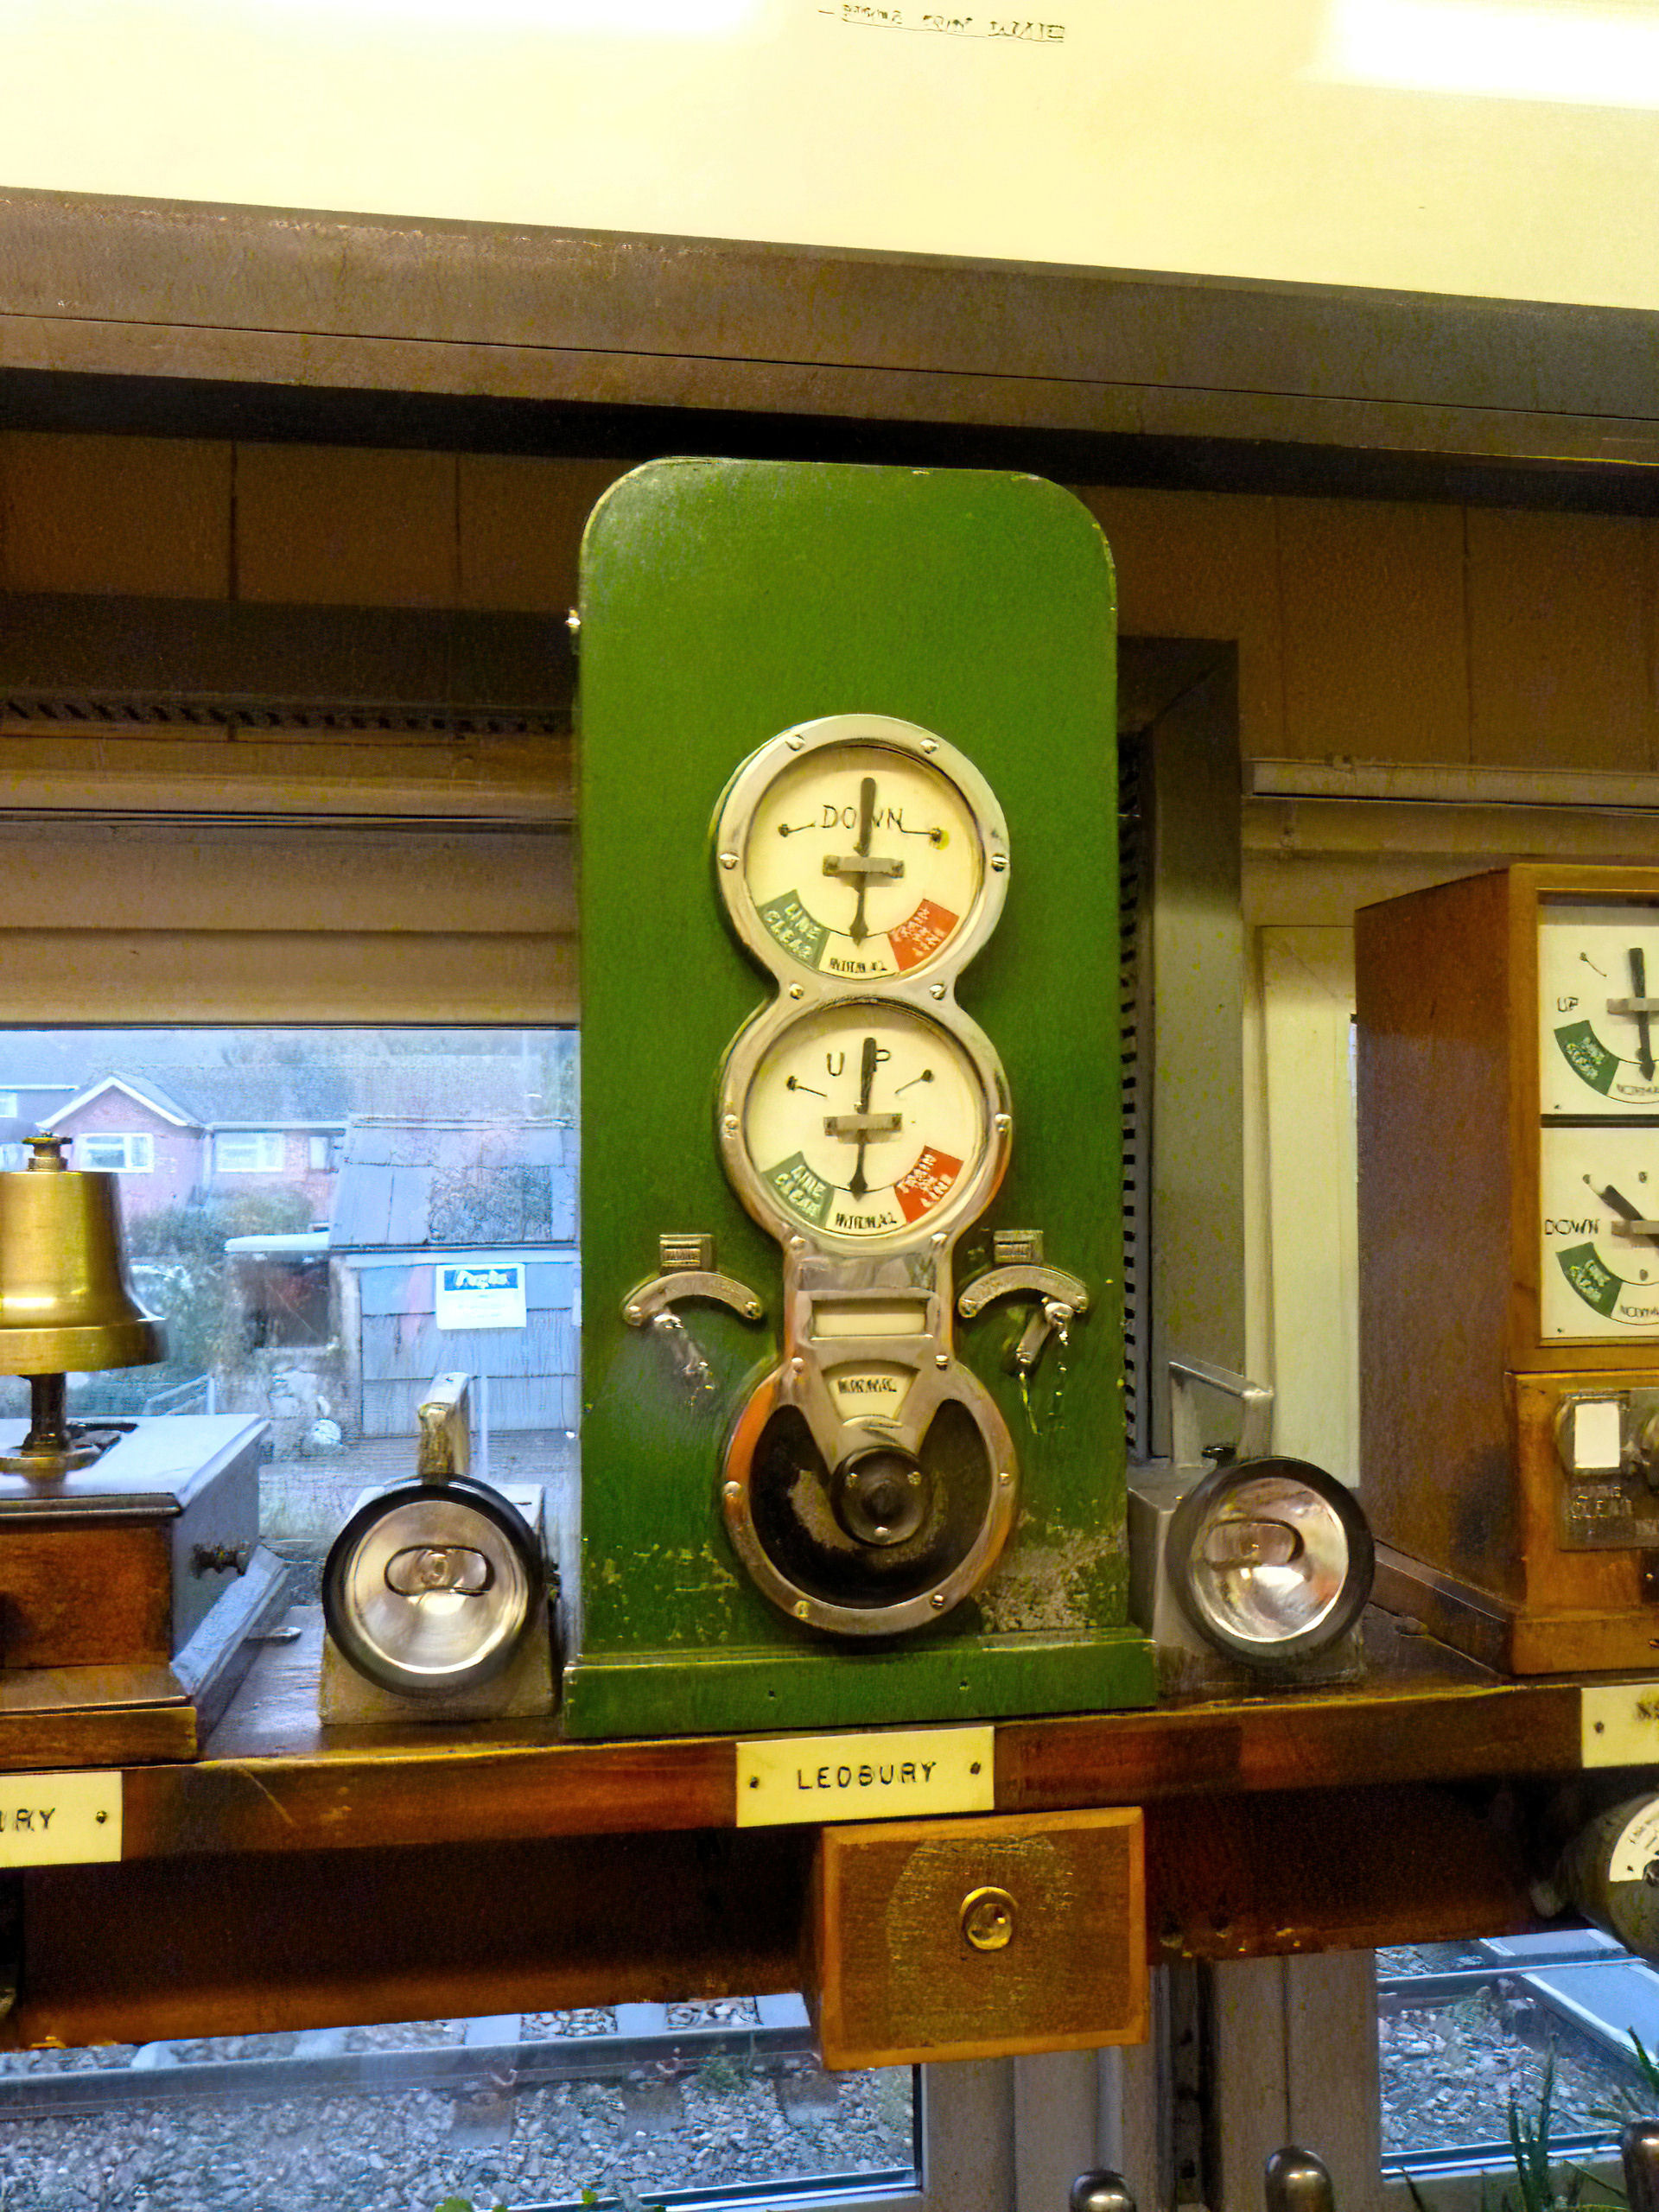
Malvern Wells signal box, the former 'Lock & Block' instrument to Ledbury box.
[© Angus McDougall 2012]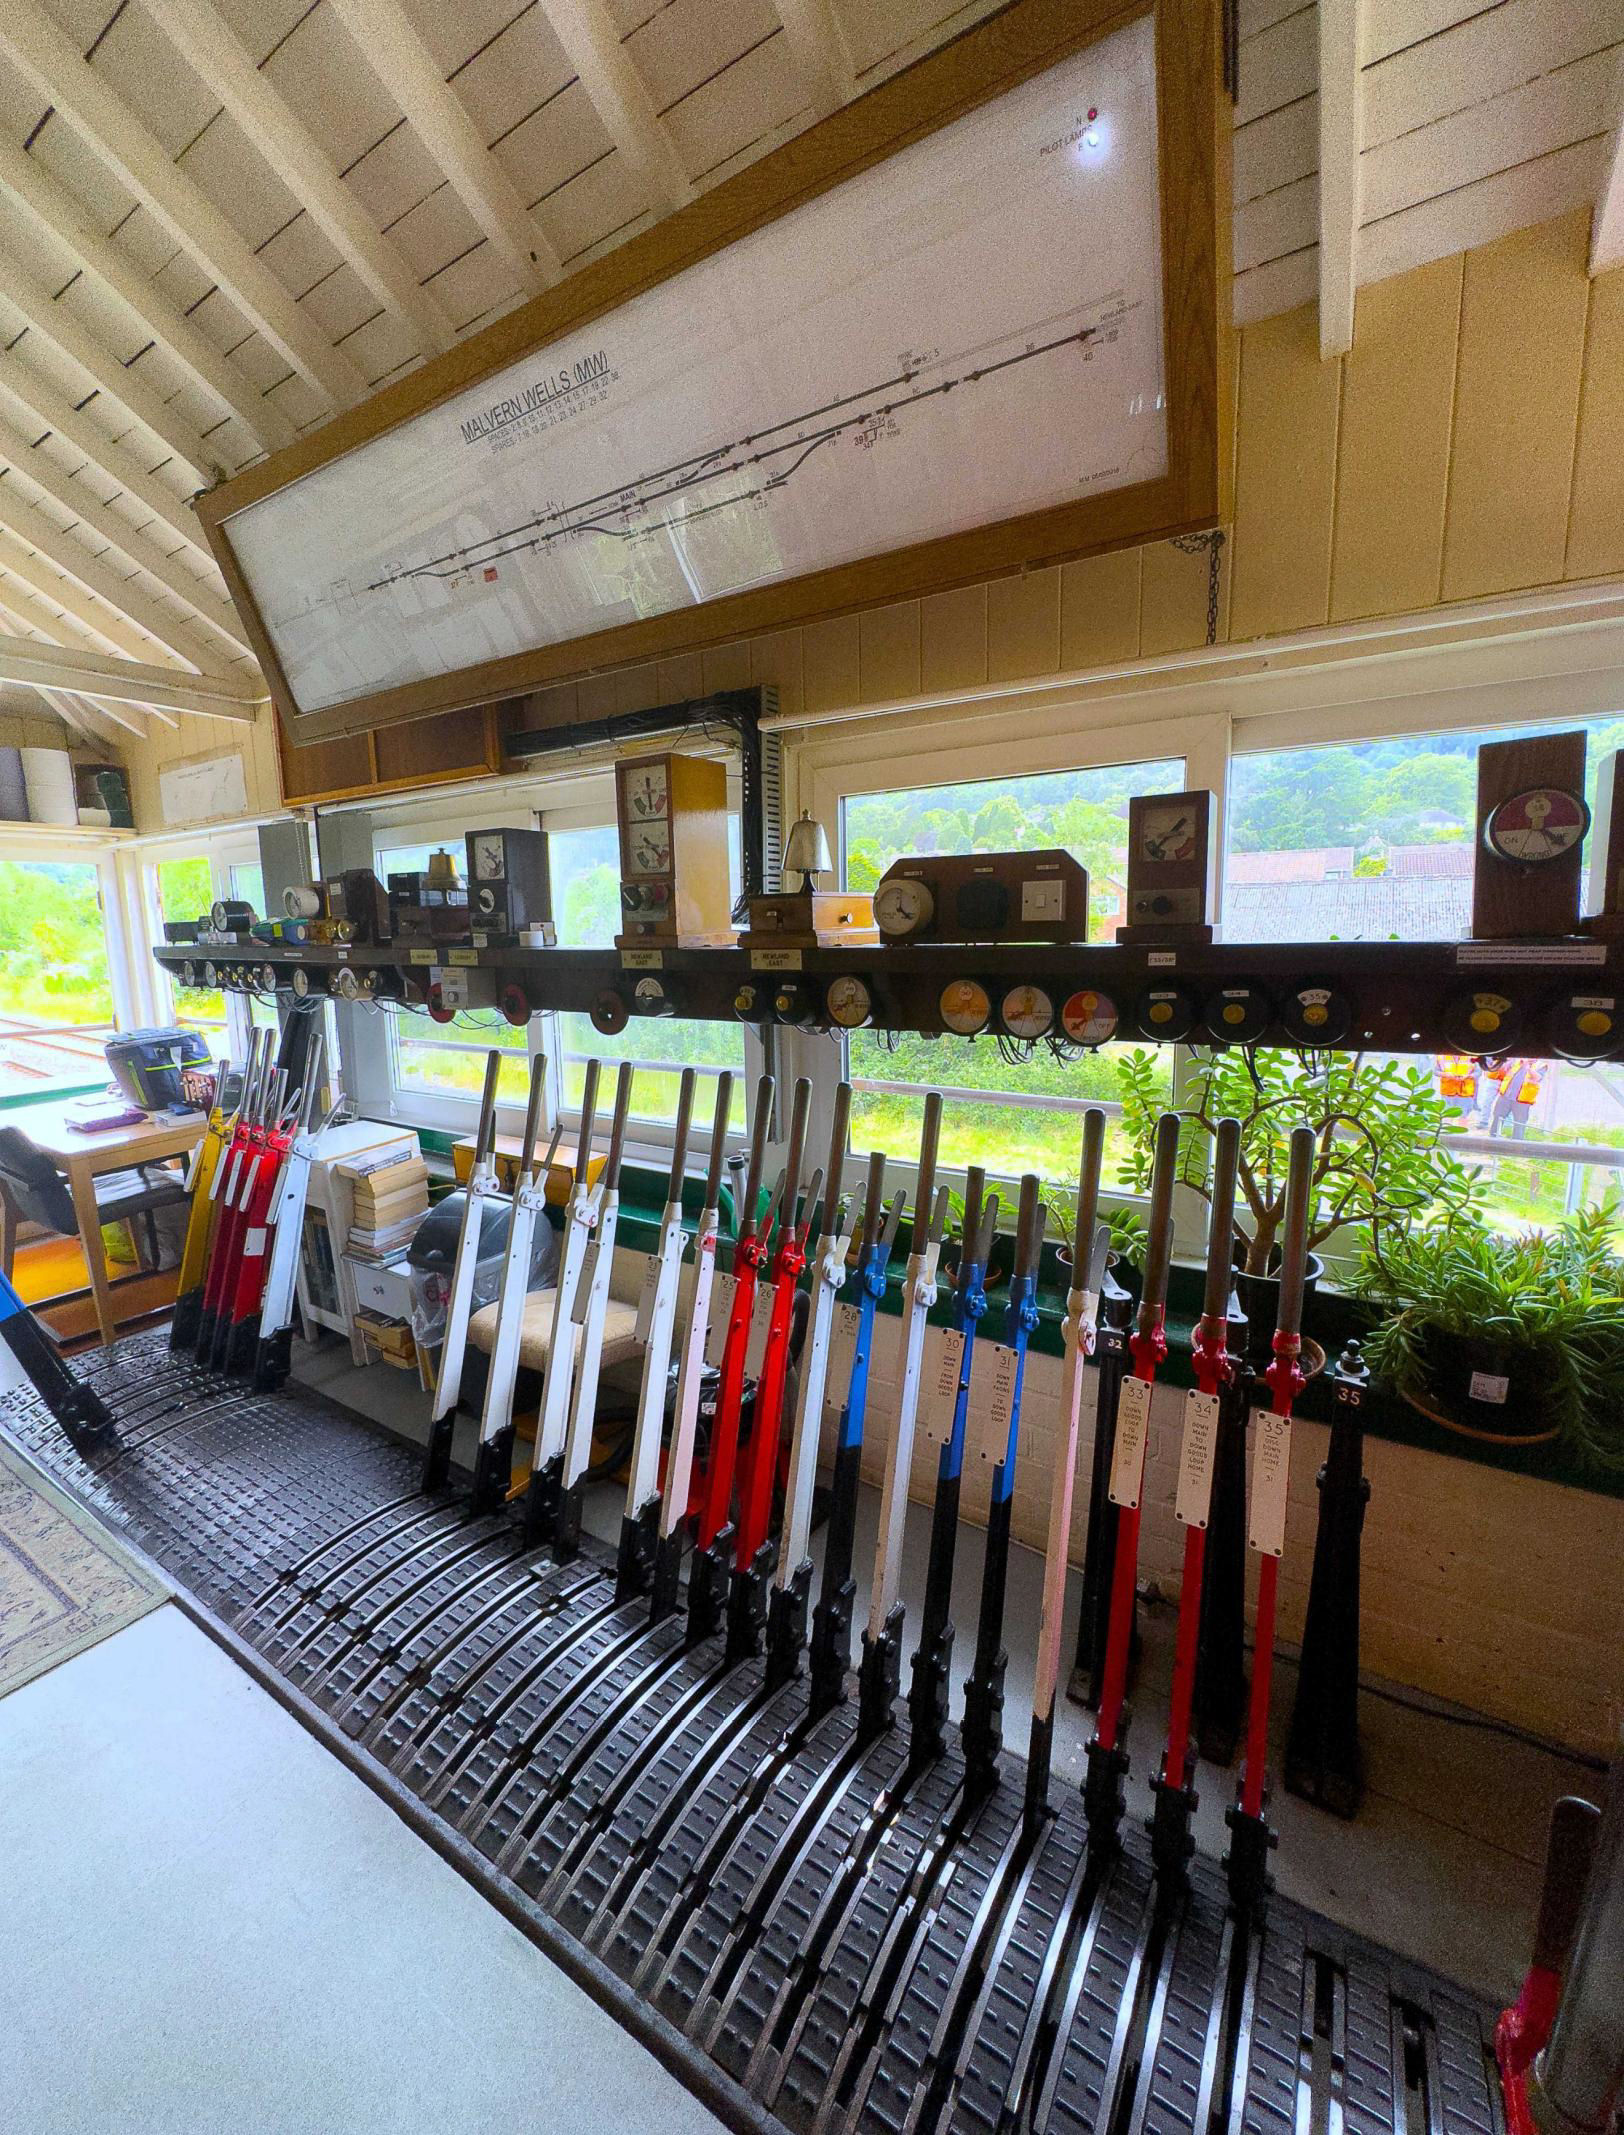
Malvern Wells interior, note loop and trailing crossover.
[© Mark Shinwell 2024]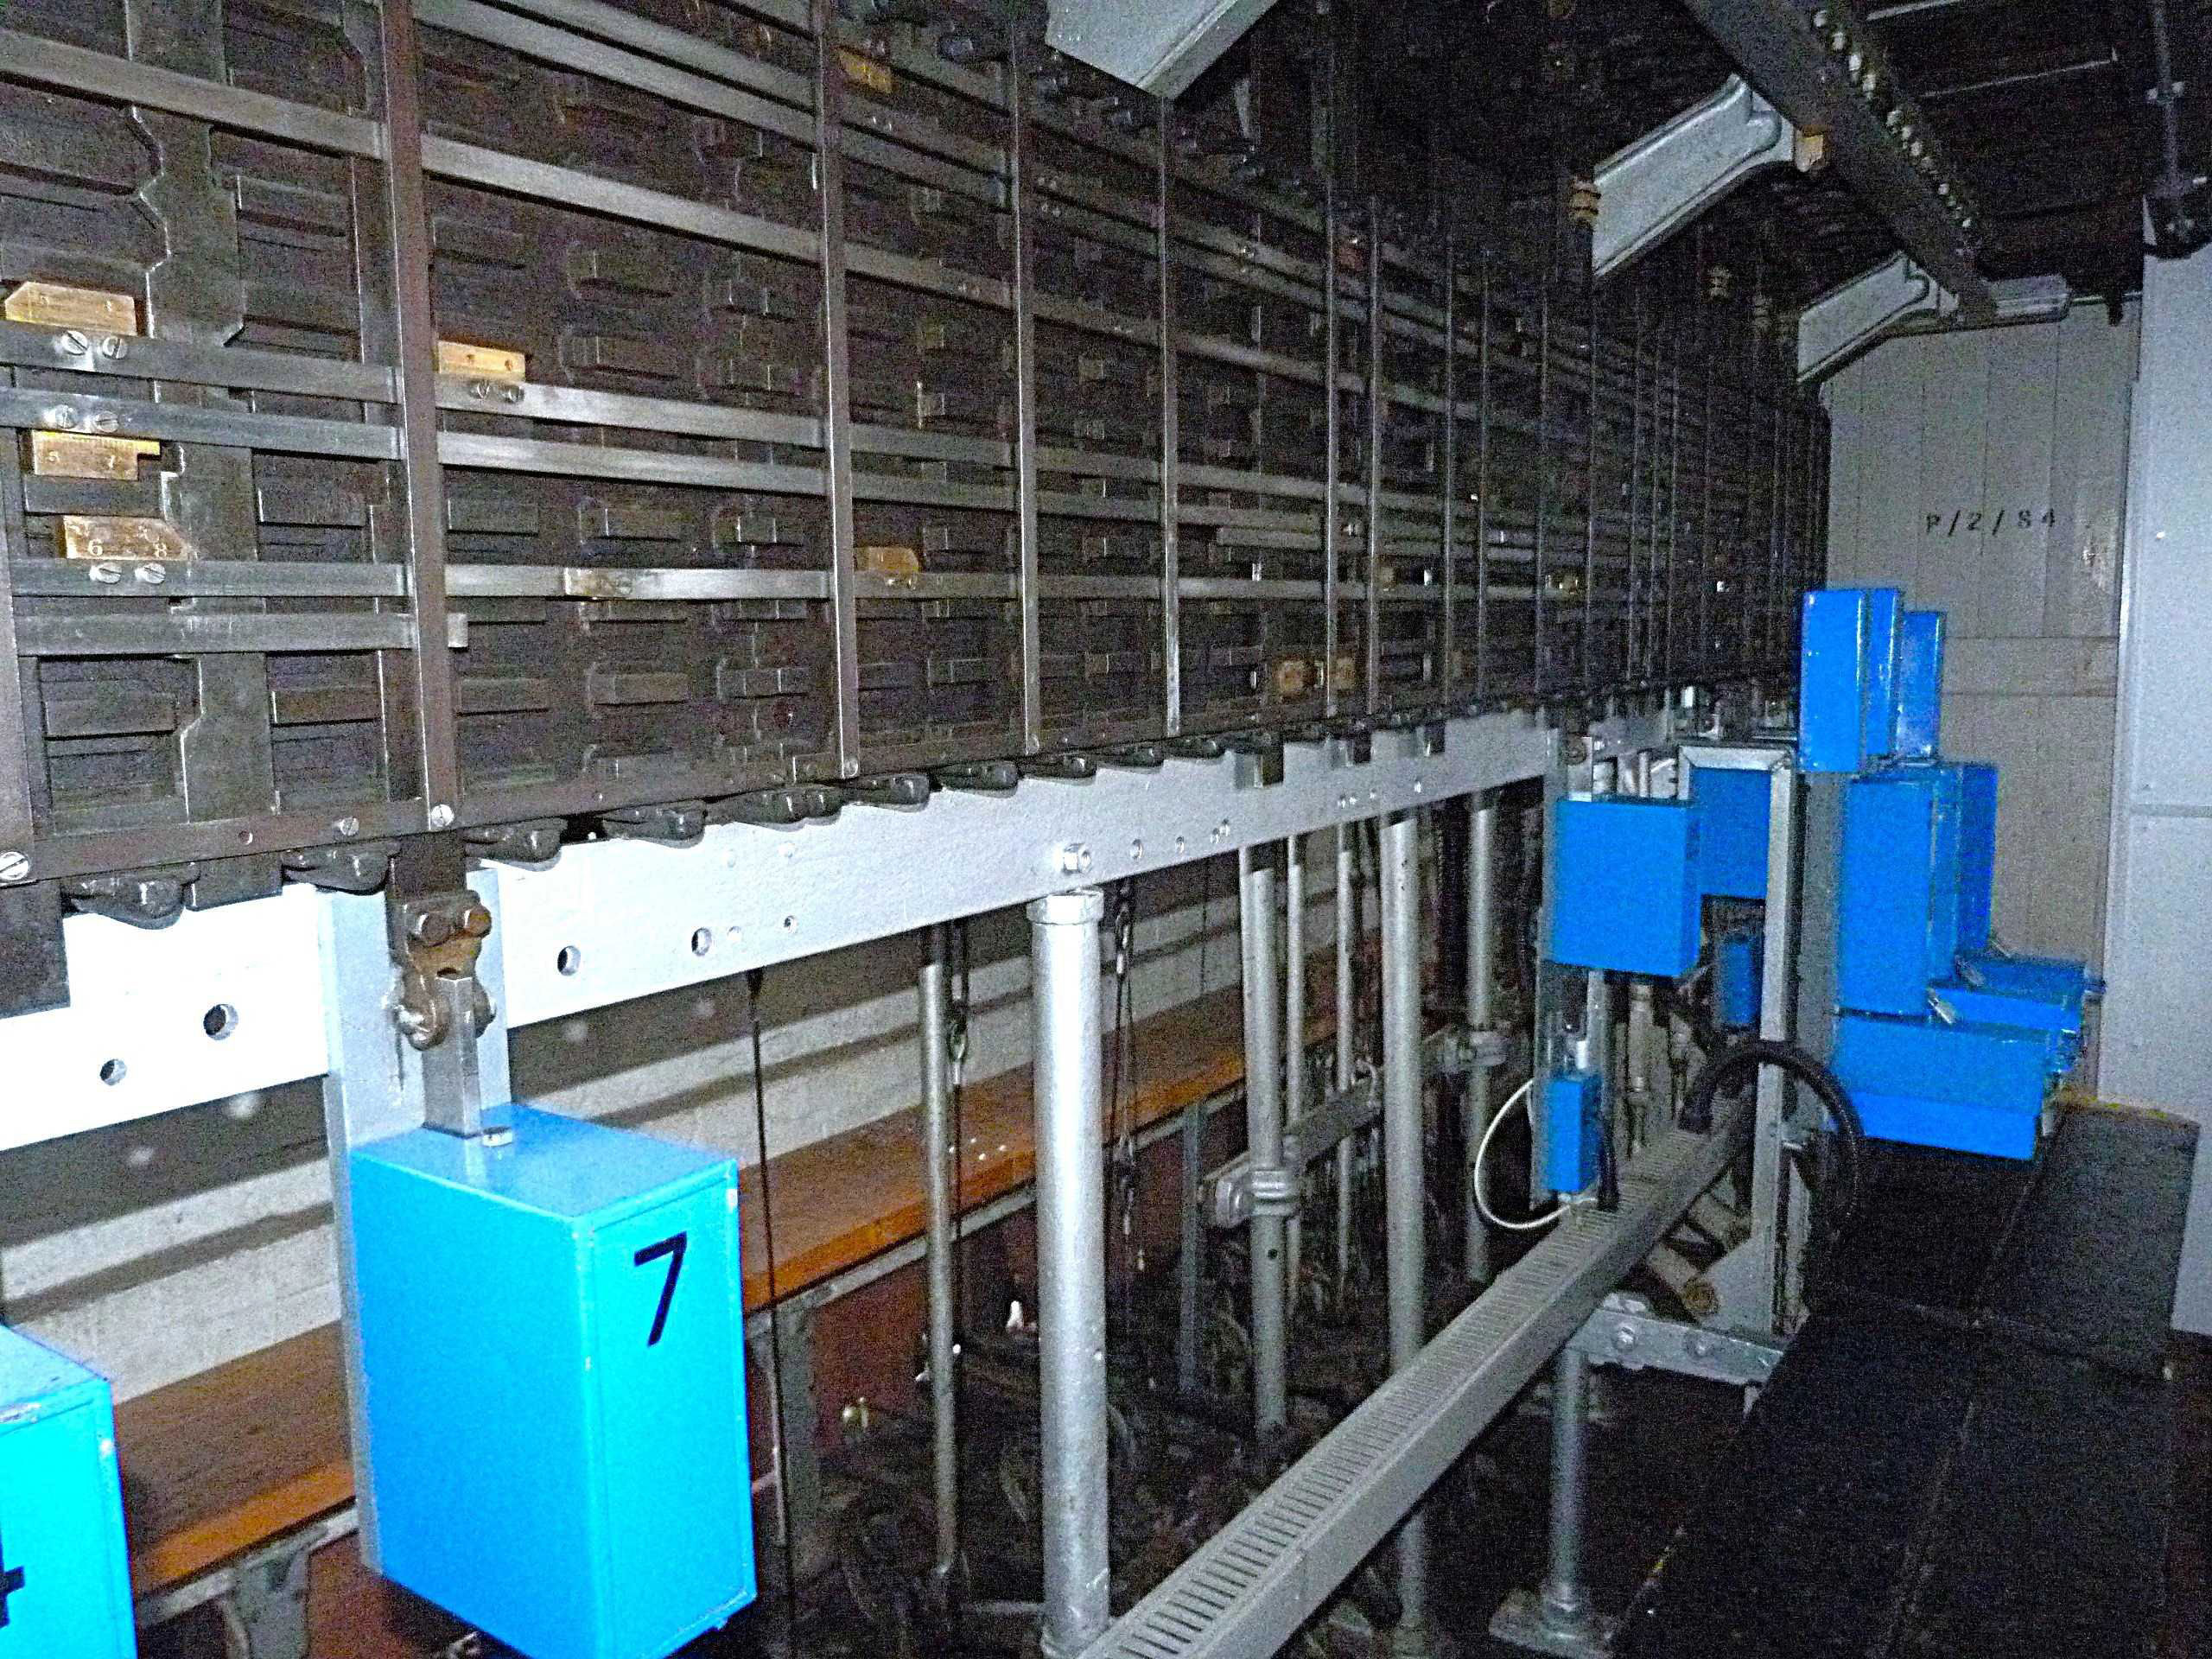
Another Victorian computer, Malvern Wells locking room.
[© Angus McDougall 2012]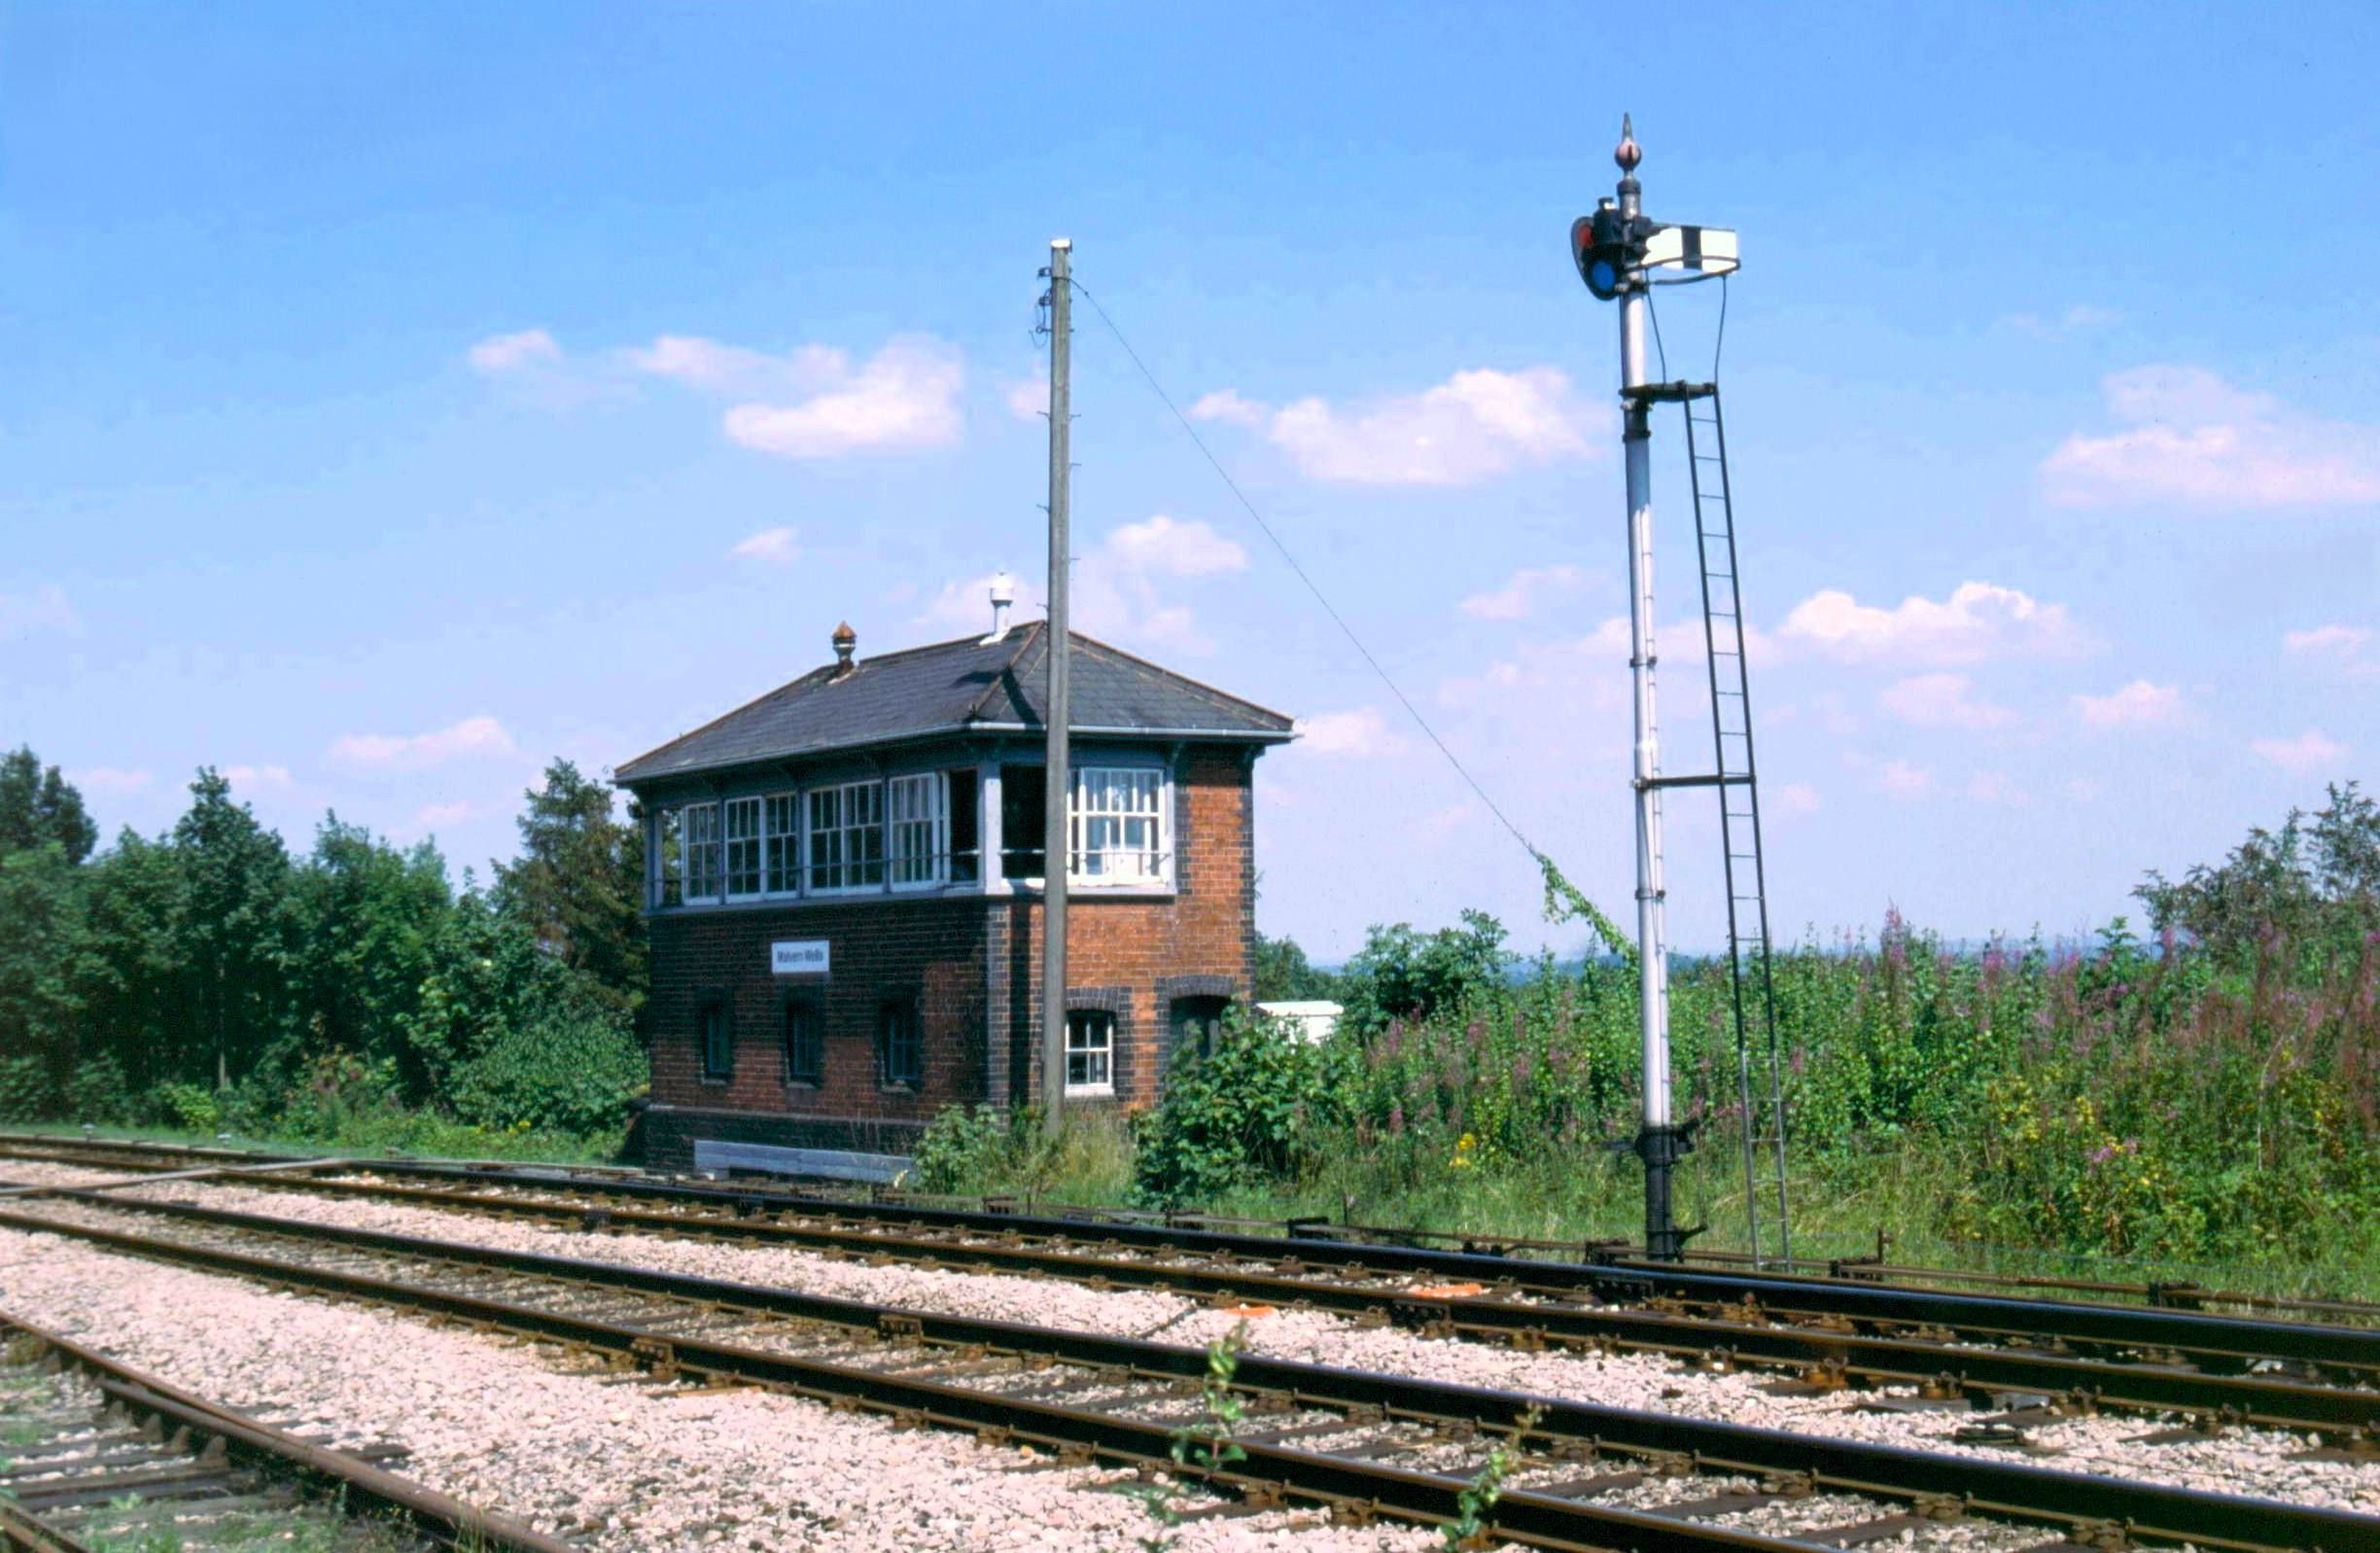
Malvern Wells box on 19 Jul 1997, Ledbury right, Great Malvern left. Bottom left corner is the trap point in the Up Refuge Siding.
[© Angus McDougall 1997]Above, a needle shows 'Normal', 'Train in Section' or 'Train Accepted'. This instrument replaced the original 'lock and block' working and associated instruments that were found in both Malvern Wells and Ledbury boxes, until removed by Network Rail in Oct 2017. The original instruments can now be seen in Kidderminster Railway Museum. Many trains from the Worcester direction turnback at Malvern Wells (ECS from and back to Great Malvern, passing your Editor's house twice). The trailing crossover was moved in Aug 2016 to facilitate this and, as far as is known, has only been used by one passenger train since (see BLN 1378.1599) - yes, your Editor was on it and only by chance. The much sought after (©Kev Adlam) Down Goods Loop is permissive but sees no goods trains. It is booked for three ECS workings SSuX, two SO and one SuO; generally those booked for a longer recess and a crew break.
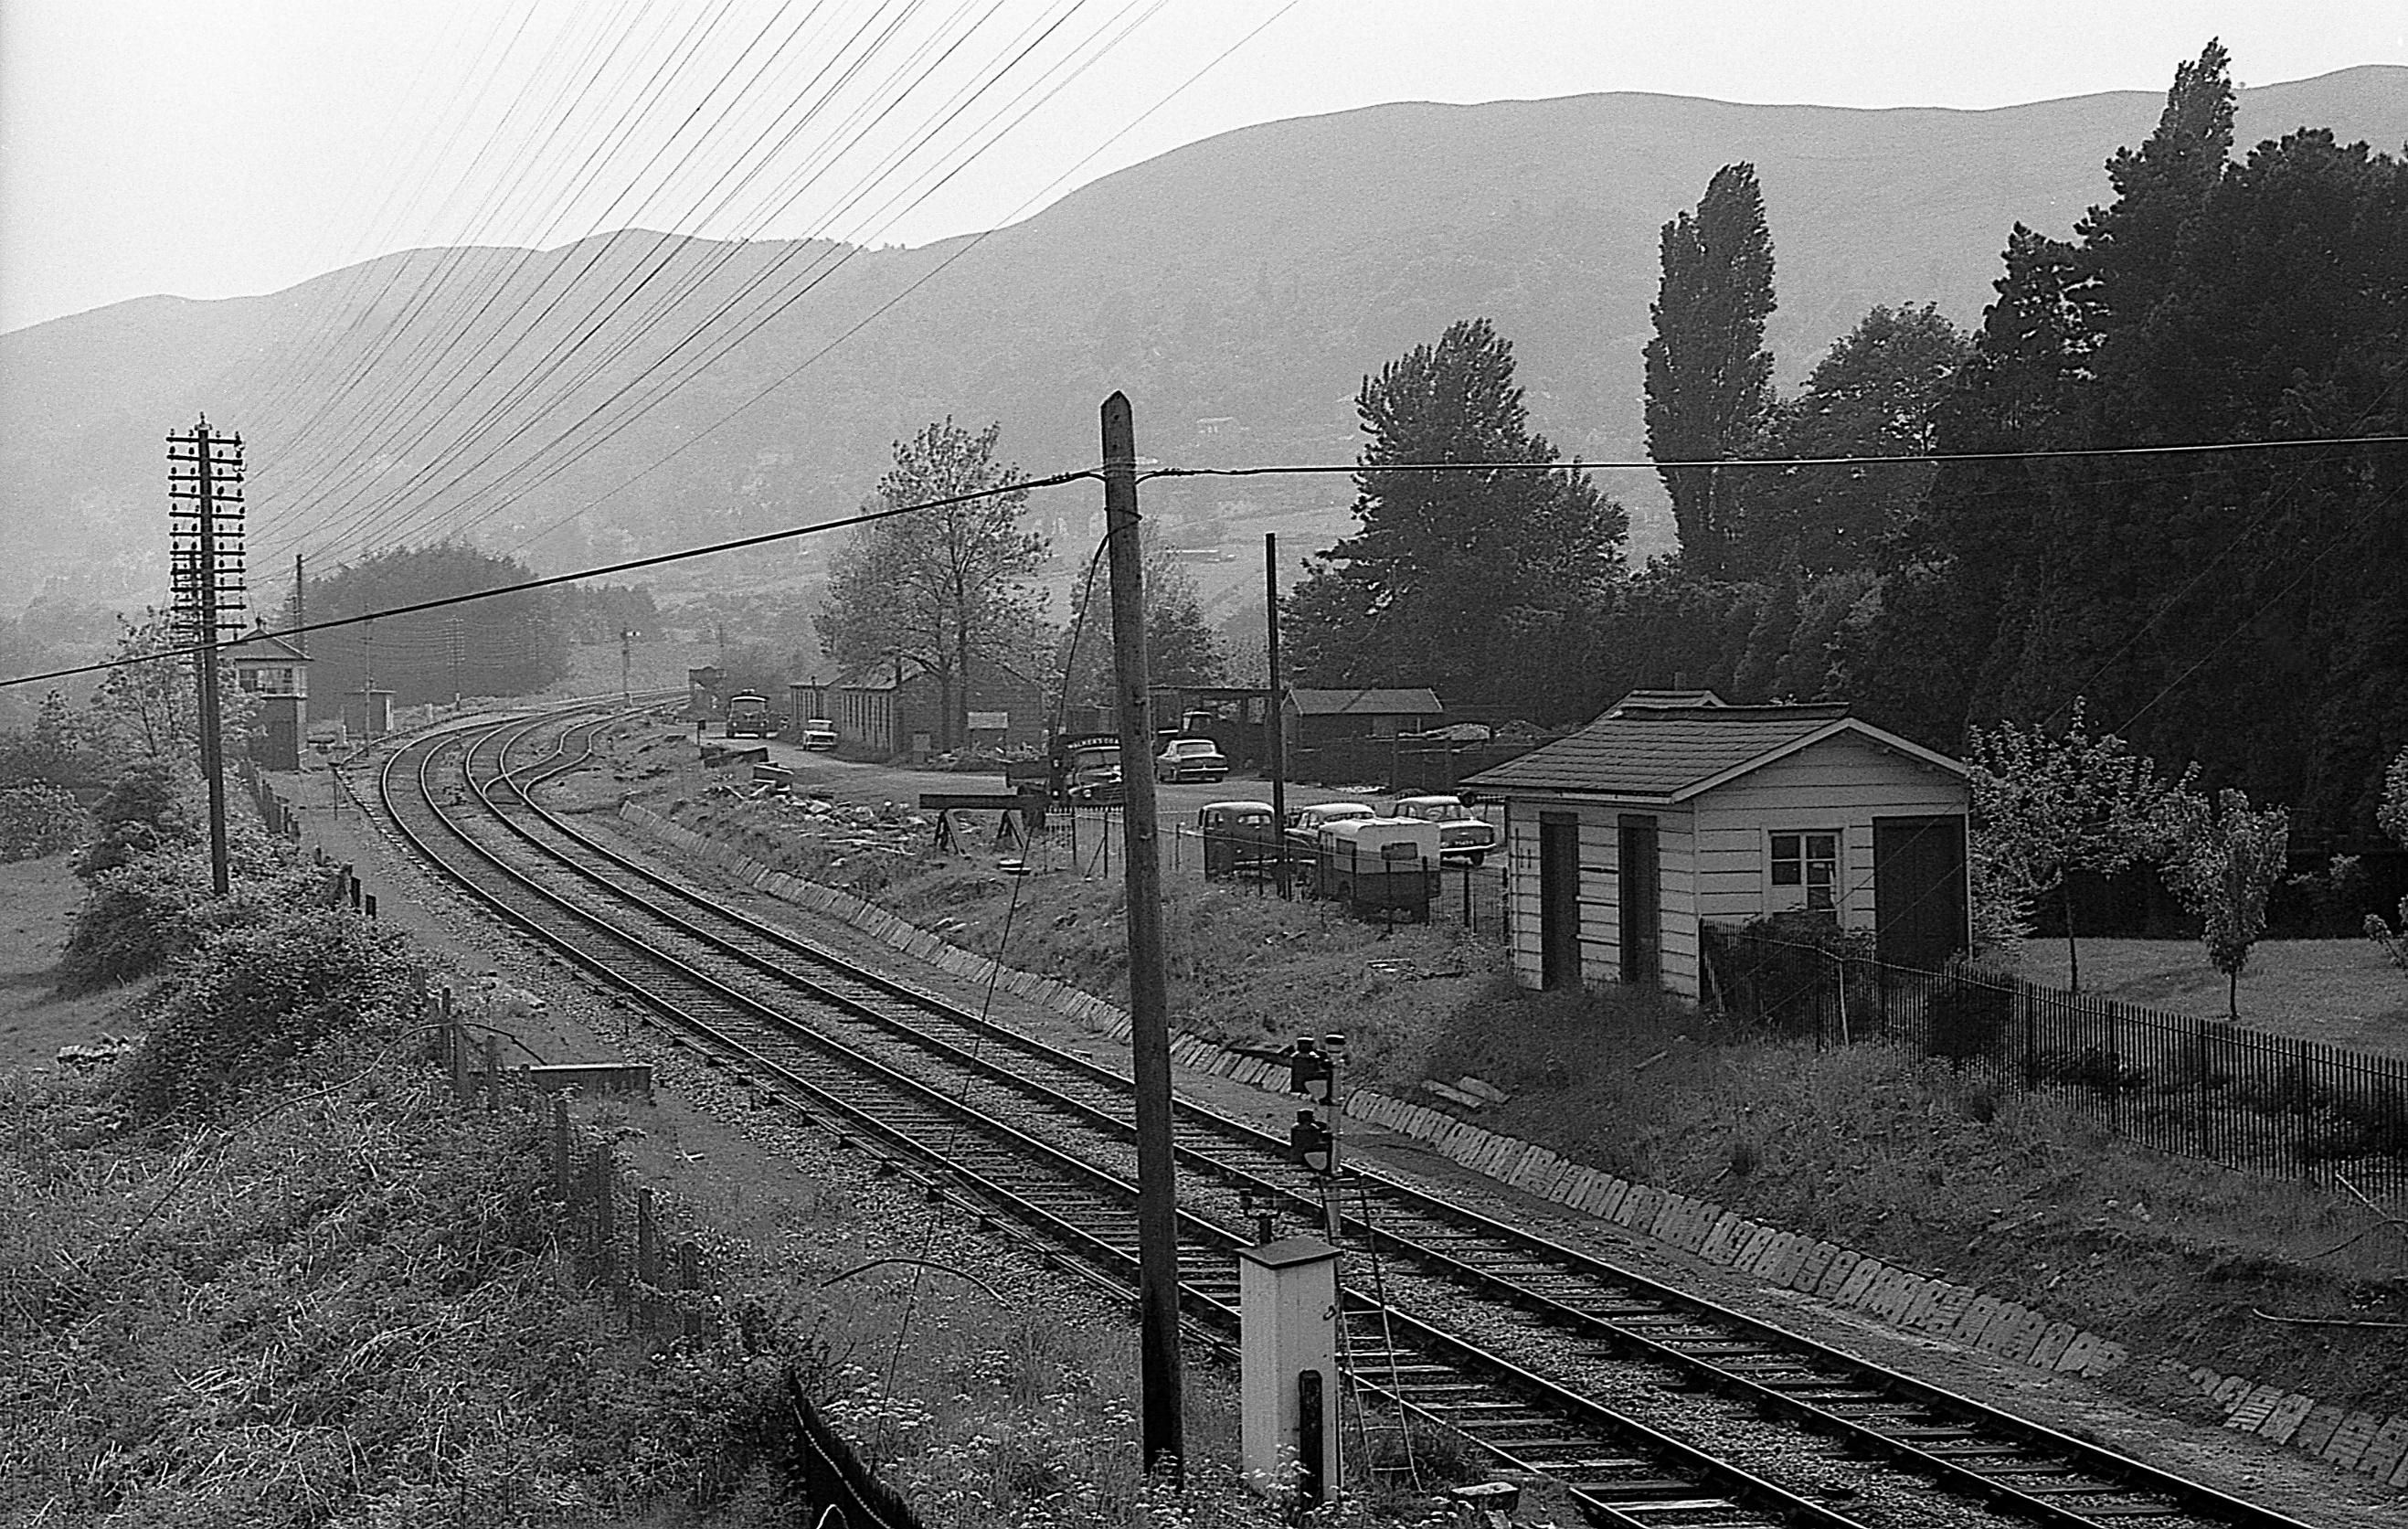
Towards Ledbury from Peachfield Road overbridge, the track has always singled here for the single track Colwall Tunnel.
Malvern Wells station (CP 5 Apr 1965) was in the foreground noite GWR spear fencing on the far (Up) platform side, the box is upper left.
The Up Refuge Siding (now disconnected) is opposite the box and the former goods shed and yard are evident.
[© Ron Meredith 1968]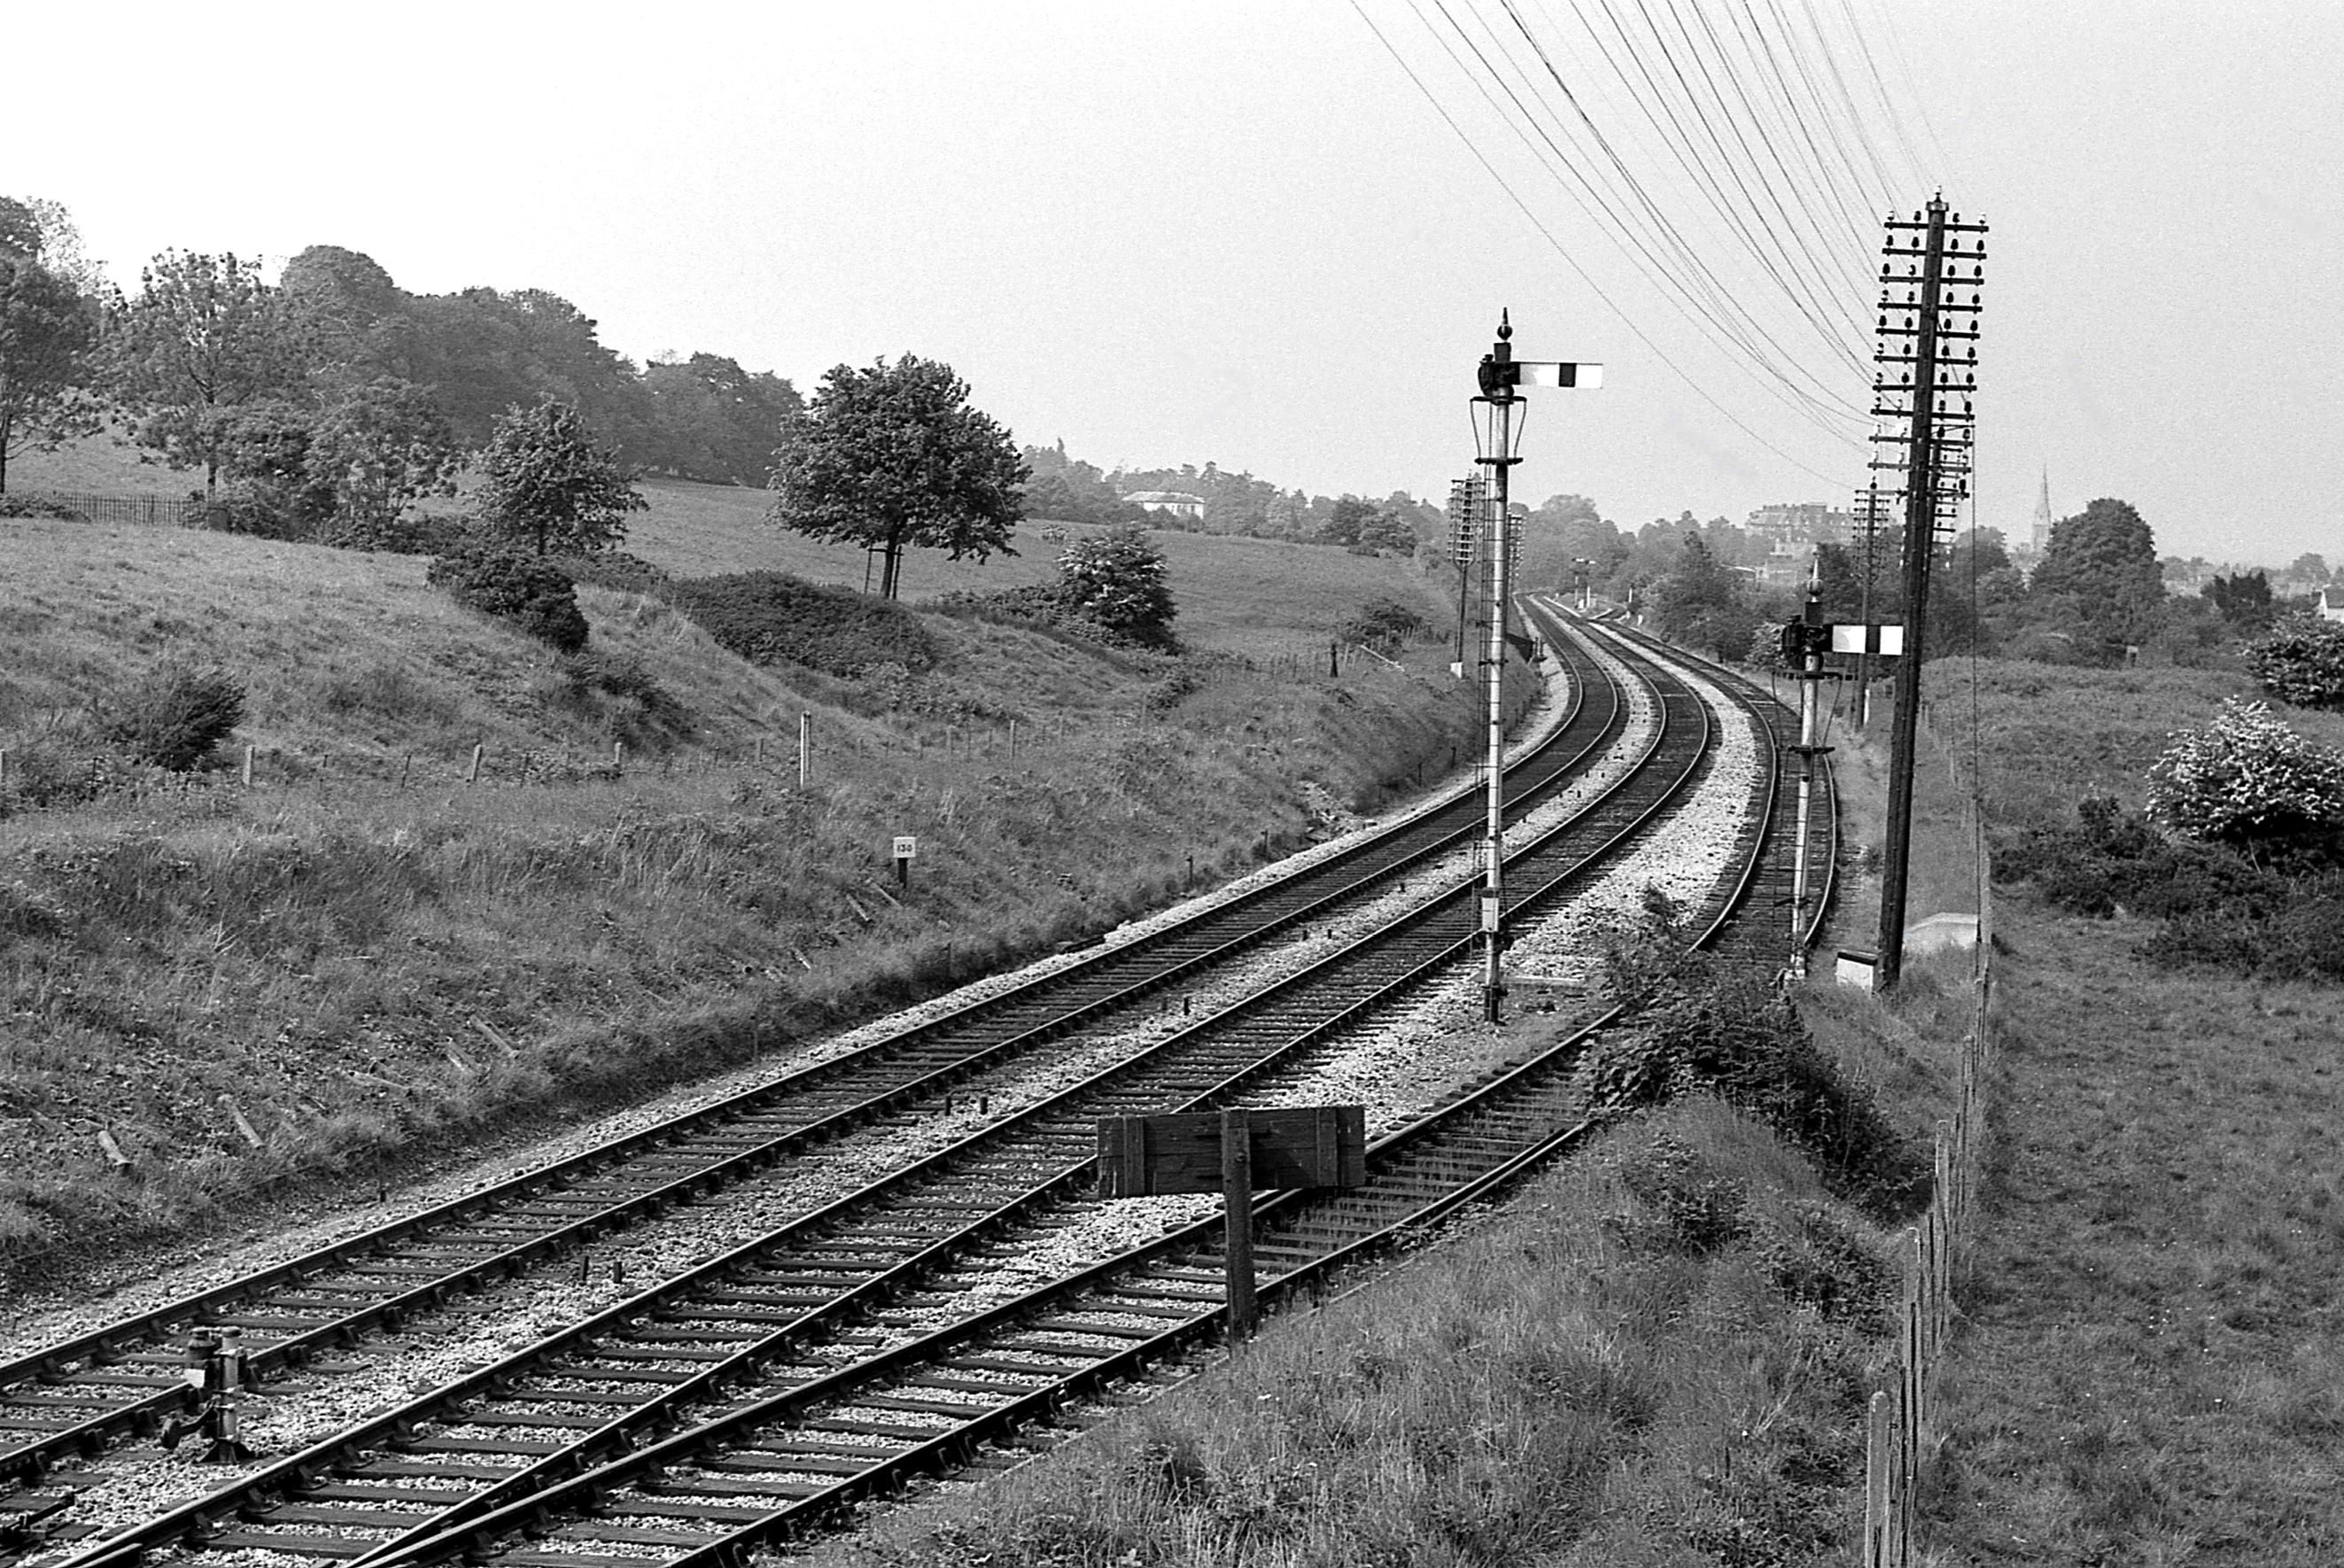
In the other direction towards Great Malvern with the Down Goods Loop; nowadays there are more trees and bigger ones in this area.
[© Ron Meredith 1968]