Eight members met Network Rail Local Operations Manager Katrina Lawson at Ferryhill. We started with the mandatory safety briefing before entering the first signalbox, Ferryhill, formerly Ferryhill No2.
This was the most modern of the boxes visited this day, although a London & North Eastern Railway Type 13 design, it was built as late as 1952, but has seen many changes since. The box is at the south end of the former Ferryhill station (CP 6 Mar 1967 but recently awarded funding towards feasibilty studies into reopening which Boris Johnson said he was keen to see!). It originally had a lever frame but in recent years there was just a small Individual Function Switch (IFS) Panel dating from 1992. This only controlled acess to/from the Stillington branch to Norton-on-Tees West, with Absolute Block controls built into the panel. It also interfaces with Tyneside Integrated Electronic Control Centre.
The box is lucky to have survived; it was a last minute reprieve. When East Coast Main Line (ECML) resignalling was planned, British Rail anticipated that the Stillington branch would close, so no provision was made to resignal it but the line was reprieved at a very late stage. The Stillington line and its junction were thus not included in the 9 May 1991 ECML resignalling. For almost 30 years this relatively large box has controlled a single two aspect signal on the Up Stillington and two on the Down Stillington Line, during which time the number of freight trains has dwindled. Despite being right next to the East Coast Main Line (four tracked at this point) and an Up goods loop, plus the Thrislington (Dolomite and aggregates) branch behind the box, it had no control over these. The first the signaller would know of a train being put into the loop would be the sound of the points being changed by Tyneside IECC. These reports are now valedictory as the boxes all closed recently (BLN 1370.360).
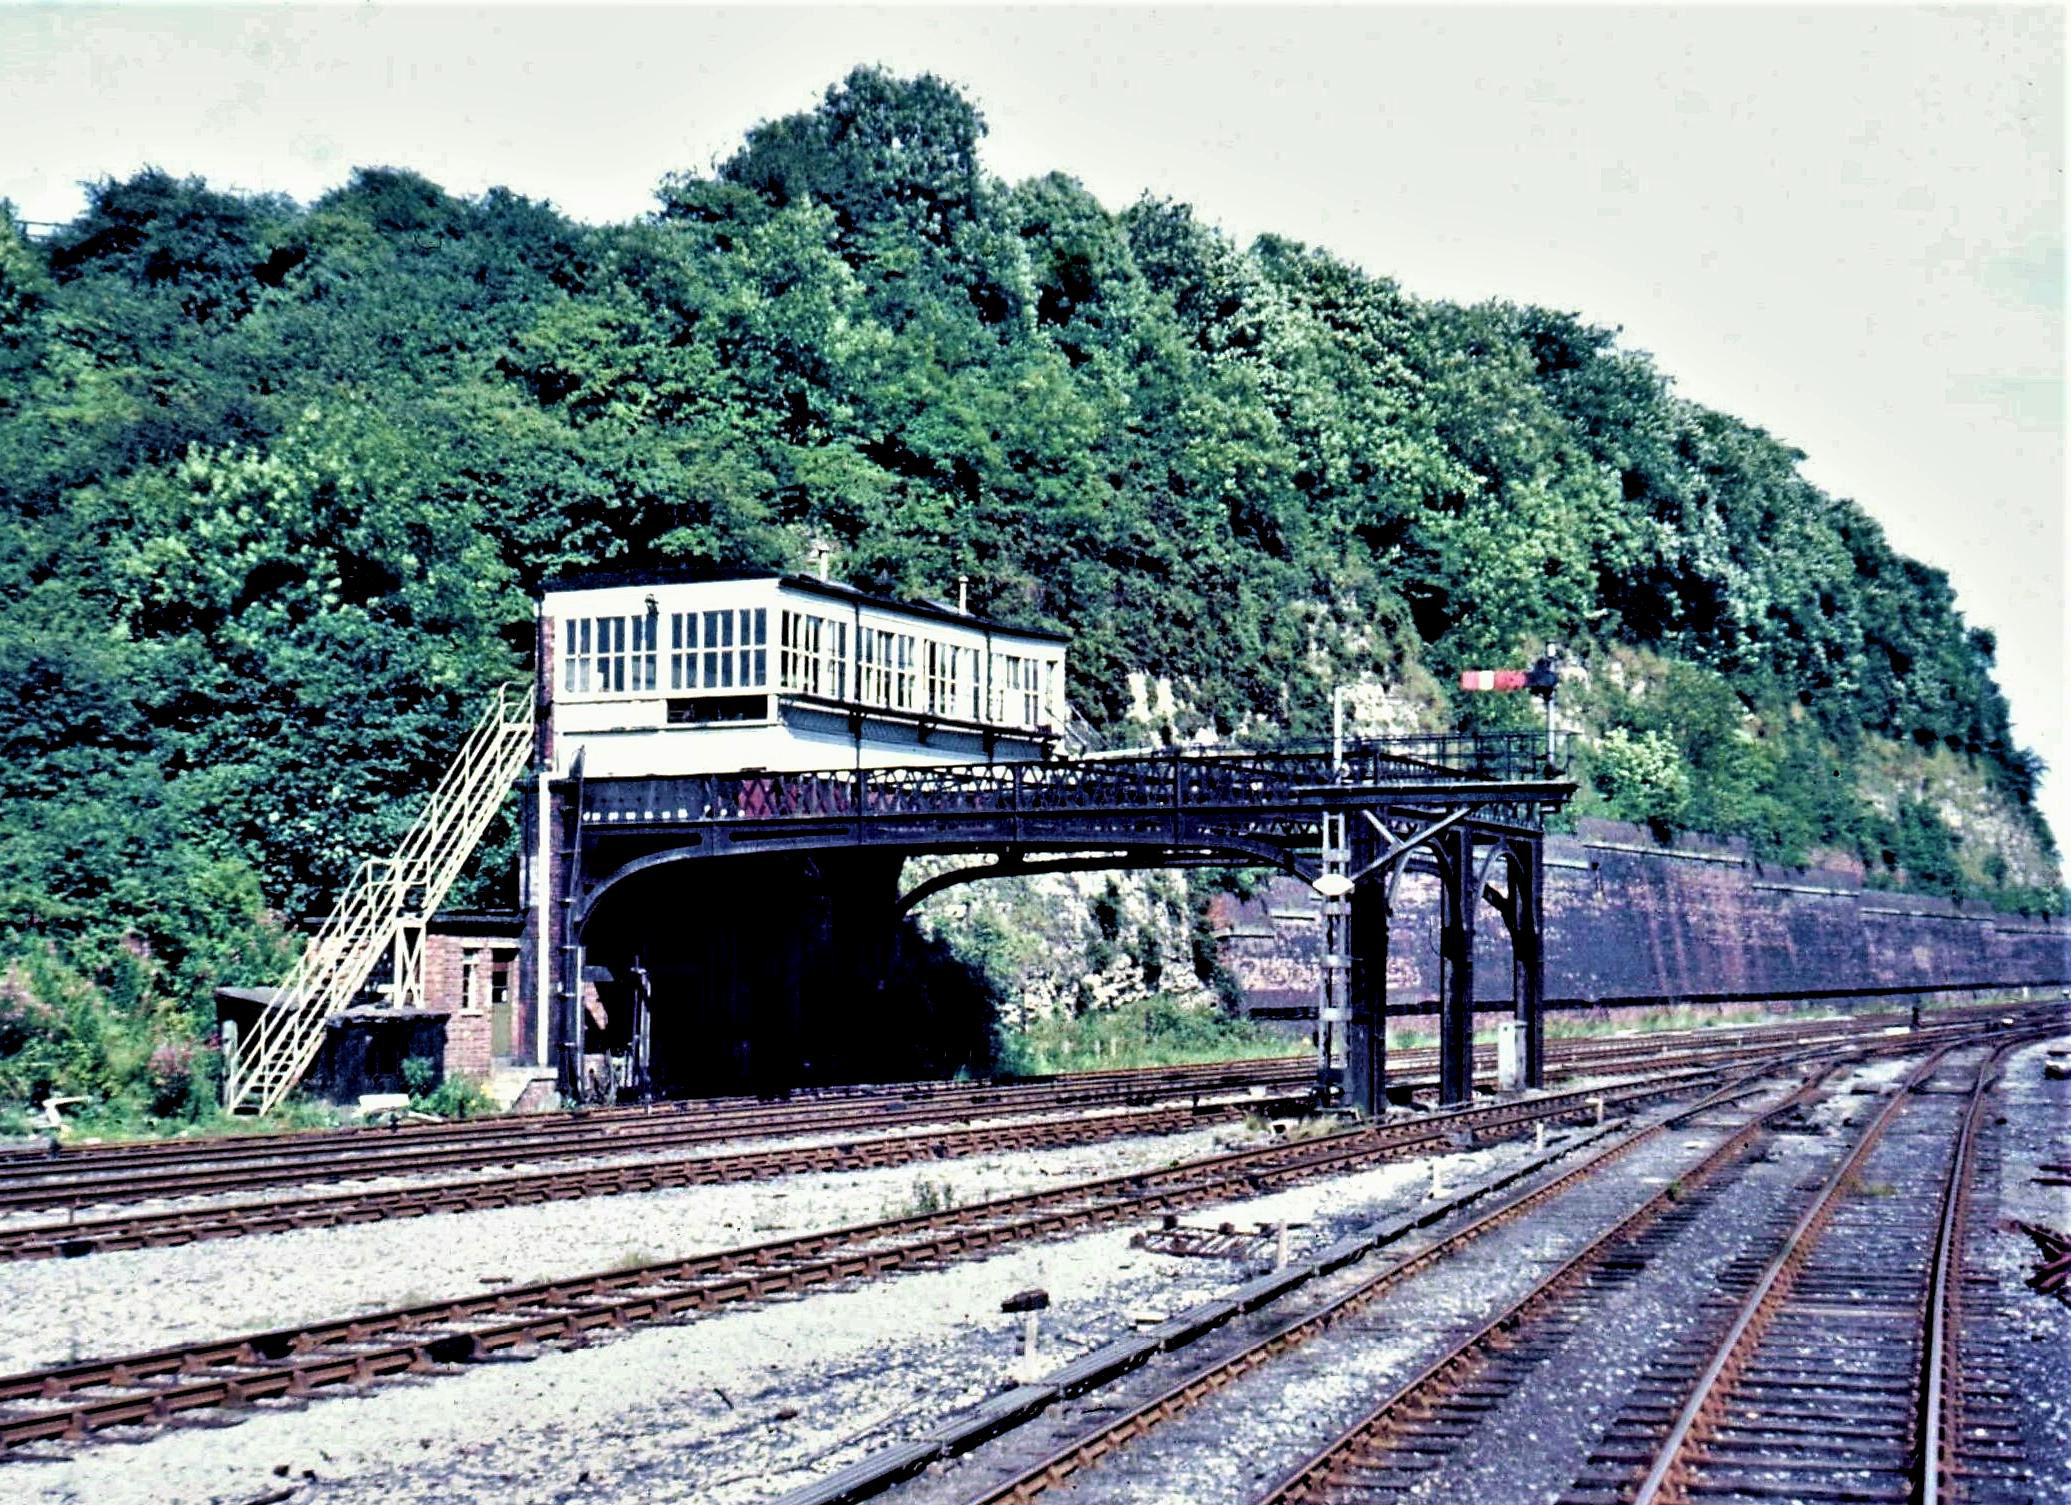
The former Ferryhill No1 Signal Box.
[© The late Angus McDougall, 6 Aug 1970]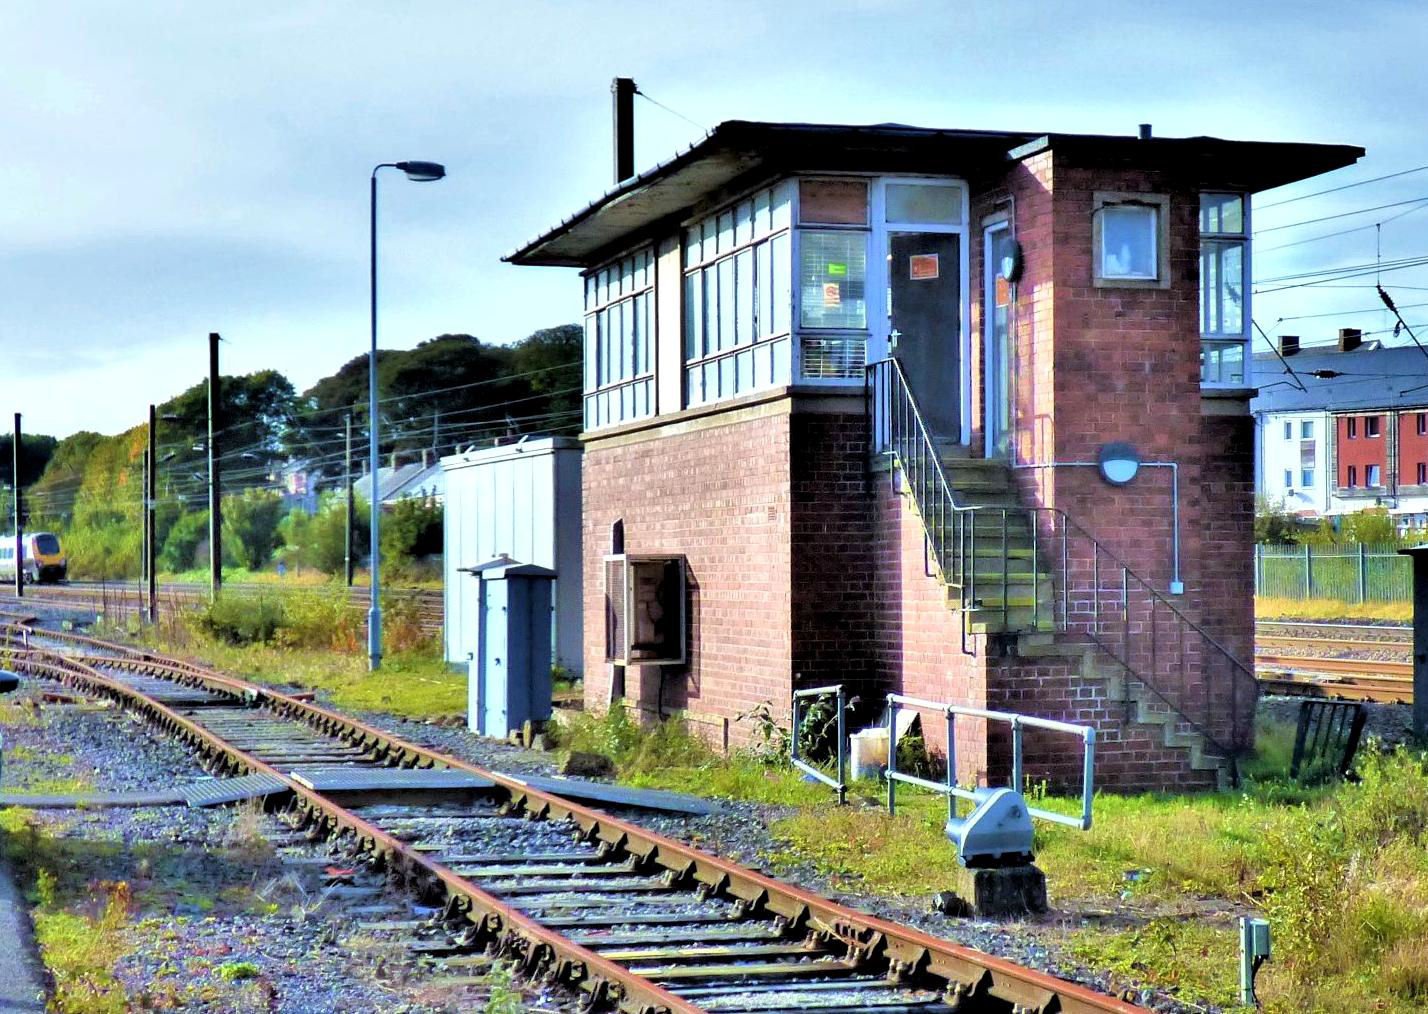
Ferryhill No2 Signal Box. The rusty track by the box is the Thrislington Quarry branch (TRACKmaps 2 p20C Sep 2020). Despite its state at least 12 trains ran after 29 Oct 2019 (BLN 1320.58) and there were at least two in 2020.
[© Nick Jones 2019]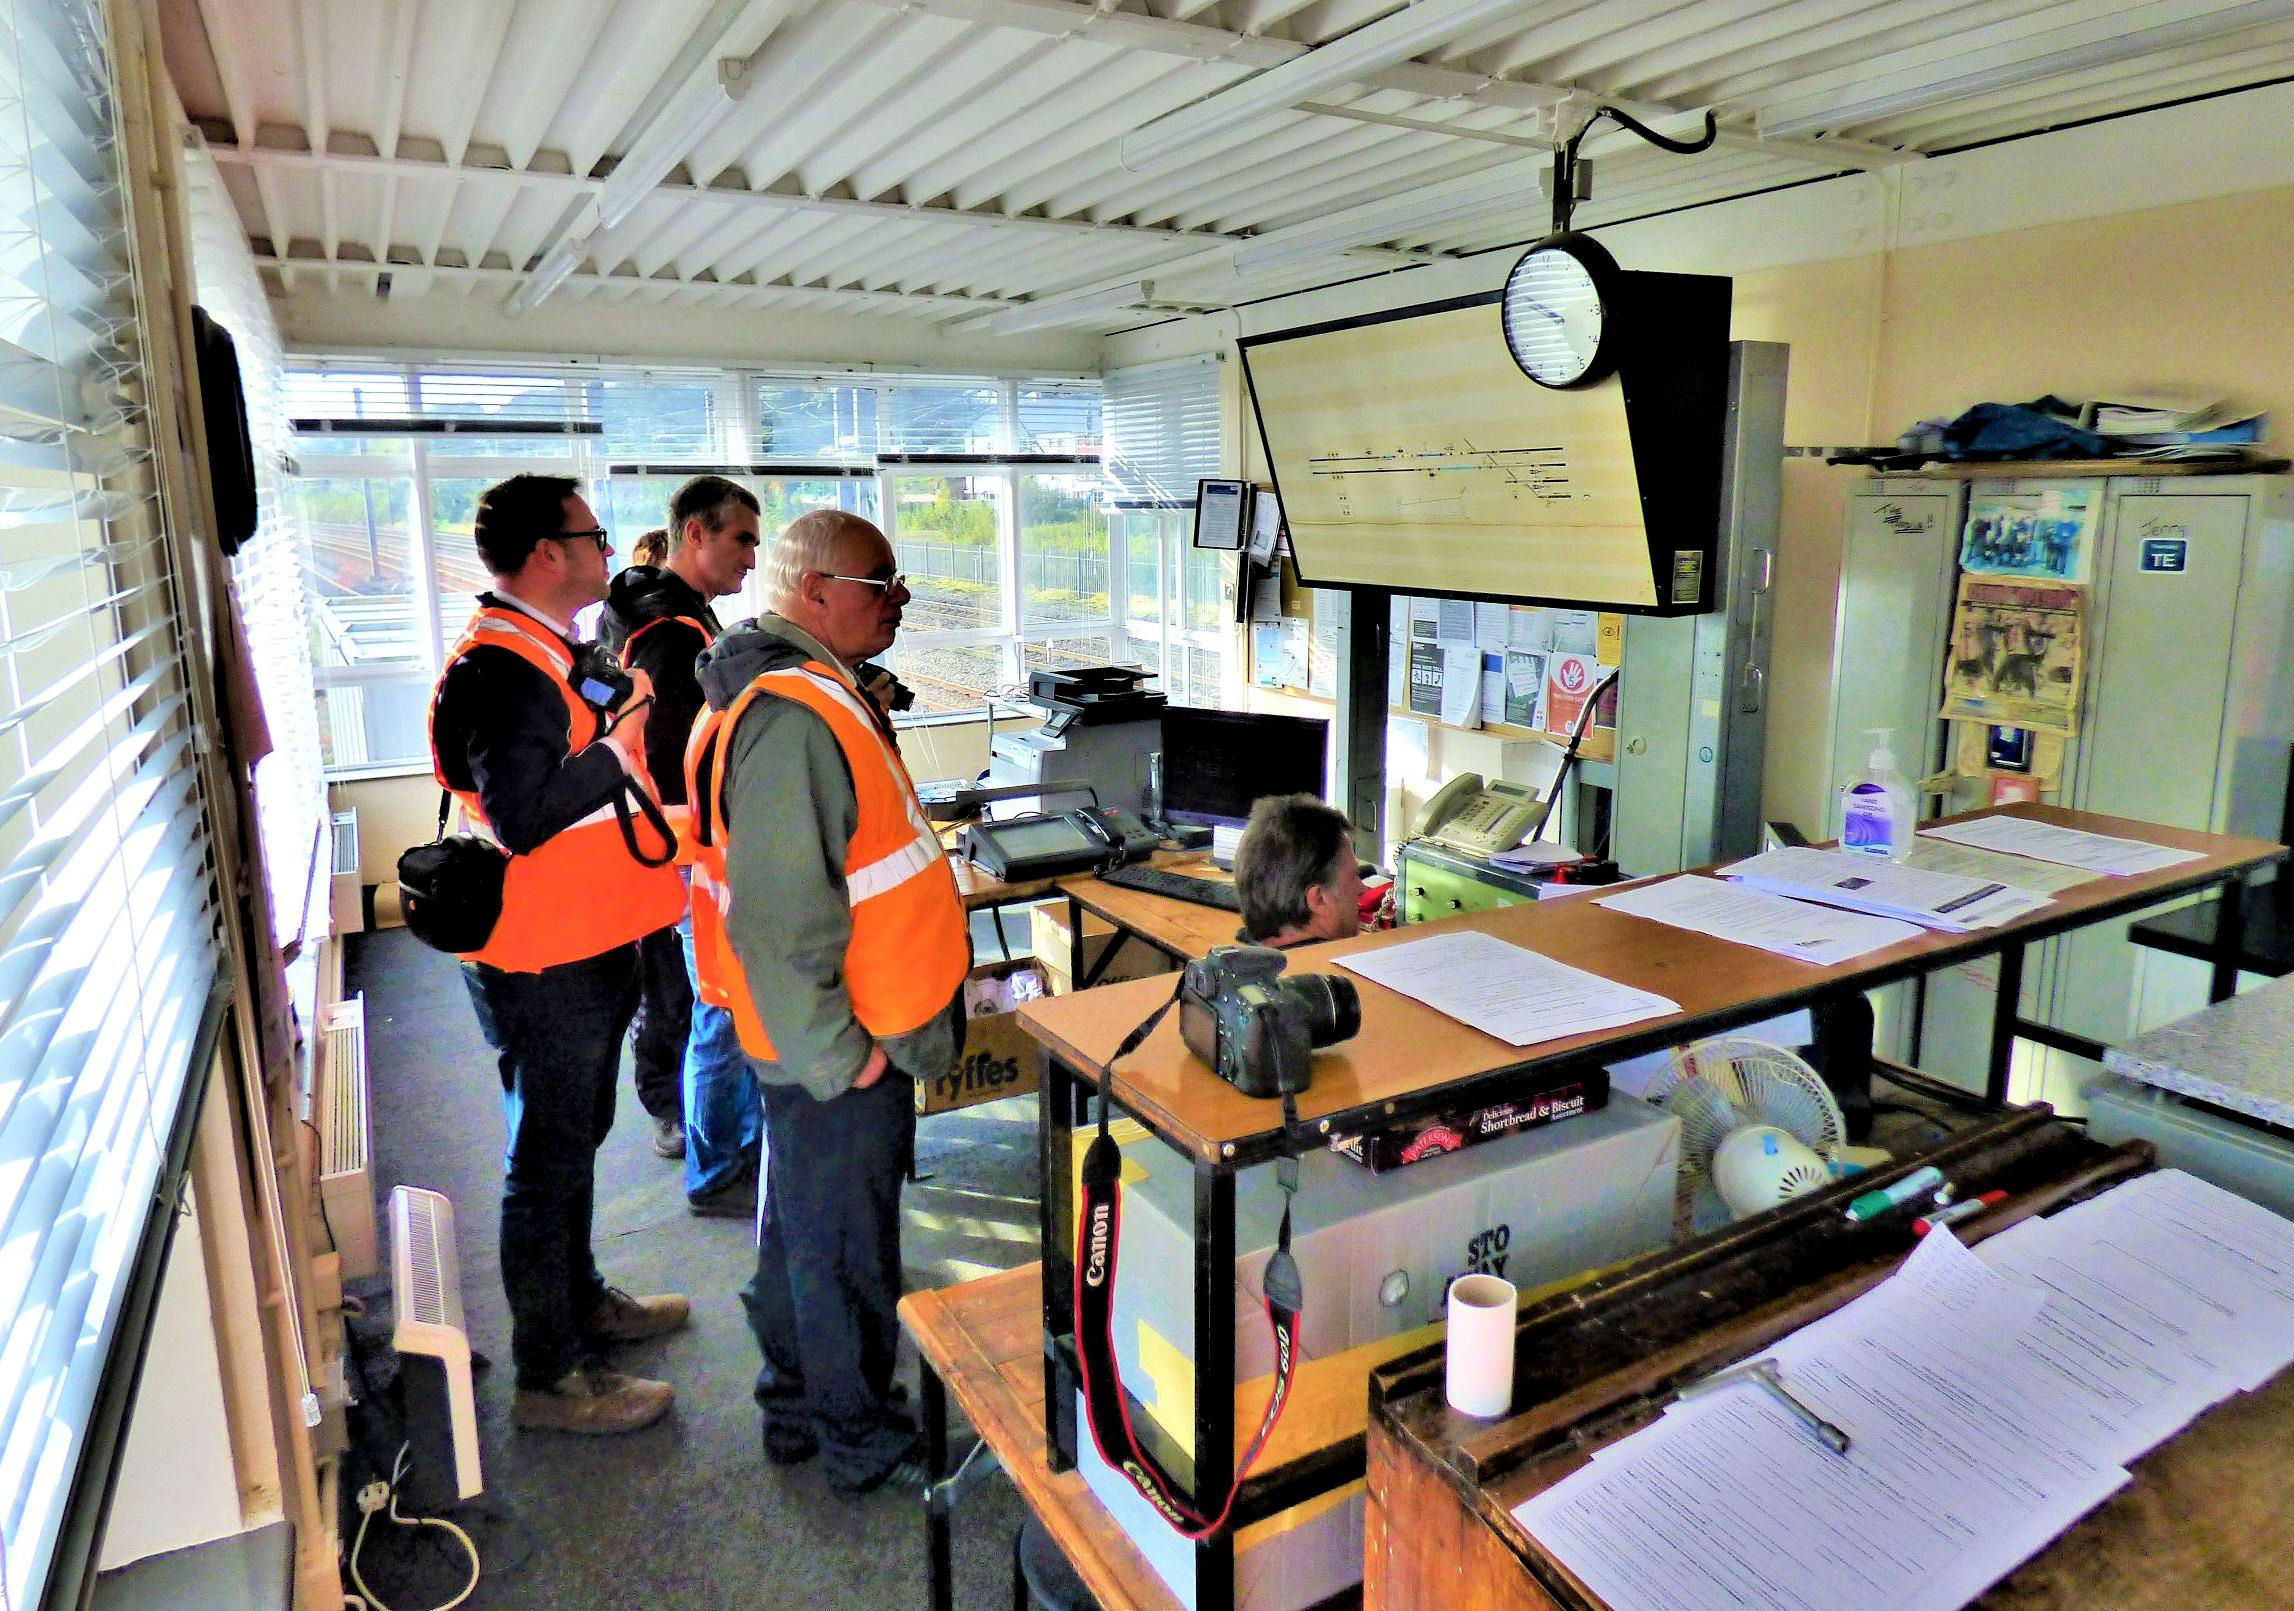
The interior of Ferryhill Signal Box.
[© Nick Jones 2019]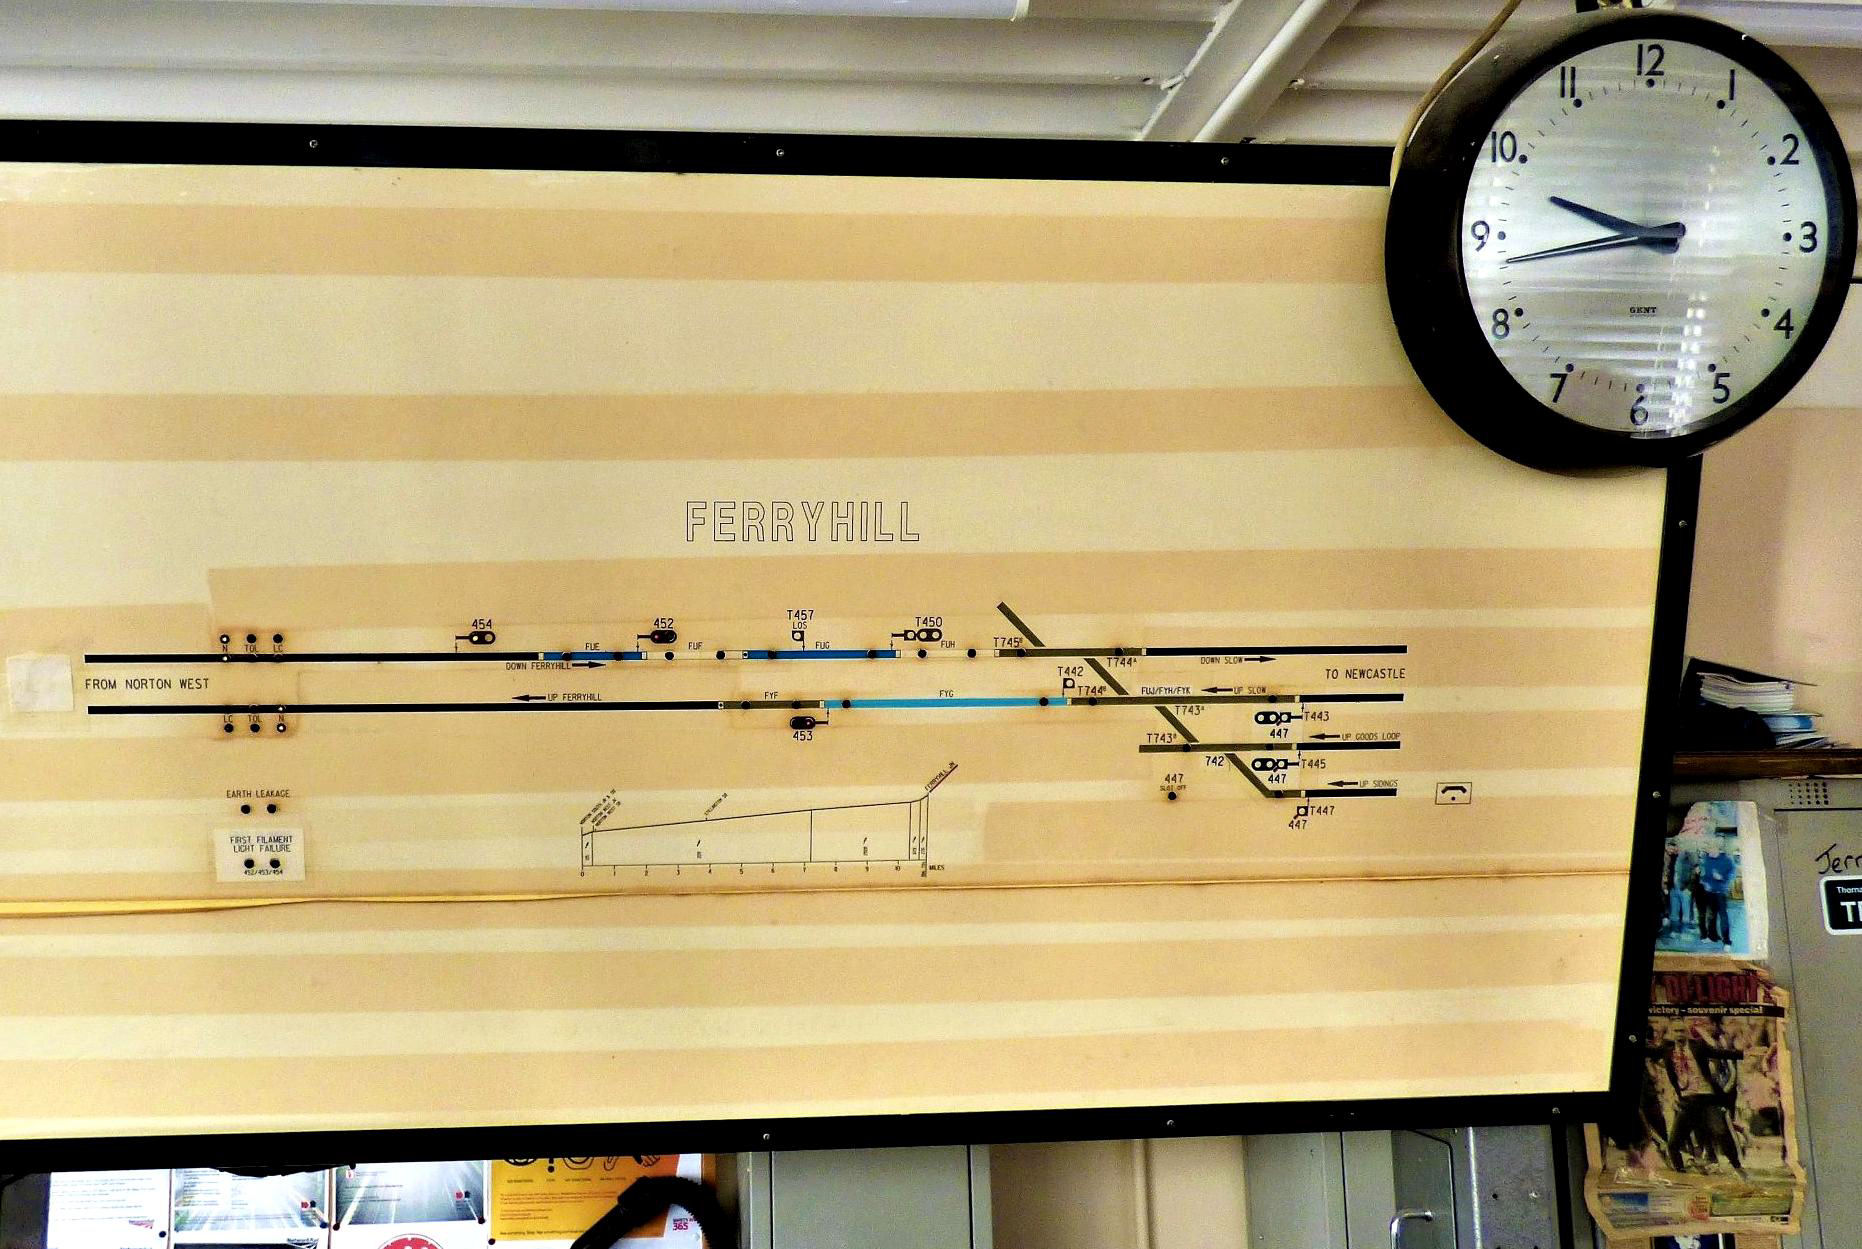
Ferryhill Signal Box diagram.
[© Nick Jones 2019]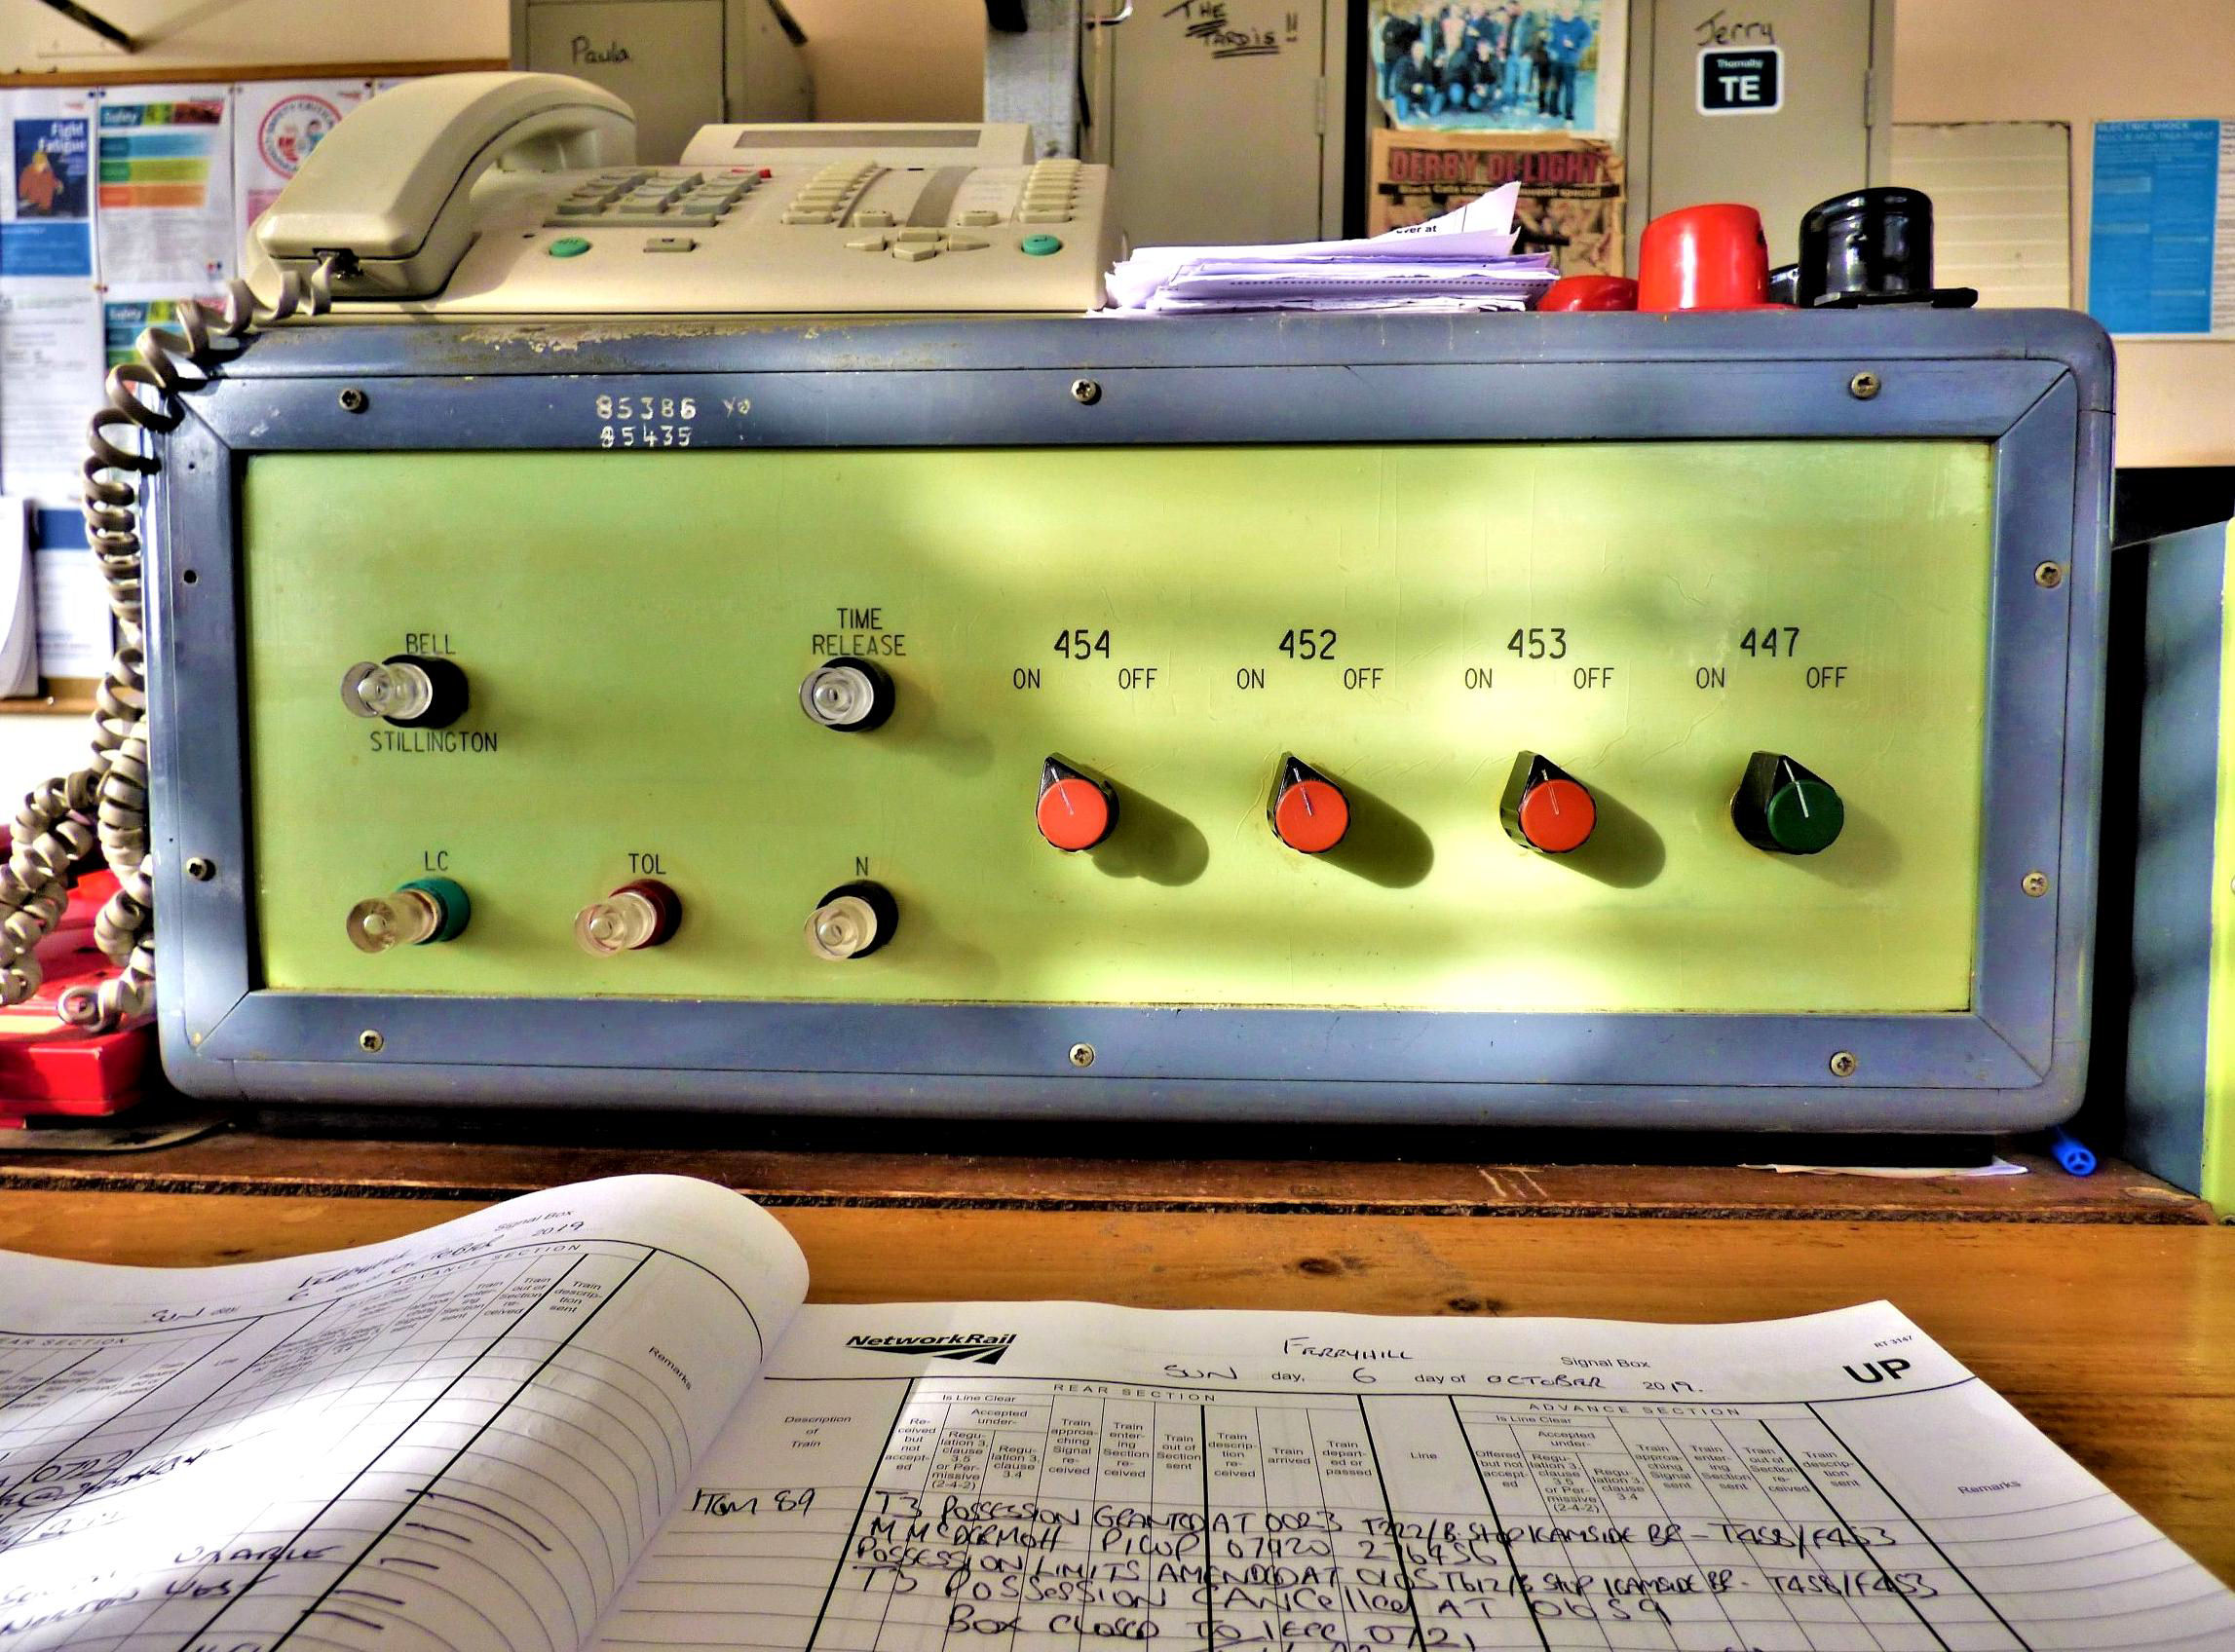
Ferryhill Individual Function Switch (IFS) Panel dating from 1992.
[© Nick Jones 2019]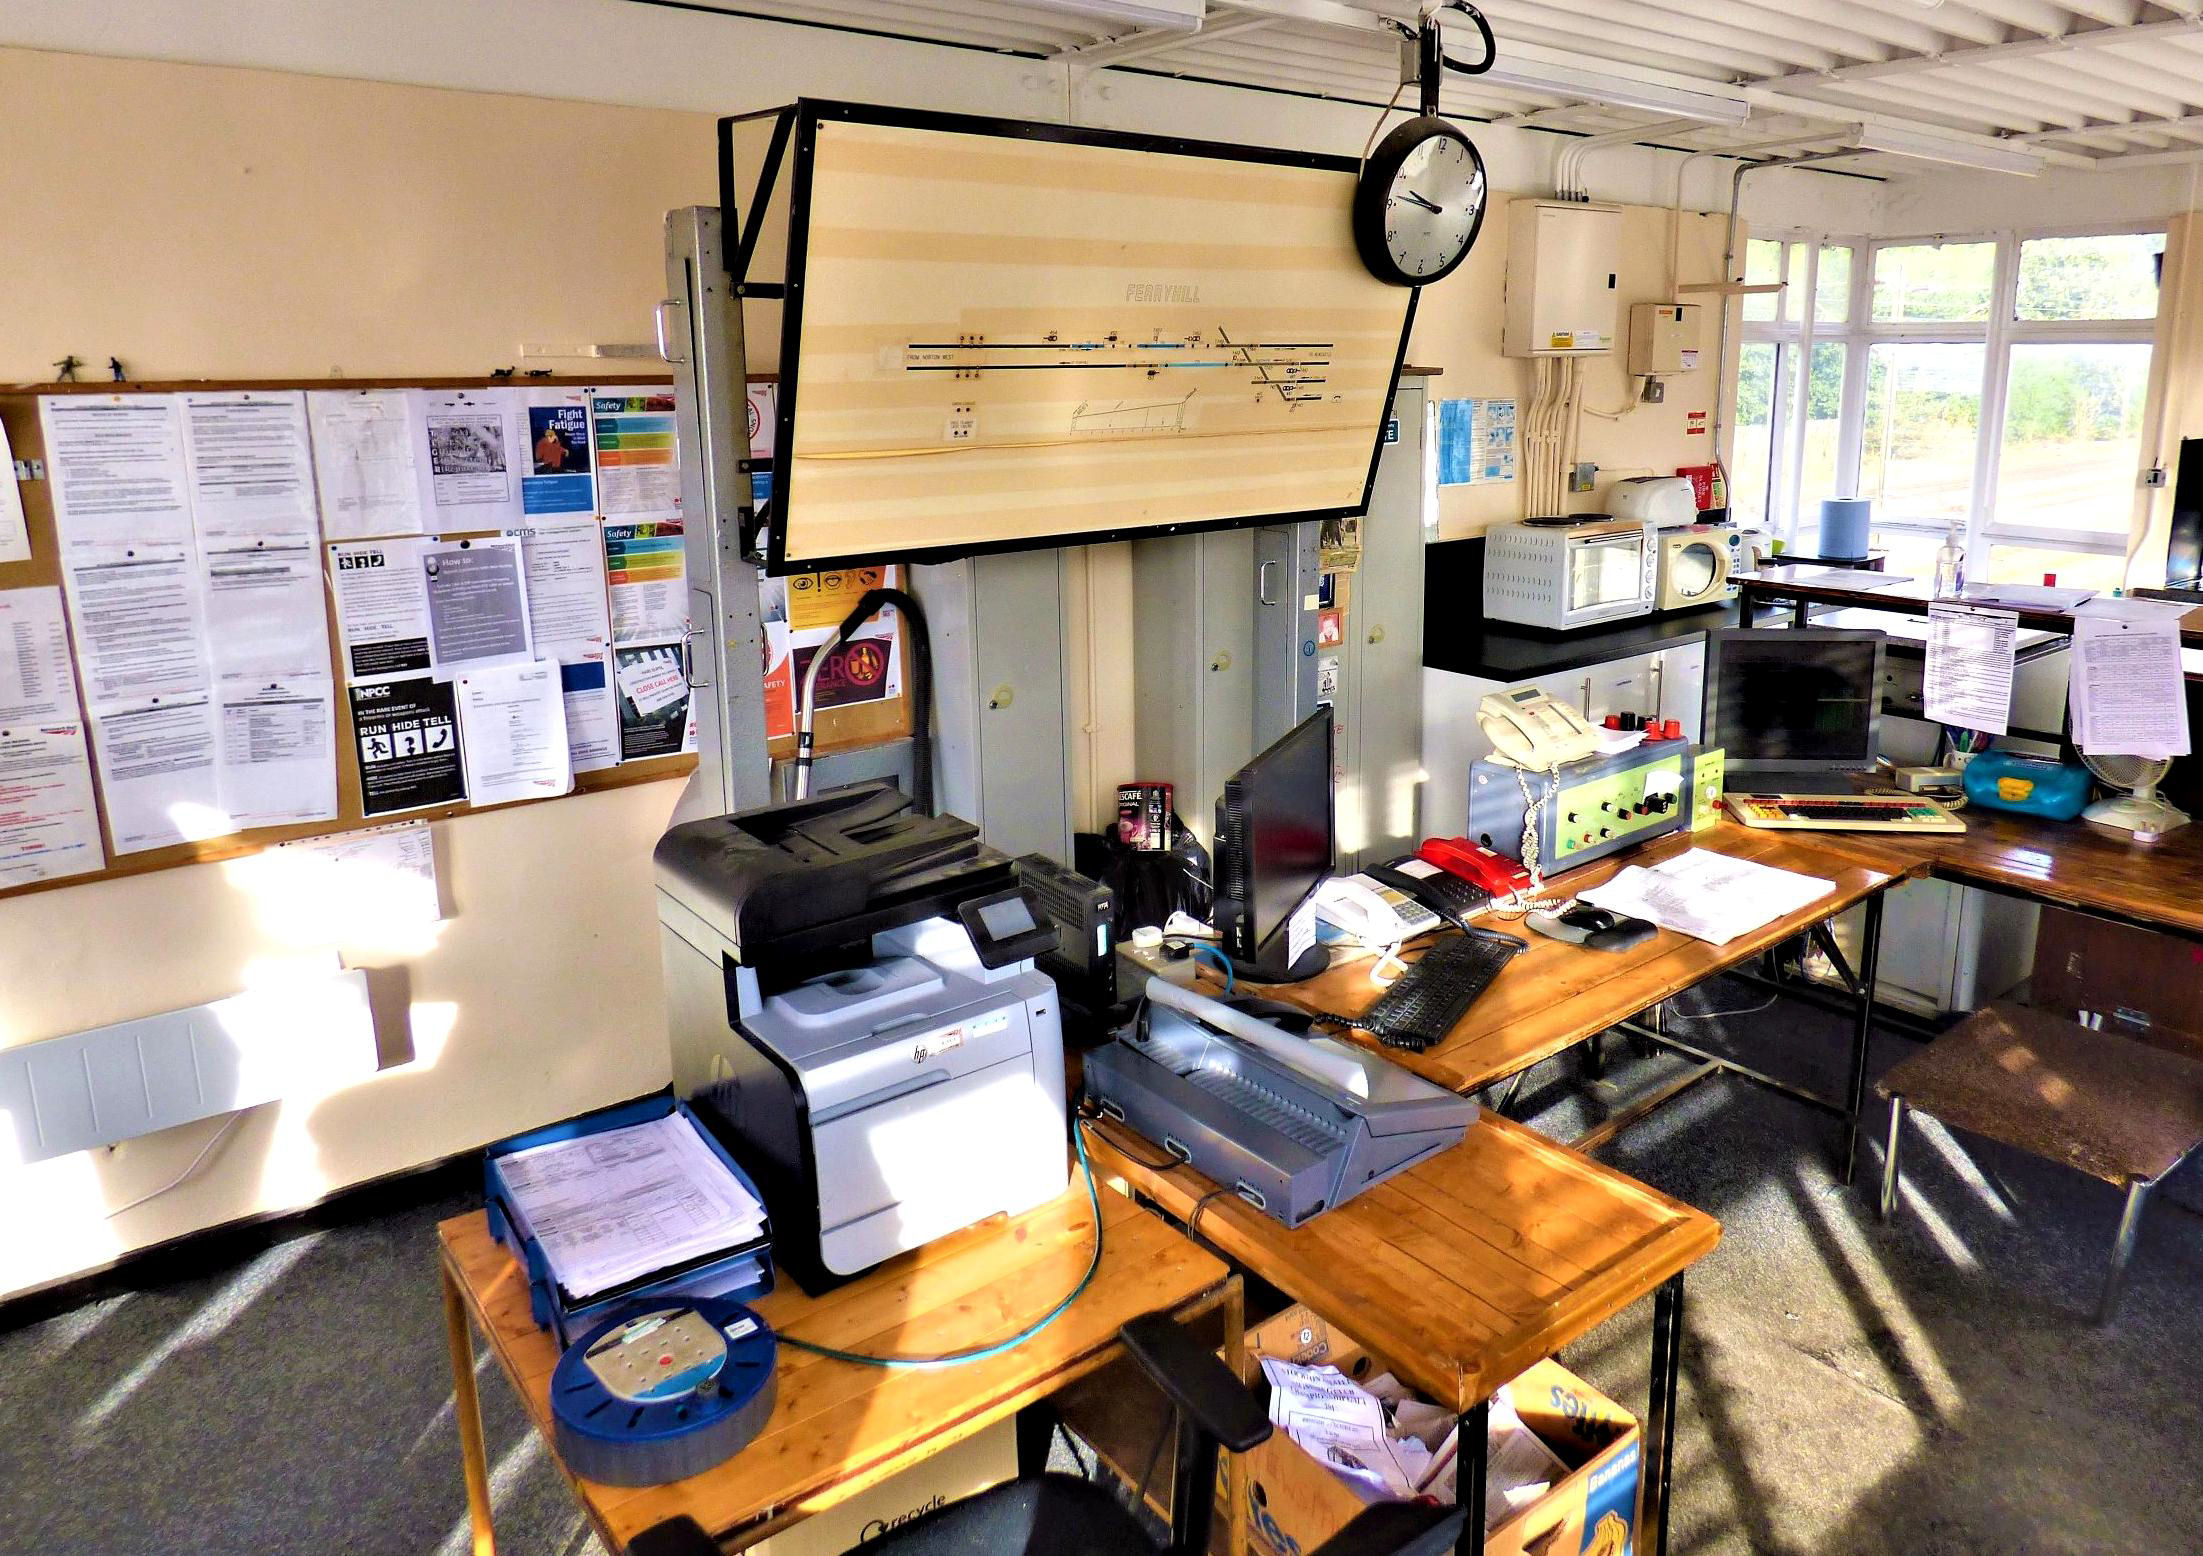
The interior of Ferryhill Signal Box. Its surprising the amount of paraphernalia required to operate a grand total of three signals and no points!
[© Nick Jones 2019]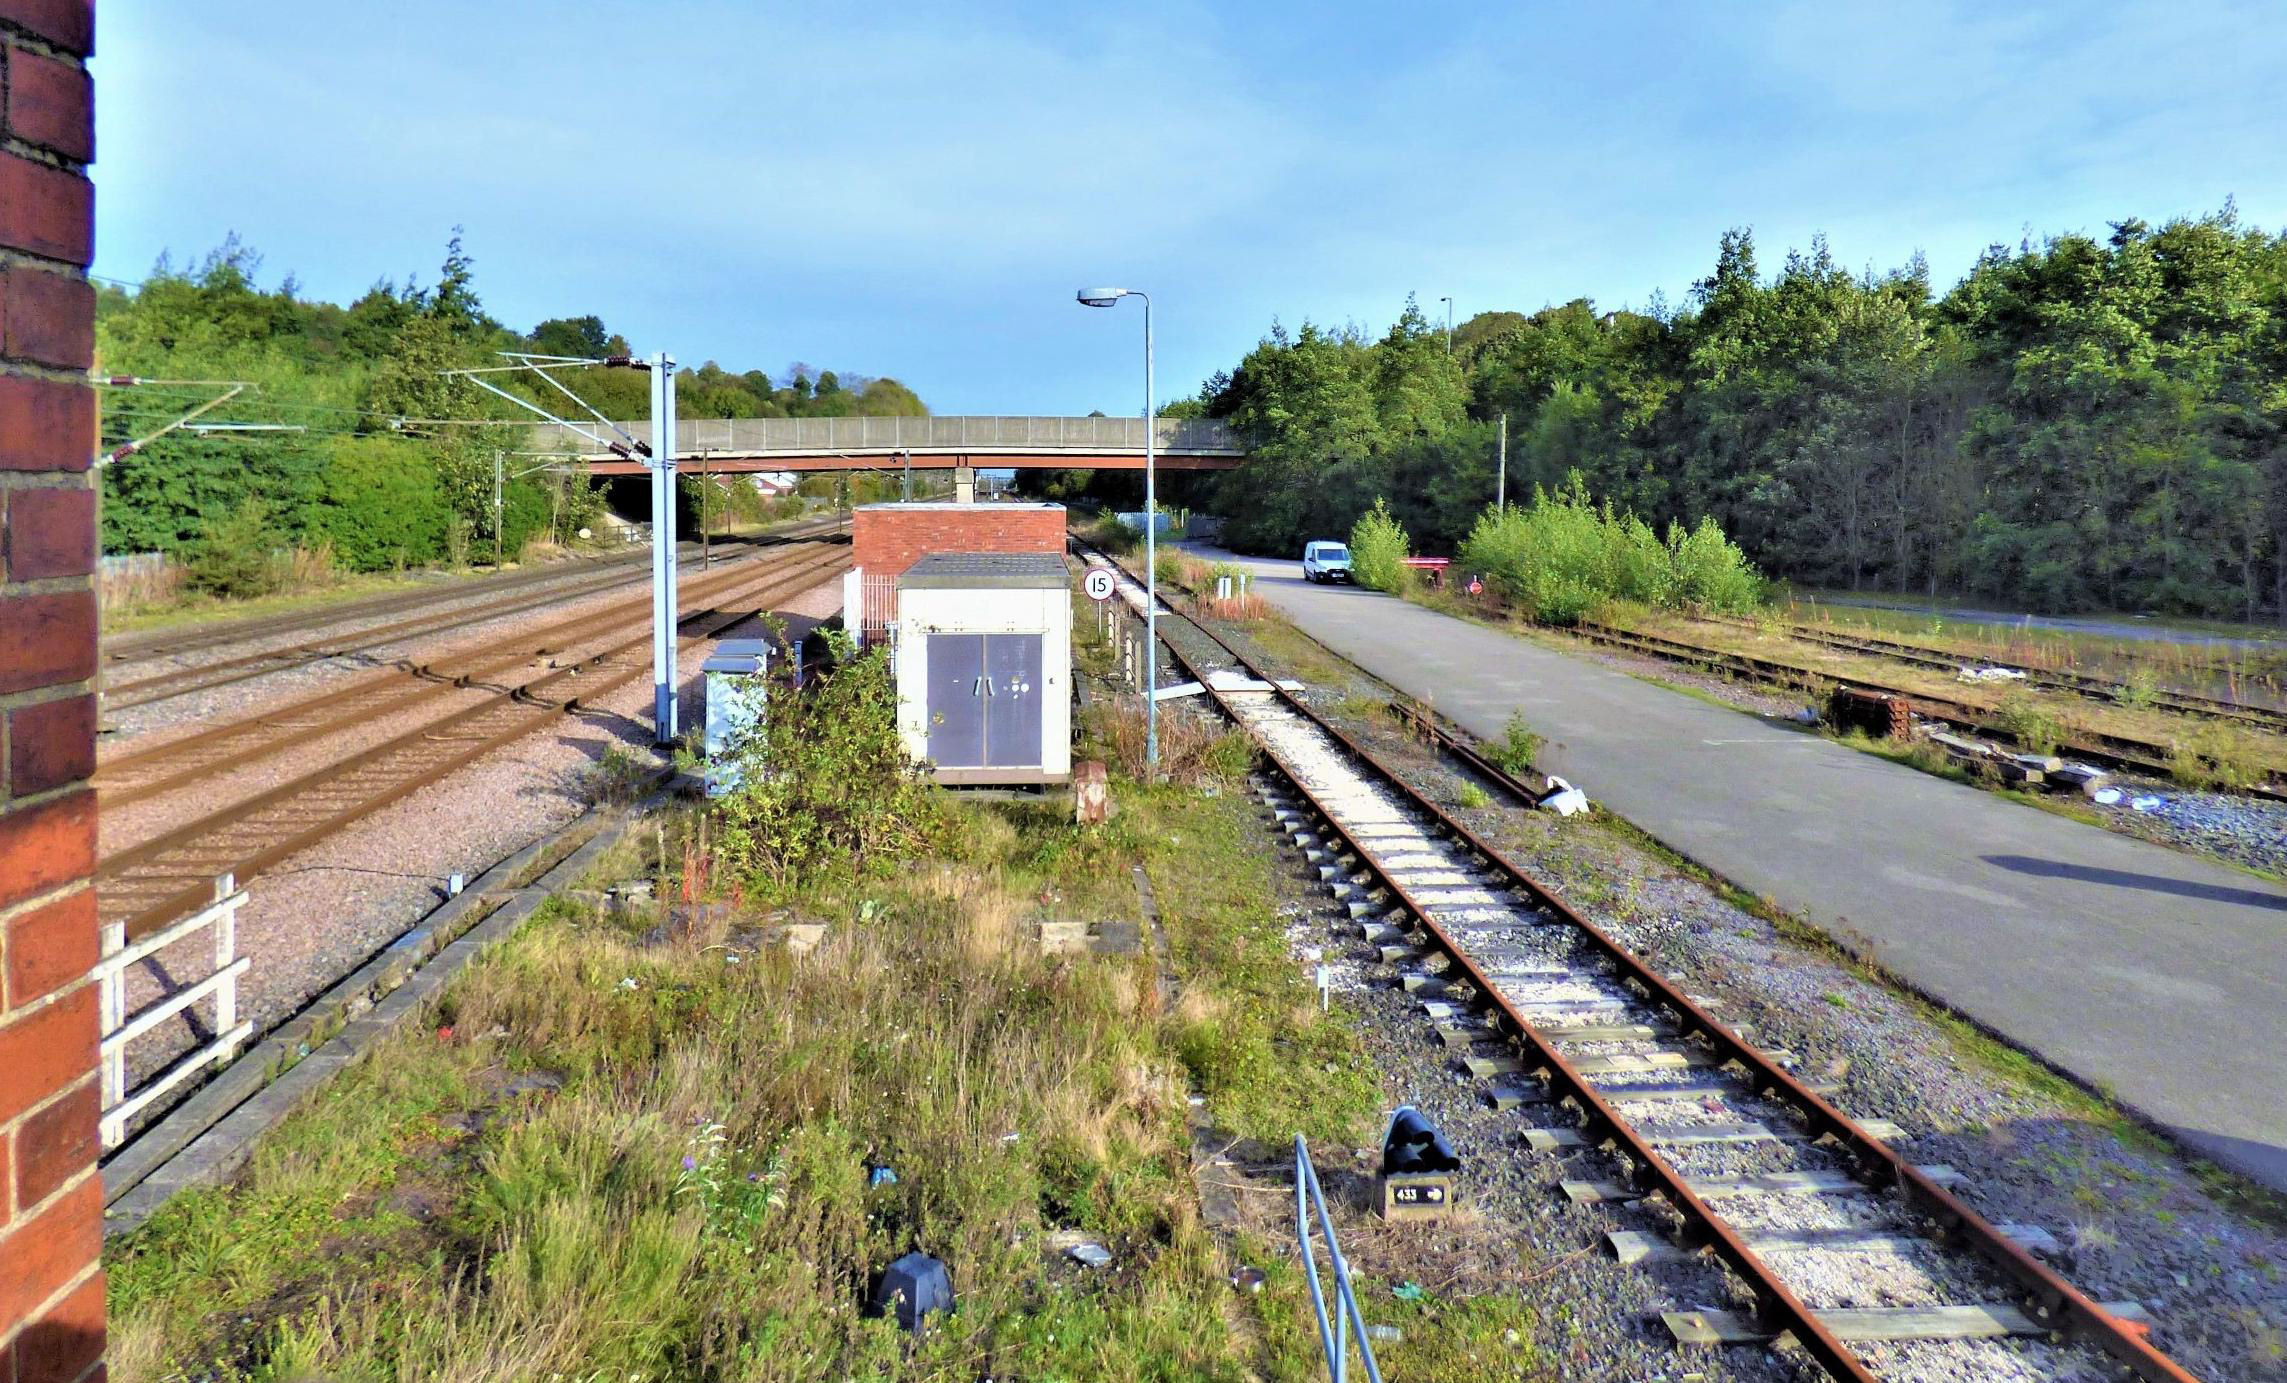
Looking north towards Durham; Ferryhill station (CP 6 Mar 1967 but may reopen) was here. Right is the Thrislington branch.
[© Nick Jones 2019]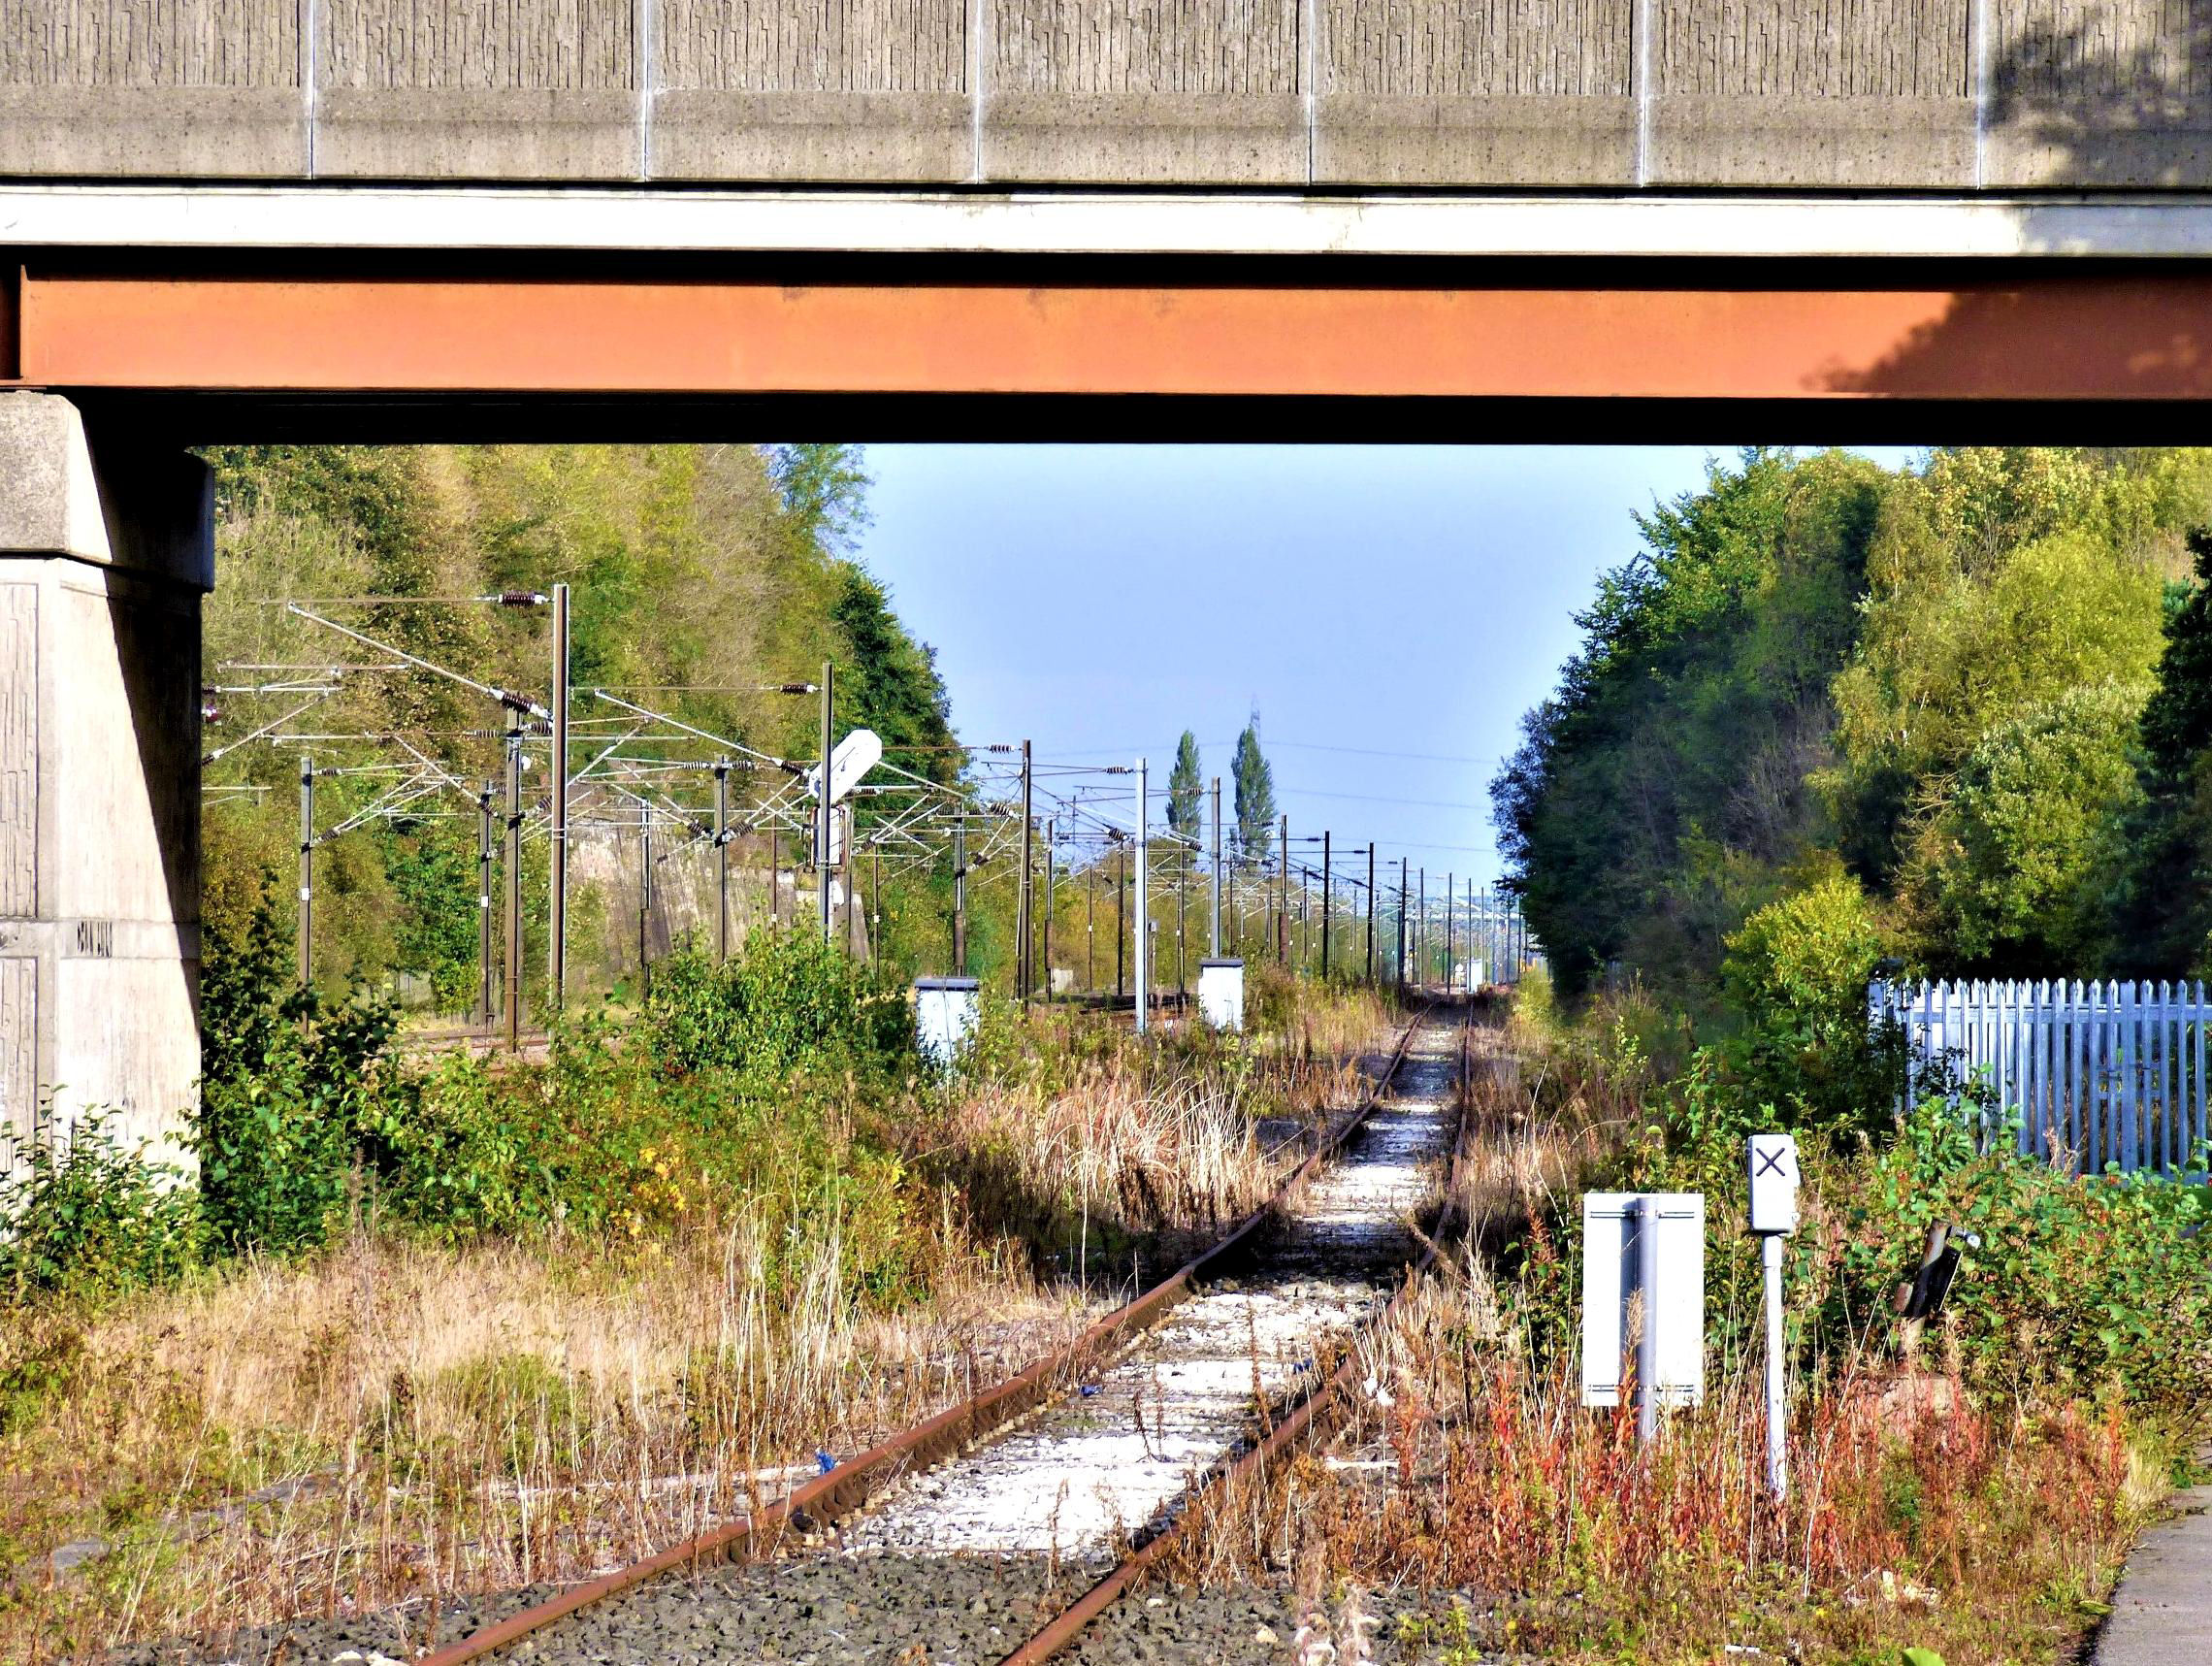
Looking north towards Durham along the Thrislington branch.
[© Nick Jones 2019] This signal box was our next visit, at the other end of the 10m 45ch mile Stillington branch from Ferryhill, which now averages only a couple of trains a day. The regular working is the SSuX Tees Yard to Dalzell Liberty Steel train and return unloaded wagons, although it doesn't actually run every day it is booked.
With 9 May 1991 East Coast Main Line resignalling, the area north of Northallerton about MP 32½ to south of Chester-le-Street MP72 was controlled by (the now) Tyneside Integrated Electronic Control Centre. Ferryhill signal box (56m 73ch ECML mileage) was described as 'temporary' in the Signalling Notice, but remained for almost 30 years until very recently just to control movements to/from Norton West signal box (0m 33ch) with Absolute Block signalling over what is one signalling section.
Despite the low usage of the Stillington branch, Norton West controlled the junction, routing trains from the branch to either Norton South Jn and on towards Stockton, or to Norton East Jn and Billingham, although the route would normally be set towards Norton South Jn as Norton East box was generally switched out. Built in 1910, Norton West was a smaller box and our group of eight needed to split into two groups to visit. It contained a 41 lever McKenzie & Holland Type 16 design frame dating from 1921 and supplied by Westinghouse who owned the company after 1920. Only 11 frames of this type remained in use at the time of the visit. Lever 19 worked an unusual set of 'wide-to-gauge' trap points but these were removed with recent resignalling. The box worked Absolute Block to Ferryhill, Norton West and Norton South. A small pedestal controlled the level crossing barriers.
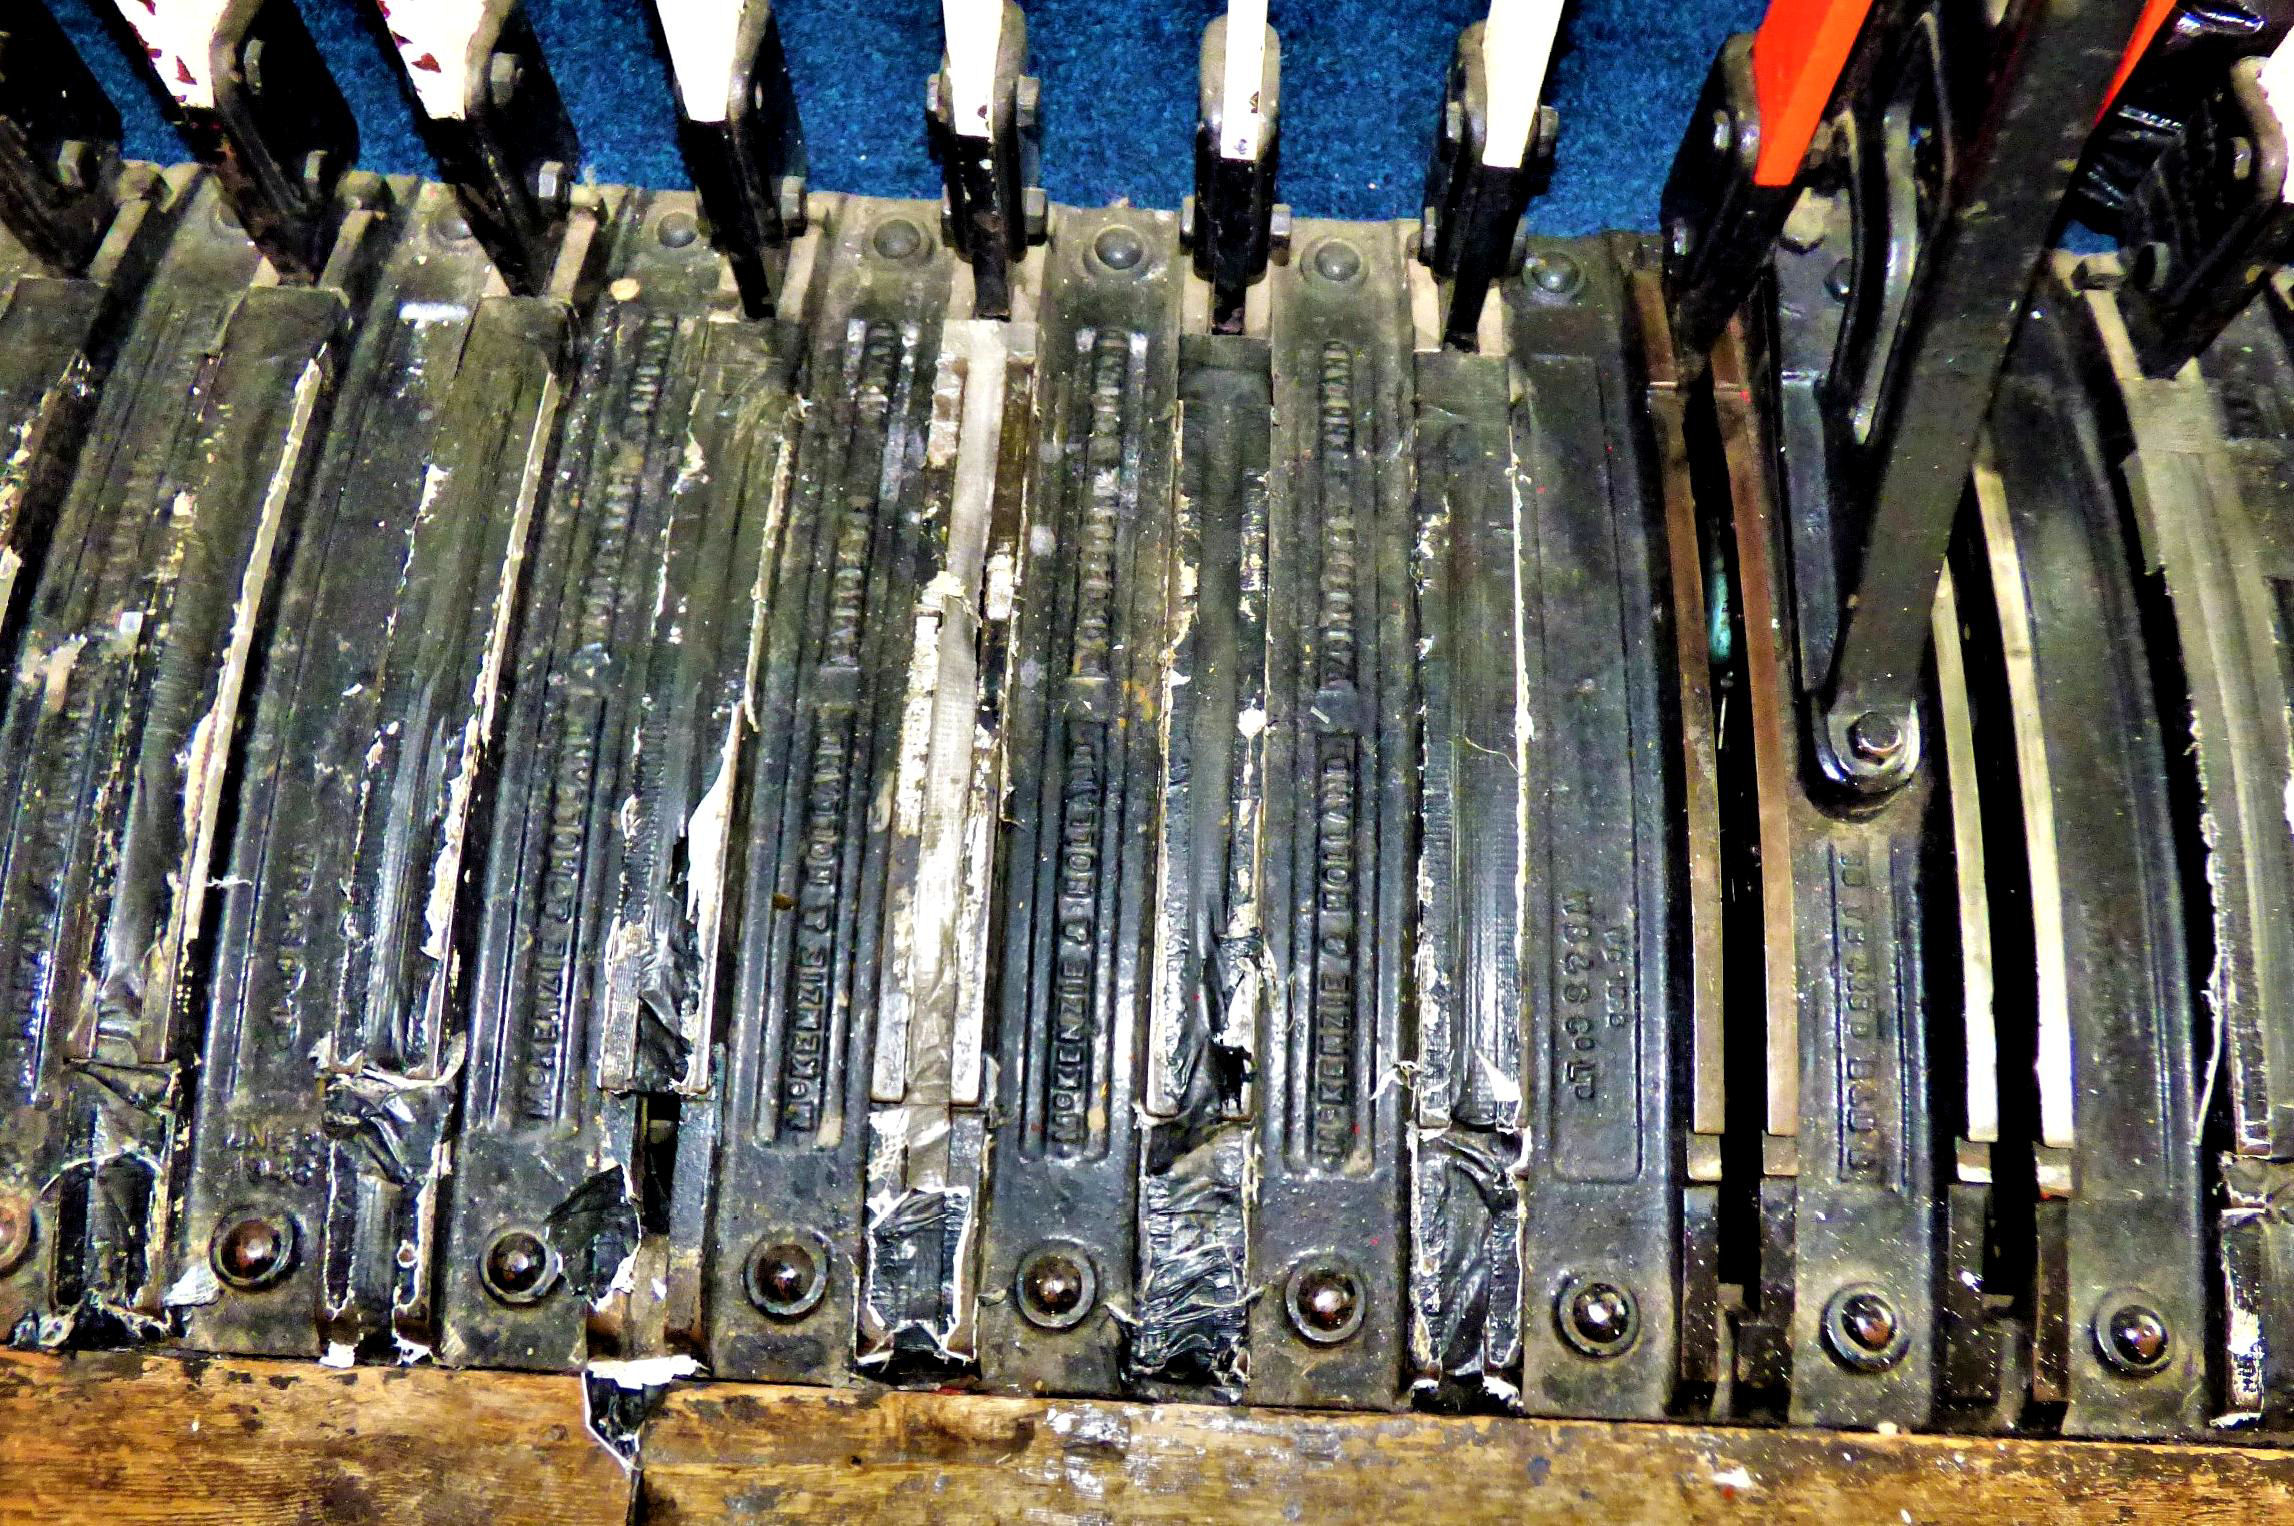
Norton West Signal Box lever frame.
[© Nick Jones 2019]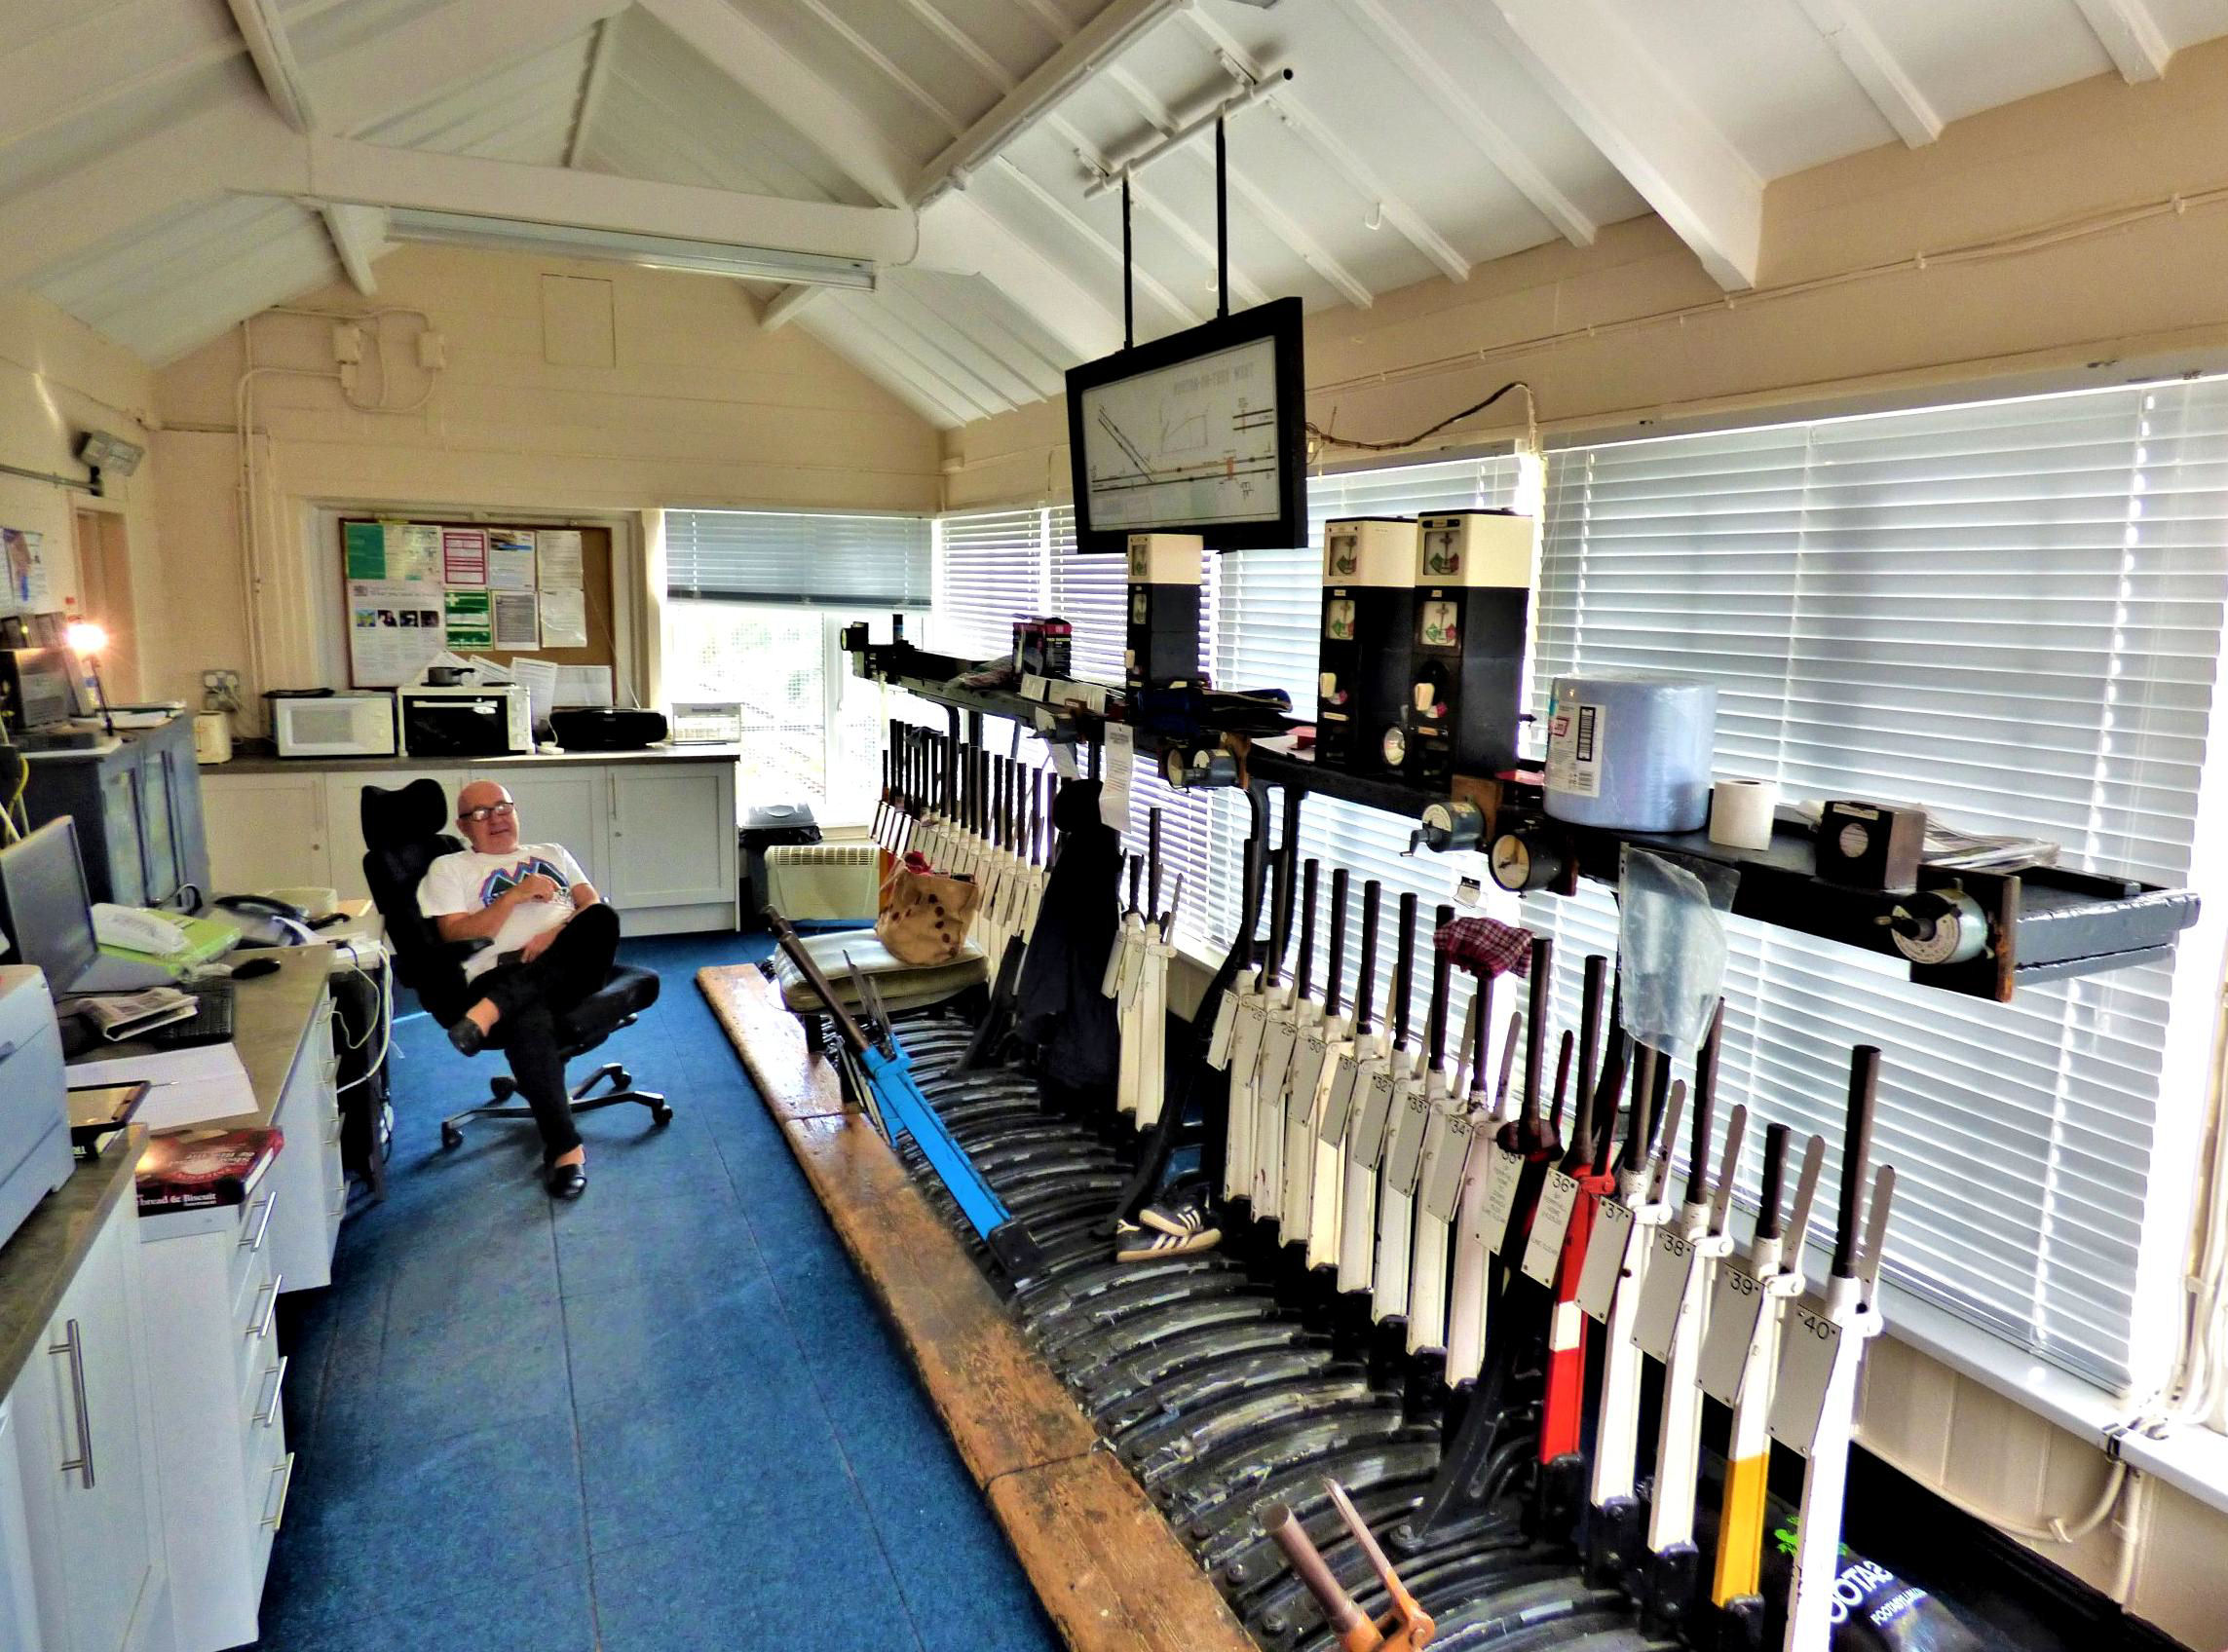
The interior of Norton West Signal Box.
[© Nick Jones 2019]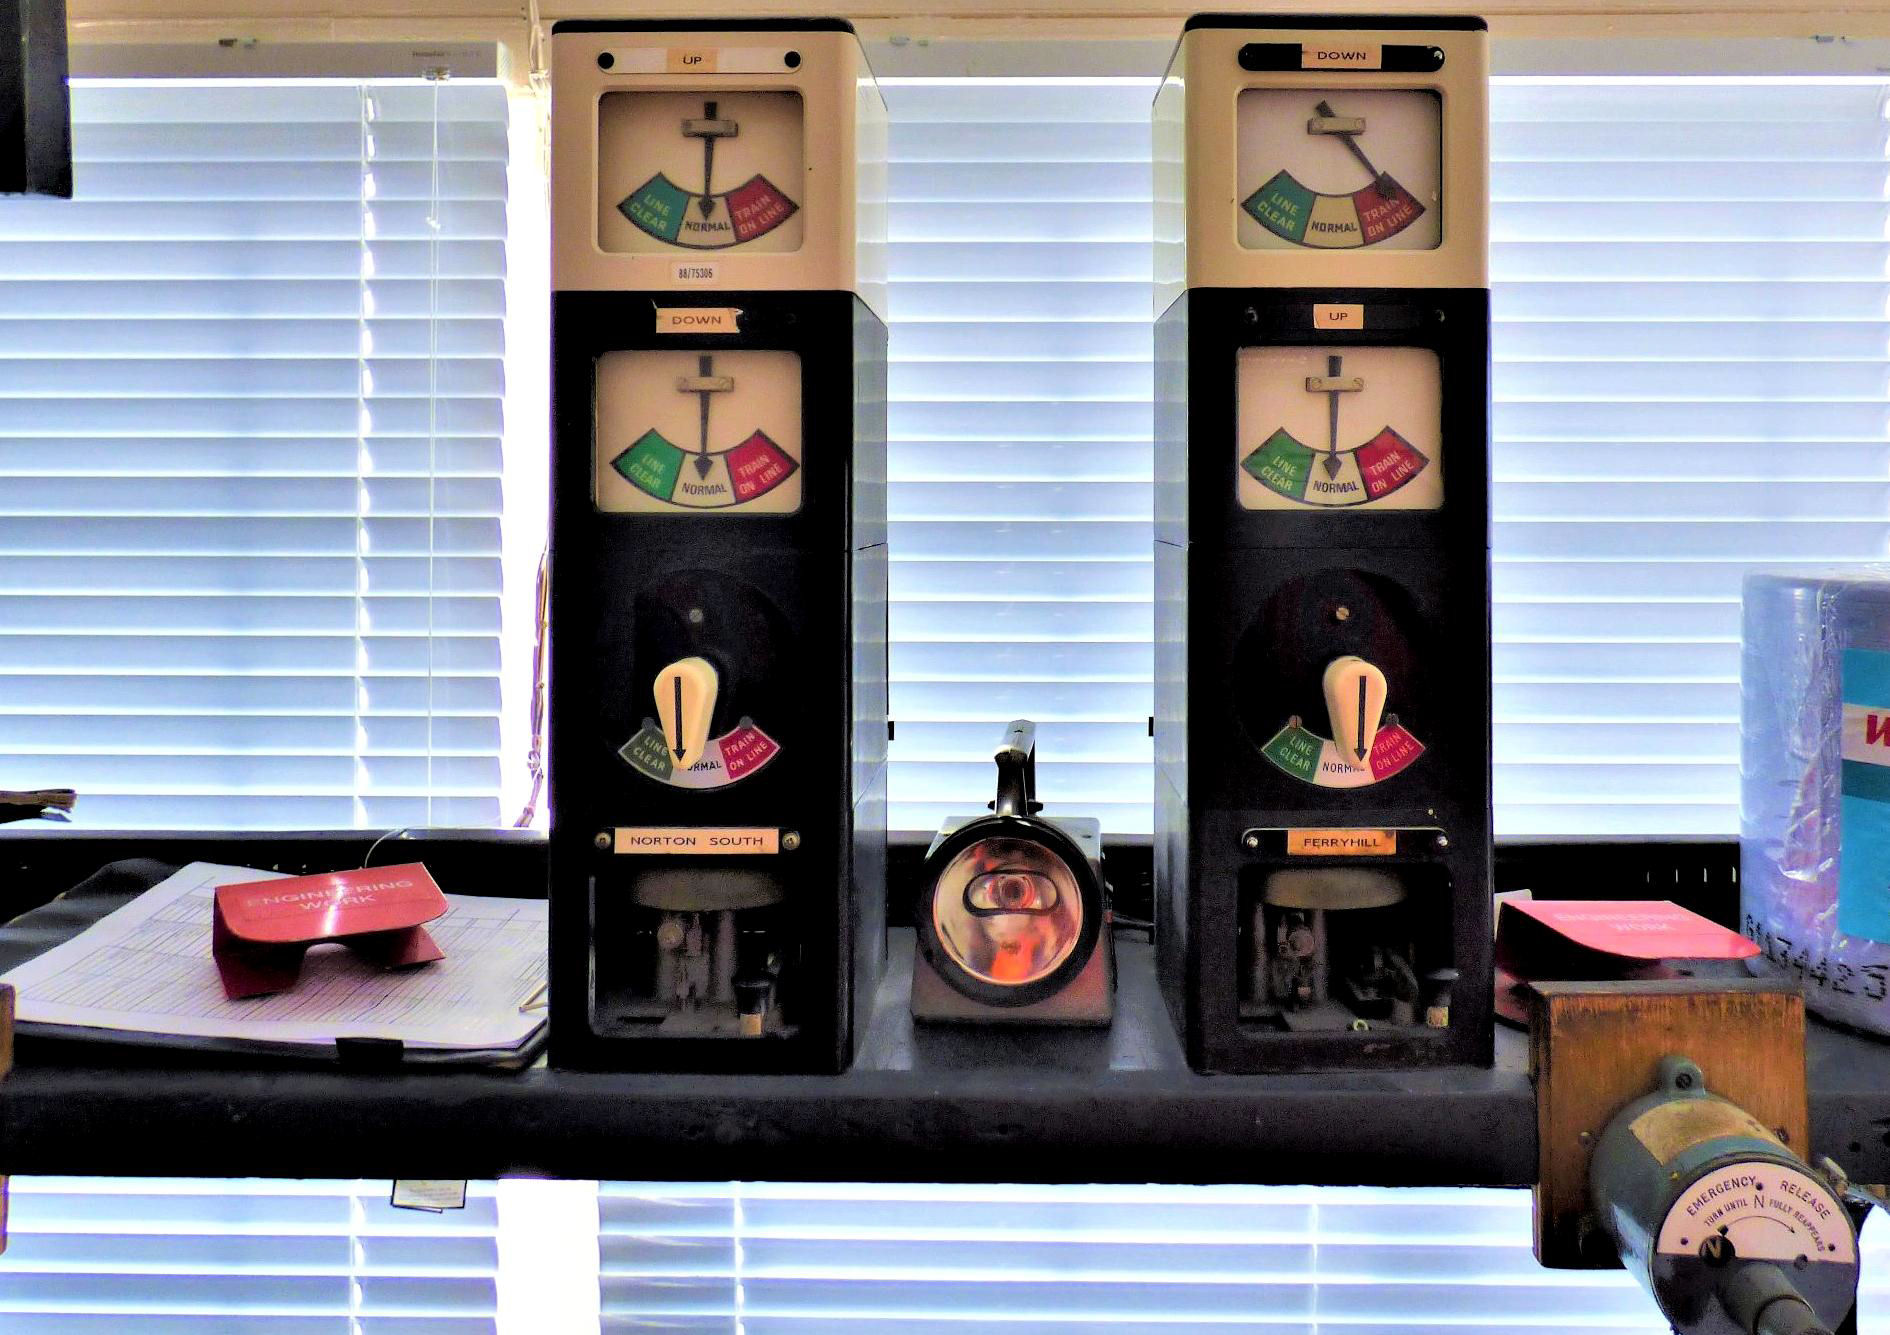
Norton West Signal Box instruments.
[© Nick Jones 2019]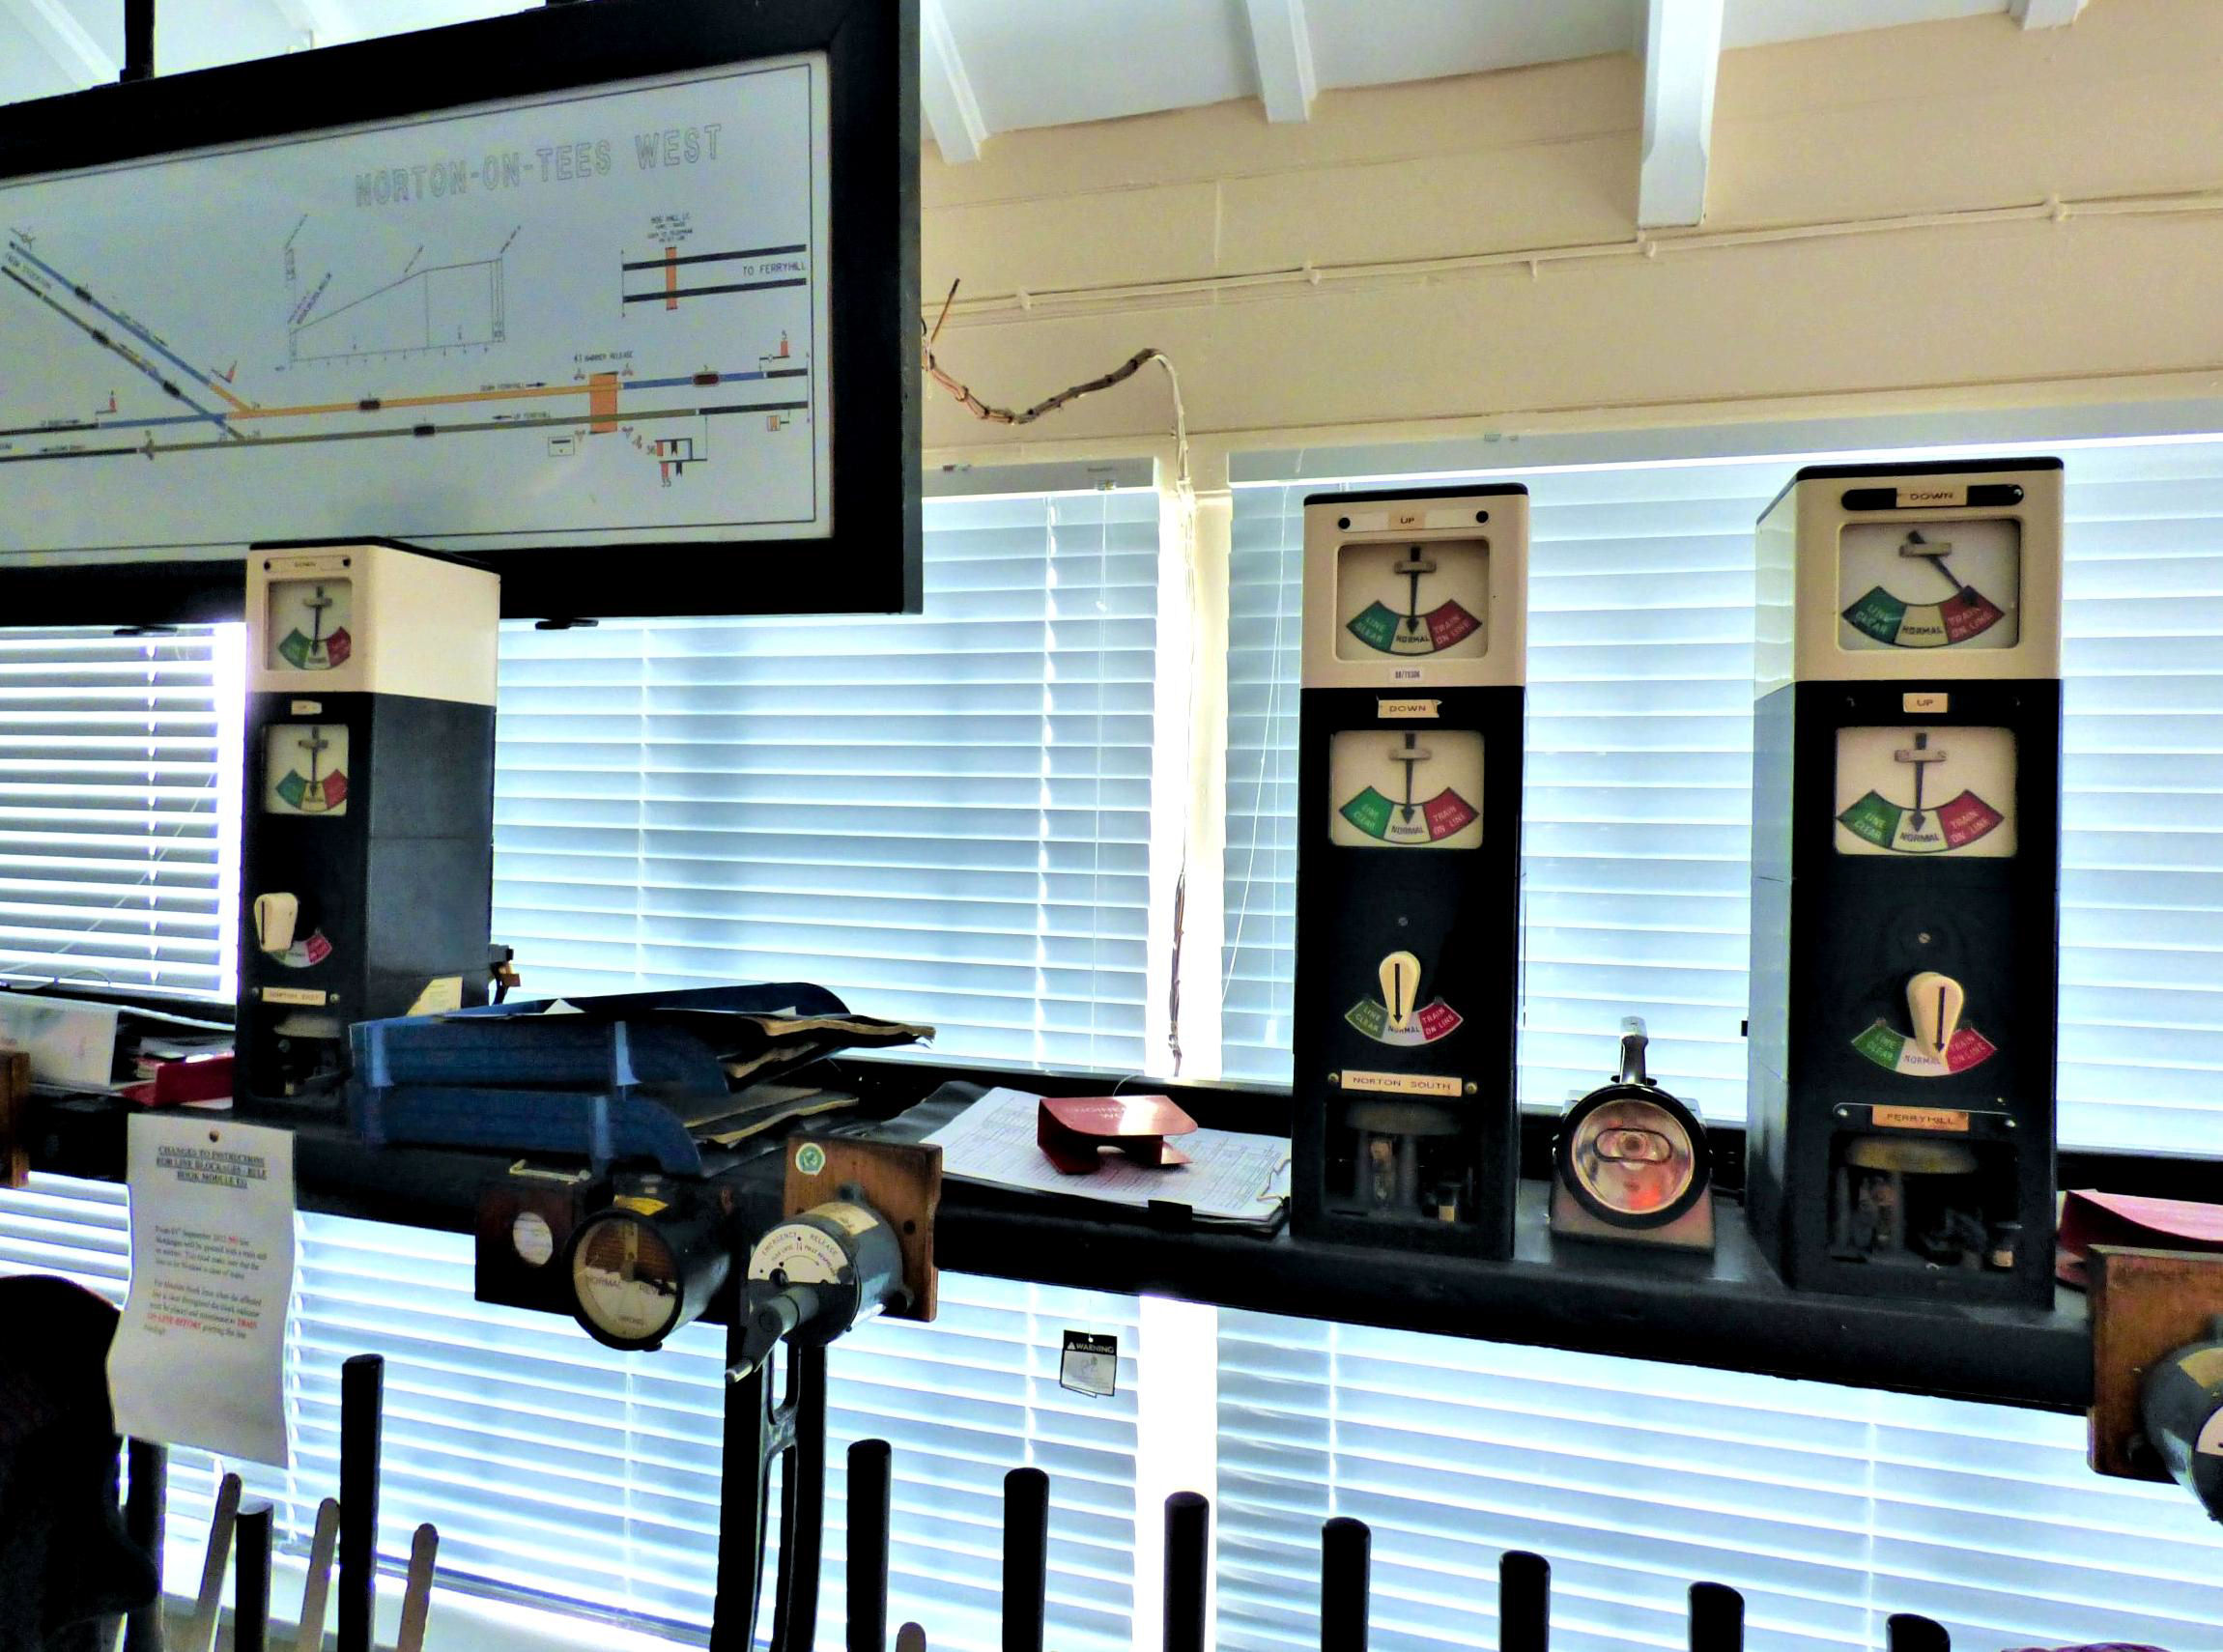
Norton West Signal Box diagram and instruments.
[© Nick Jones 2019]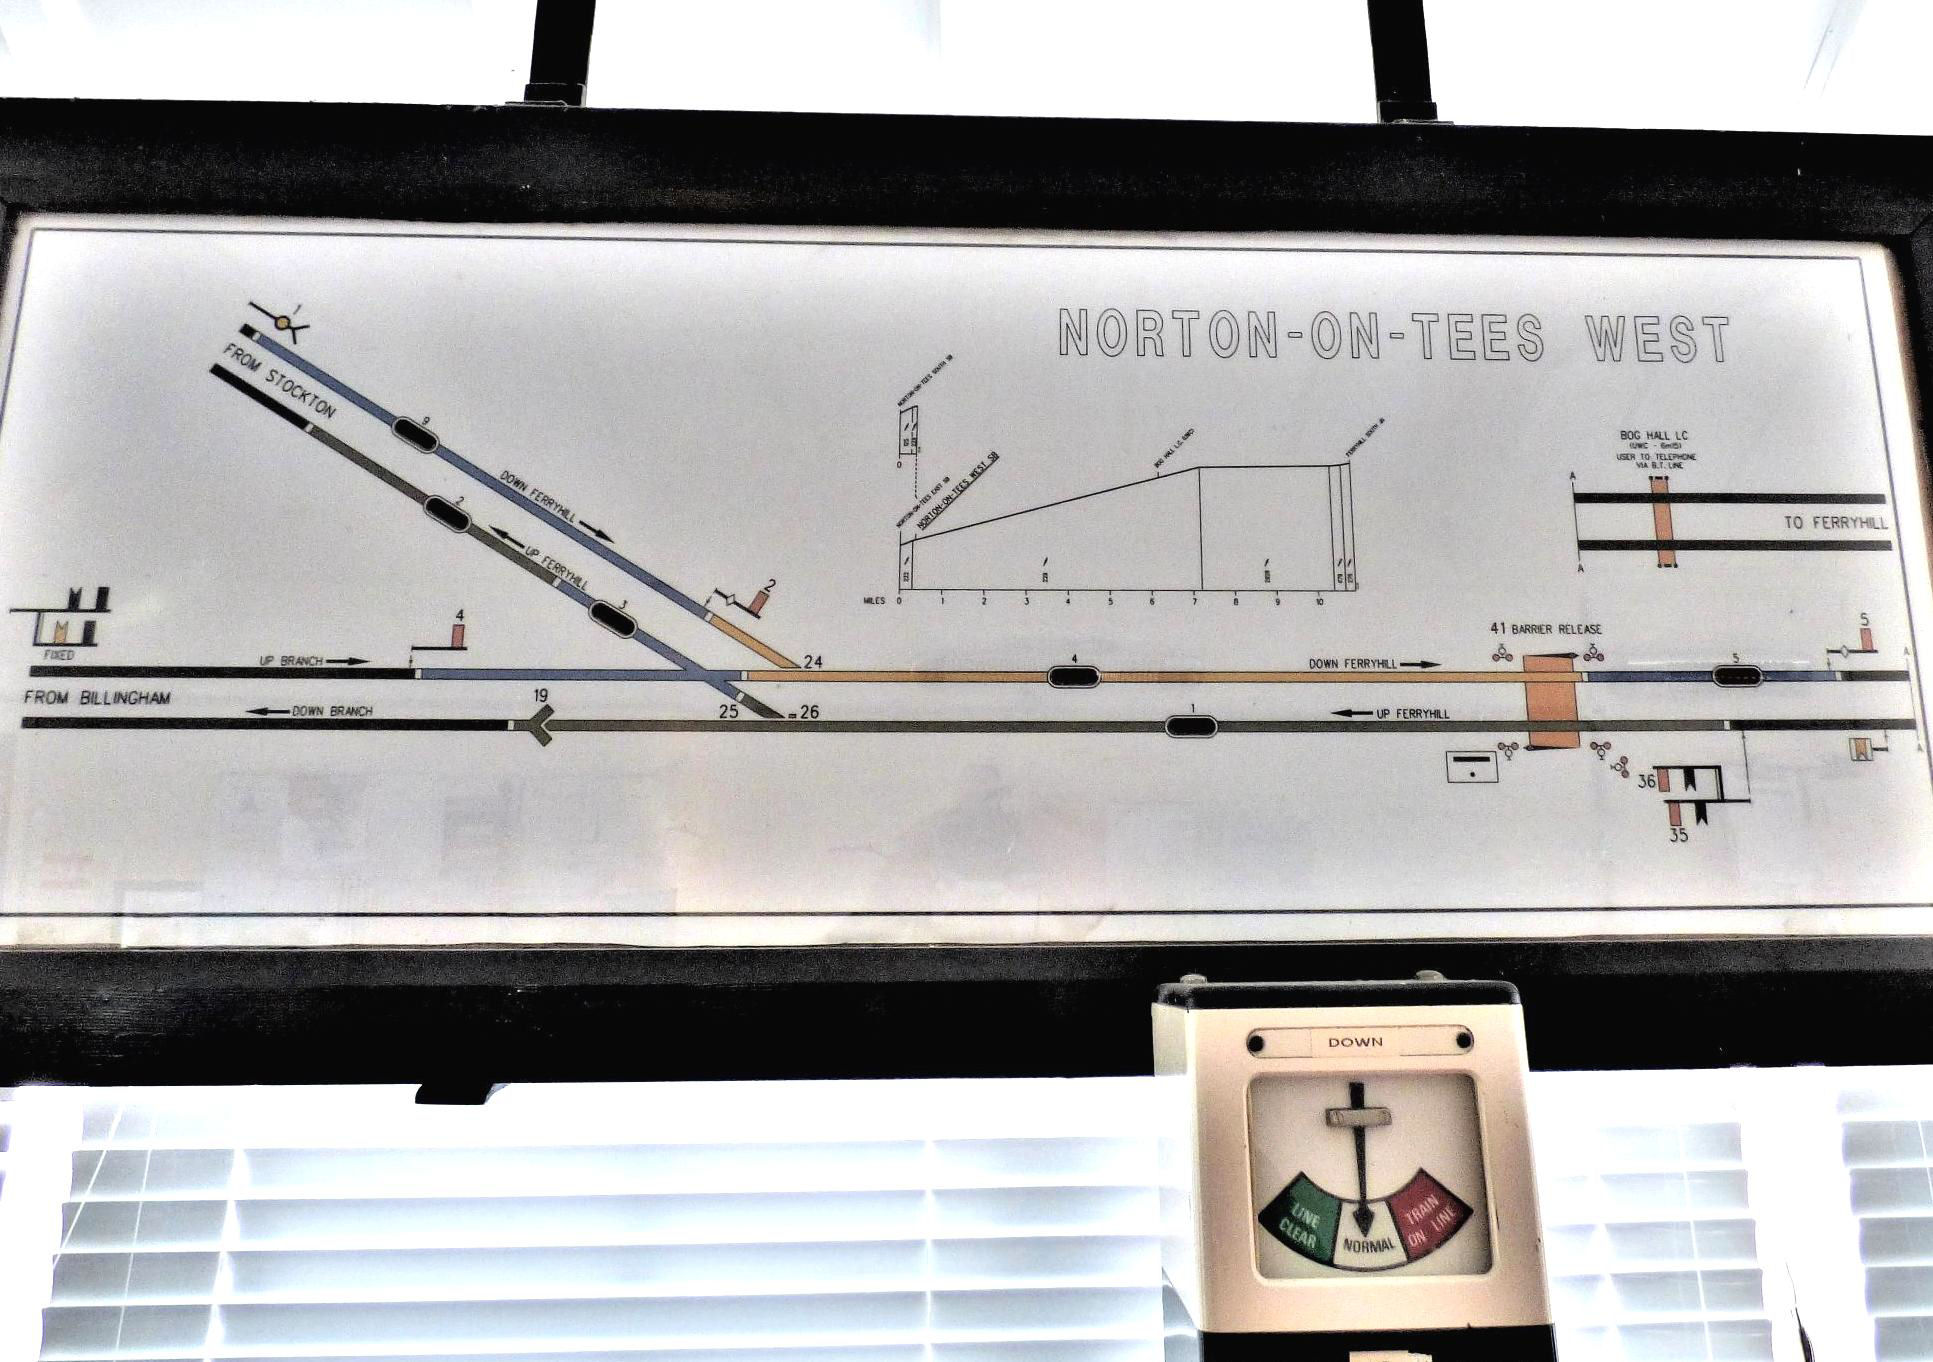
Norton West Signal Box diagram.
[© Nick Jones 2019]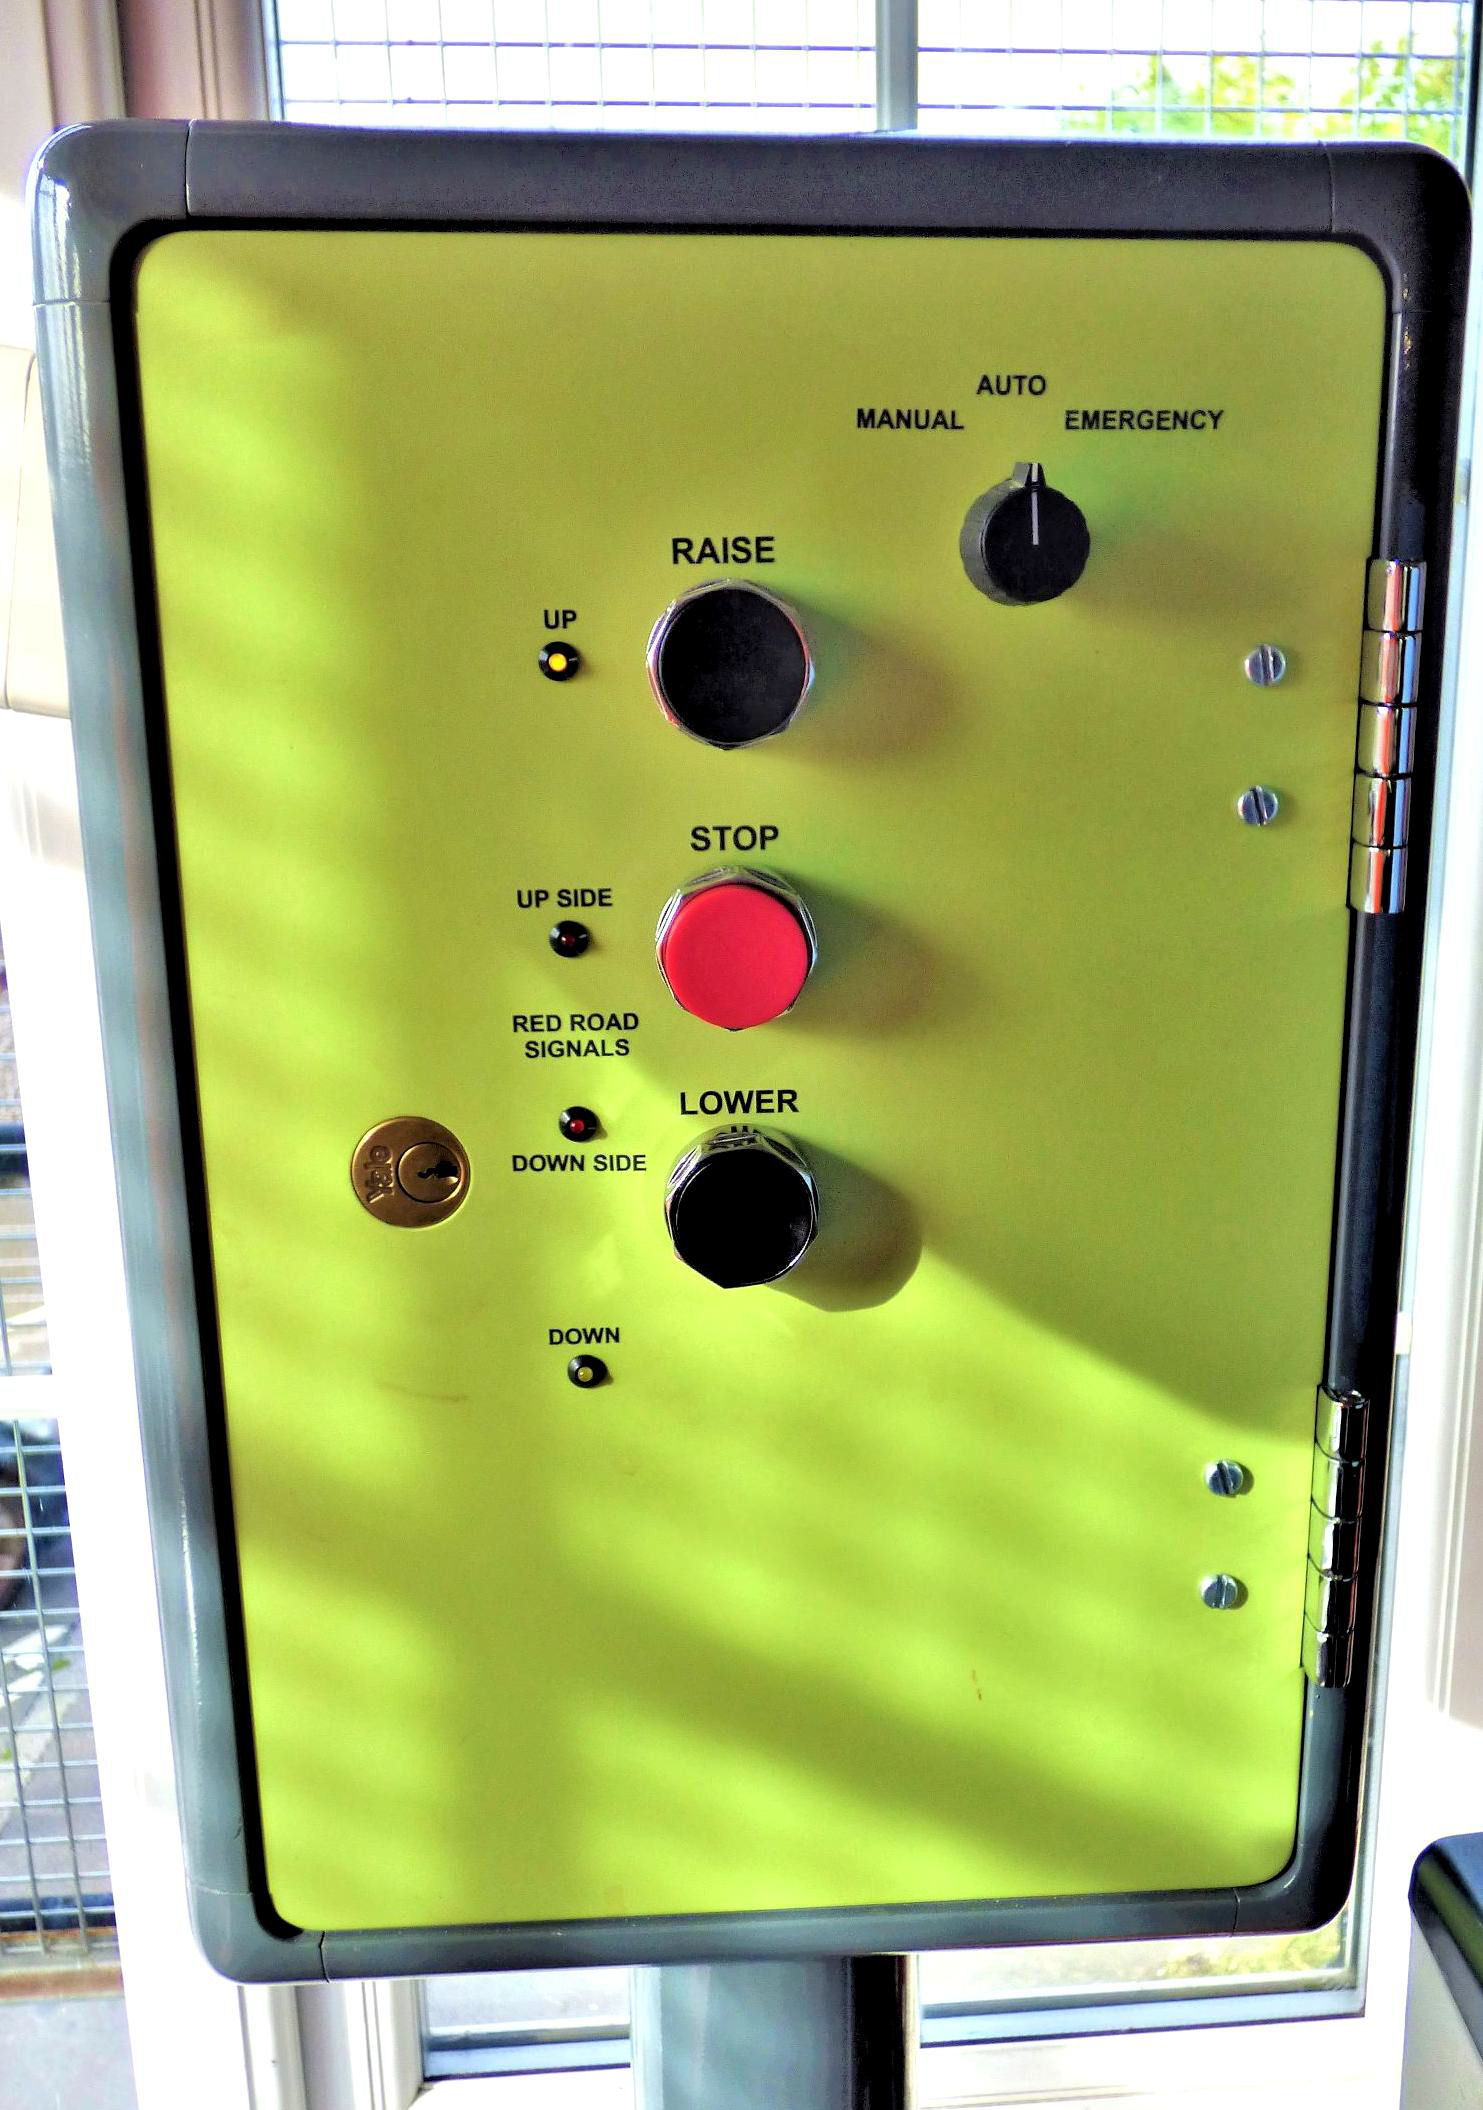
Norton West Signal Box level crossing control.
[© Nick Jones 2019] We then moved on to our reporter's local signal box (at last!) at 63m 63ch. On arrival the first thing that the party noticed was the very realistic large pub sign of this signal box on the pub ('Norton Tavern') across the road. It was the smallest of the six boxes that we visited and we had to split into three groups, even after the trainee signaller had left the box to make more room for us (yes, Network Rail was having to train a signaller for these manual signal boxes 16 months before closing them!).
The 1897 North Eastern Railway box, was on the opposite side of Calf Fallow Lane from the site of Norton-on-Tees station (CP 7 Mar 1966). This was the minor road over the crossing. It was taller than most signal boxes - approaching lighthouse proportions - to allow the signaller to see over the station footbridge (long since removed).
Norton-on-Tees Signal Box had a 26 lever McKenzie & Holland Type 16 reconditioned frame dating from 1957 with tappet interlocking. Only 7 levers were still in use and, unlike the Grade 3 signal boxes either side, it was only a Grade 2 signalling position as it didn't control any pointwork.
Norton was unique among the signal boxes we visited in retaining an increasingly rare wheel to operate its level crossing barriers which had not been motorised. One feature of Norton box was that Norton East (24ch to the west) had a block switch enabling the block section to become Norton South to Norton instead of Norton South to Norton East. The latter box only needed to be open for trains to run over Norton Curve to/from Norton West, which box had to stay open to work the crossing there. Norton Box closed for the final time at 01.35 Sun 31 Jan 2021 and is retained for track workers.
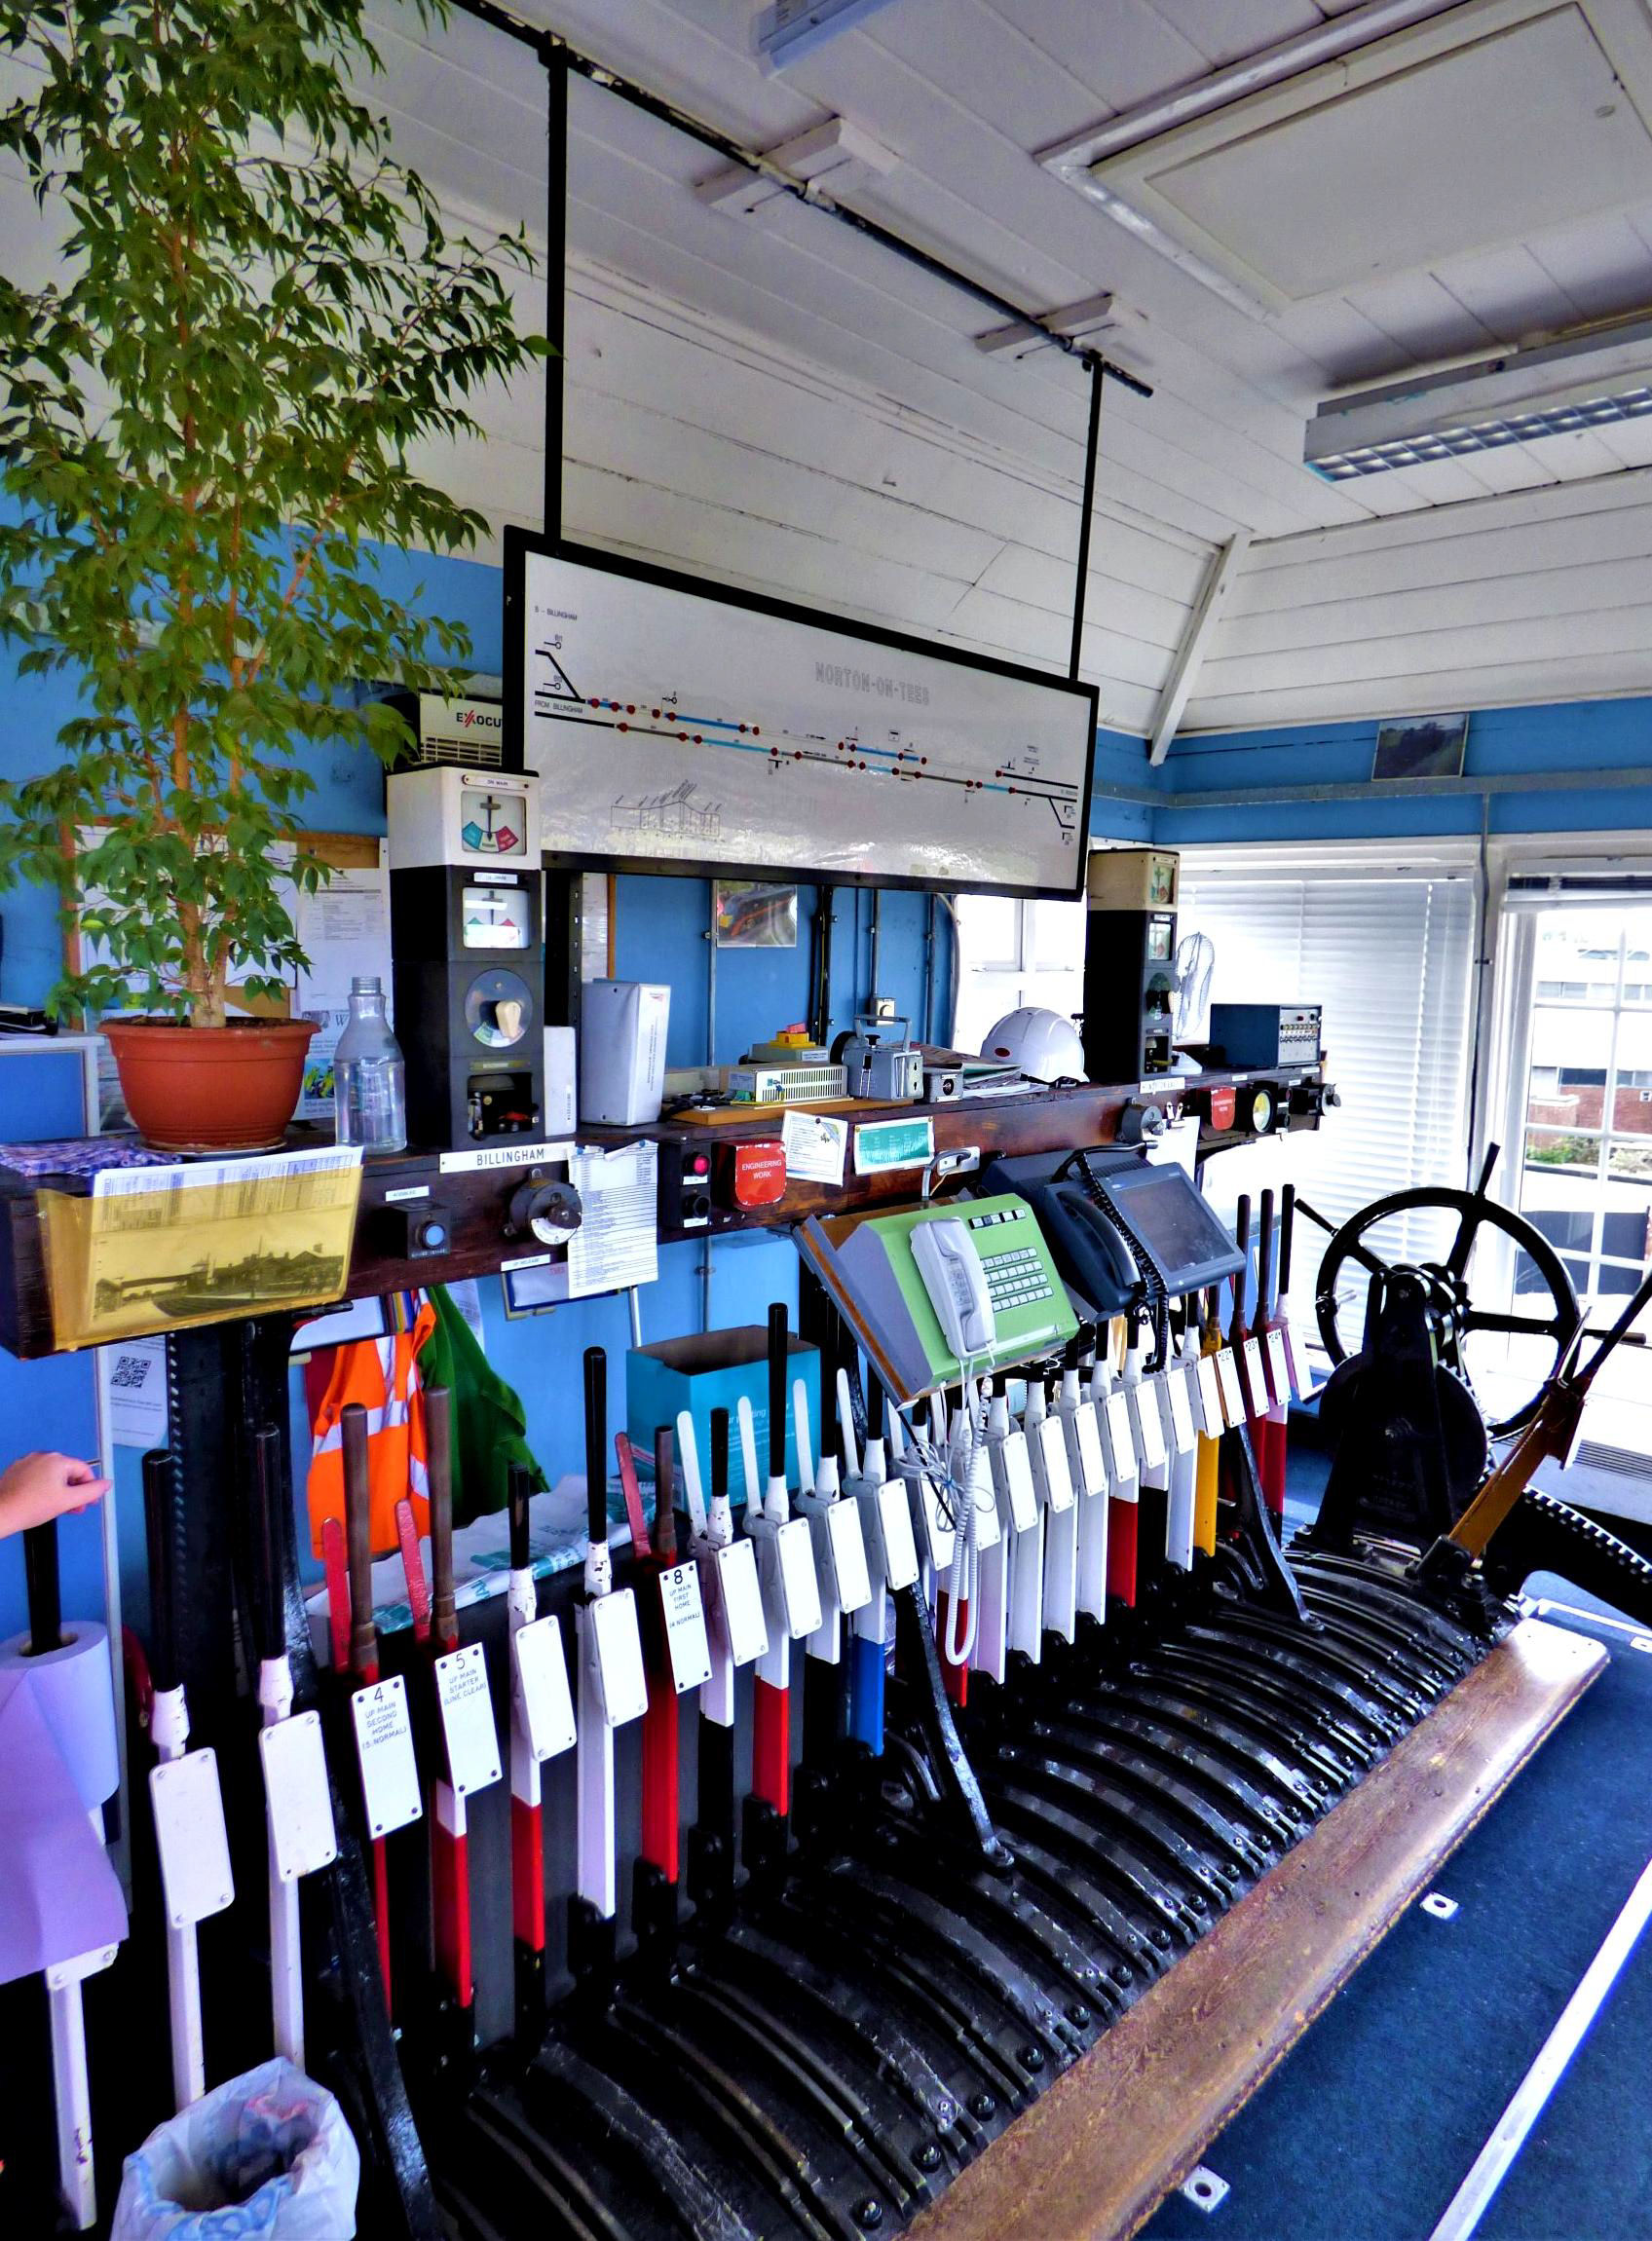
Norton-on-Tees Signal Box lever frame, diagram and instruments.
[© Nick Jones 2019]
Norton-on-Tees Signal Box sign.
[© Nick Jones 2019]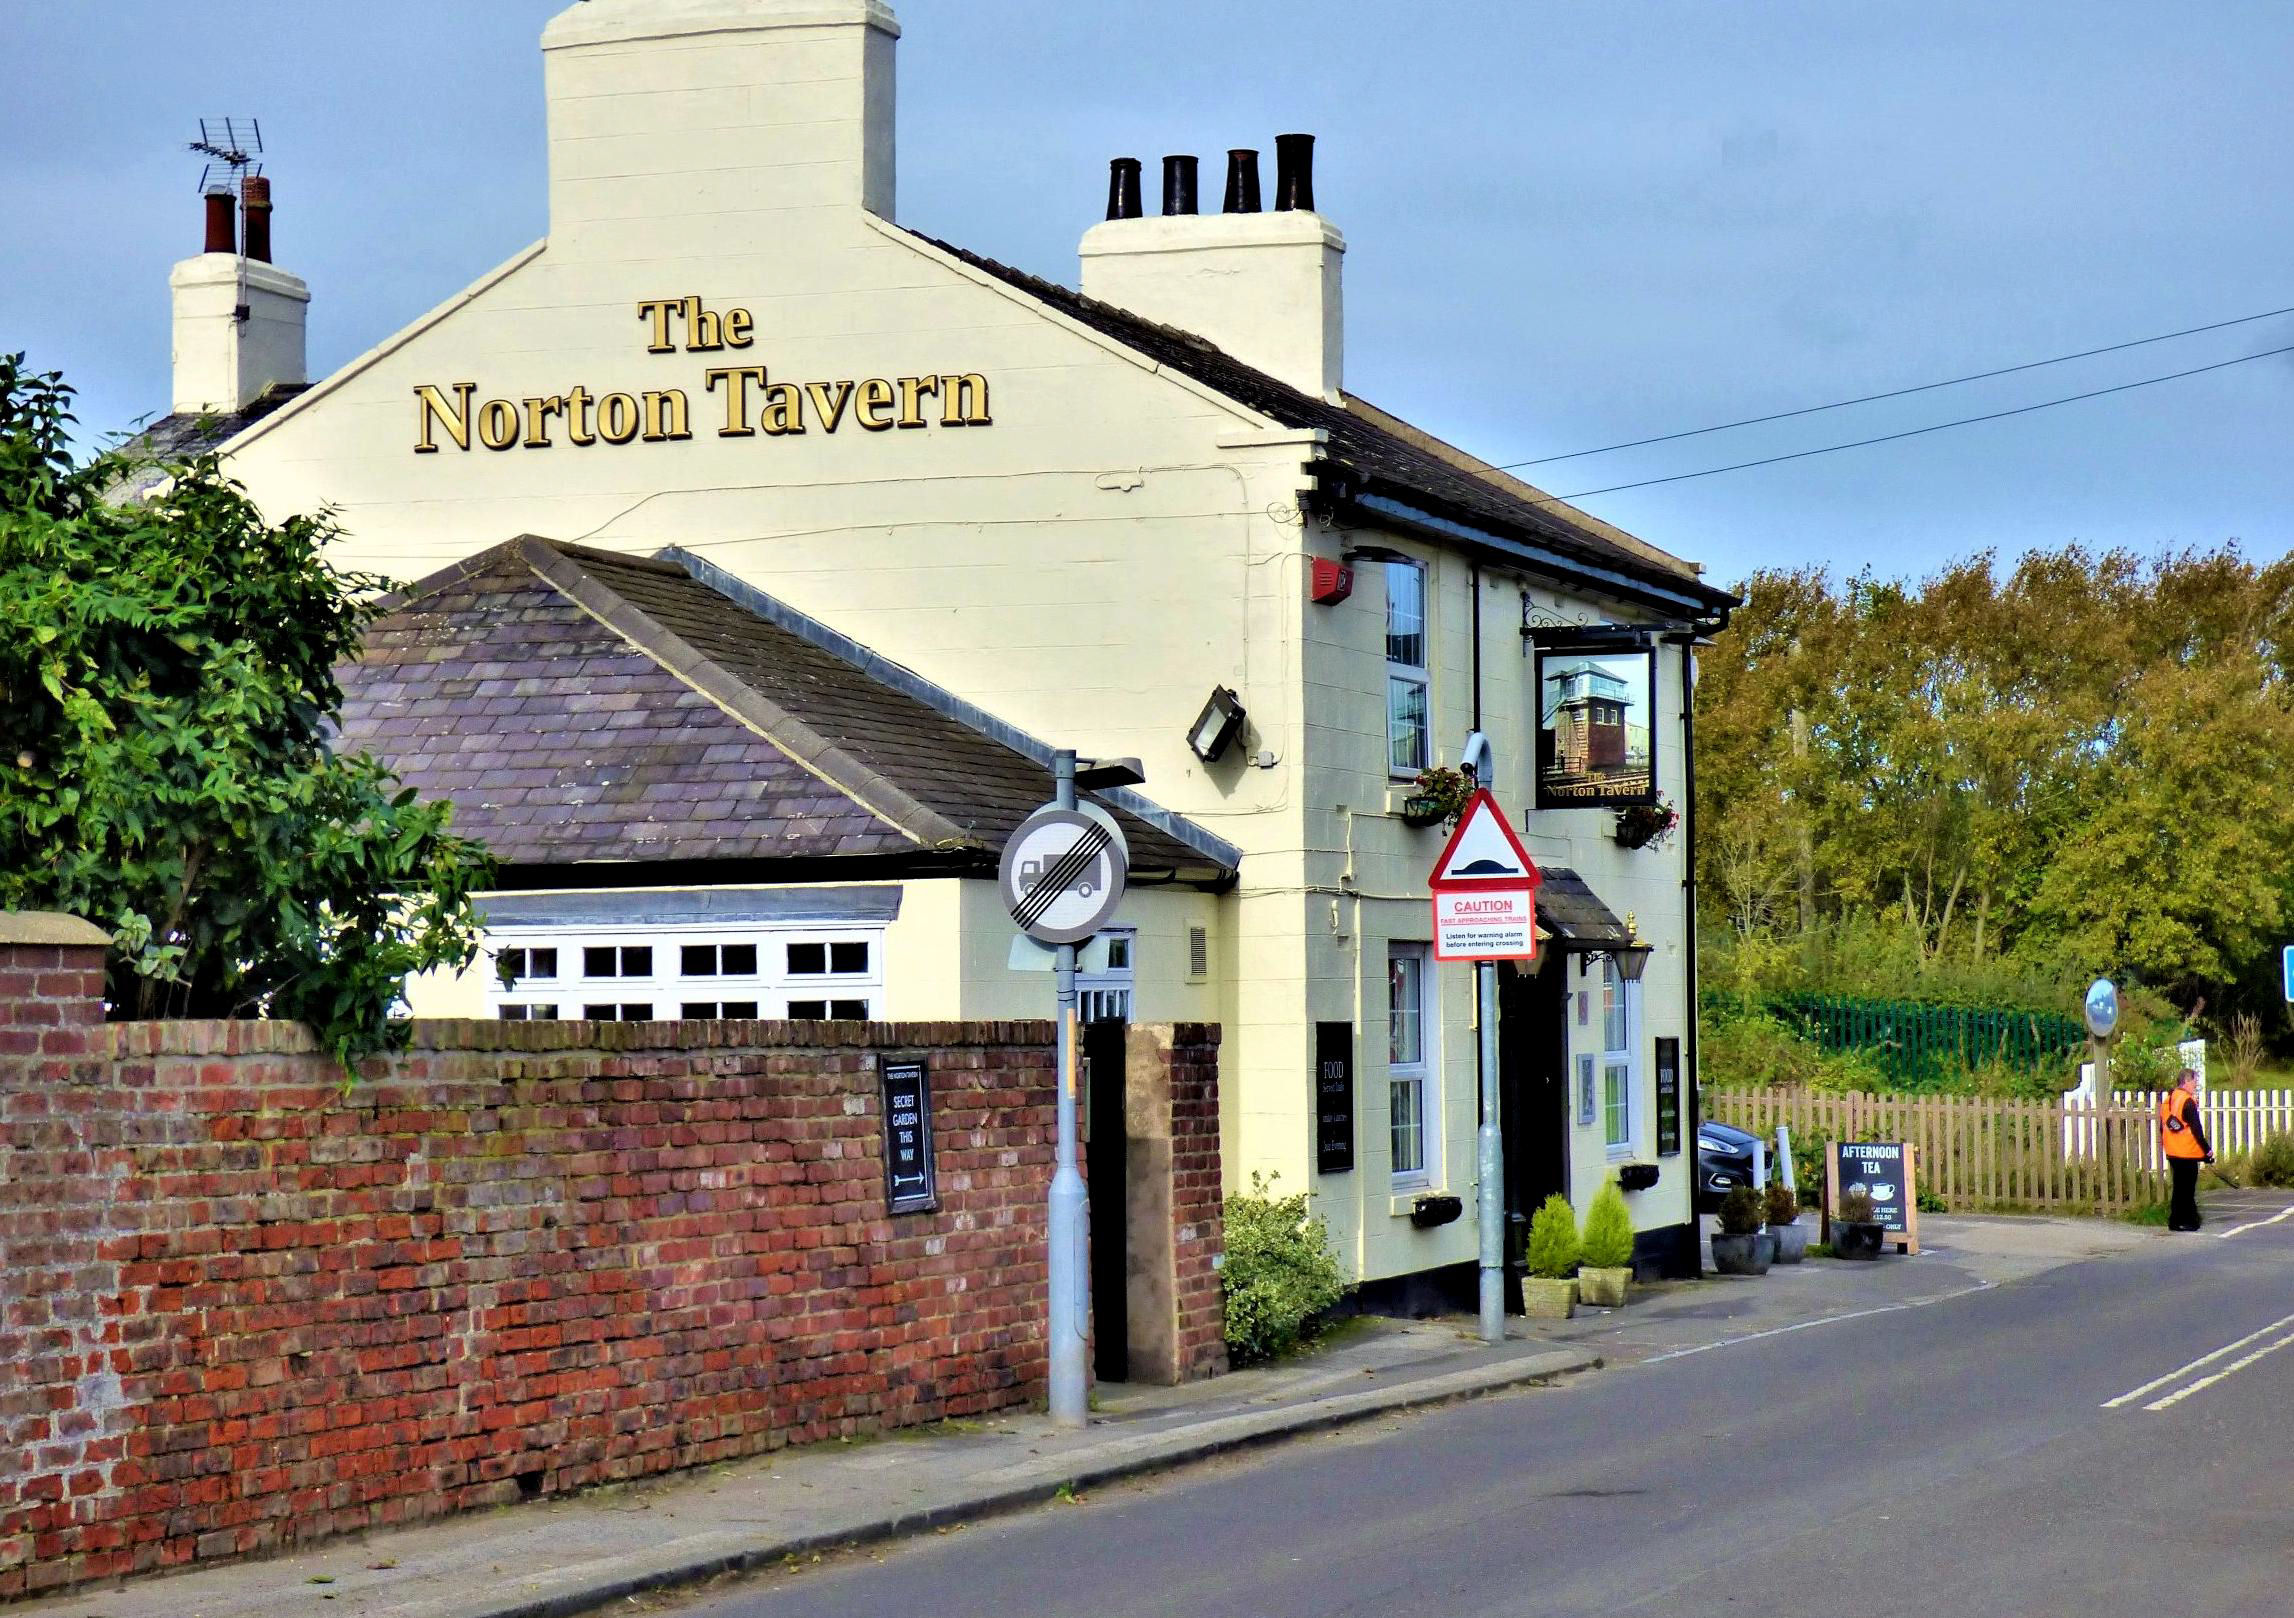
Norton Tavern opposite the box showing its pub sign
[© Nick Jones 2019]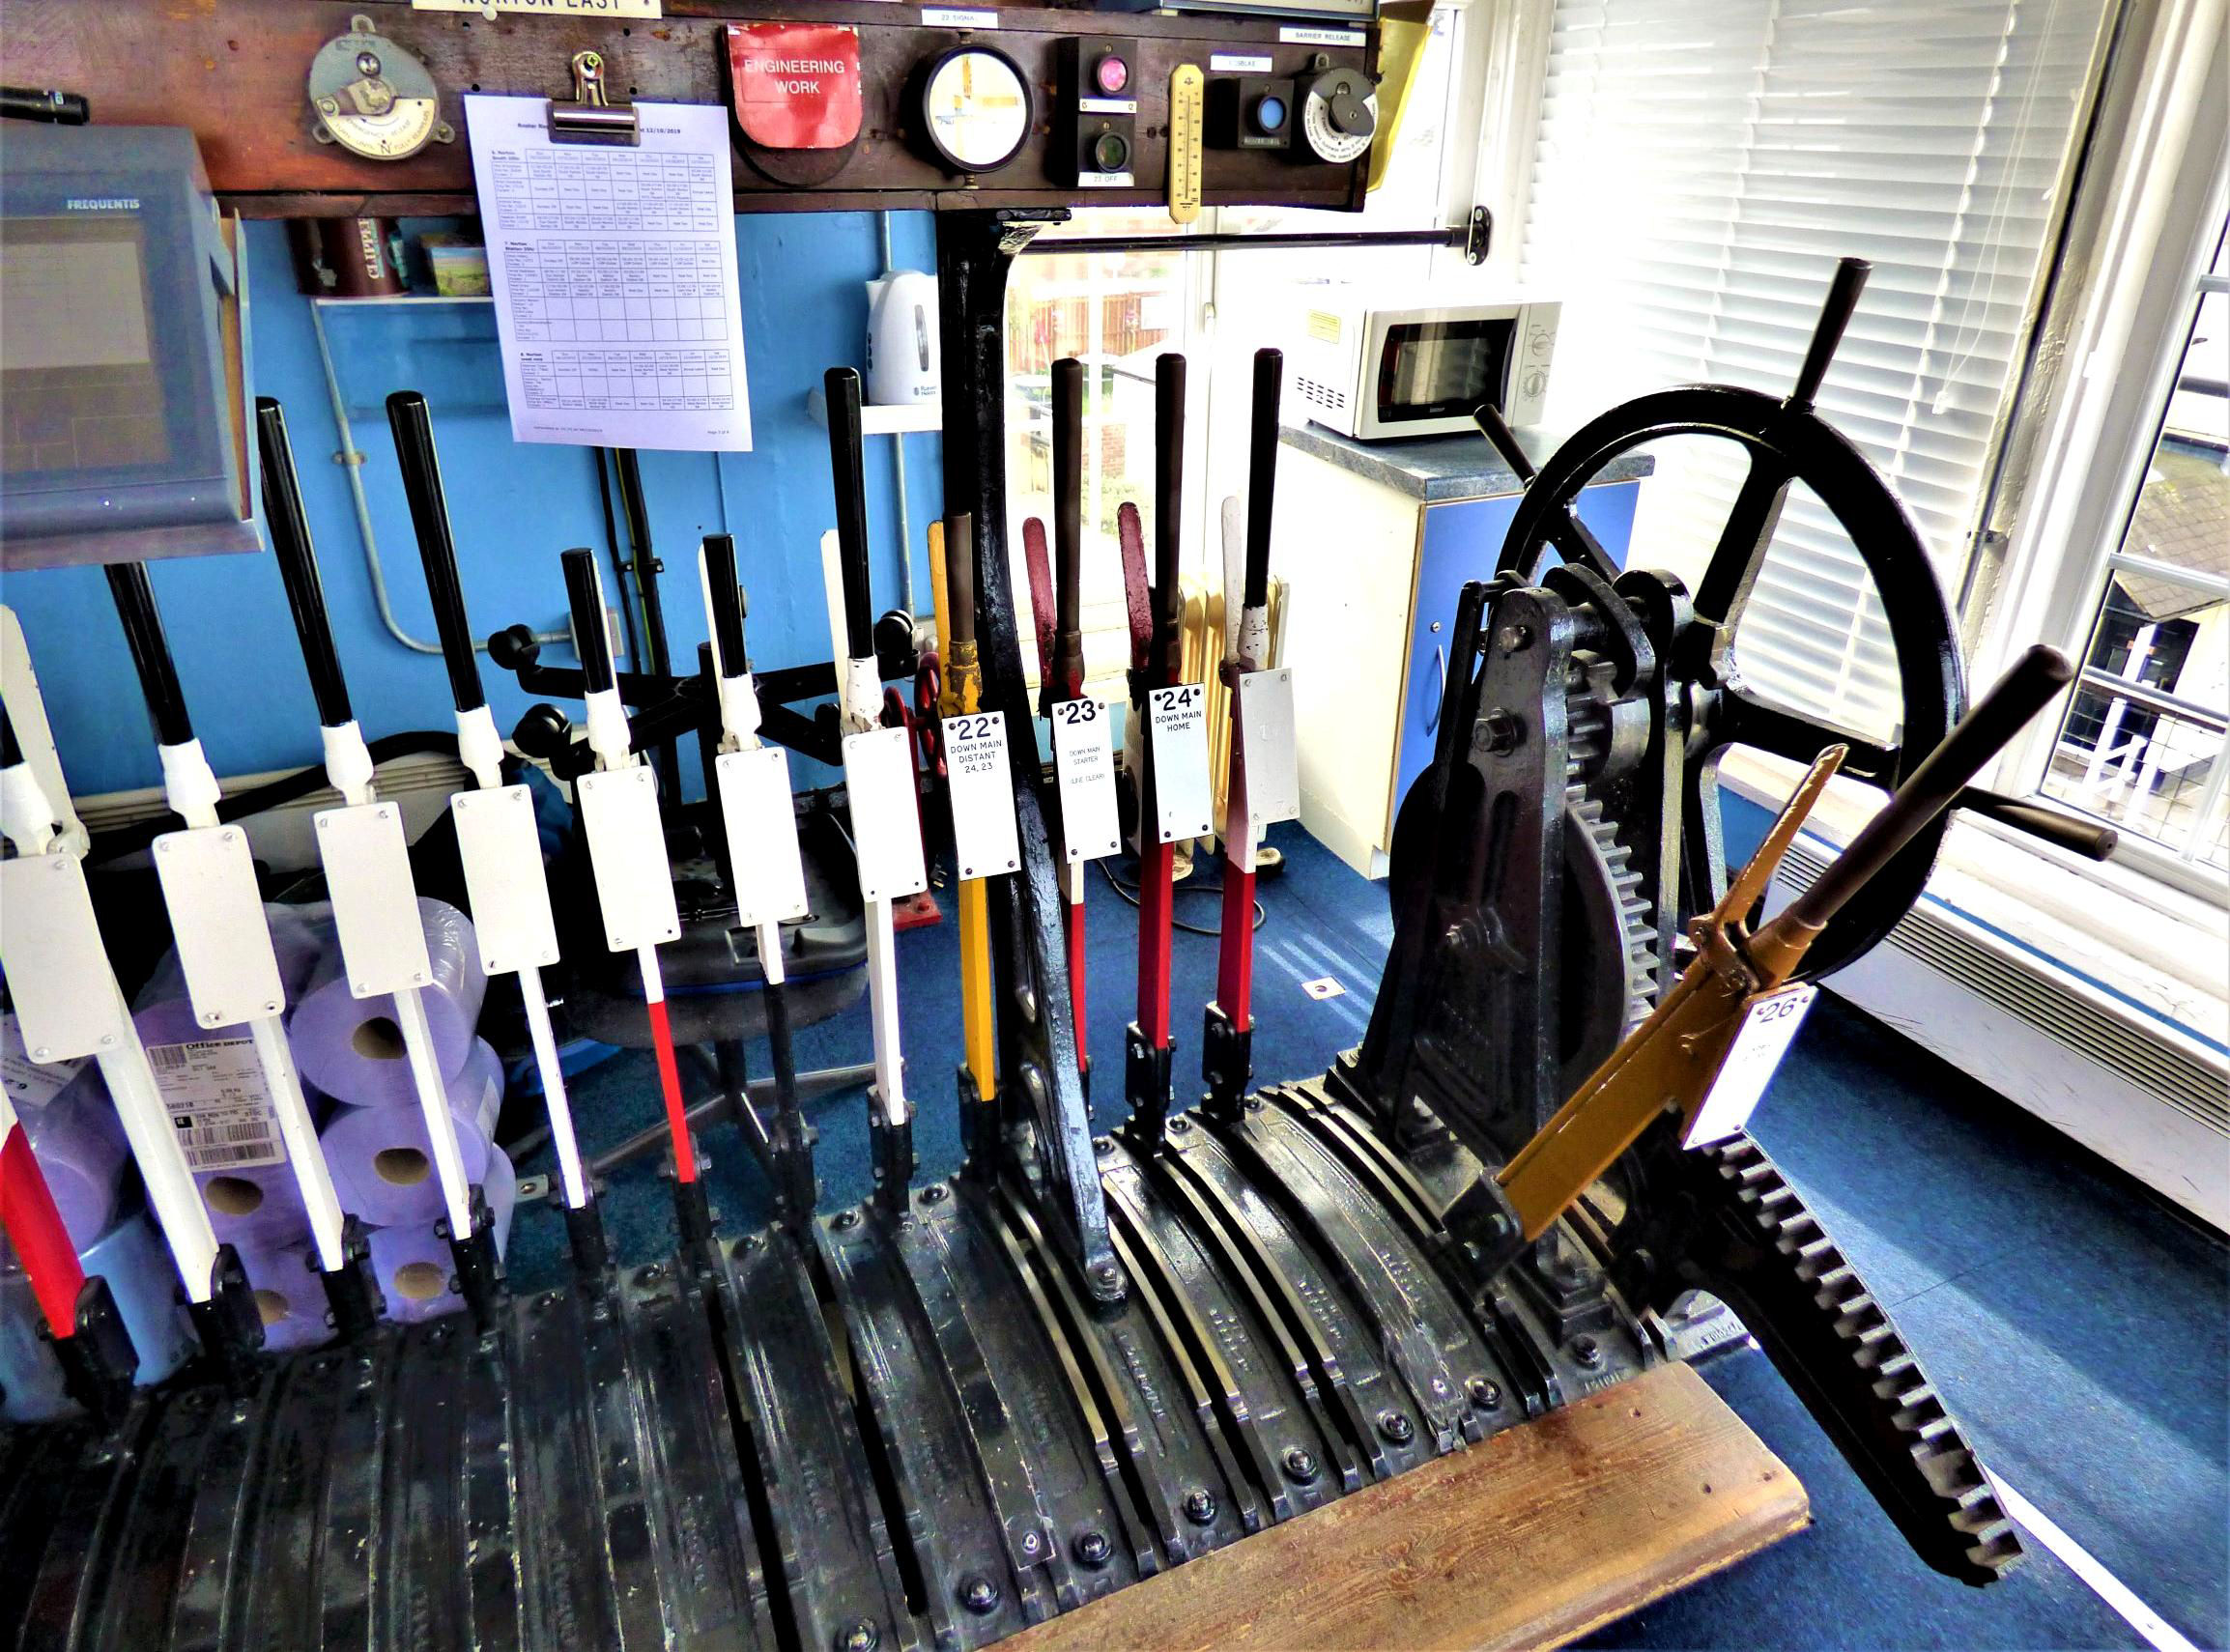
Norton-on-Tees Signal Box lever frame and level crossing wheel.
[© Nick Jones 2019]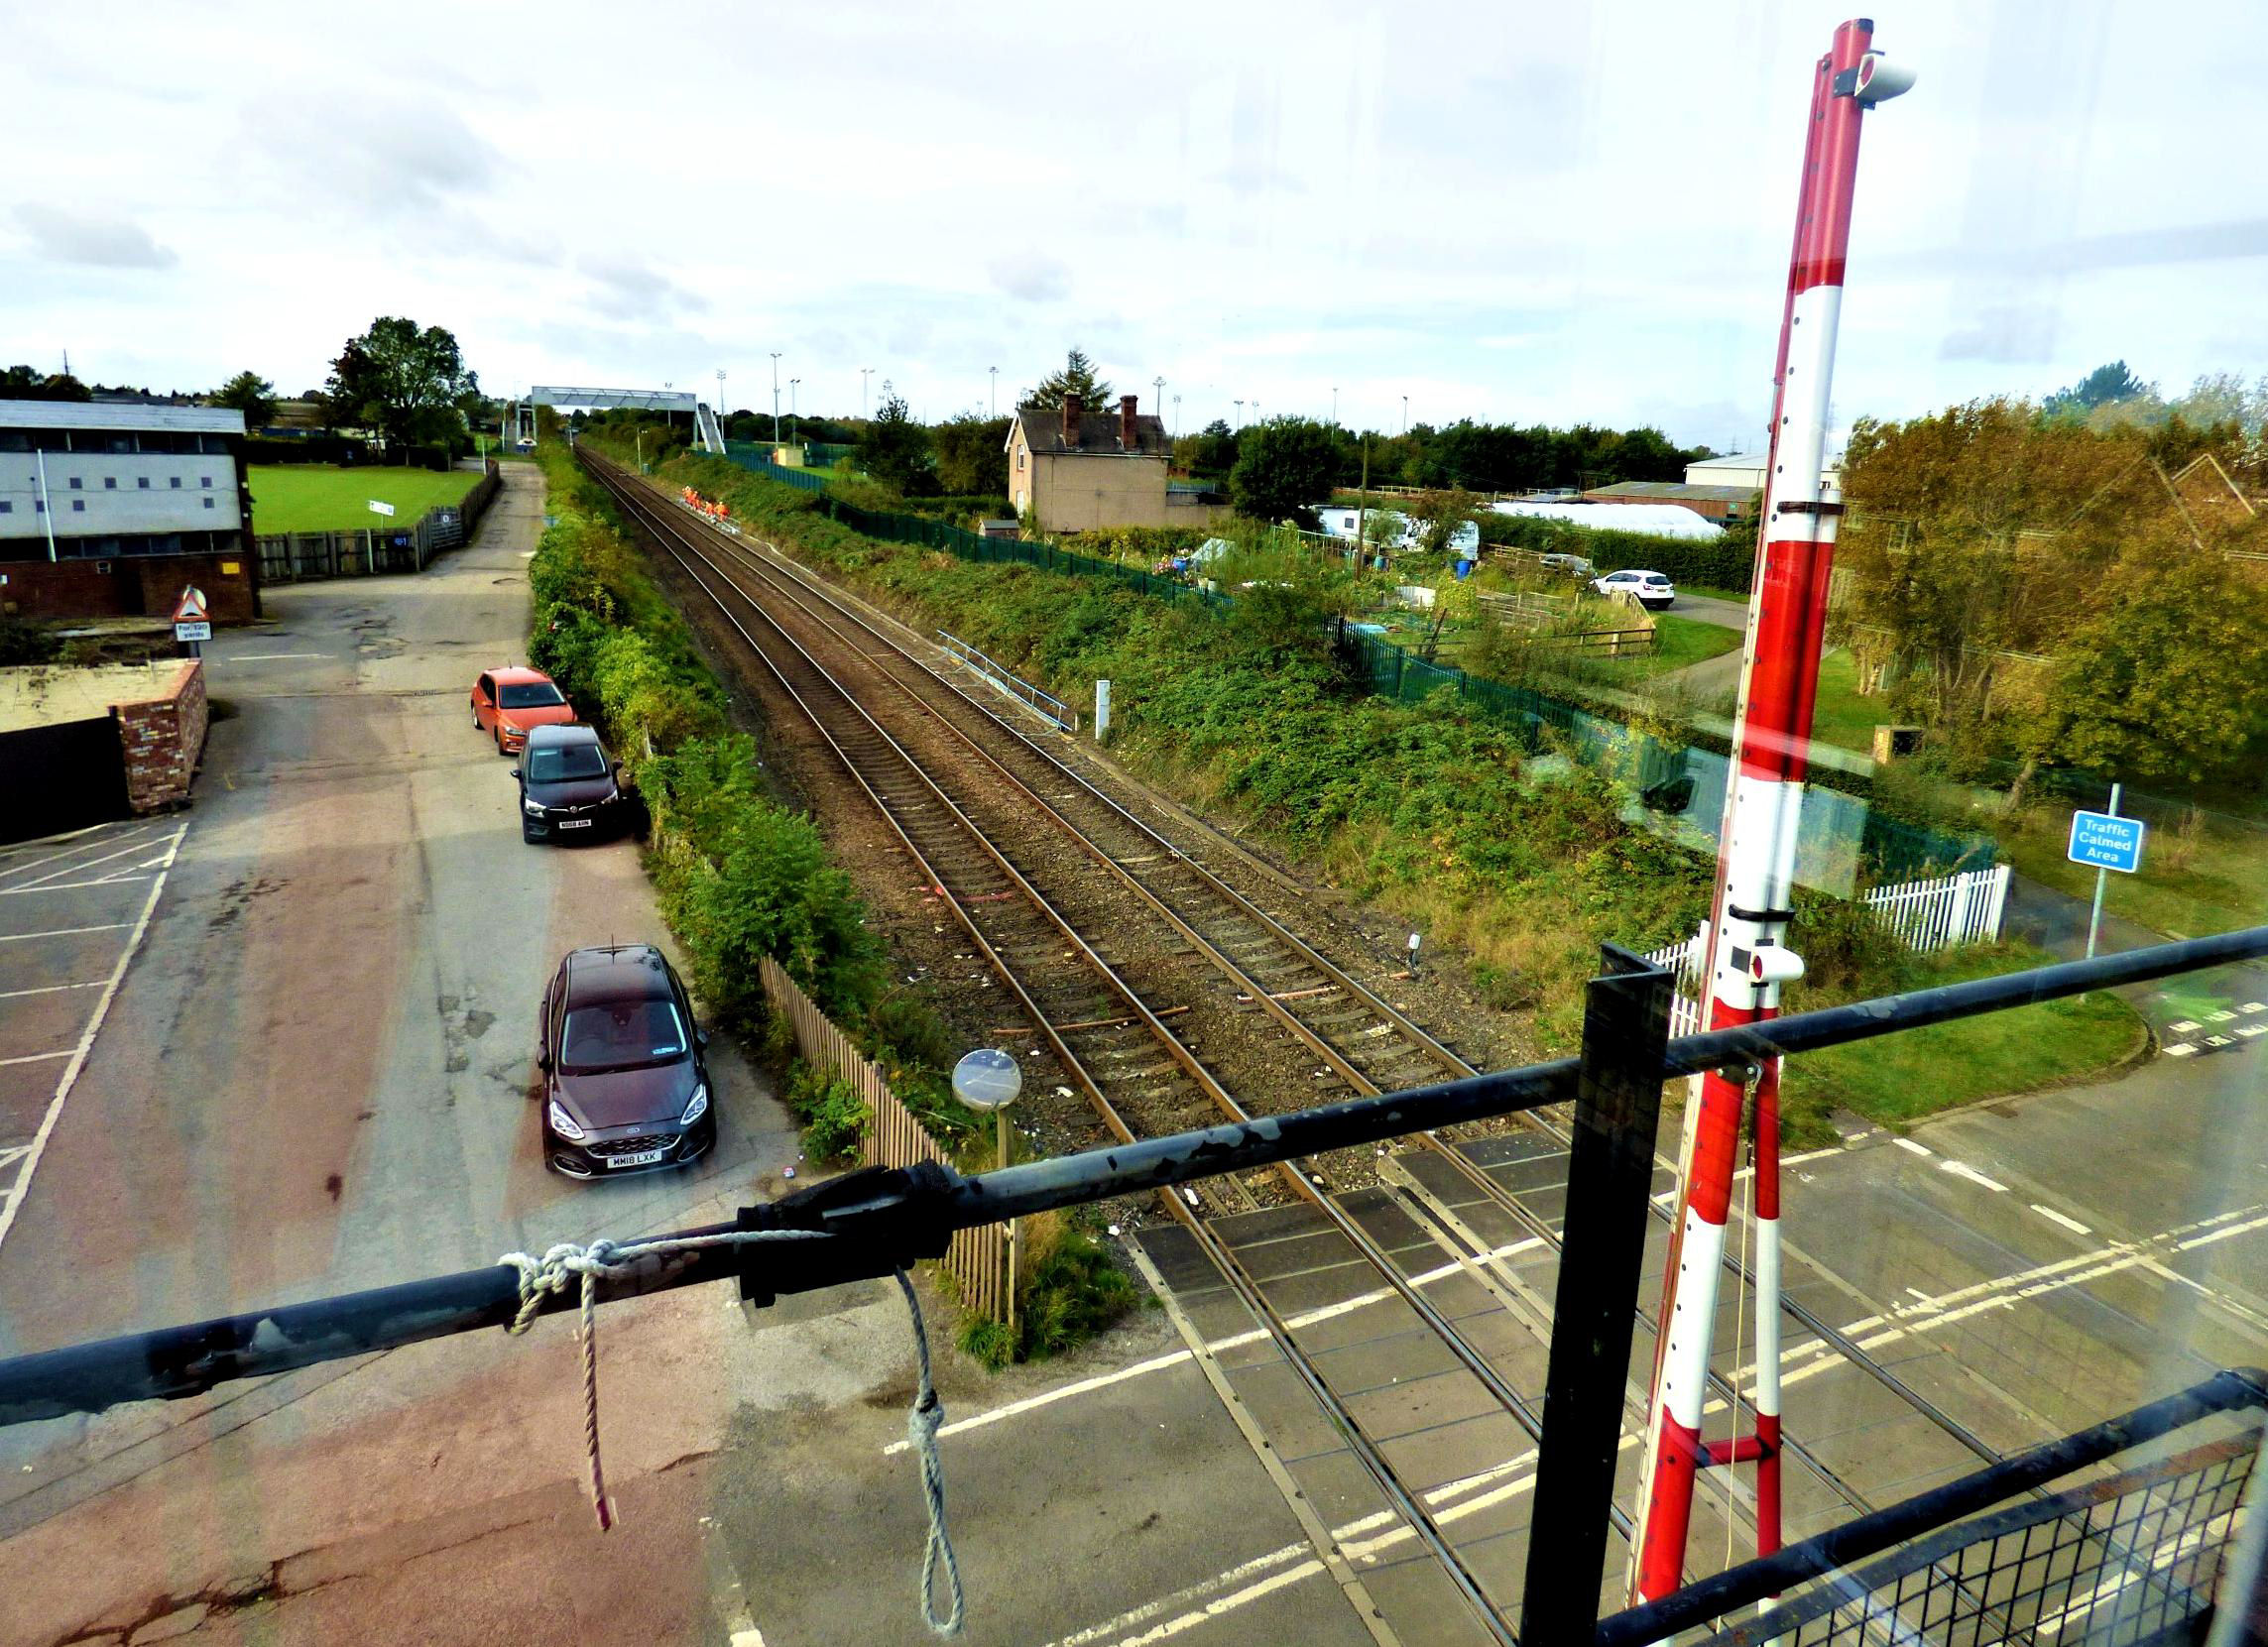
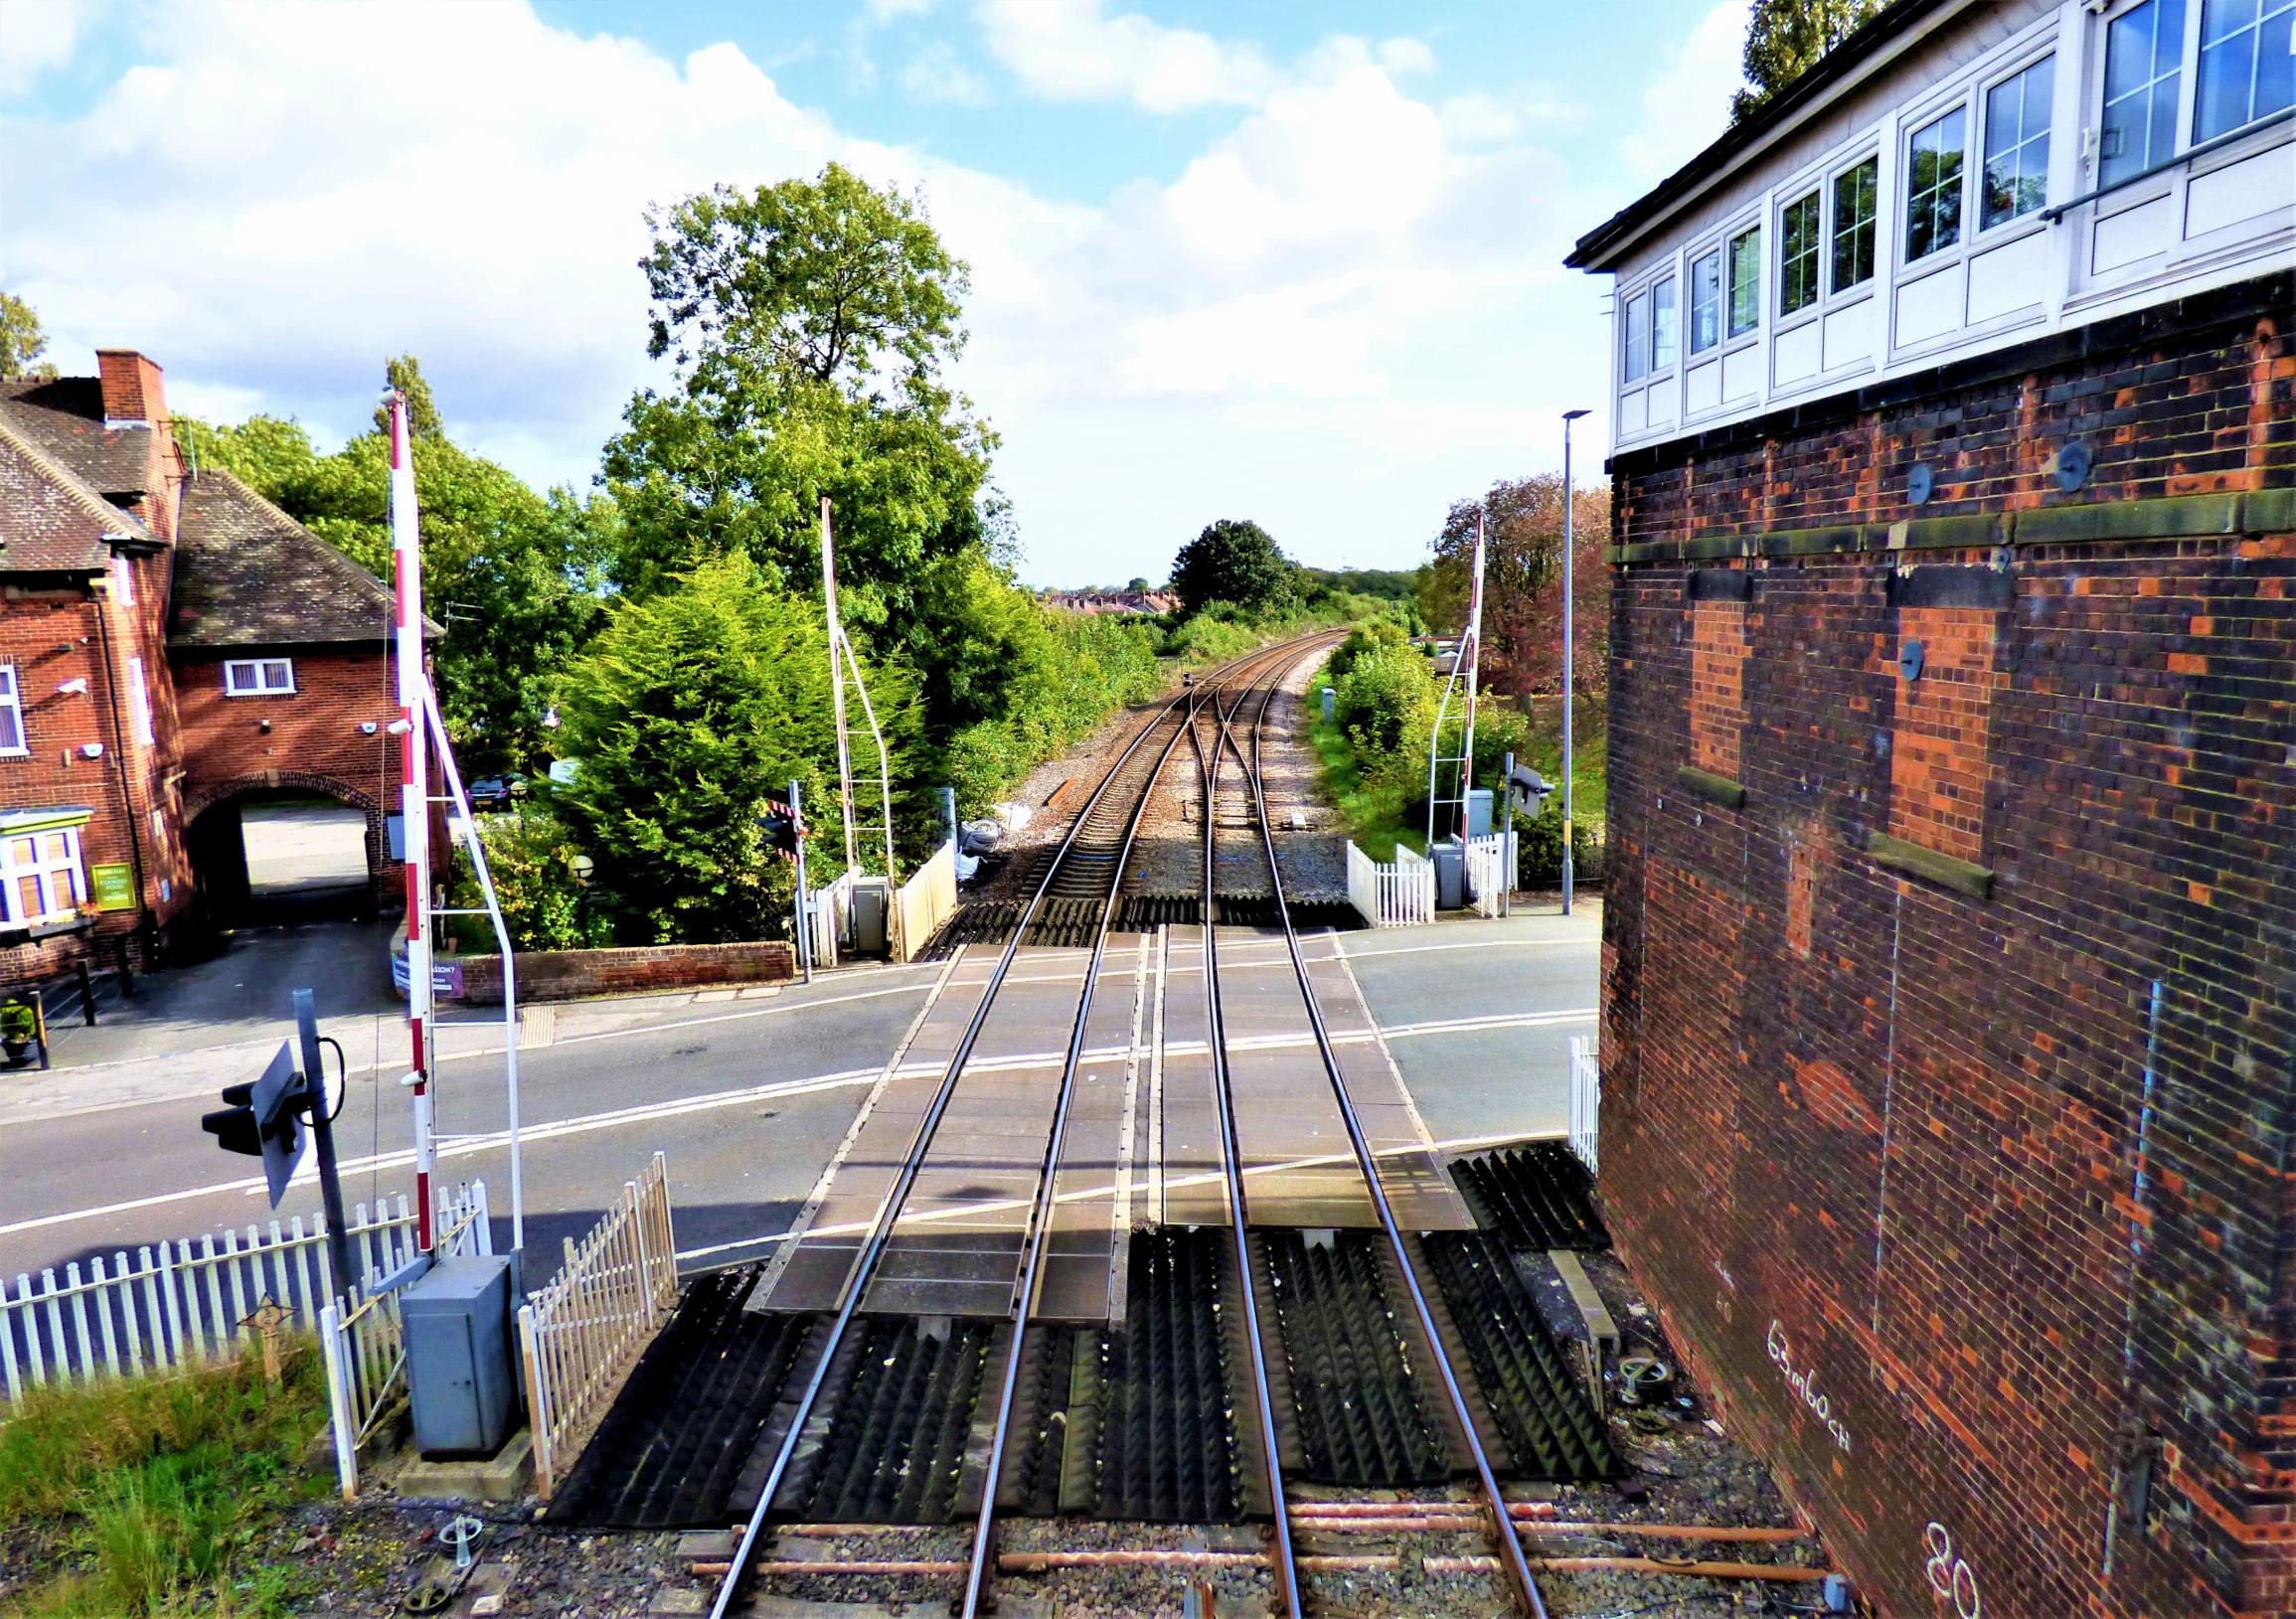
The view from Norton-on-Tees Signal Box looking towards Stockton.
[© Nick Jones 2019]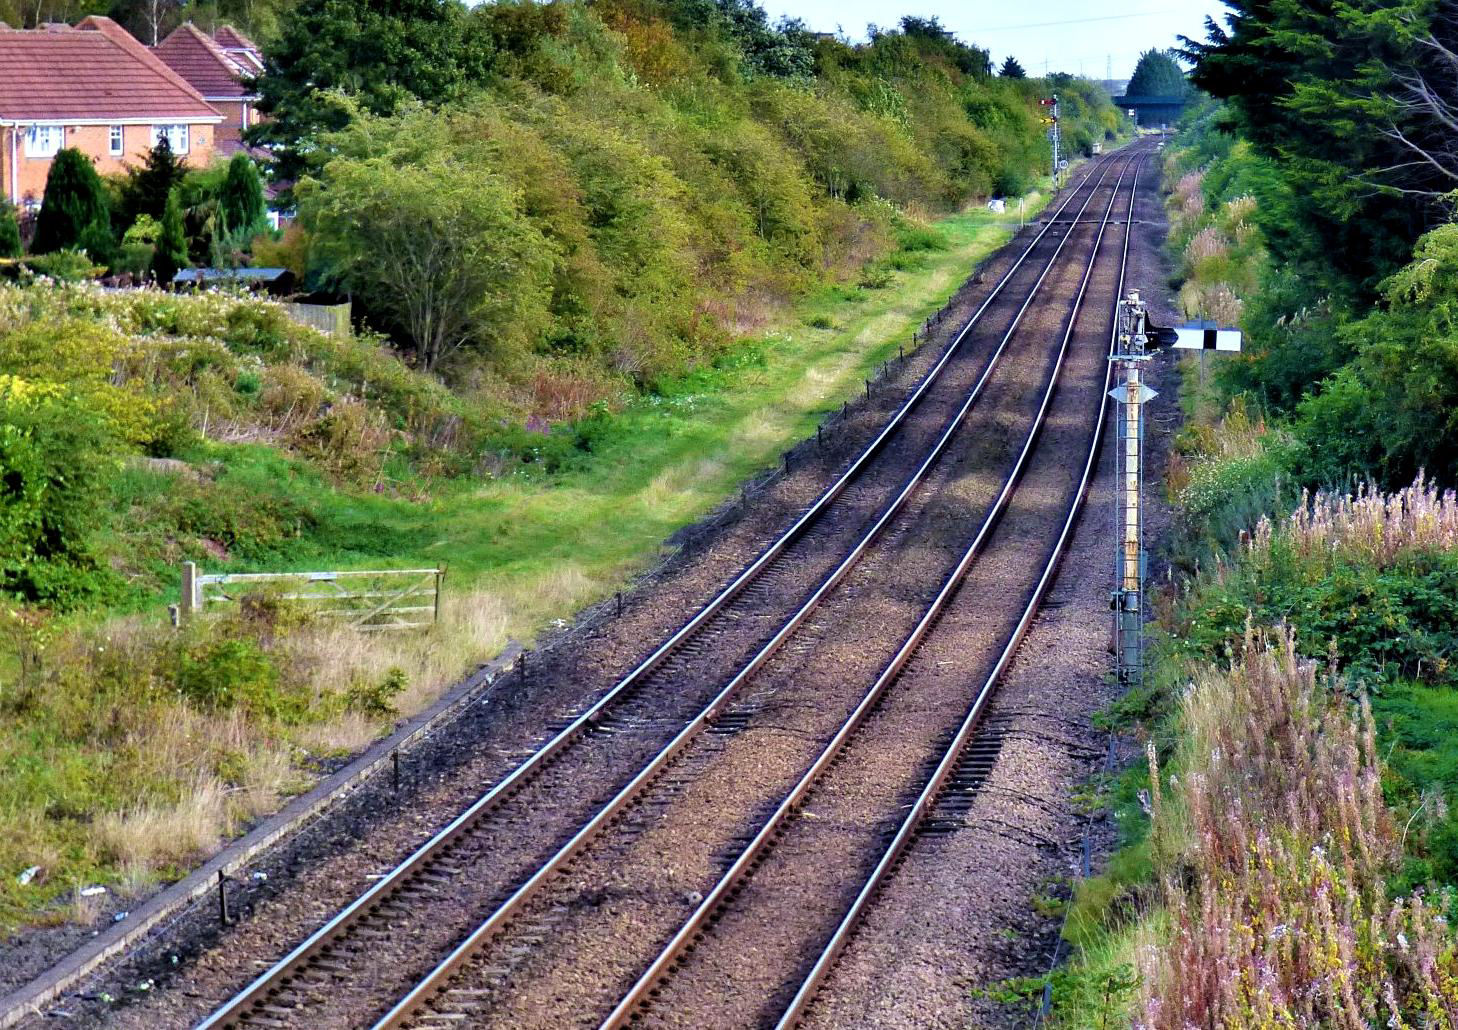
The view from Norton-on-Tees Signal Box looking towards Billingham.
[© Nick Jones 2019]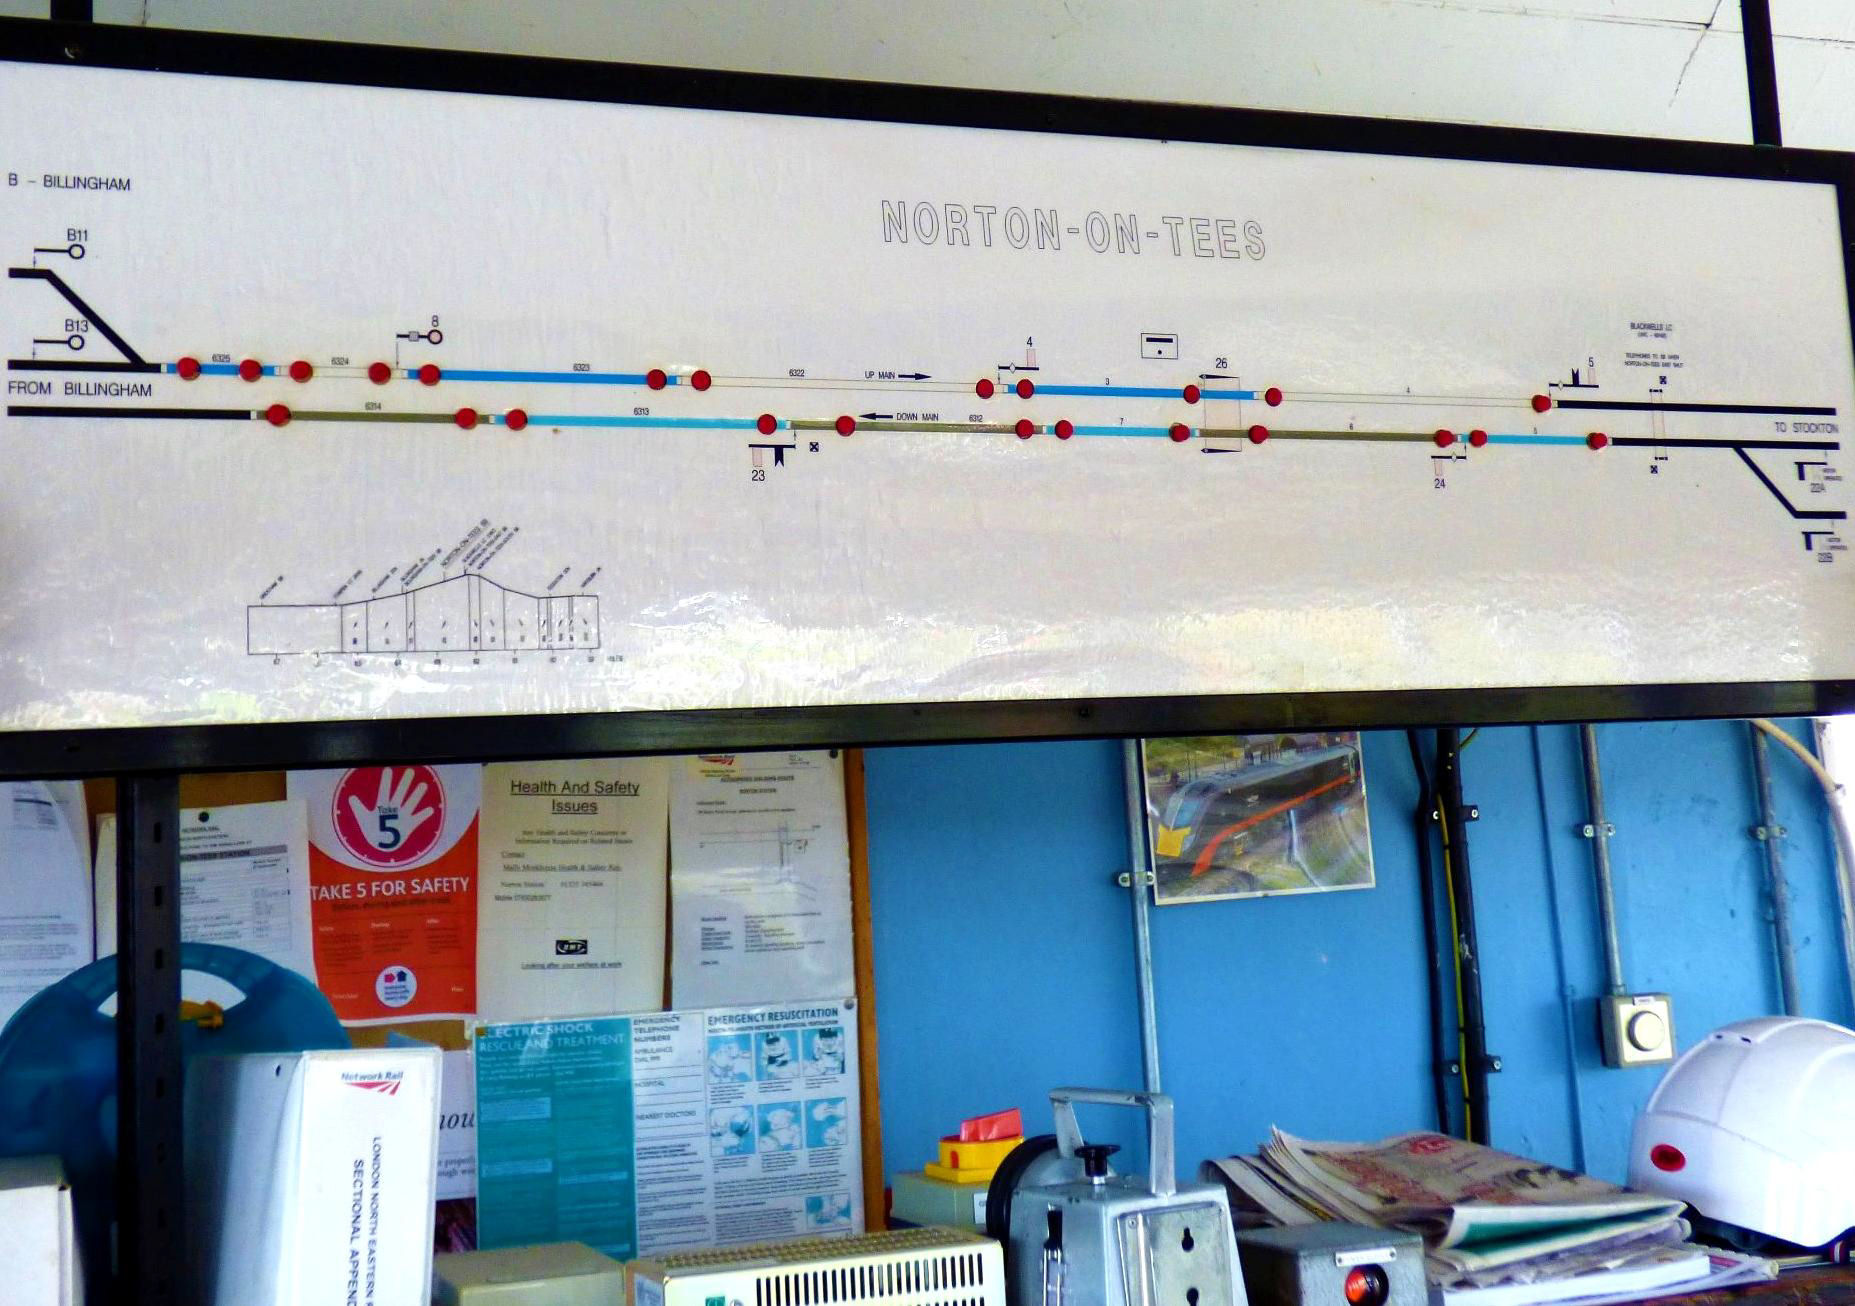
Norton-on-Tees Signal Box diagram.
[© Nick Jones 2019] Our next visit was another signal box built taller than normal due to sighting problems with a station footbridge. Here Billingham-on-Tees station had been relocated to its present site, ¾ mile nearer Hartlepool, from 7 Nov 1966 and was renamed just Billingham. The considerable height was less obvious from the outside than Norton-on-Tees signal box had been as this was a much larger box, so it appeared better proportioned. The level crossing adjacent to the box had a replica North Eastern Railway (NER) style footbridge (demolished on 14 Mar 2021 and is not being replaced due to the cost) to provide access over the line when the barriers were lowered; access to the signal box was from this bridge. The box dated from 1904 and was fitted with a reconditioned (1945) Type 17 McKenzie & Holland 50 lever frame of which only 14 were still in use. The levers were numbered 2 to 51, suggesting that position 1 used to be occupied by a gate wheel (NER practice was to number the gate wheel as a lever).
Billingham is also the junction for the truncated freight branch once to Seal Sands, still double track to Belasis Lane. This was worked by Absolute Block to Belasis Lane box but by the time of our visit regular traffic (biofuel to Cardiff) had ceased six months earlier, so Belasis Lane box was rarely manned. In what was quite an unusual arrangement, Billingham (colour light) Up Distant '11R' from Belasis Lane was mounted on the same post as Belasis Lane (semaphore) Up Starter 'BL3'. Billingham box closed permanently at 01.35 on 6 Feb 2021 and was demolished during Sun 7 Feb (pictures e-BLN 1370.360).
While we were here the signaller told us that some trains were being diverted from the ECML that day due to a train fire and so we were able to photo one of the last LNER HSTs on the Durham Coast line (working the 10.00 King's Cross to Aberdeen) and what was believed locally to have been the first LNER Azuma on the Durham Coast line (10.00 Edinburgh Waverley to King's Cross). For the record the 07.52 Aberdeen to King's Cross was also diverted, passing after we had moved on from the signal box.
The colossus of Billingham during our 9 Oct 2019 visit. The first is looking north; Billingham Jn is round the corner.
[© Nick Jones 2019]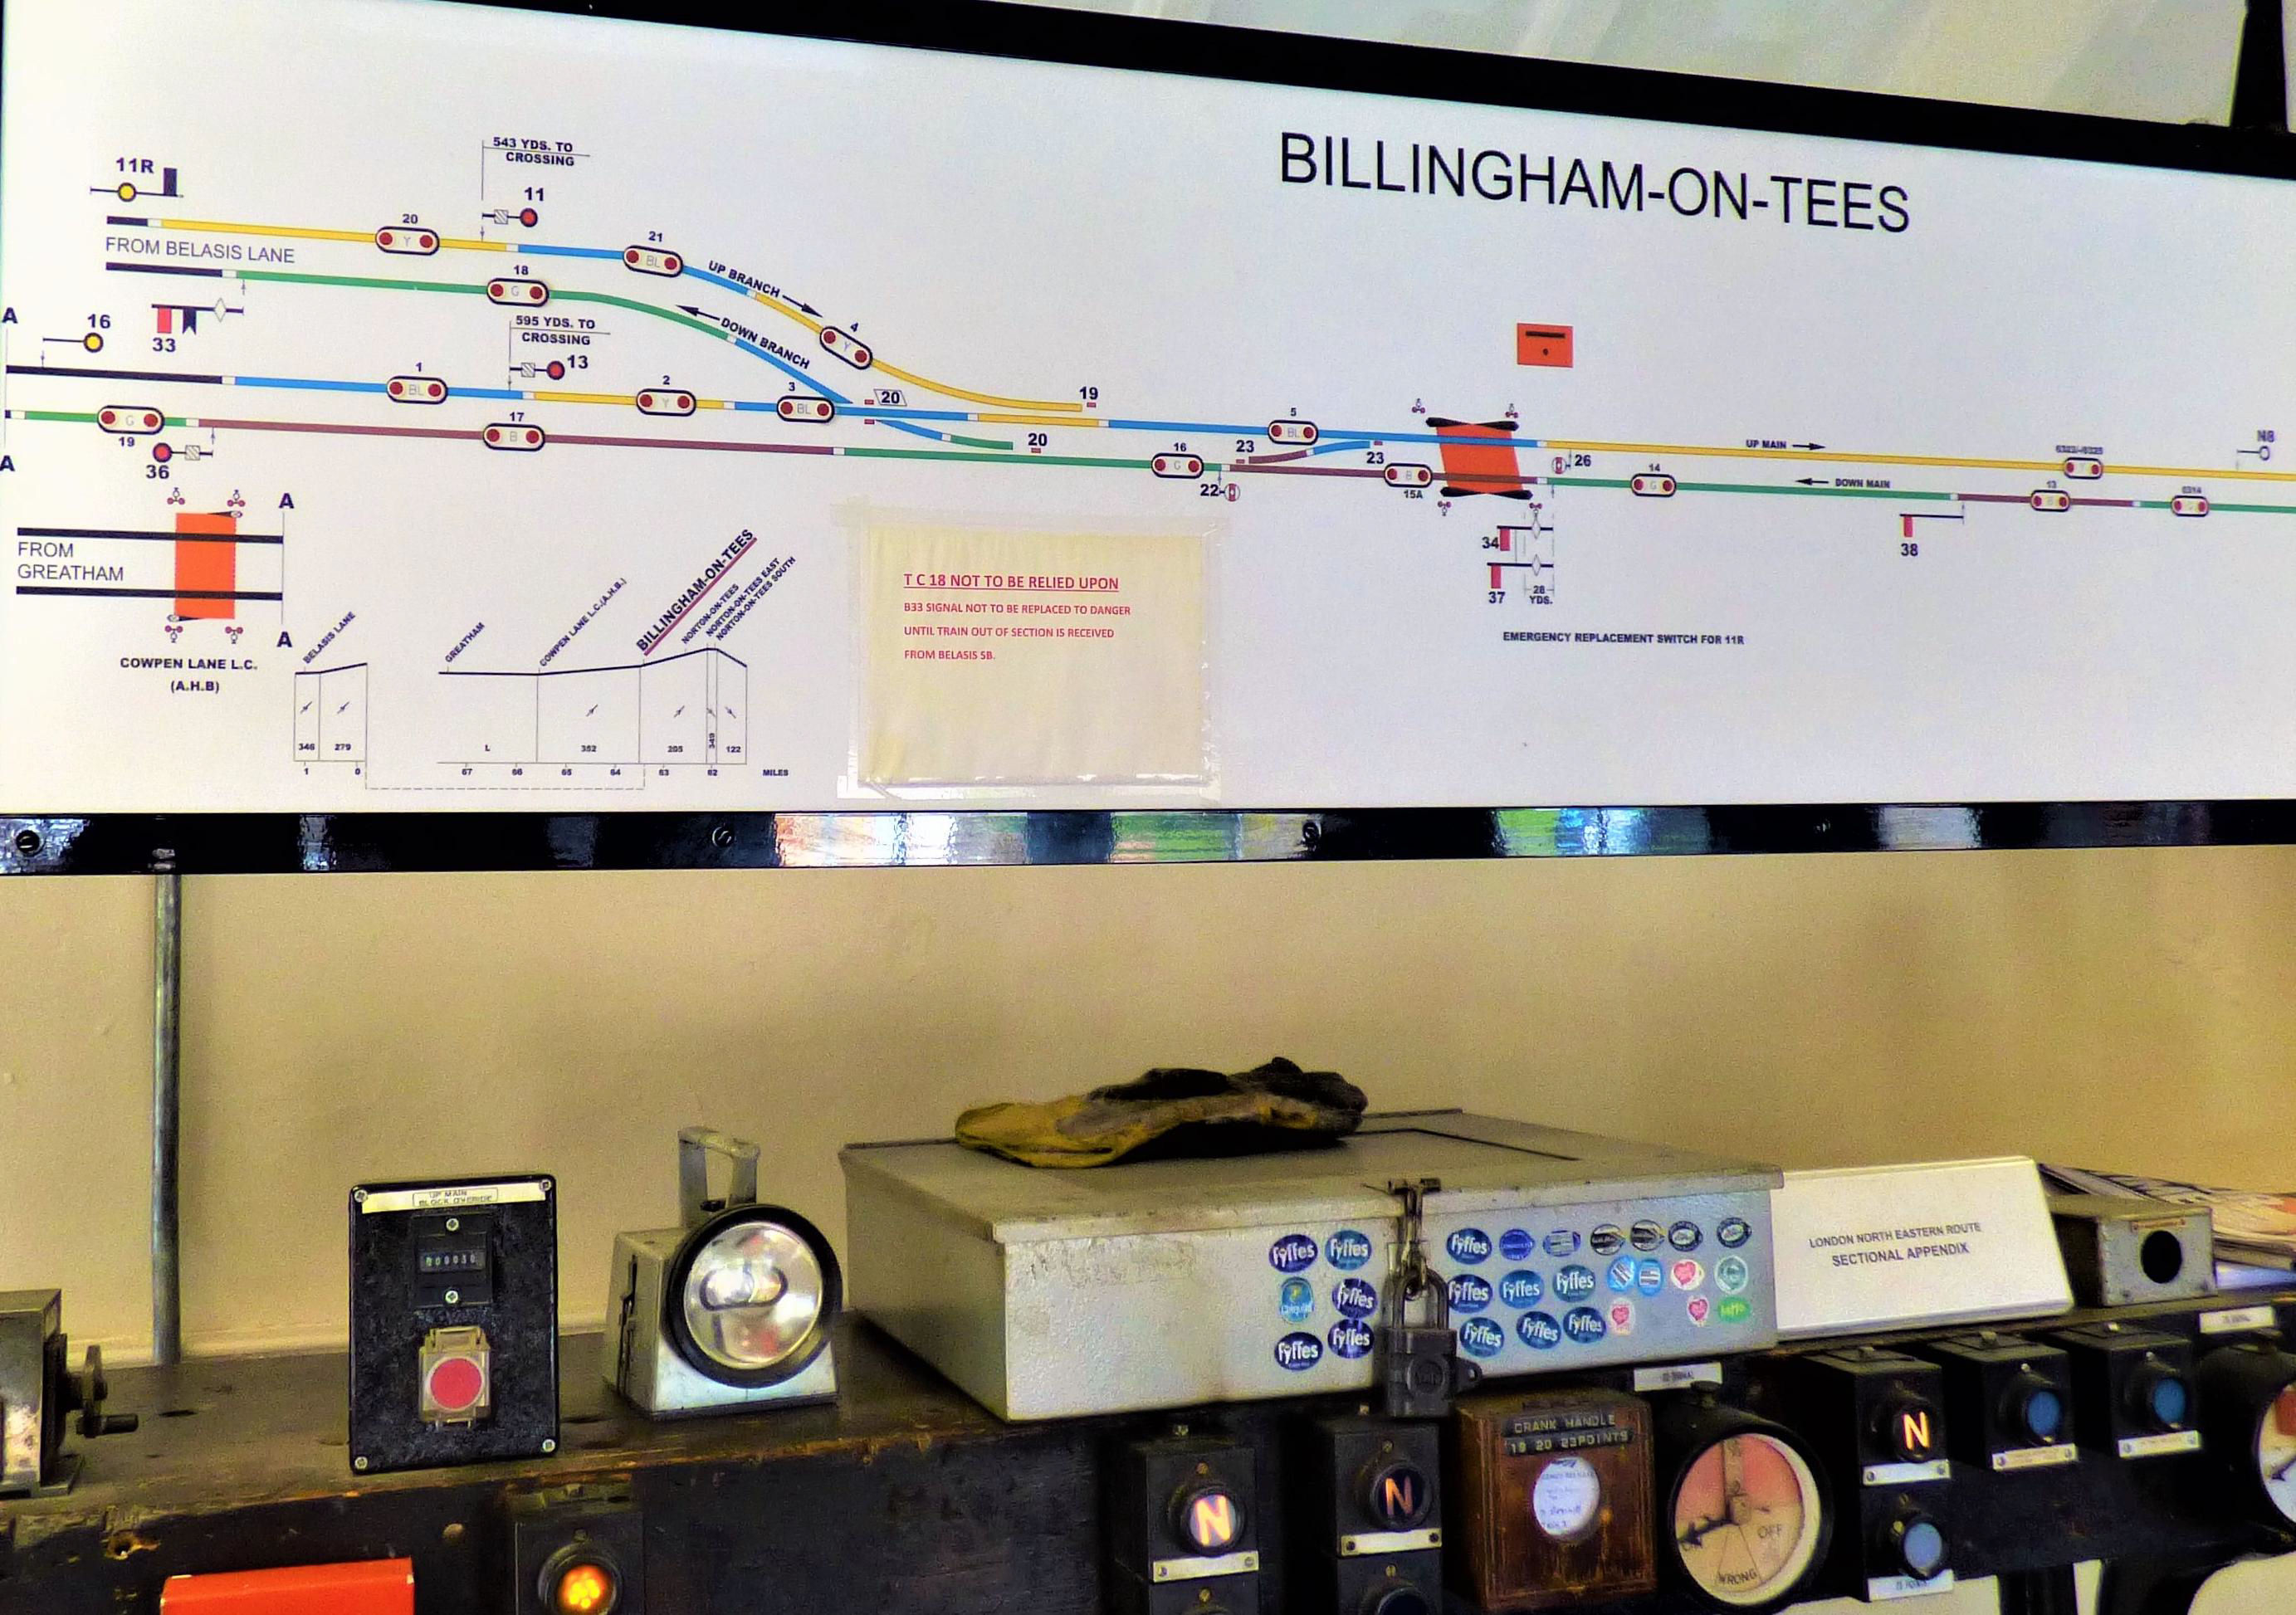
Billingham Signal Box diagram, Working here appeared to drive signallers bananas.
[© Nick Jones 2019]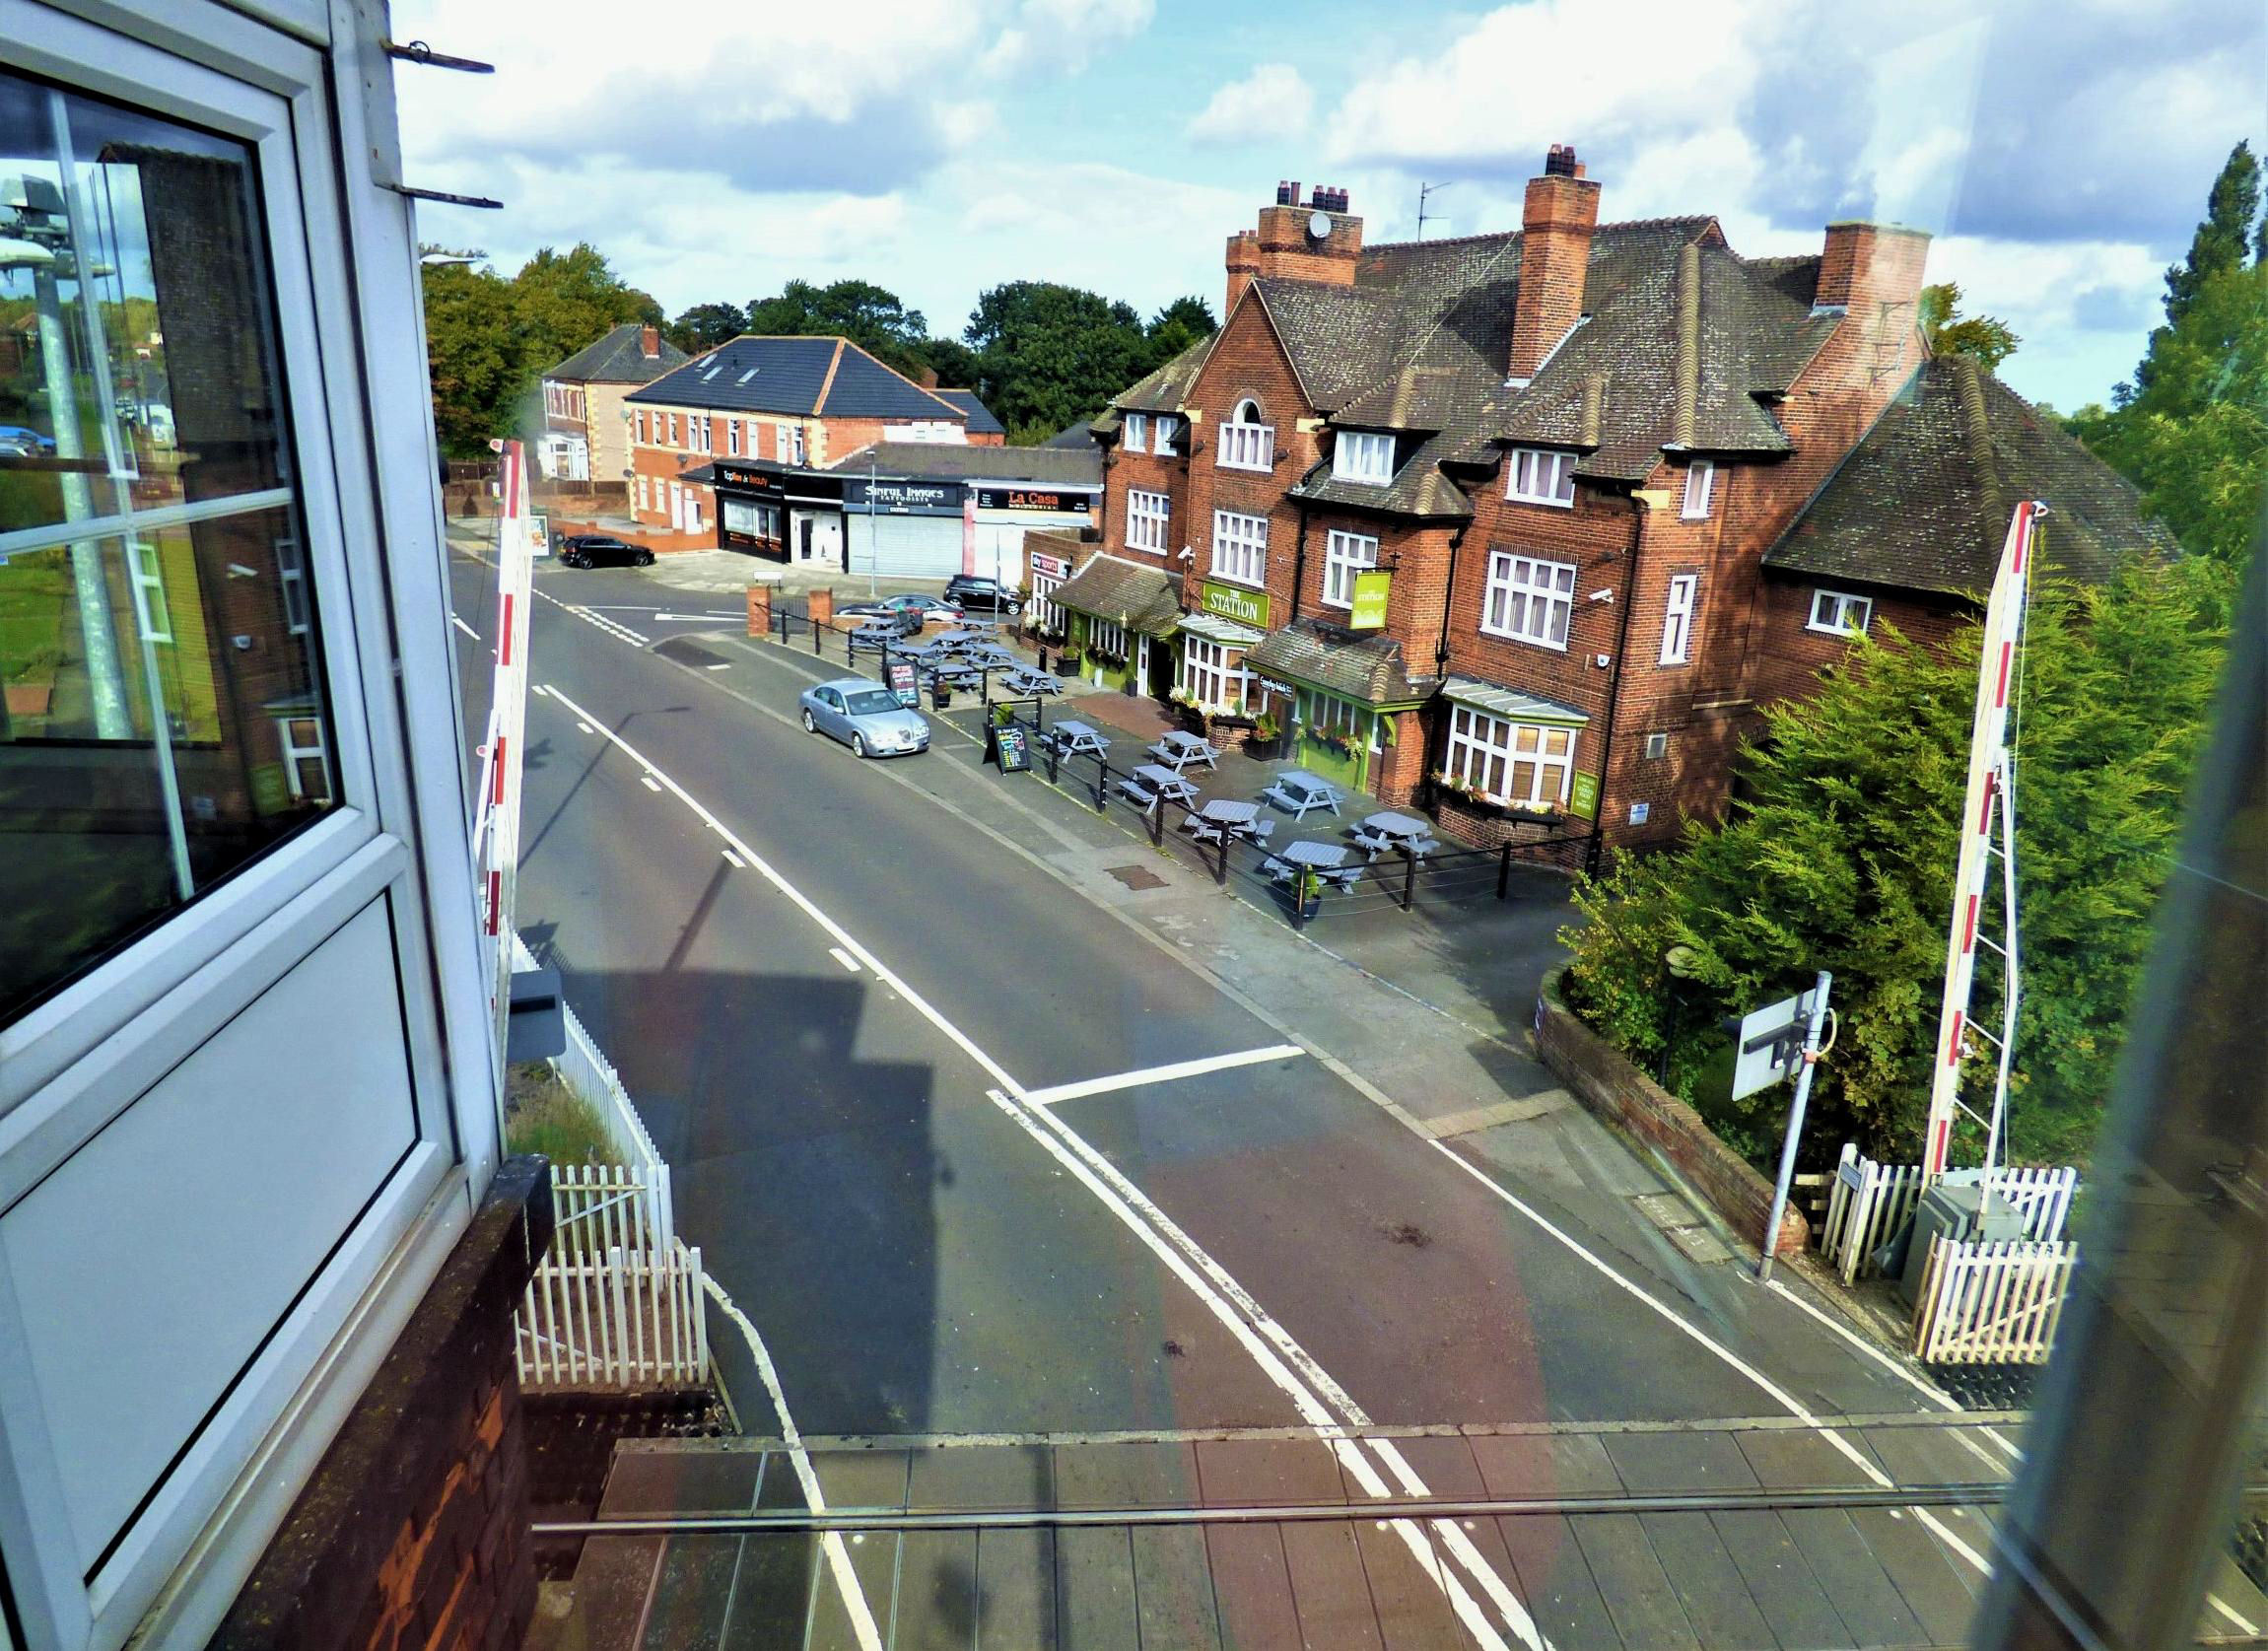
A view from Billingham Signal box of The Station.
[© Nick Jones 2019]
The group inside Billingham Signal Box. These are the last photos we have of former chairman, the late Angus McDougall.
[© Nick Jones 2019]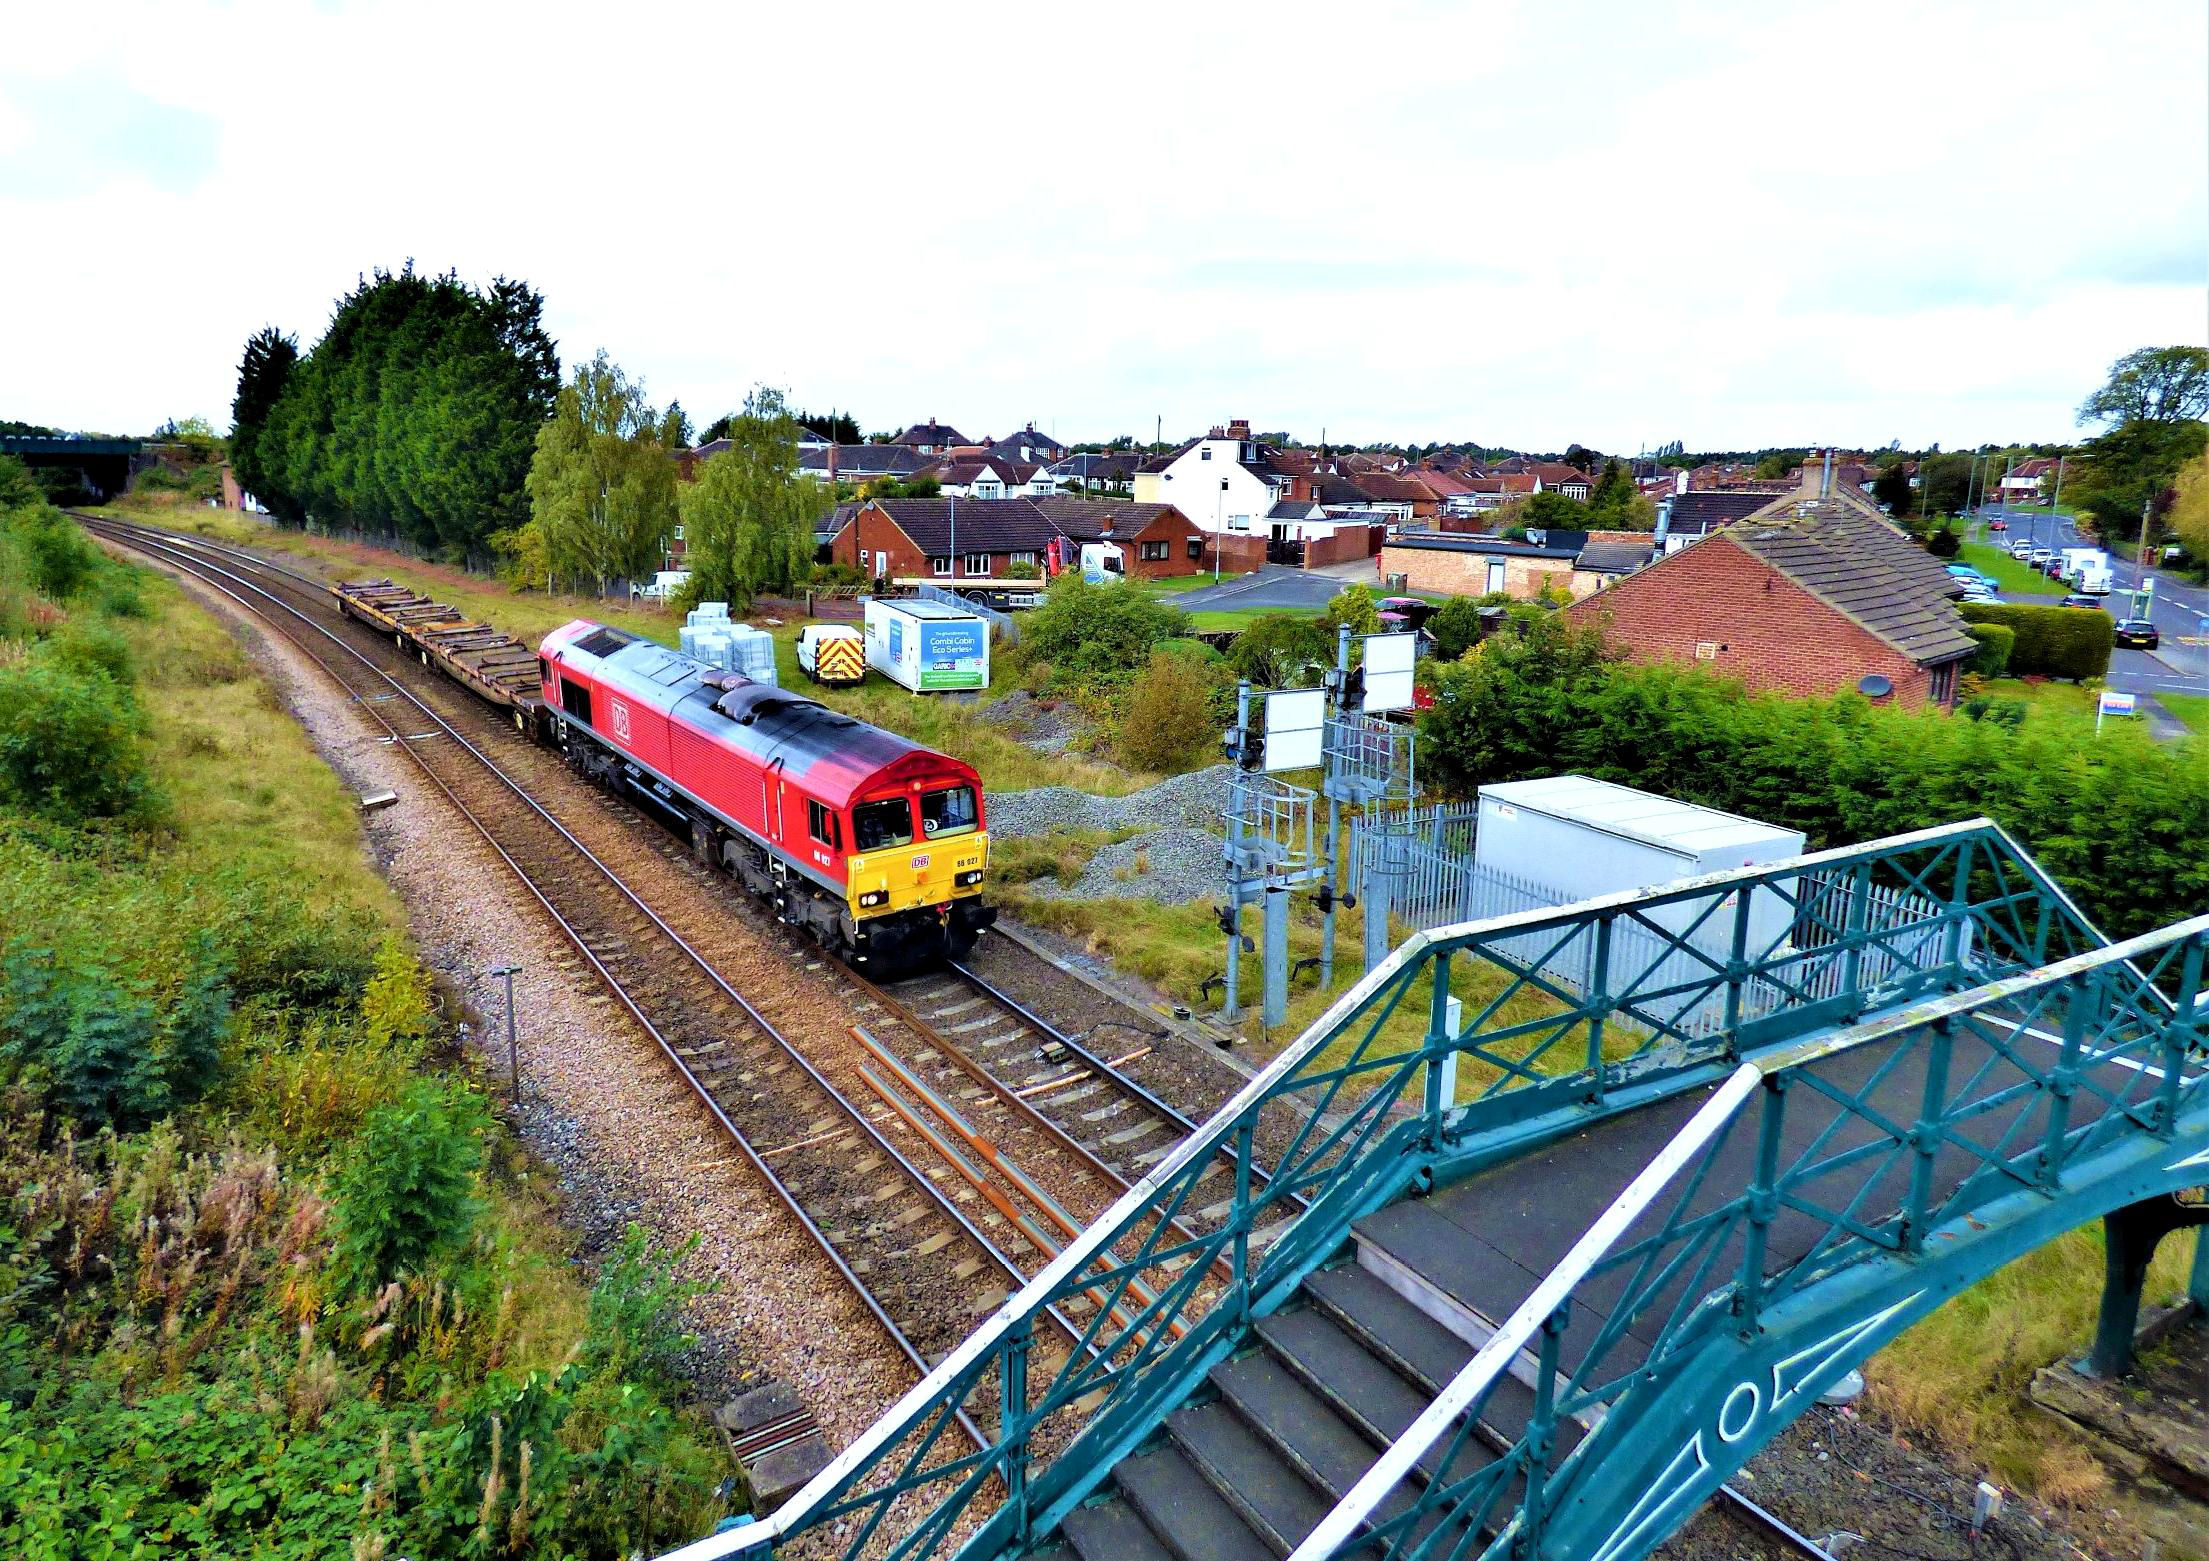
66027 with a short freight working passes Billingham Signal Box.
[© Nick Jones 2019]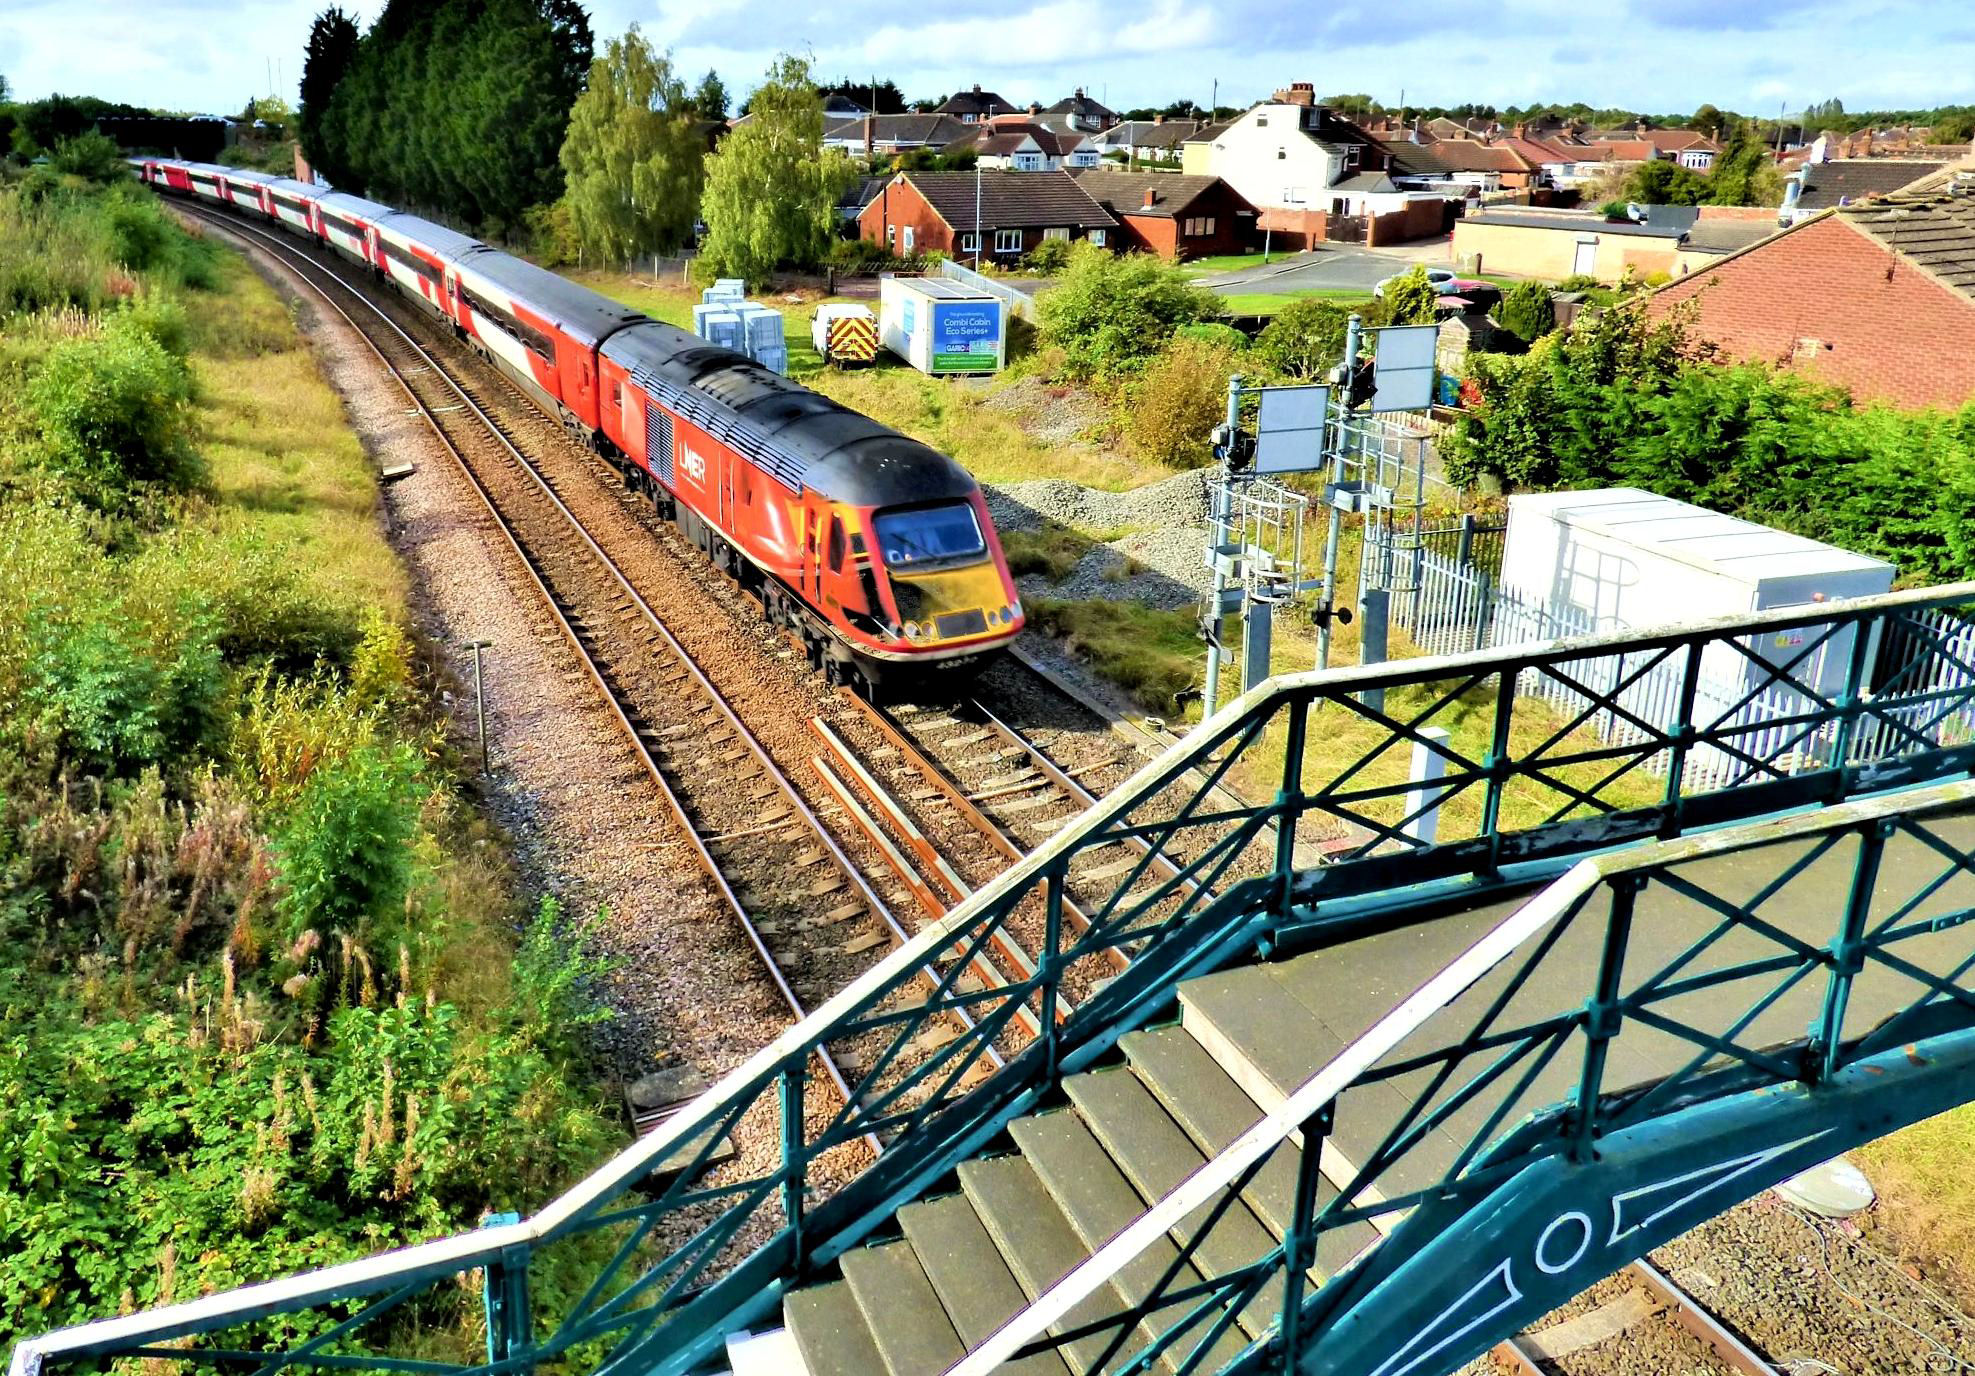
One of the last LNER HSTs on the Durham Coast line (working the 10.00 King's Cross to Aberdeen) passing Billingham Signal Box.
[© Nick Jones 2019]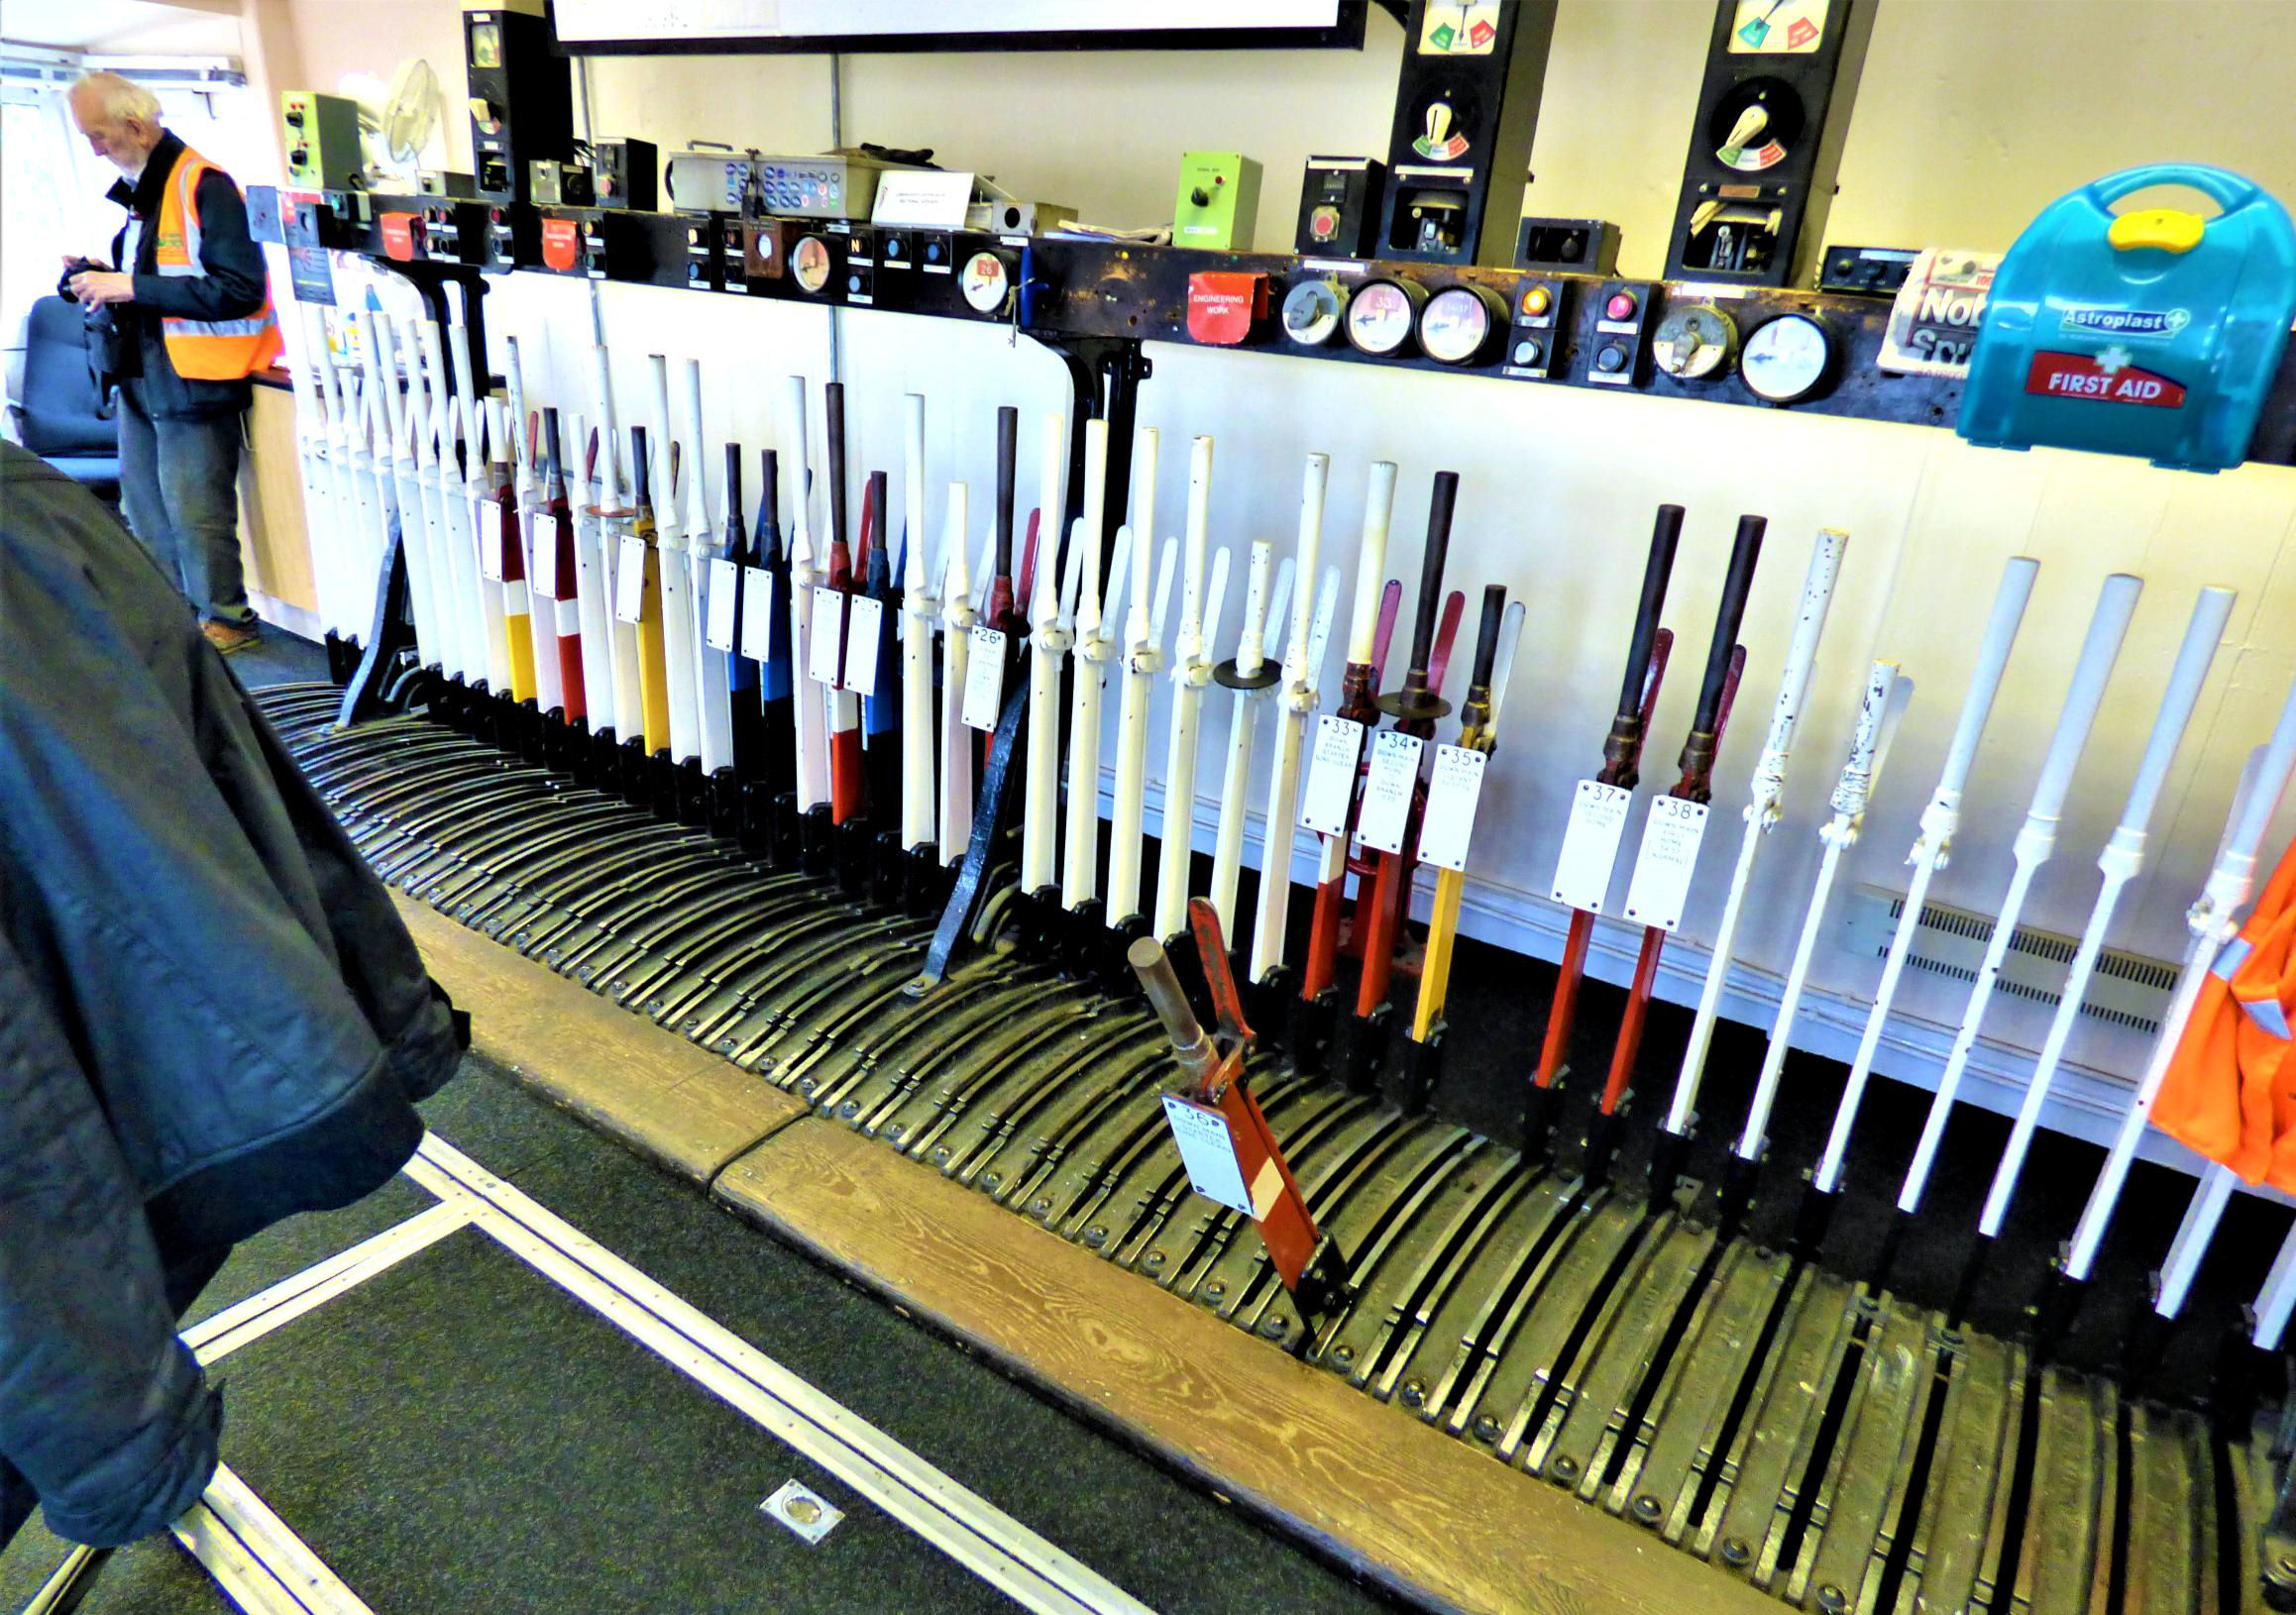
Billingham Signal Box lever frame.
[© Nick Jones 2019]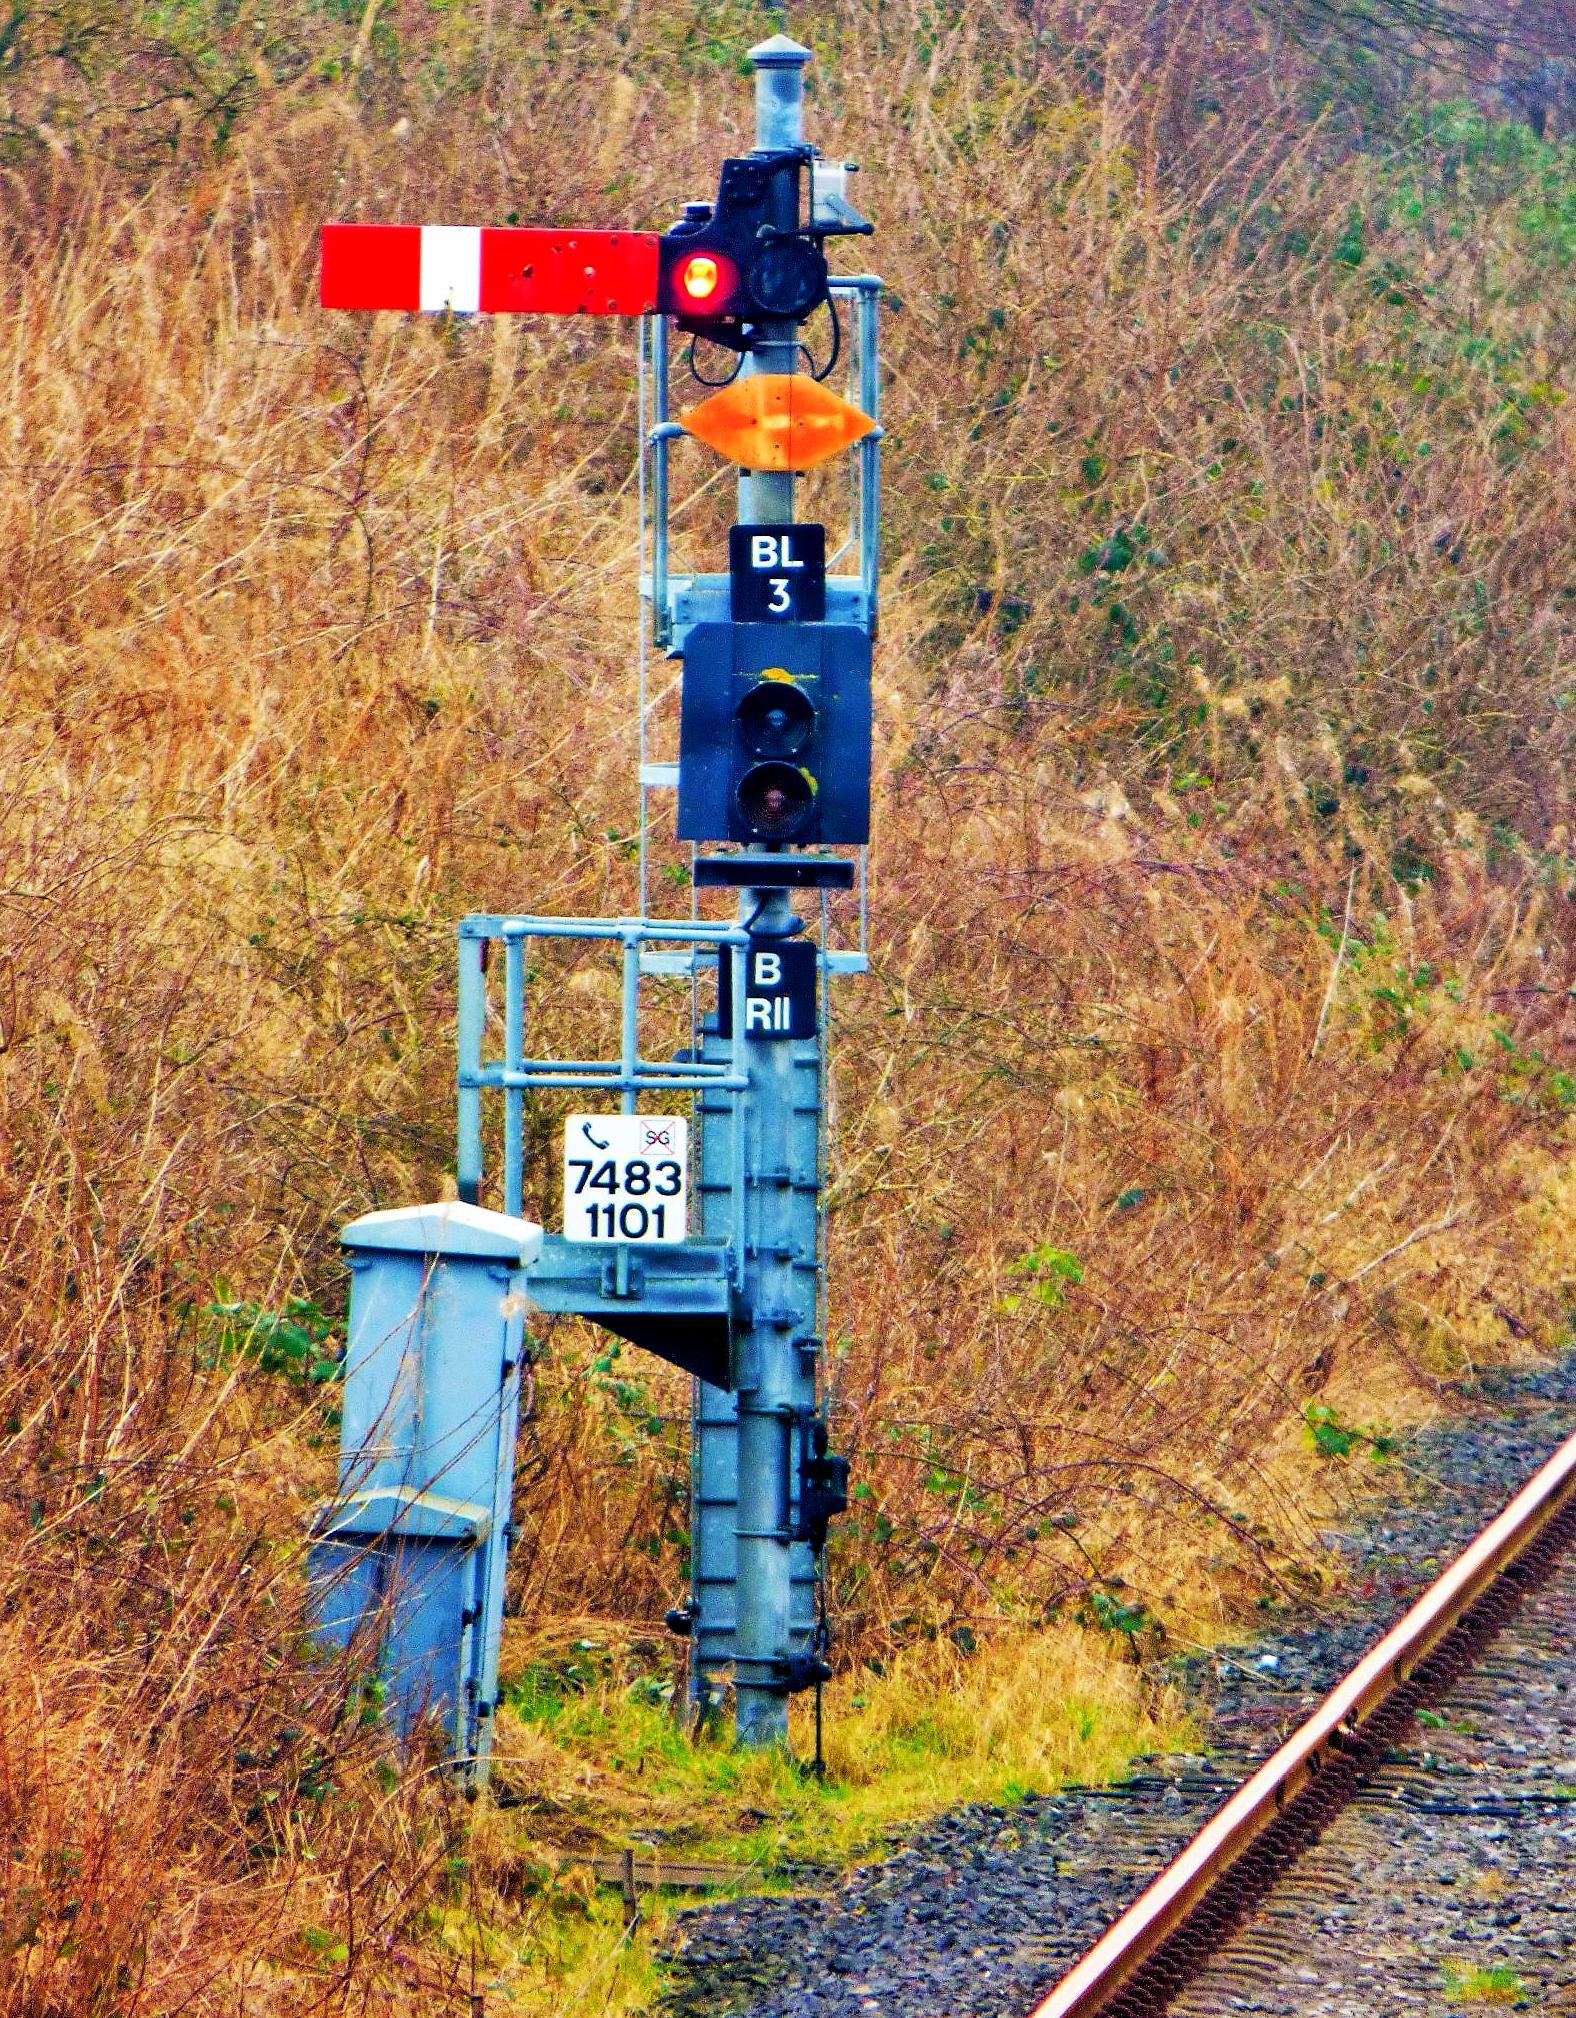
The unusual Billingham hybrid signal on 18 Feb 2017.
[© Nick Jones 2017]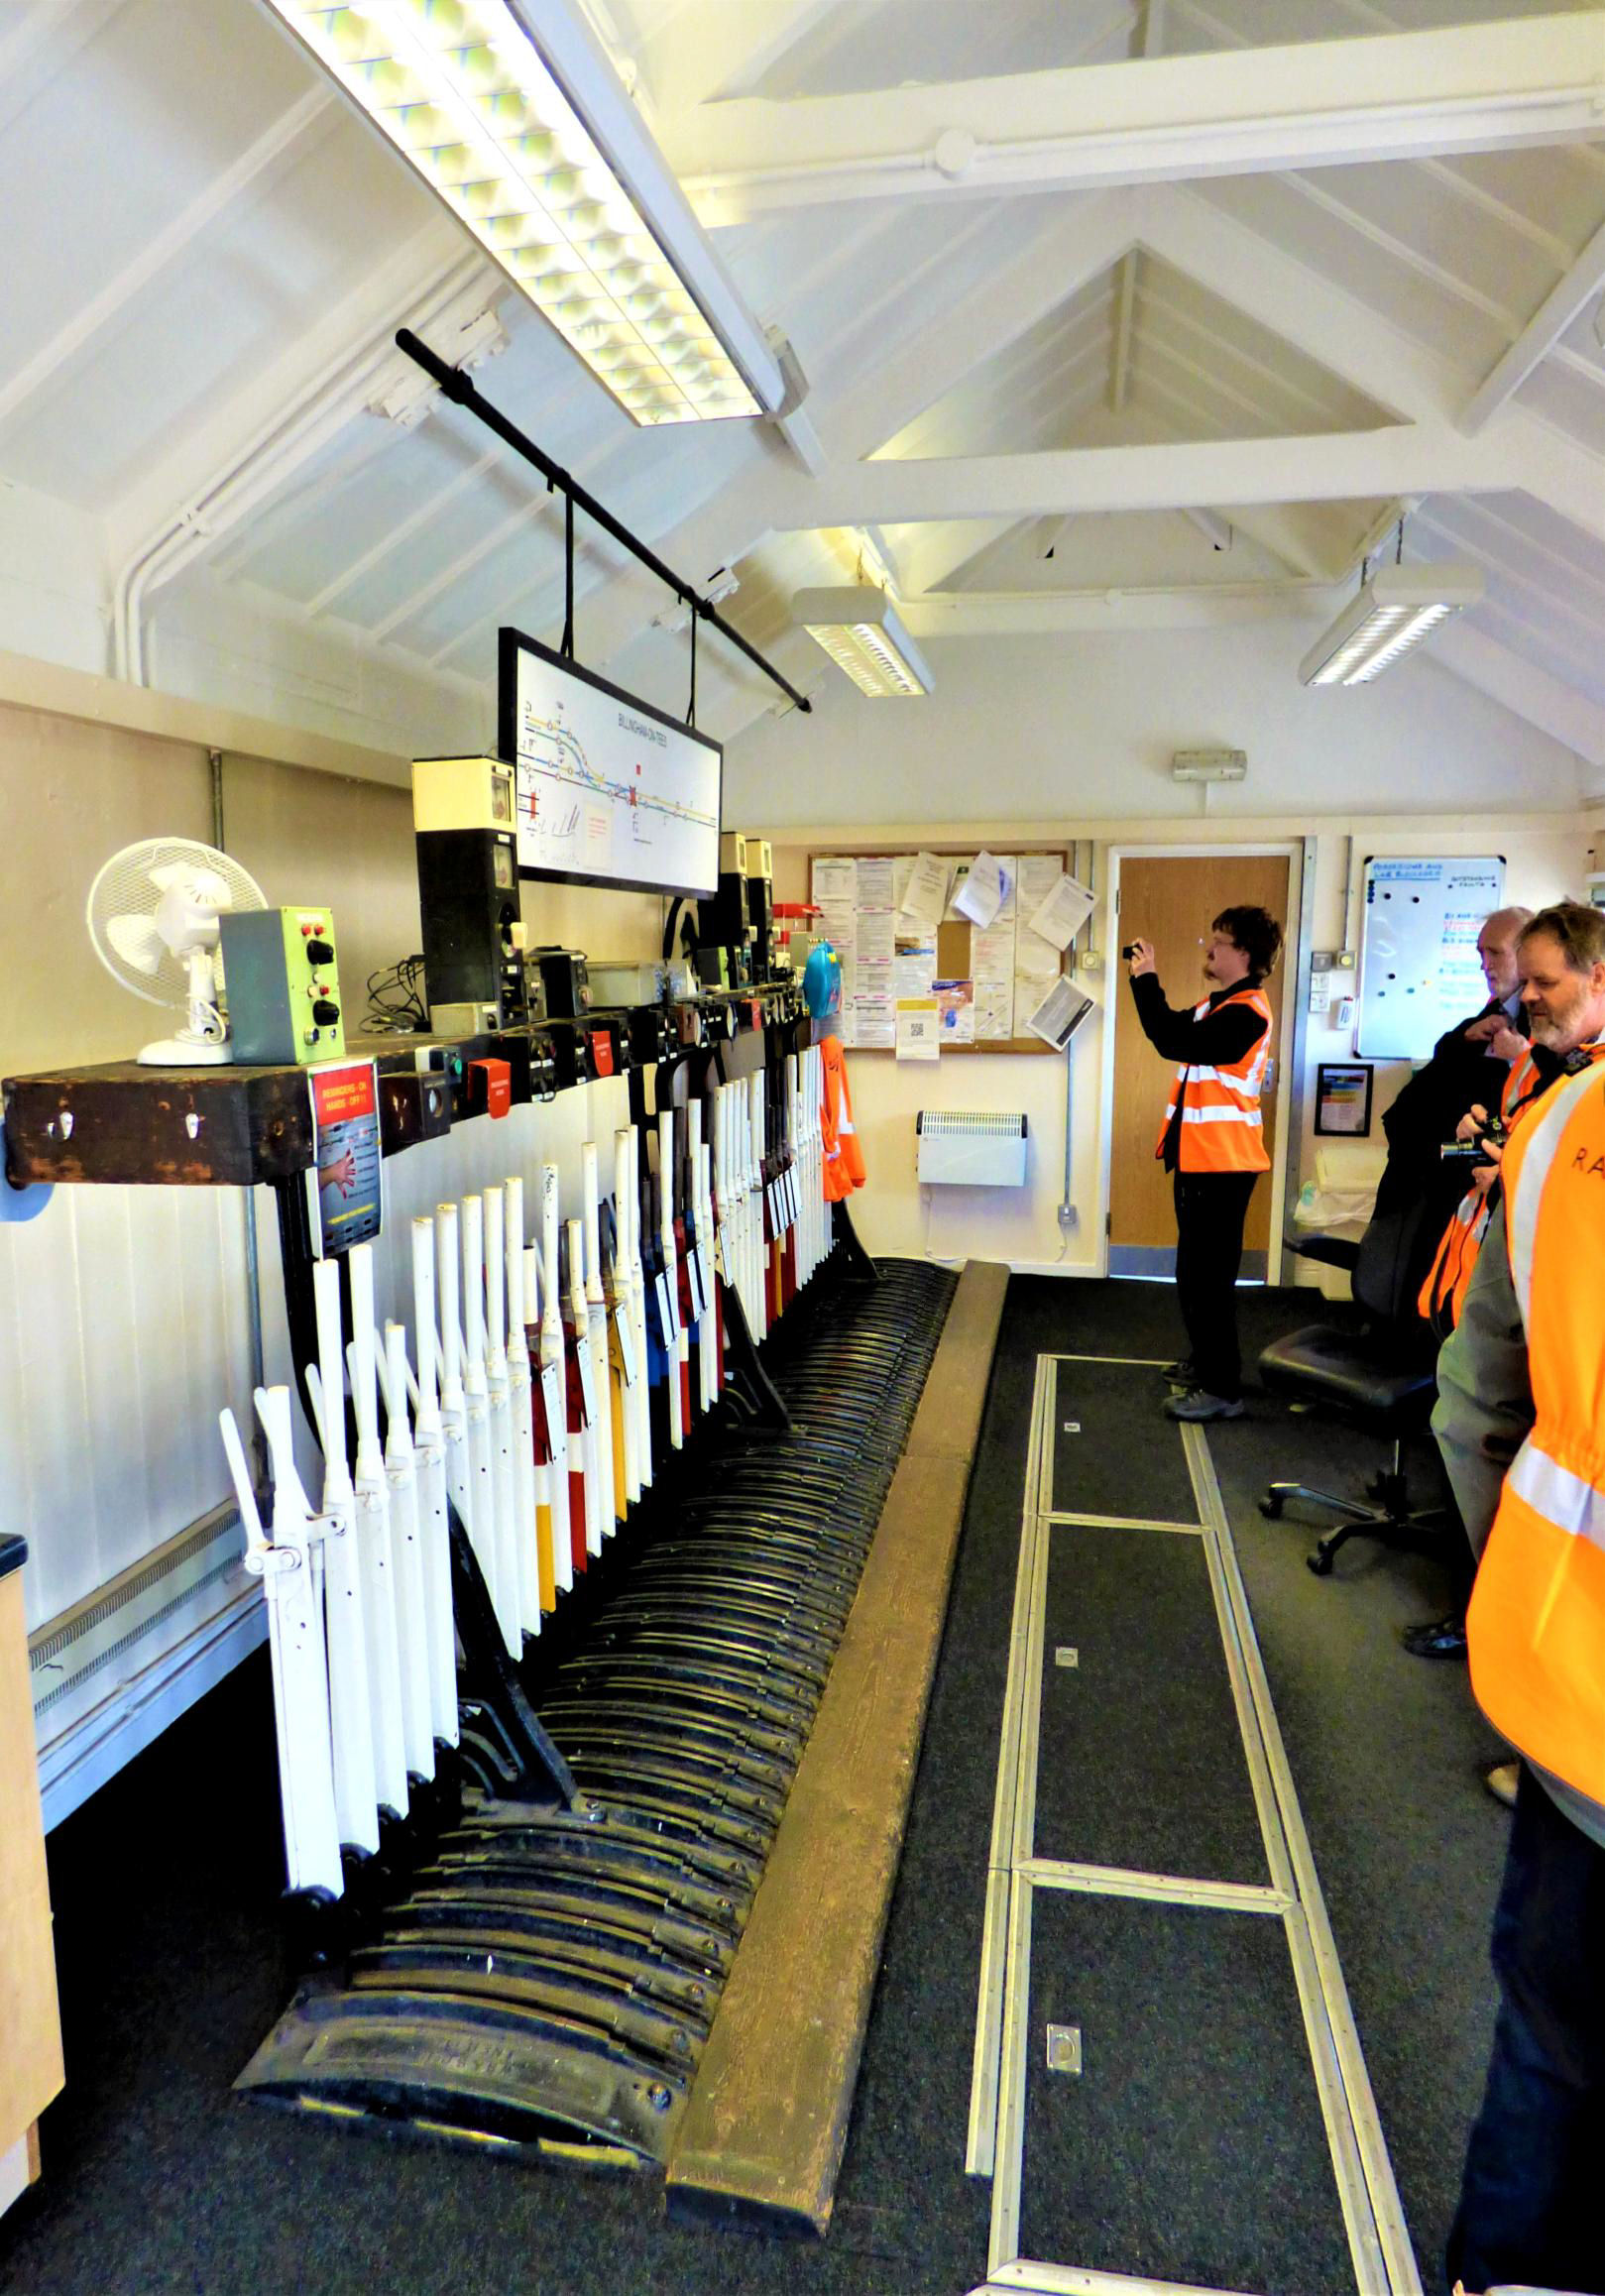
Billingham Signal Box lever frame, diagram and instruments.
[© Nick Jones 2019]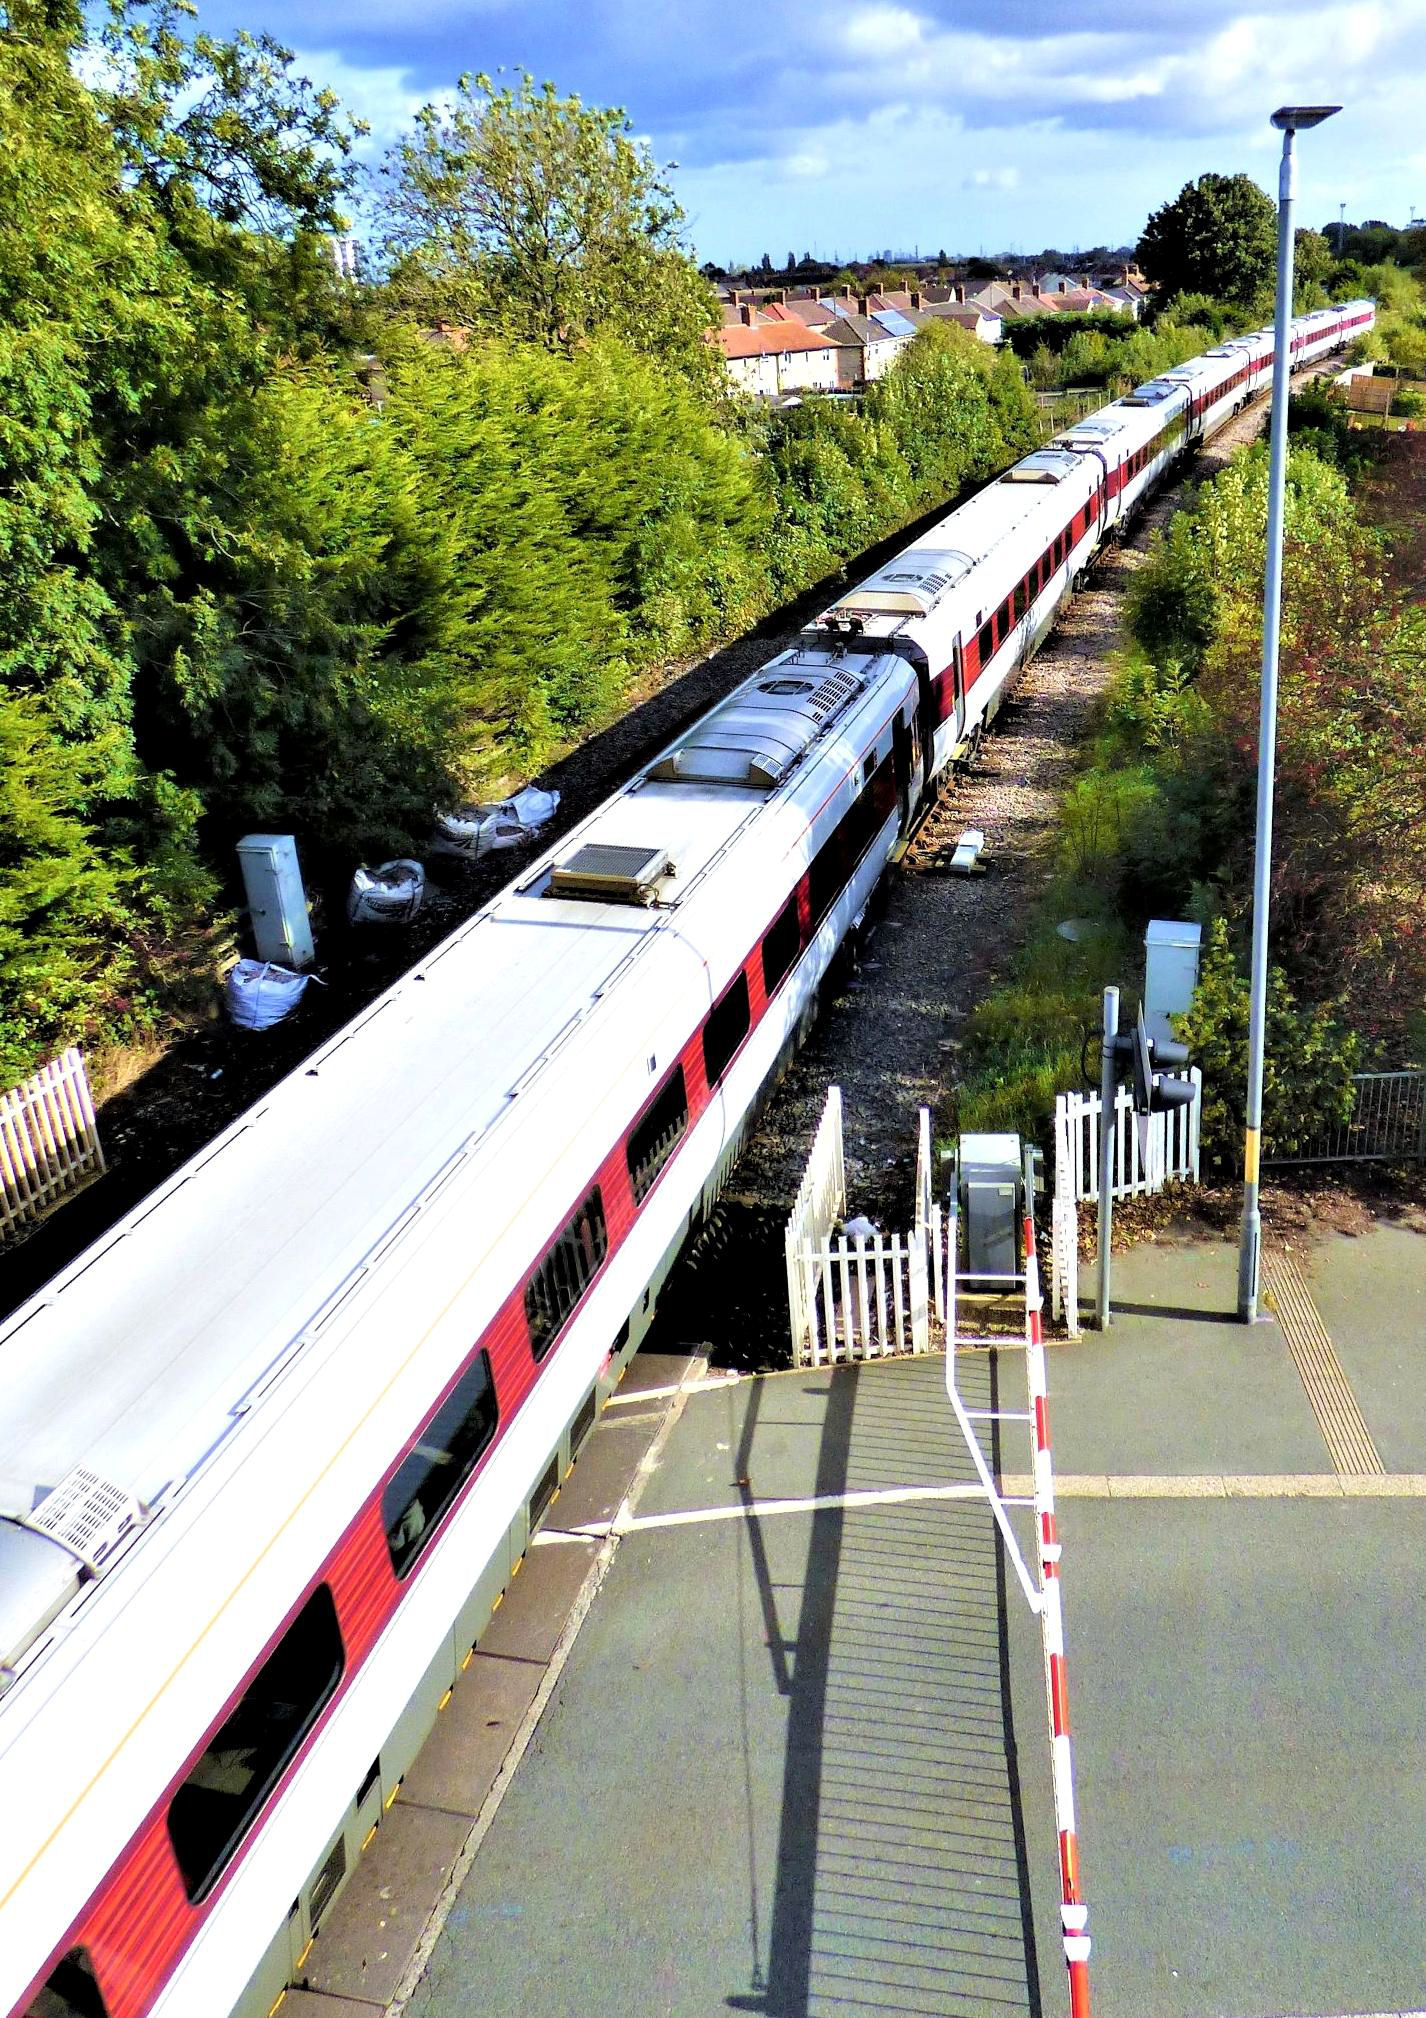
What was believed locally to have been the first LNER Azuma on the Durham Coast line (10.00 Edinburgh Waverley to King's Cross) passing Billingham Signal Box.
[© Nick Jones 2019] This box was another next to a closed station between Billingham and Seaton Carew. Greatham OP 10 Feb 1841 (North Eastern Railway) it CP 25 Nov 1991 - last train Sat 23rd - by which time there was one train north and three south SuX. The platforms shown on TRACKmaps are intact on the other side of the crossing.
This 1889 box was a more conventional height. It had a 21 switch IFS Panel, with relay locking, dating from 2004. Greatham worked Absolute Block to Billingham with block controls built into the panel, and Track Circuit Block to Ryhope Grange with a Train Describer. As well as the main line, it controlled the 1m 51ch Hartlepool Nuclear Power Station (Seaton-on-Tees) branch using One Train Working without a staff and Hartlepool Pipe Mill (Liberty, Hartlepool South Works) worked as a siding.
Loops are provided at Cliff House, although the (1m 51ch) lengthy Up Loop was OOU - but is due to be restored to use following 2021 resignalling (but isn't yet). A note on the panel warned signallers that the track circuit on the very little used 43ch Down Goods Loop was not reliable due to rusty rails. The box controlled the adjacent Marsh House Lane crossing with four barriers.
Incredibly our visit coincided with the weekly Seaton-on-Tees flask train. We observed its progress on the panel as it was signalled from the branch to the Down Sunderland before crossing back to the Up Sunderland and passing the box a few minutes later. There is a daily path (SSuX) from and back to Carlisle Kingmoor Yard but it normally runs on Wednesdays (booked at Seaton from 11.05 to 13.40).
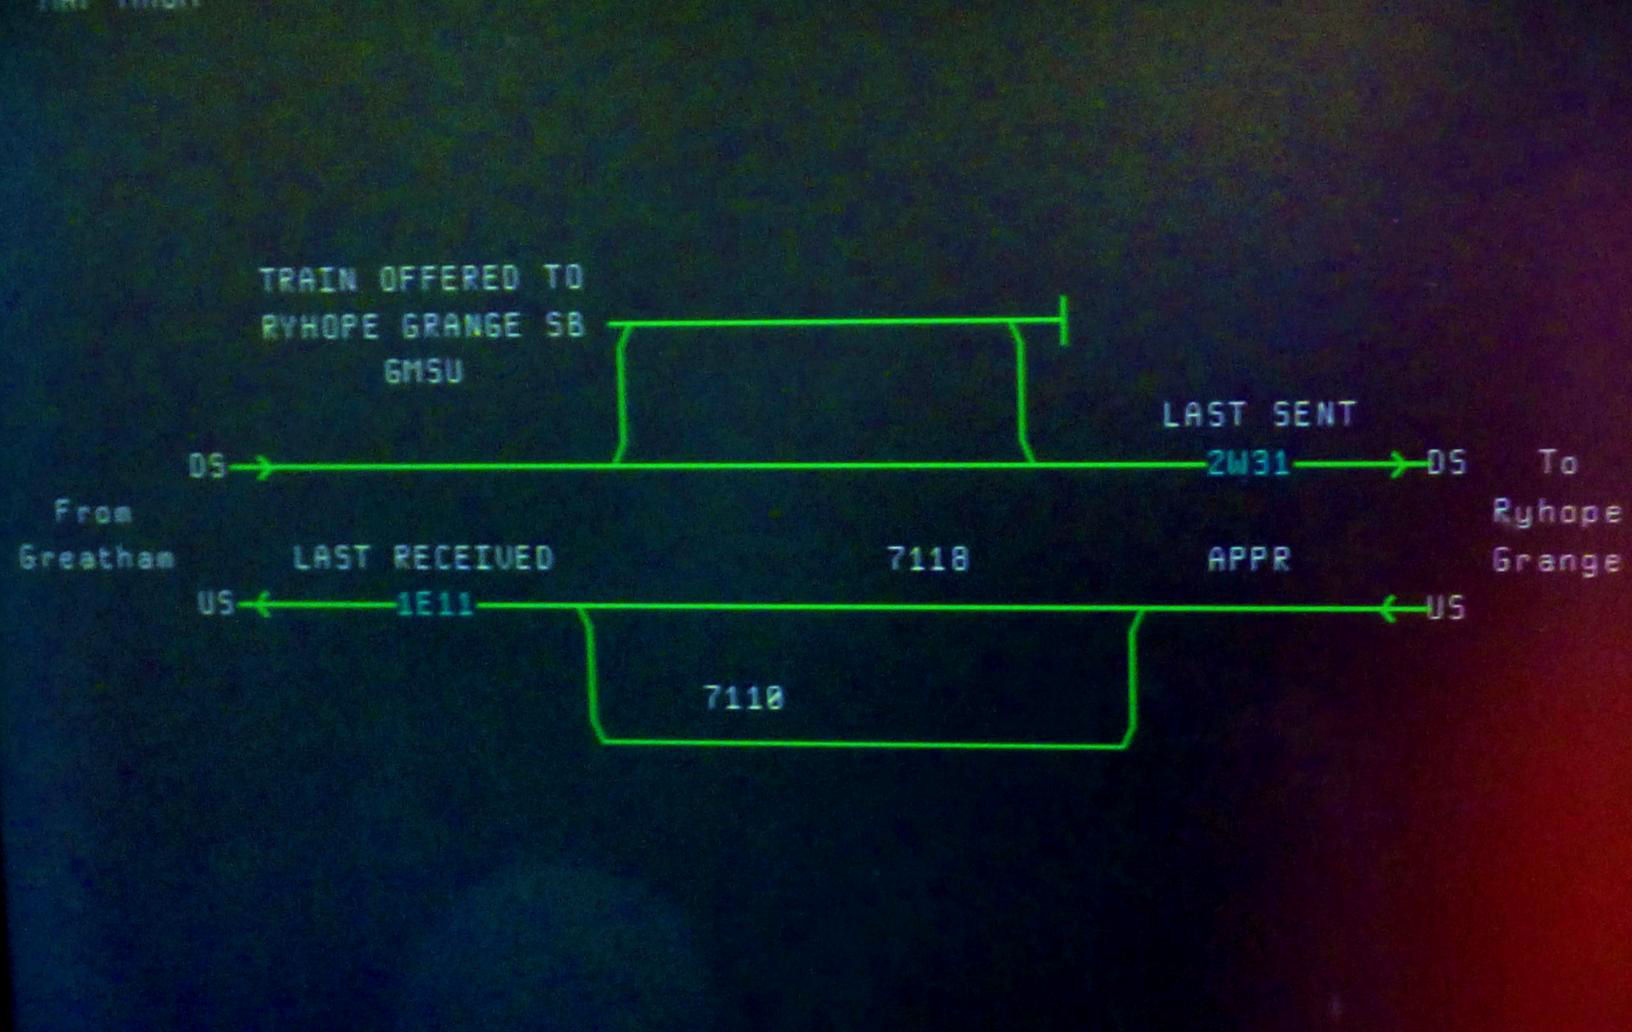
The train describer to Ryhope Grange.
[© Nick Jones 2019]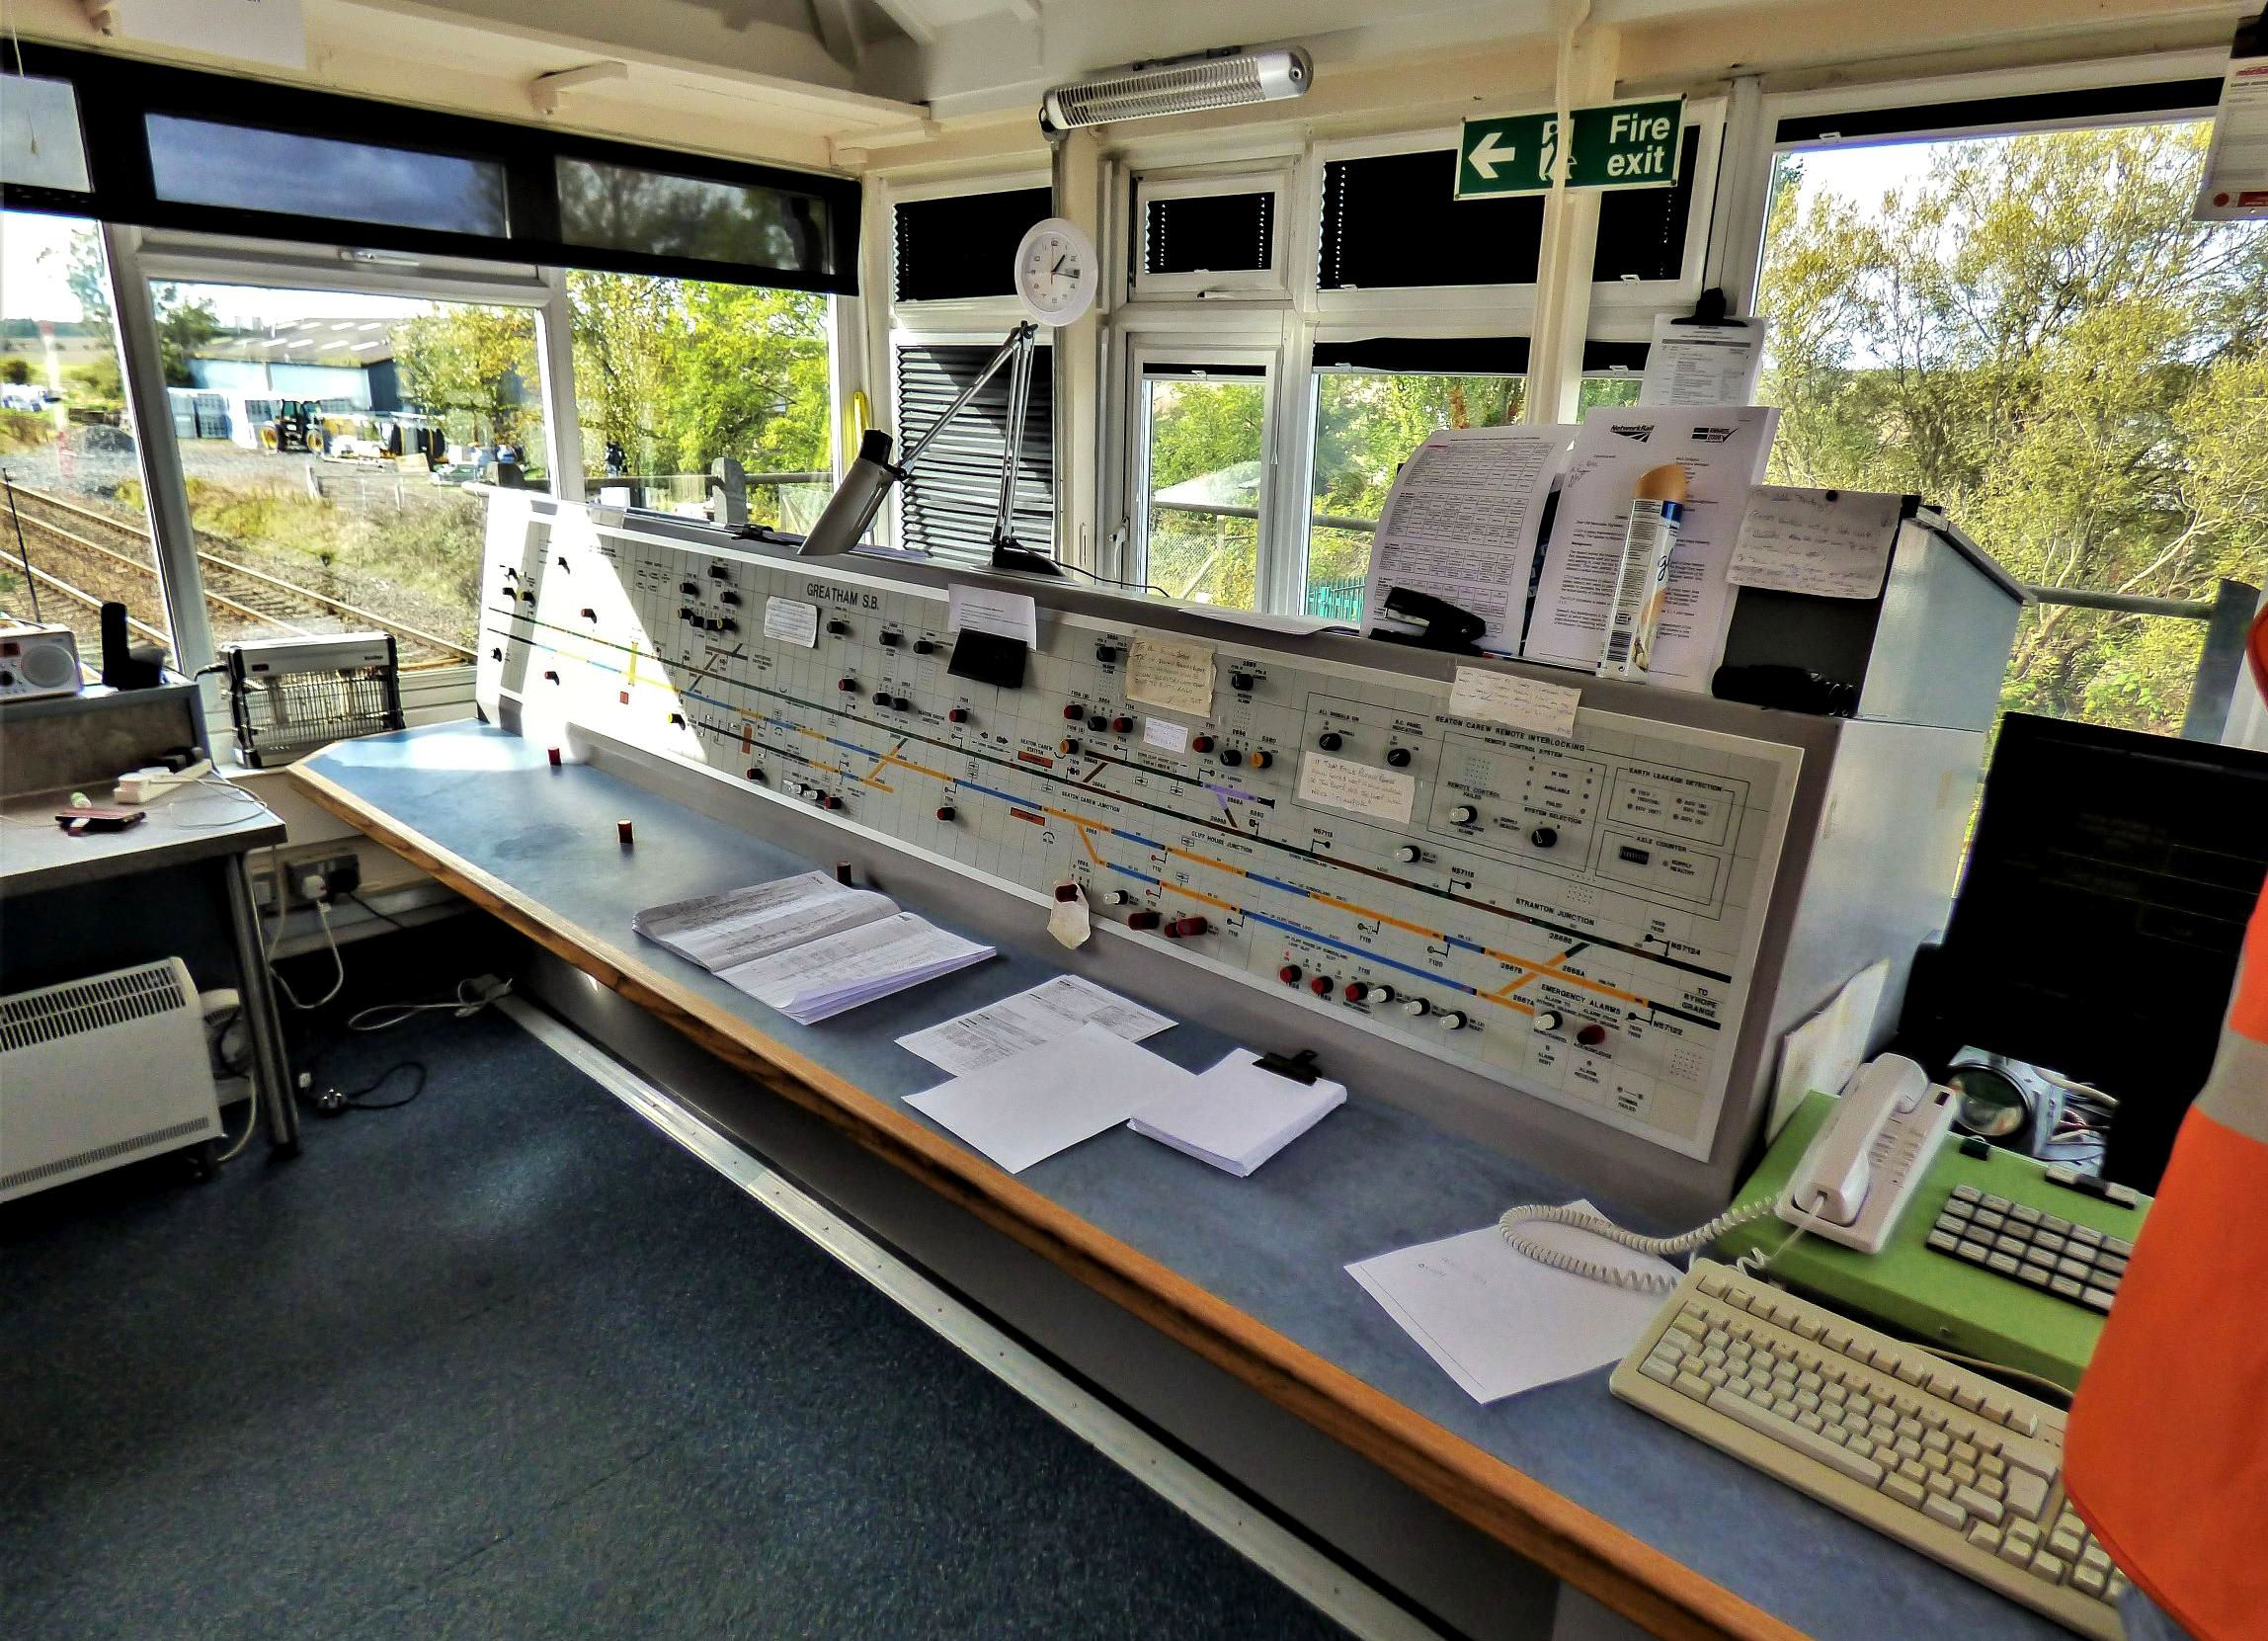
Greatham Signal Box panel.
[© Nick Jones 2019]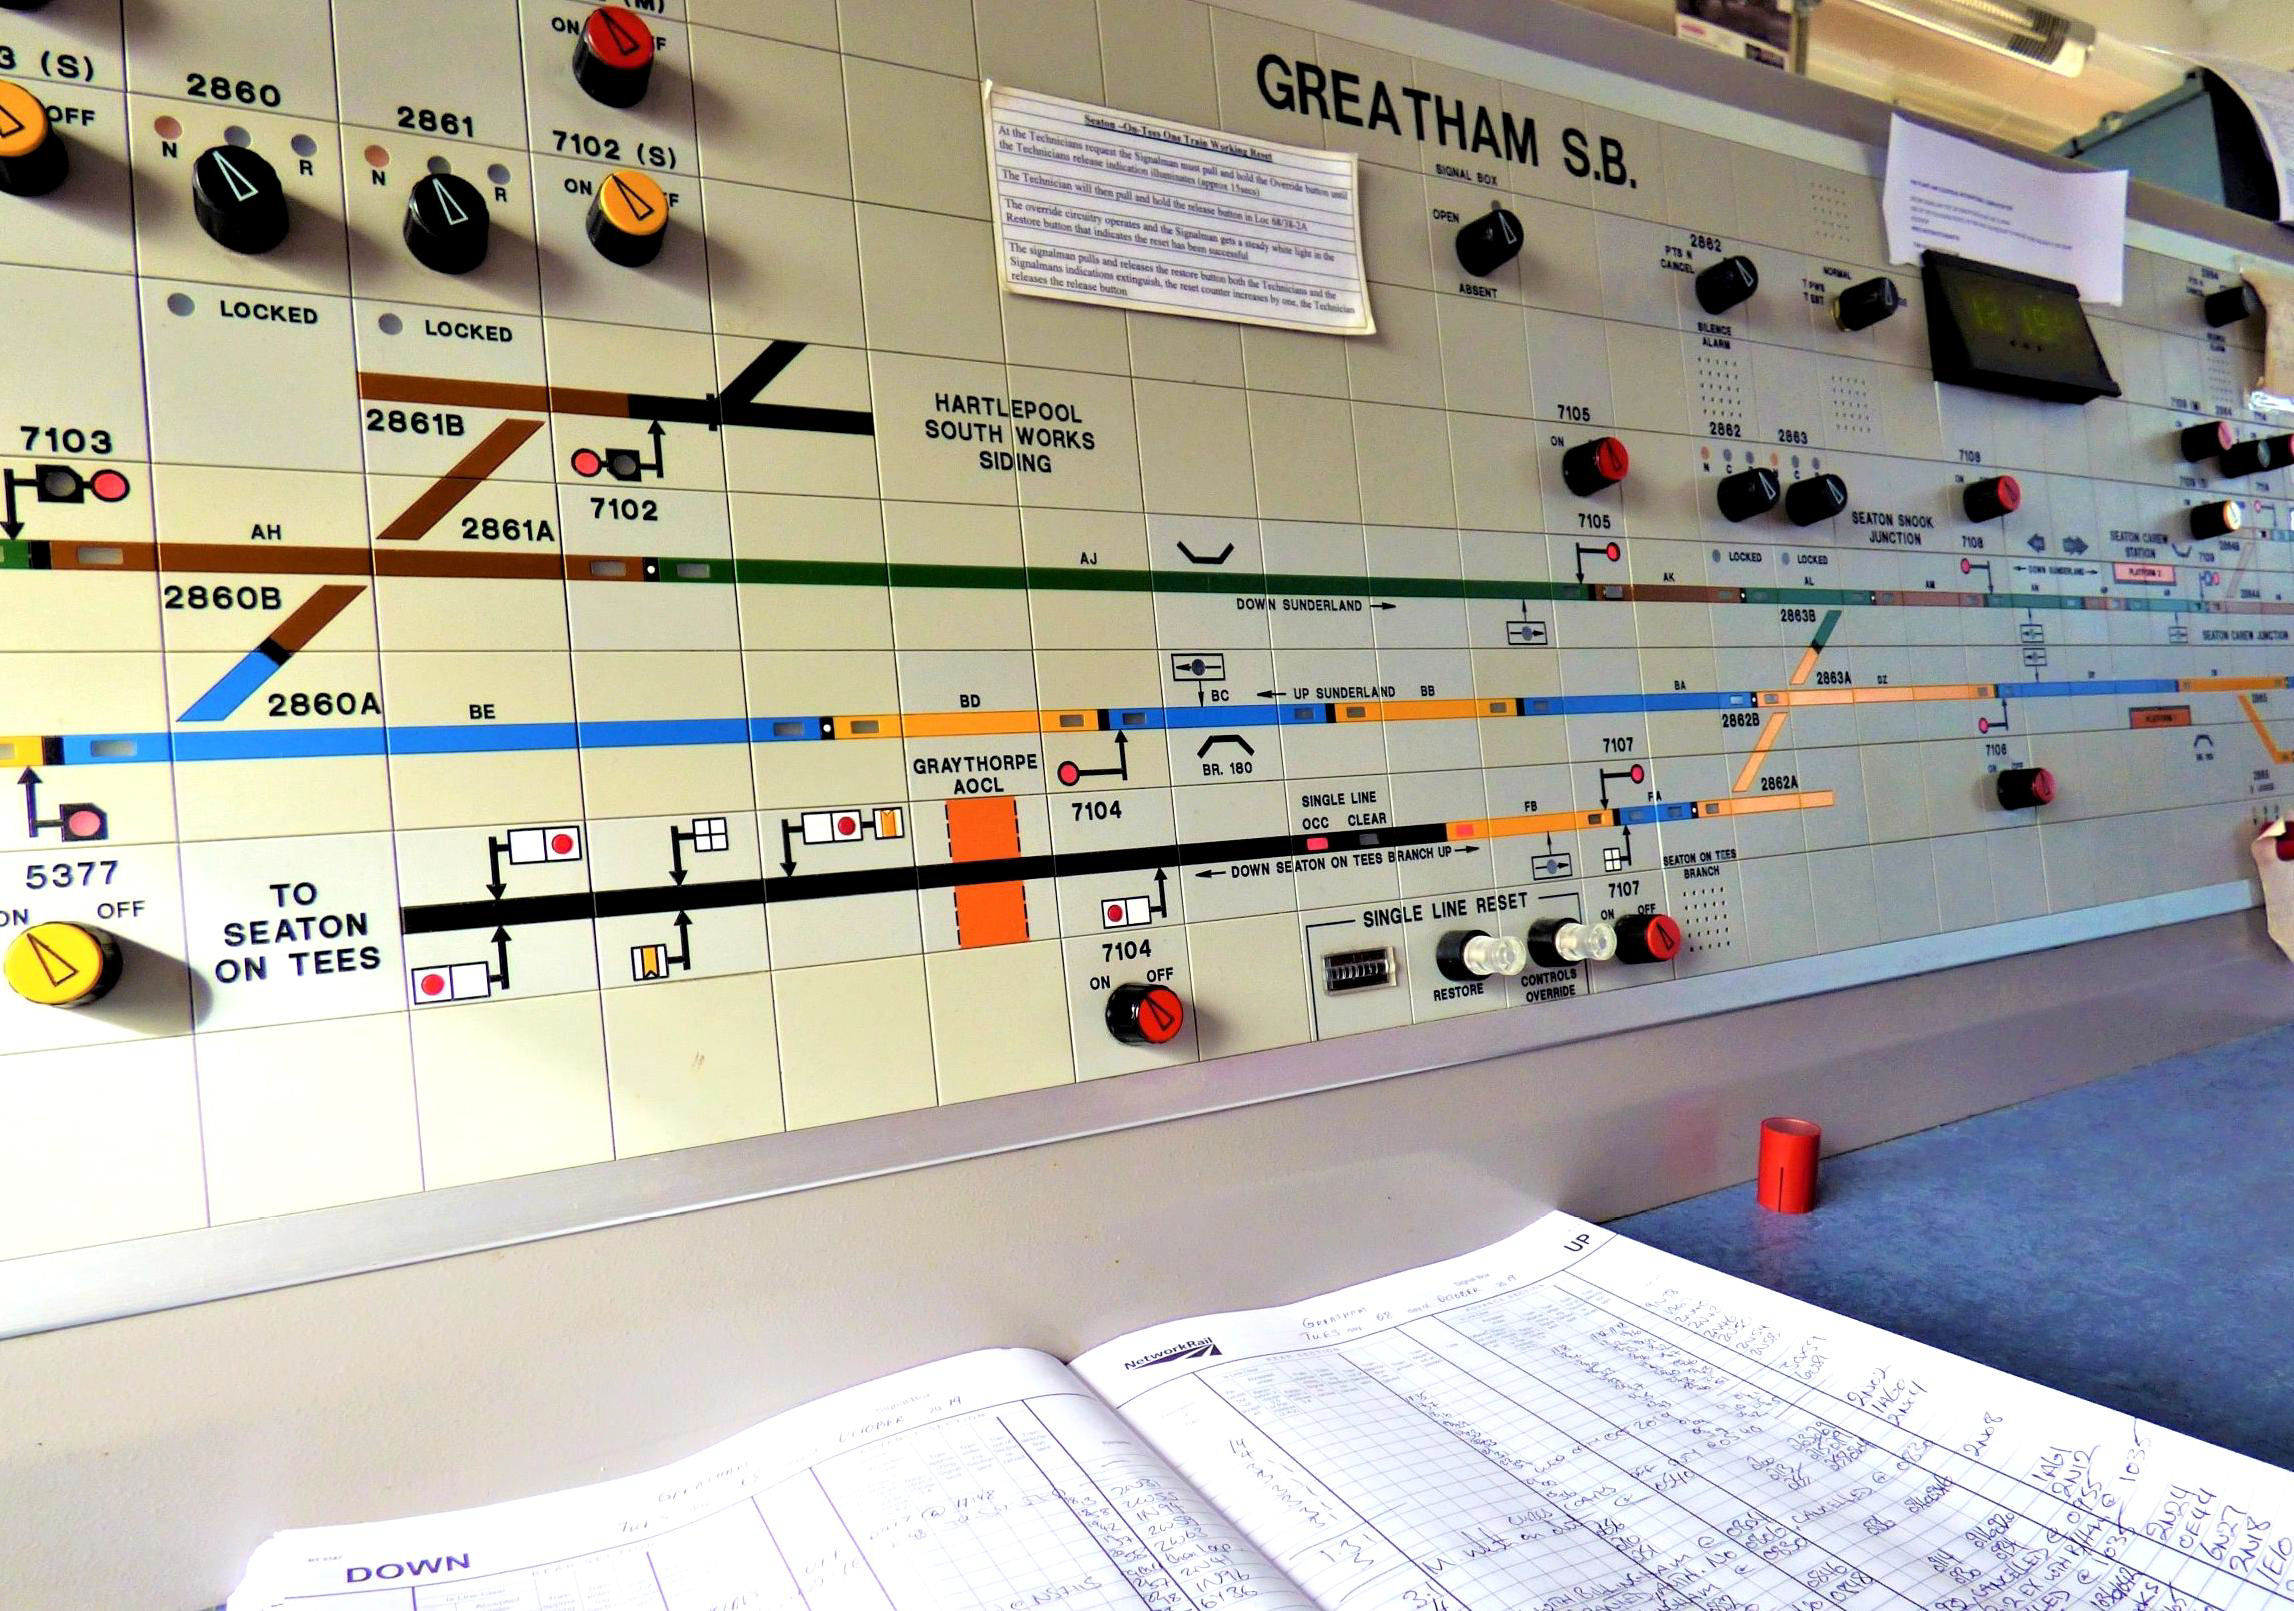
Greatham Signal Box panel.
[© Nick Jones 2019]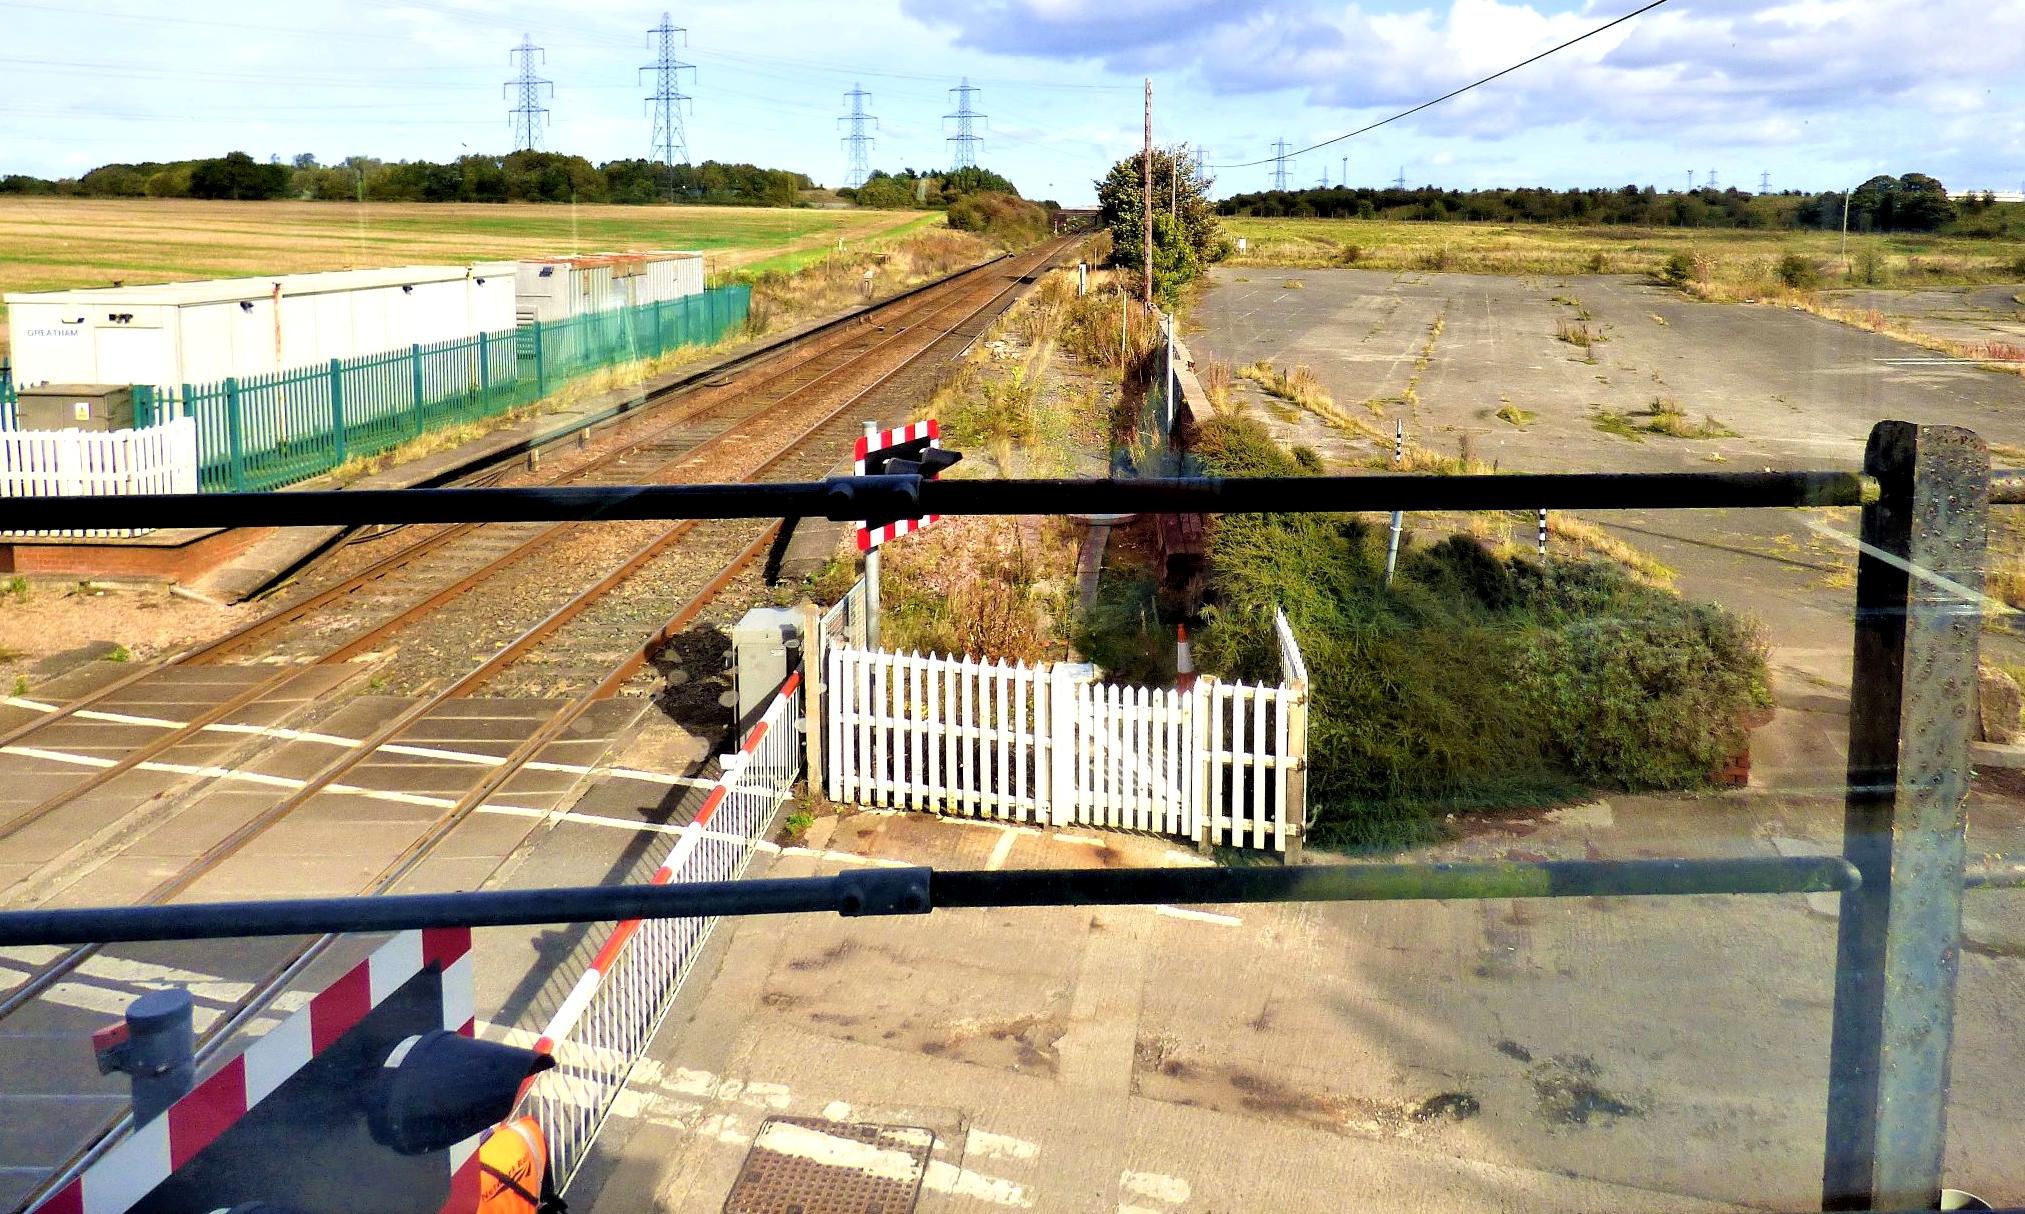
Looking towards Hartlepool from the box, Greatham station here CP 25 Nov 1991 when there were three trains south and one north SuX.
[© Nick Jones 2019]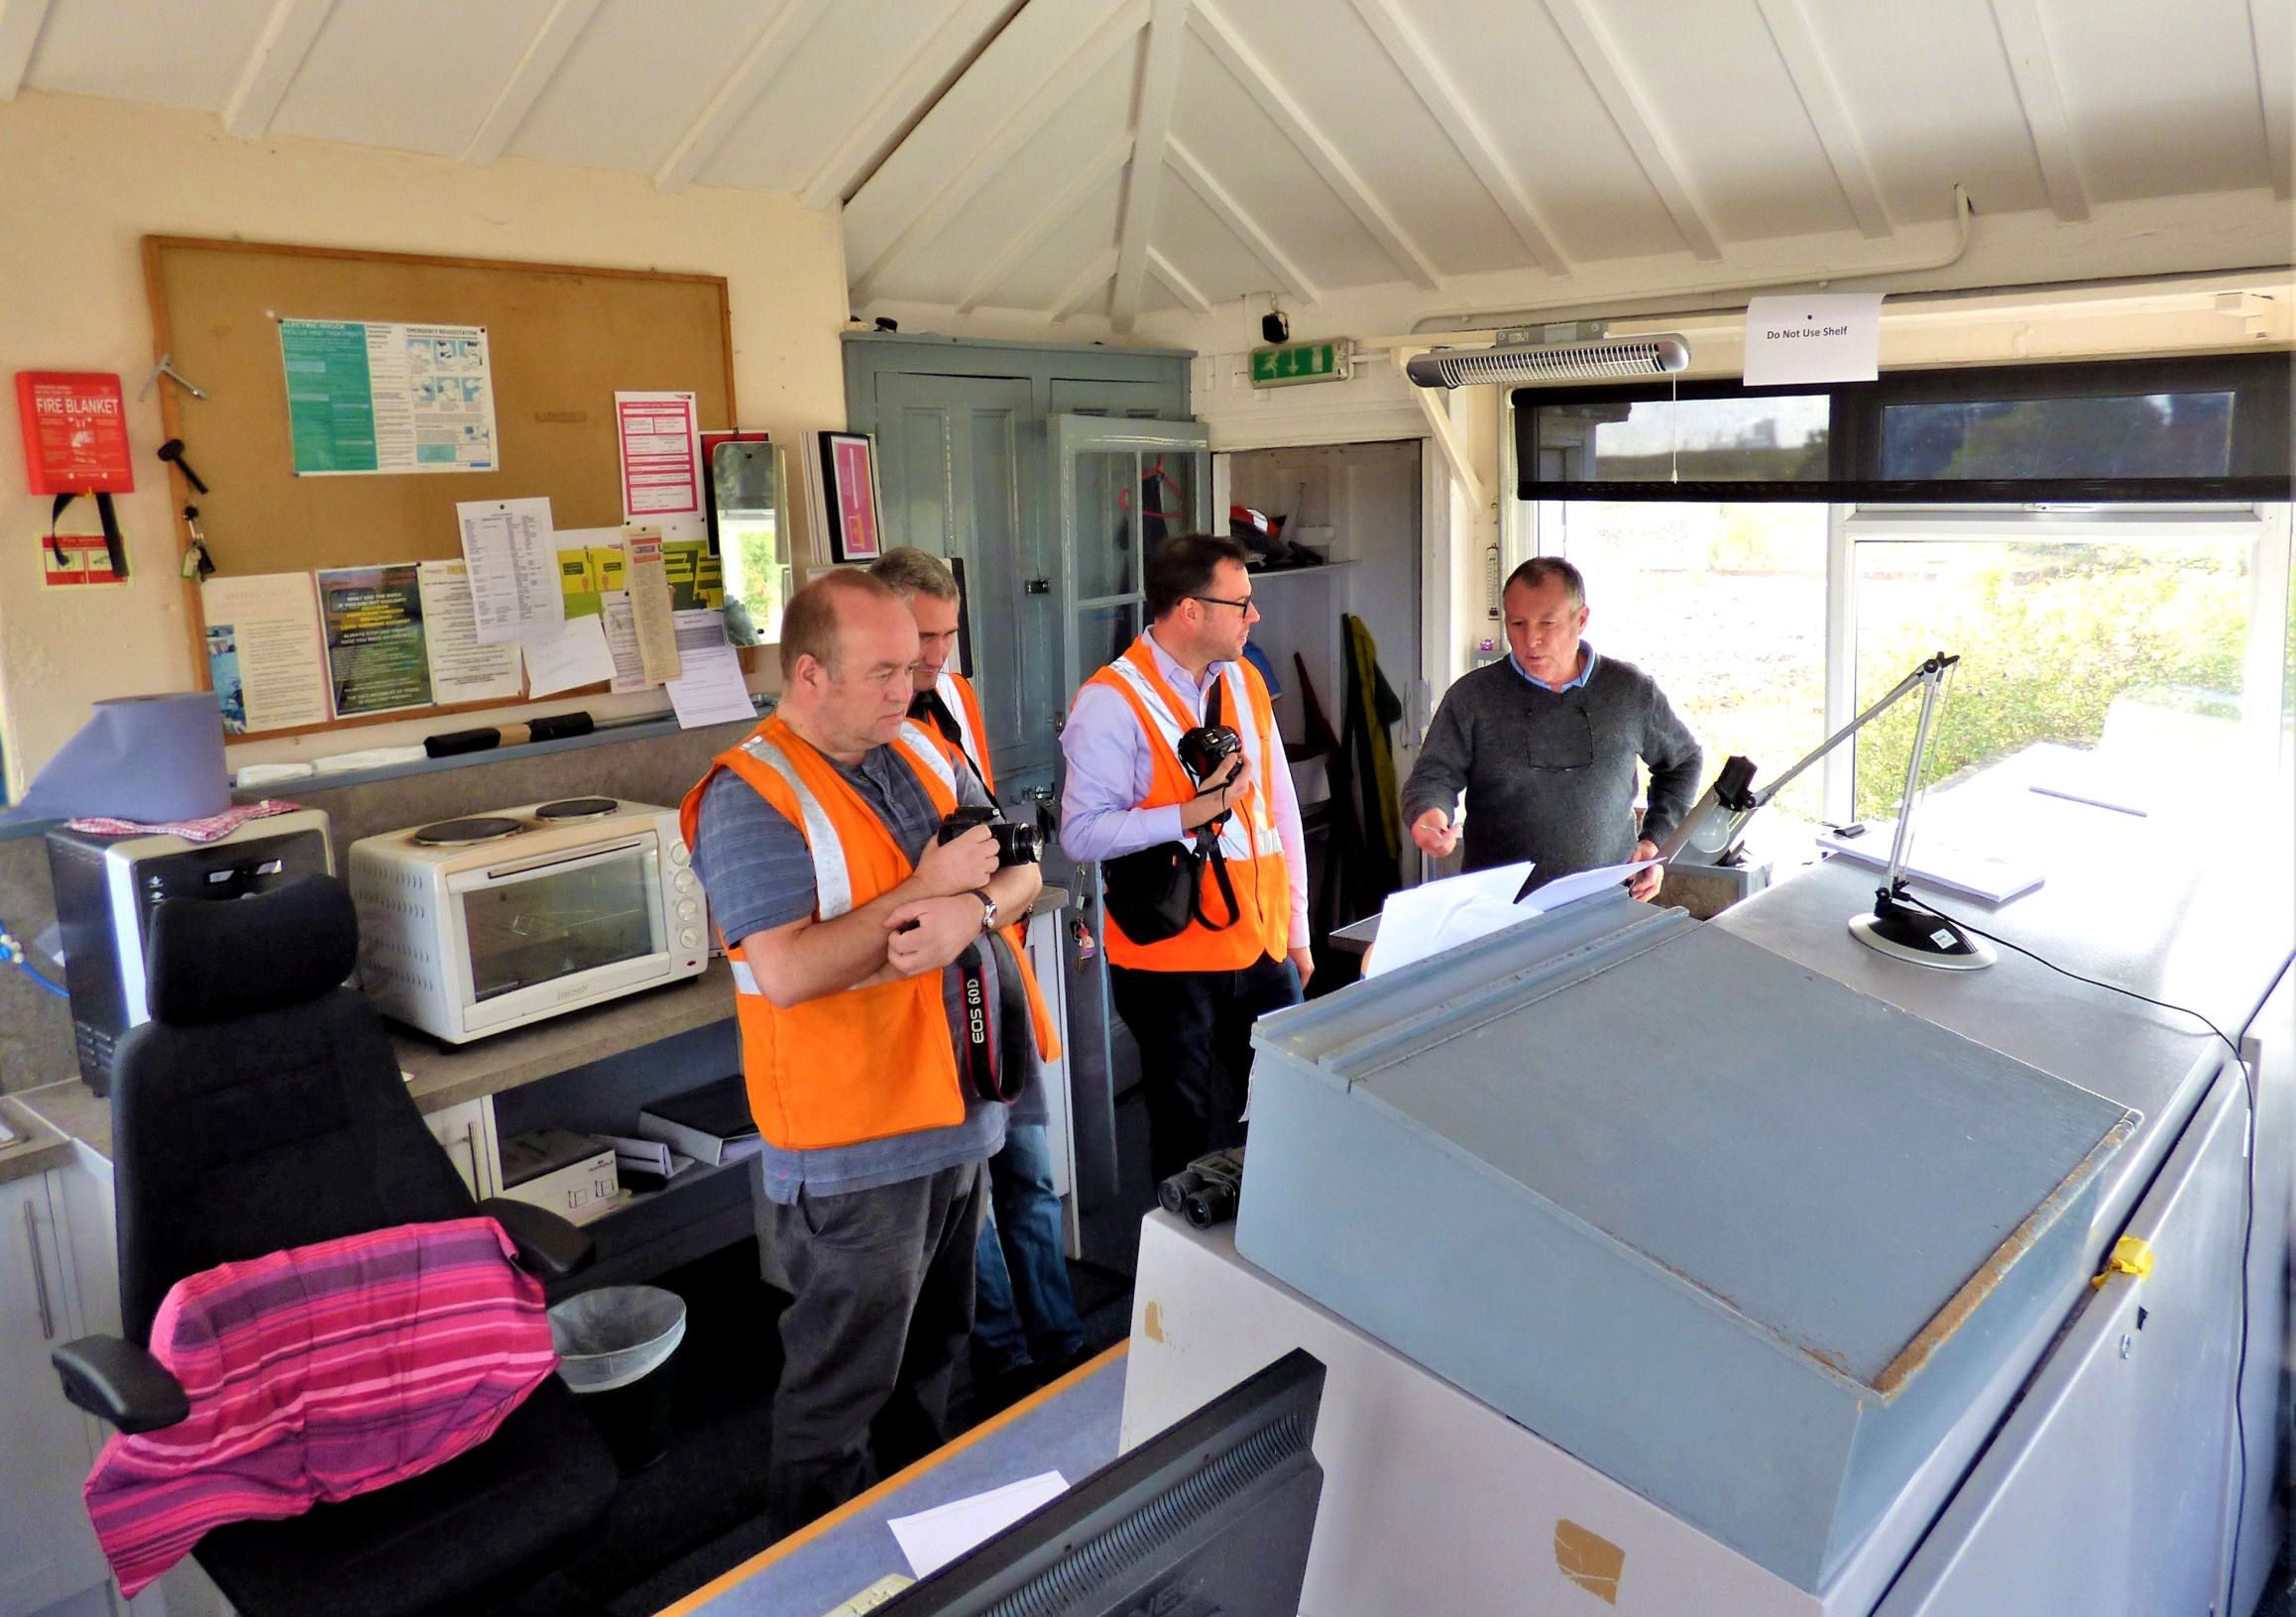
Some of the group inside Greatham Signal Box.
[© Nick Jones 2019]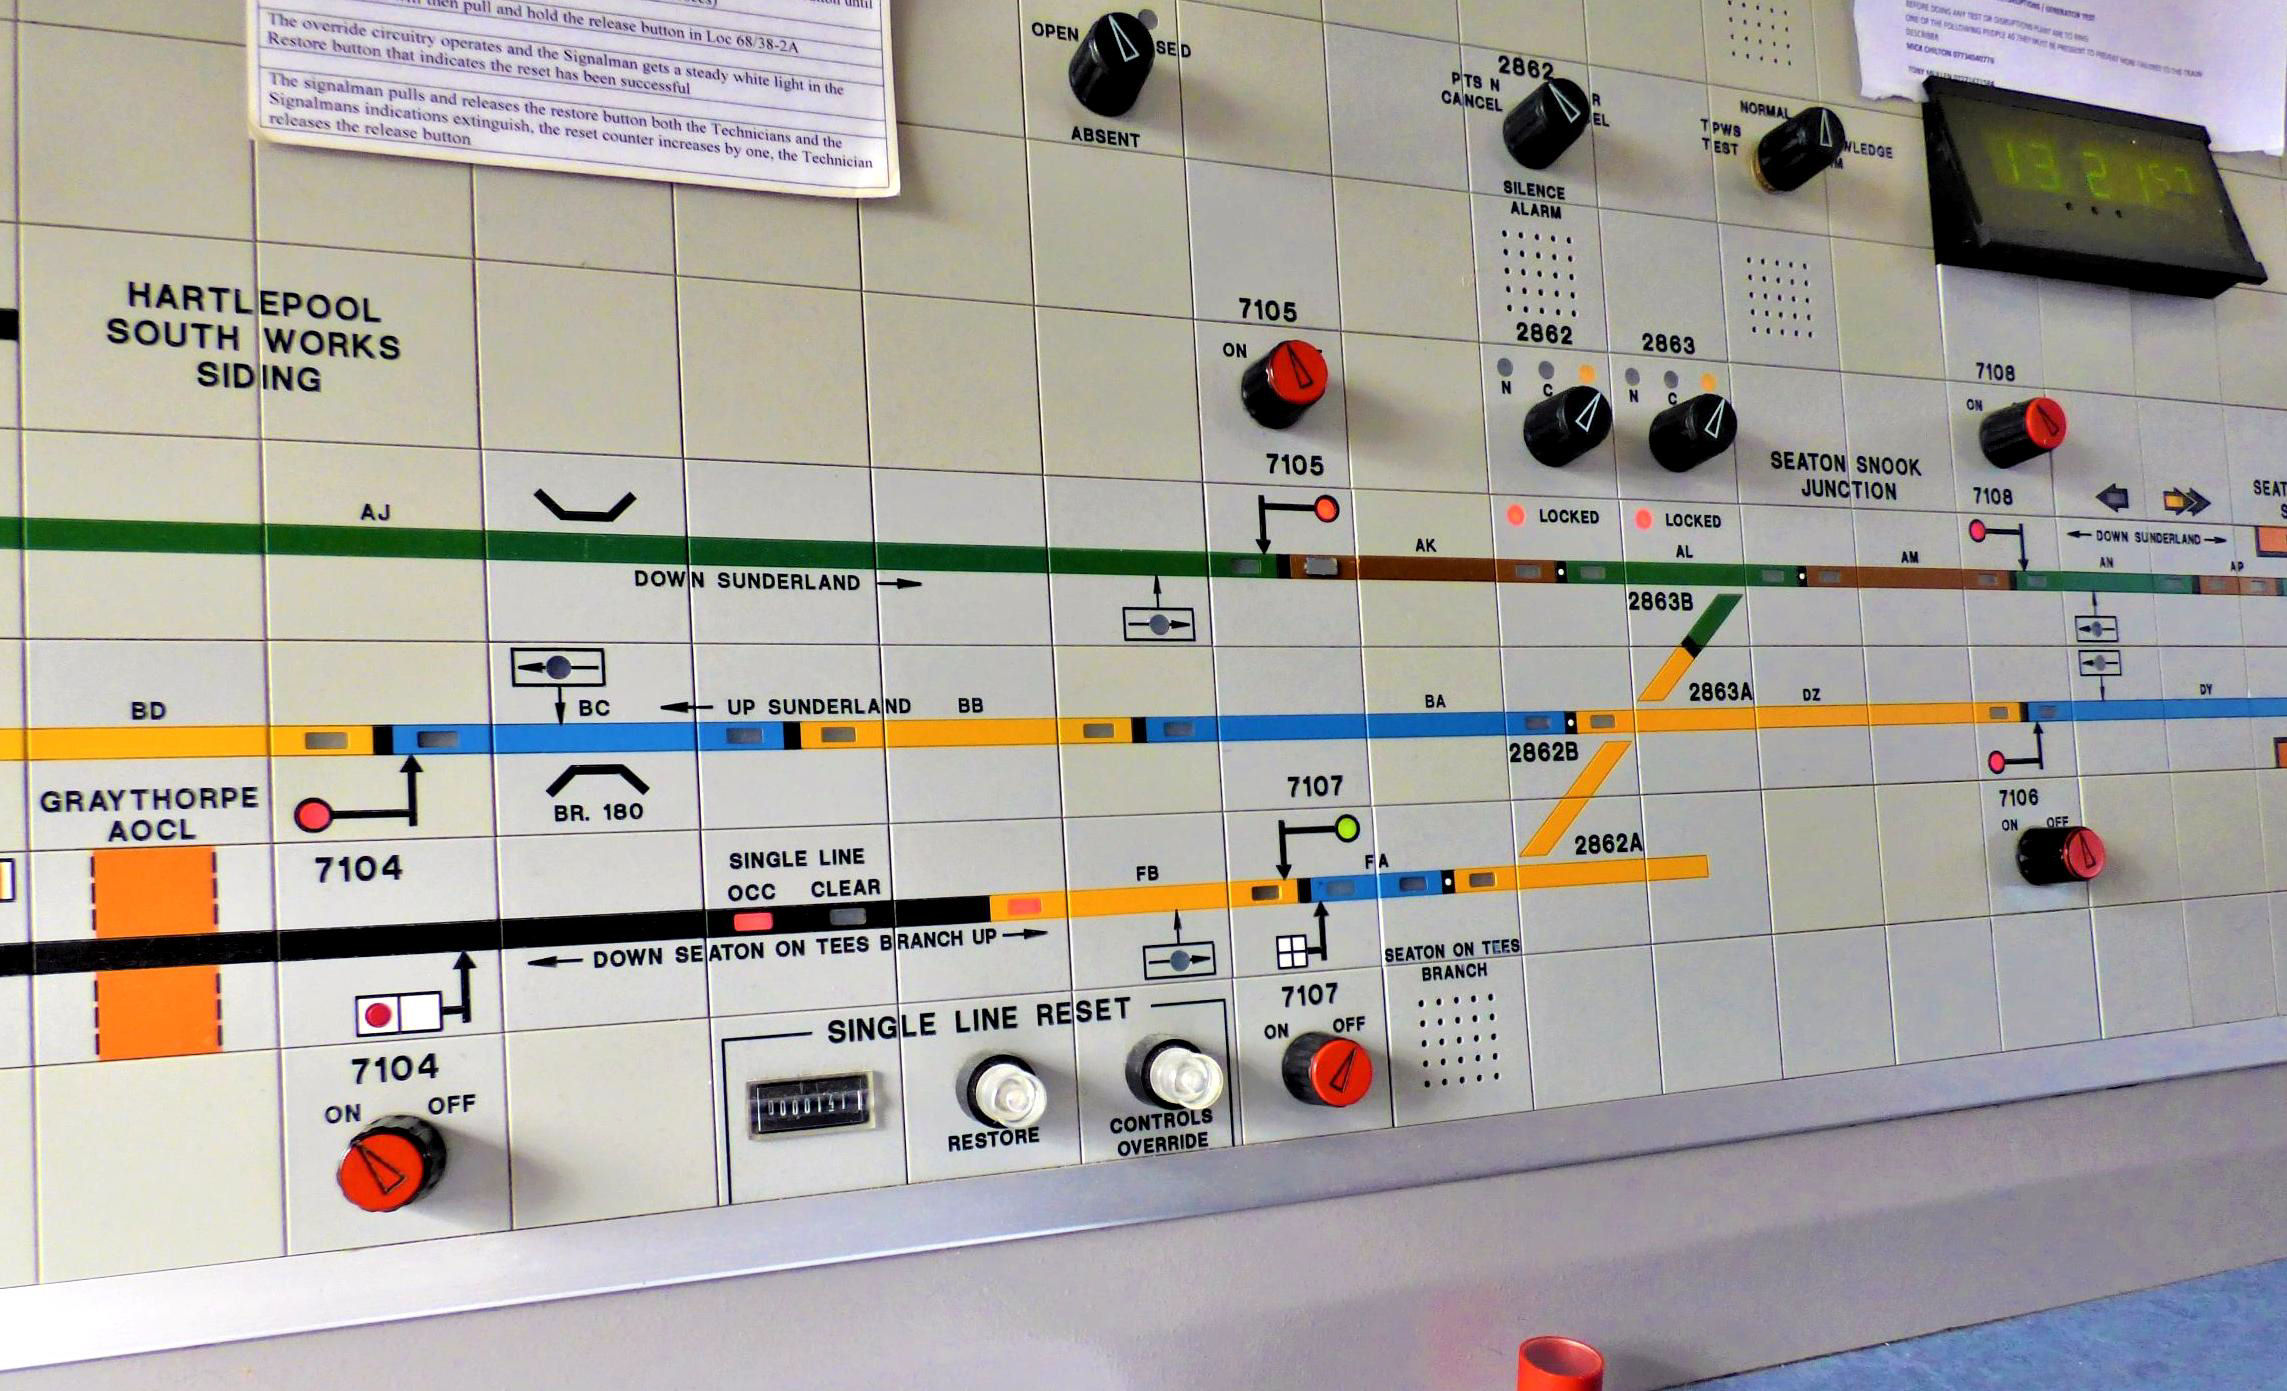
Signal 7107 is clear (green) for the nuclear flask train to leave the Seaton-on-Tees branch, it will reverse at Seaton Snook Jn (see next photo).
[© Nick Jones 2019]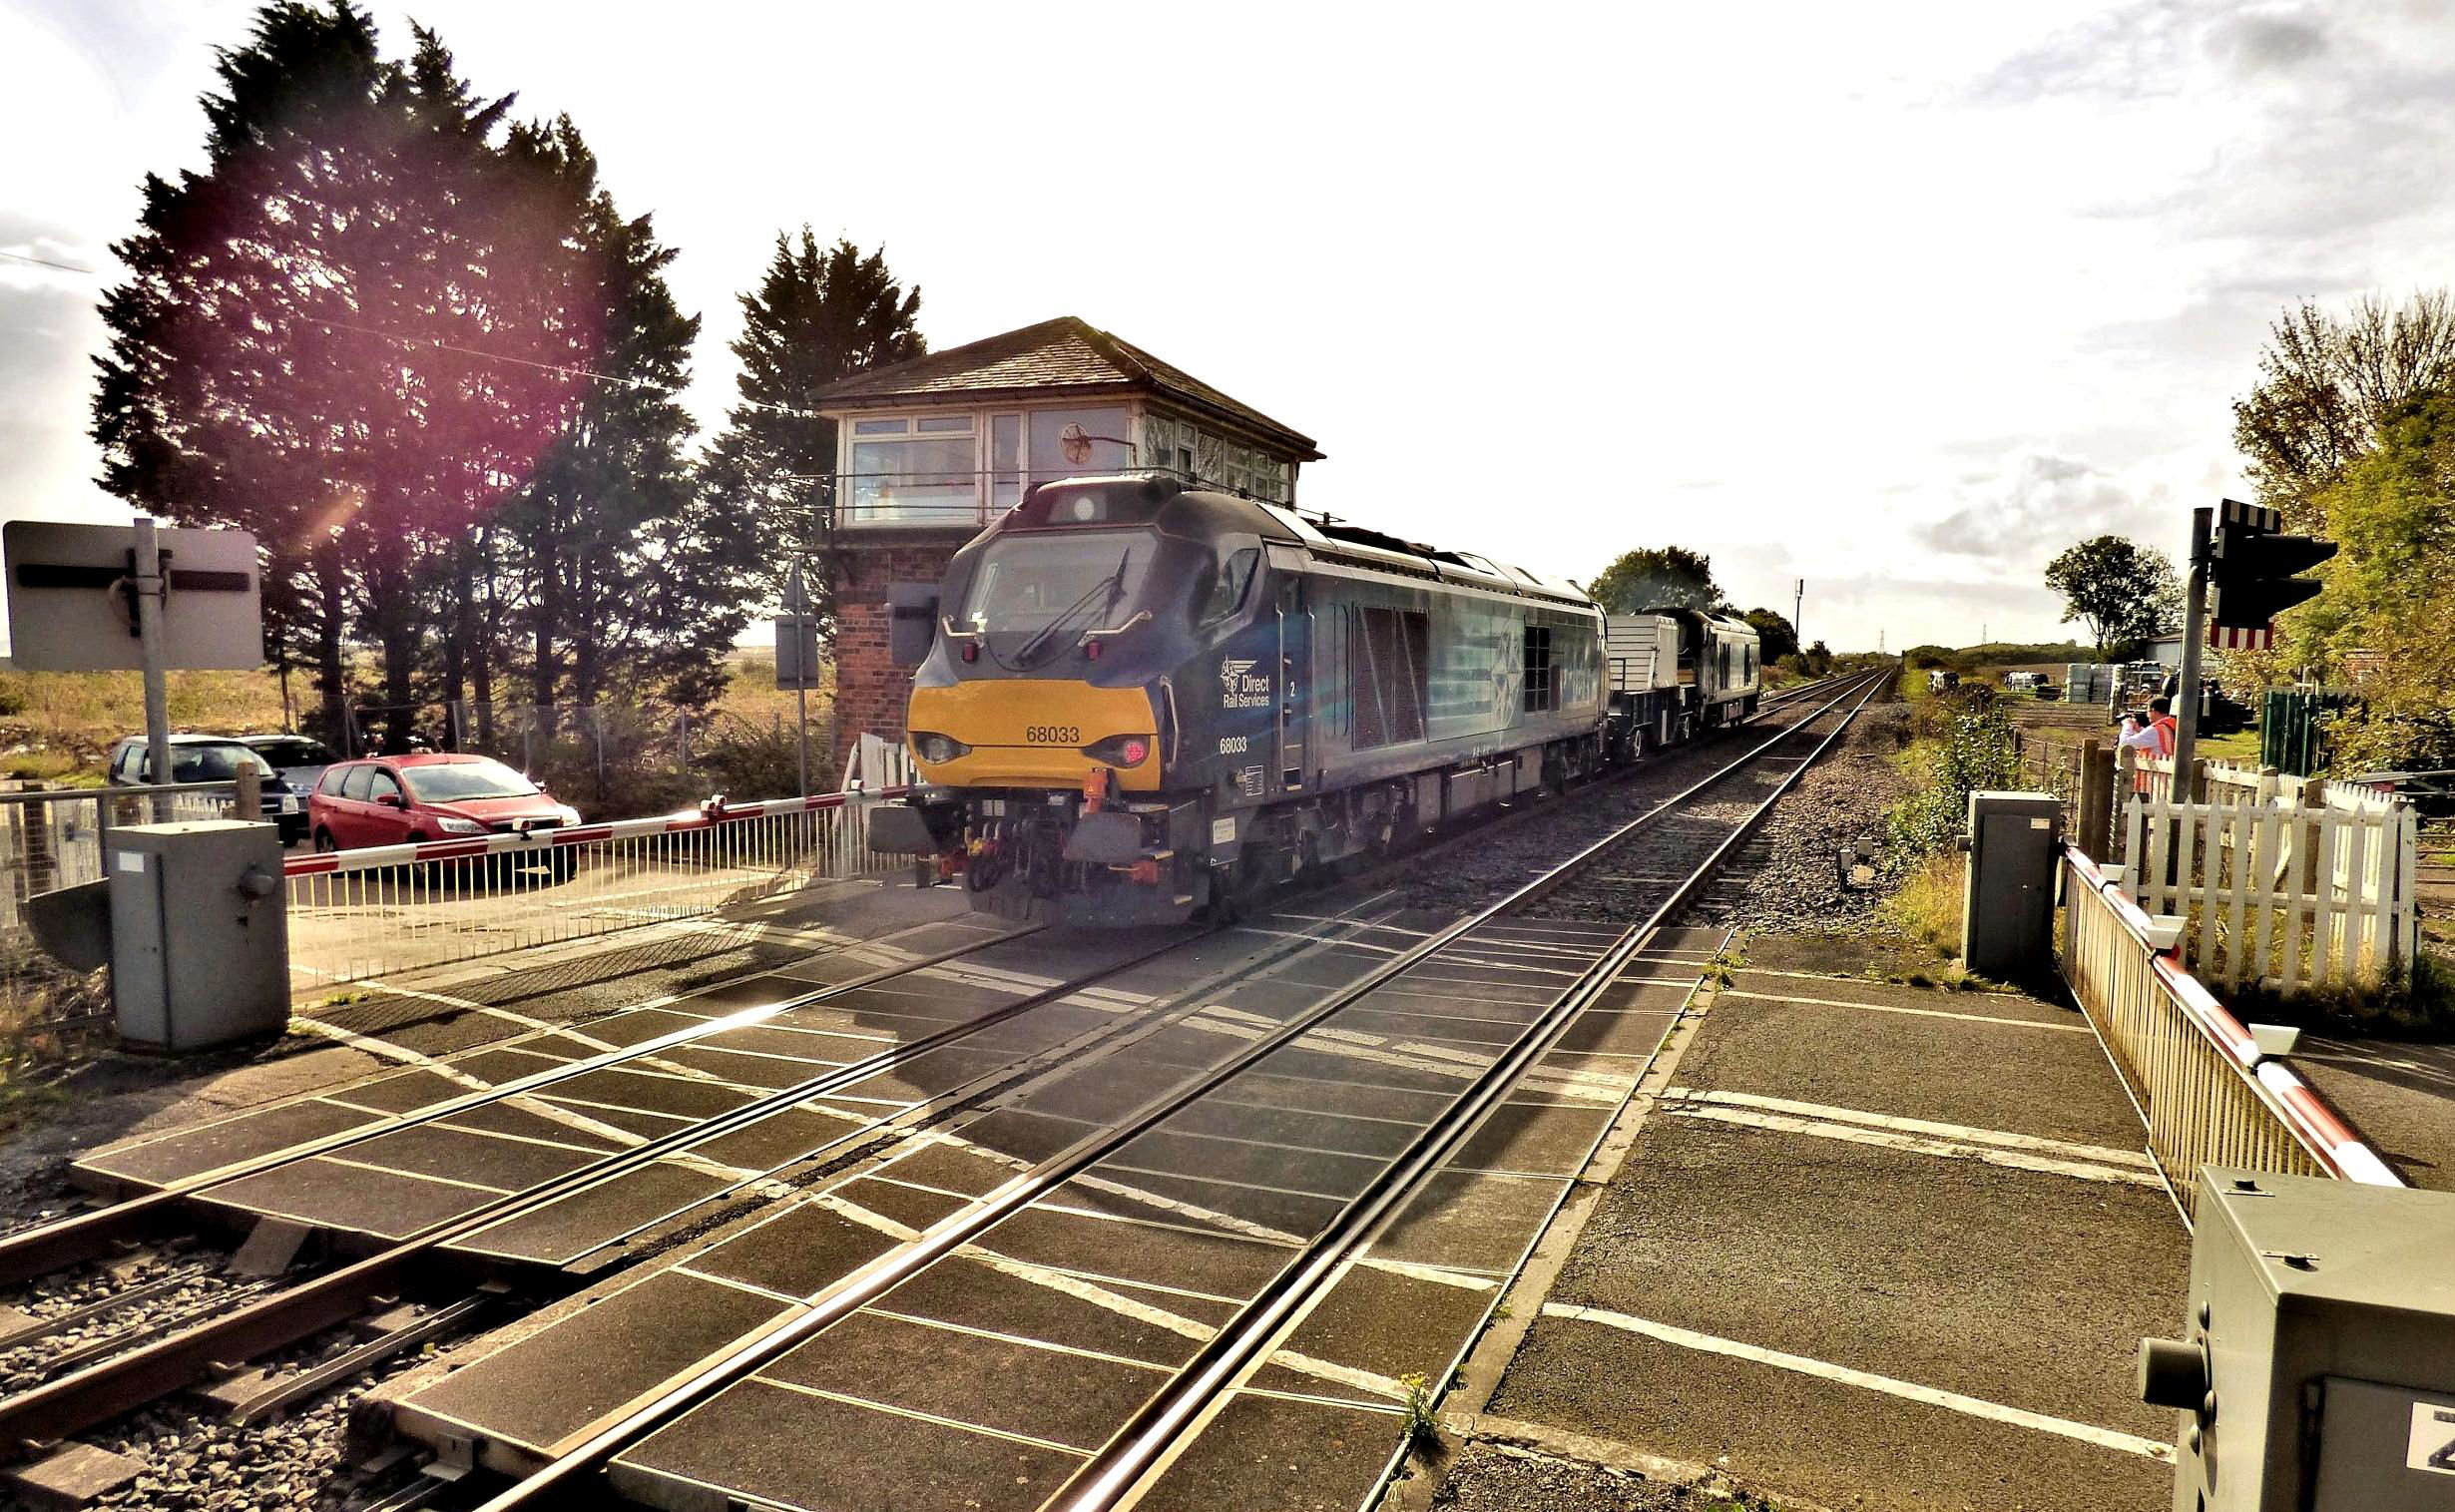
The 13.35 Seaton-on-Tees to, very unusually, Immingham nuclear flask trains passes Greatham. Normally they run from Carlisle Kingmoor and back to Sellafield (via the Carlisle Newcastle Goods lines avoiding the station) through Sunderland in both directions, not past this location.
[© Nick Jones 2019]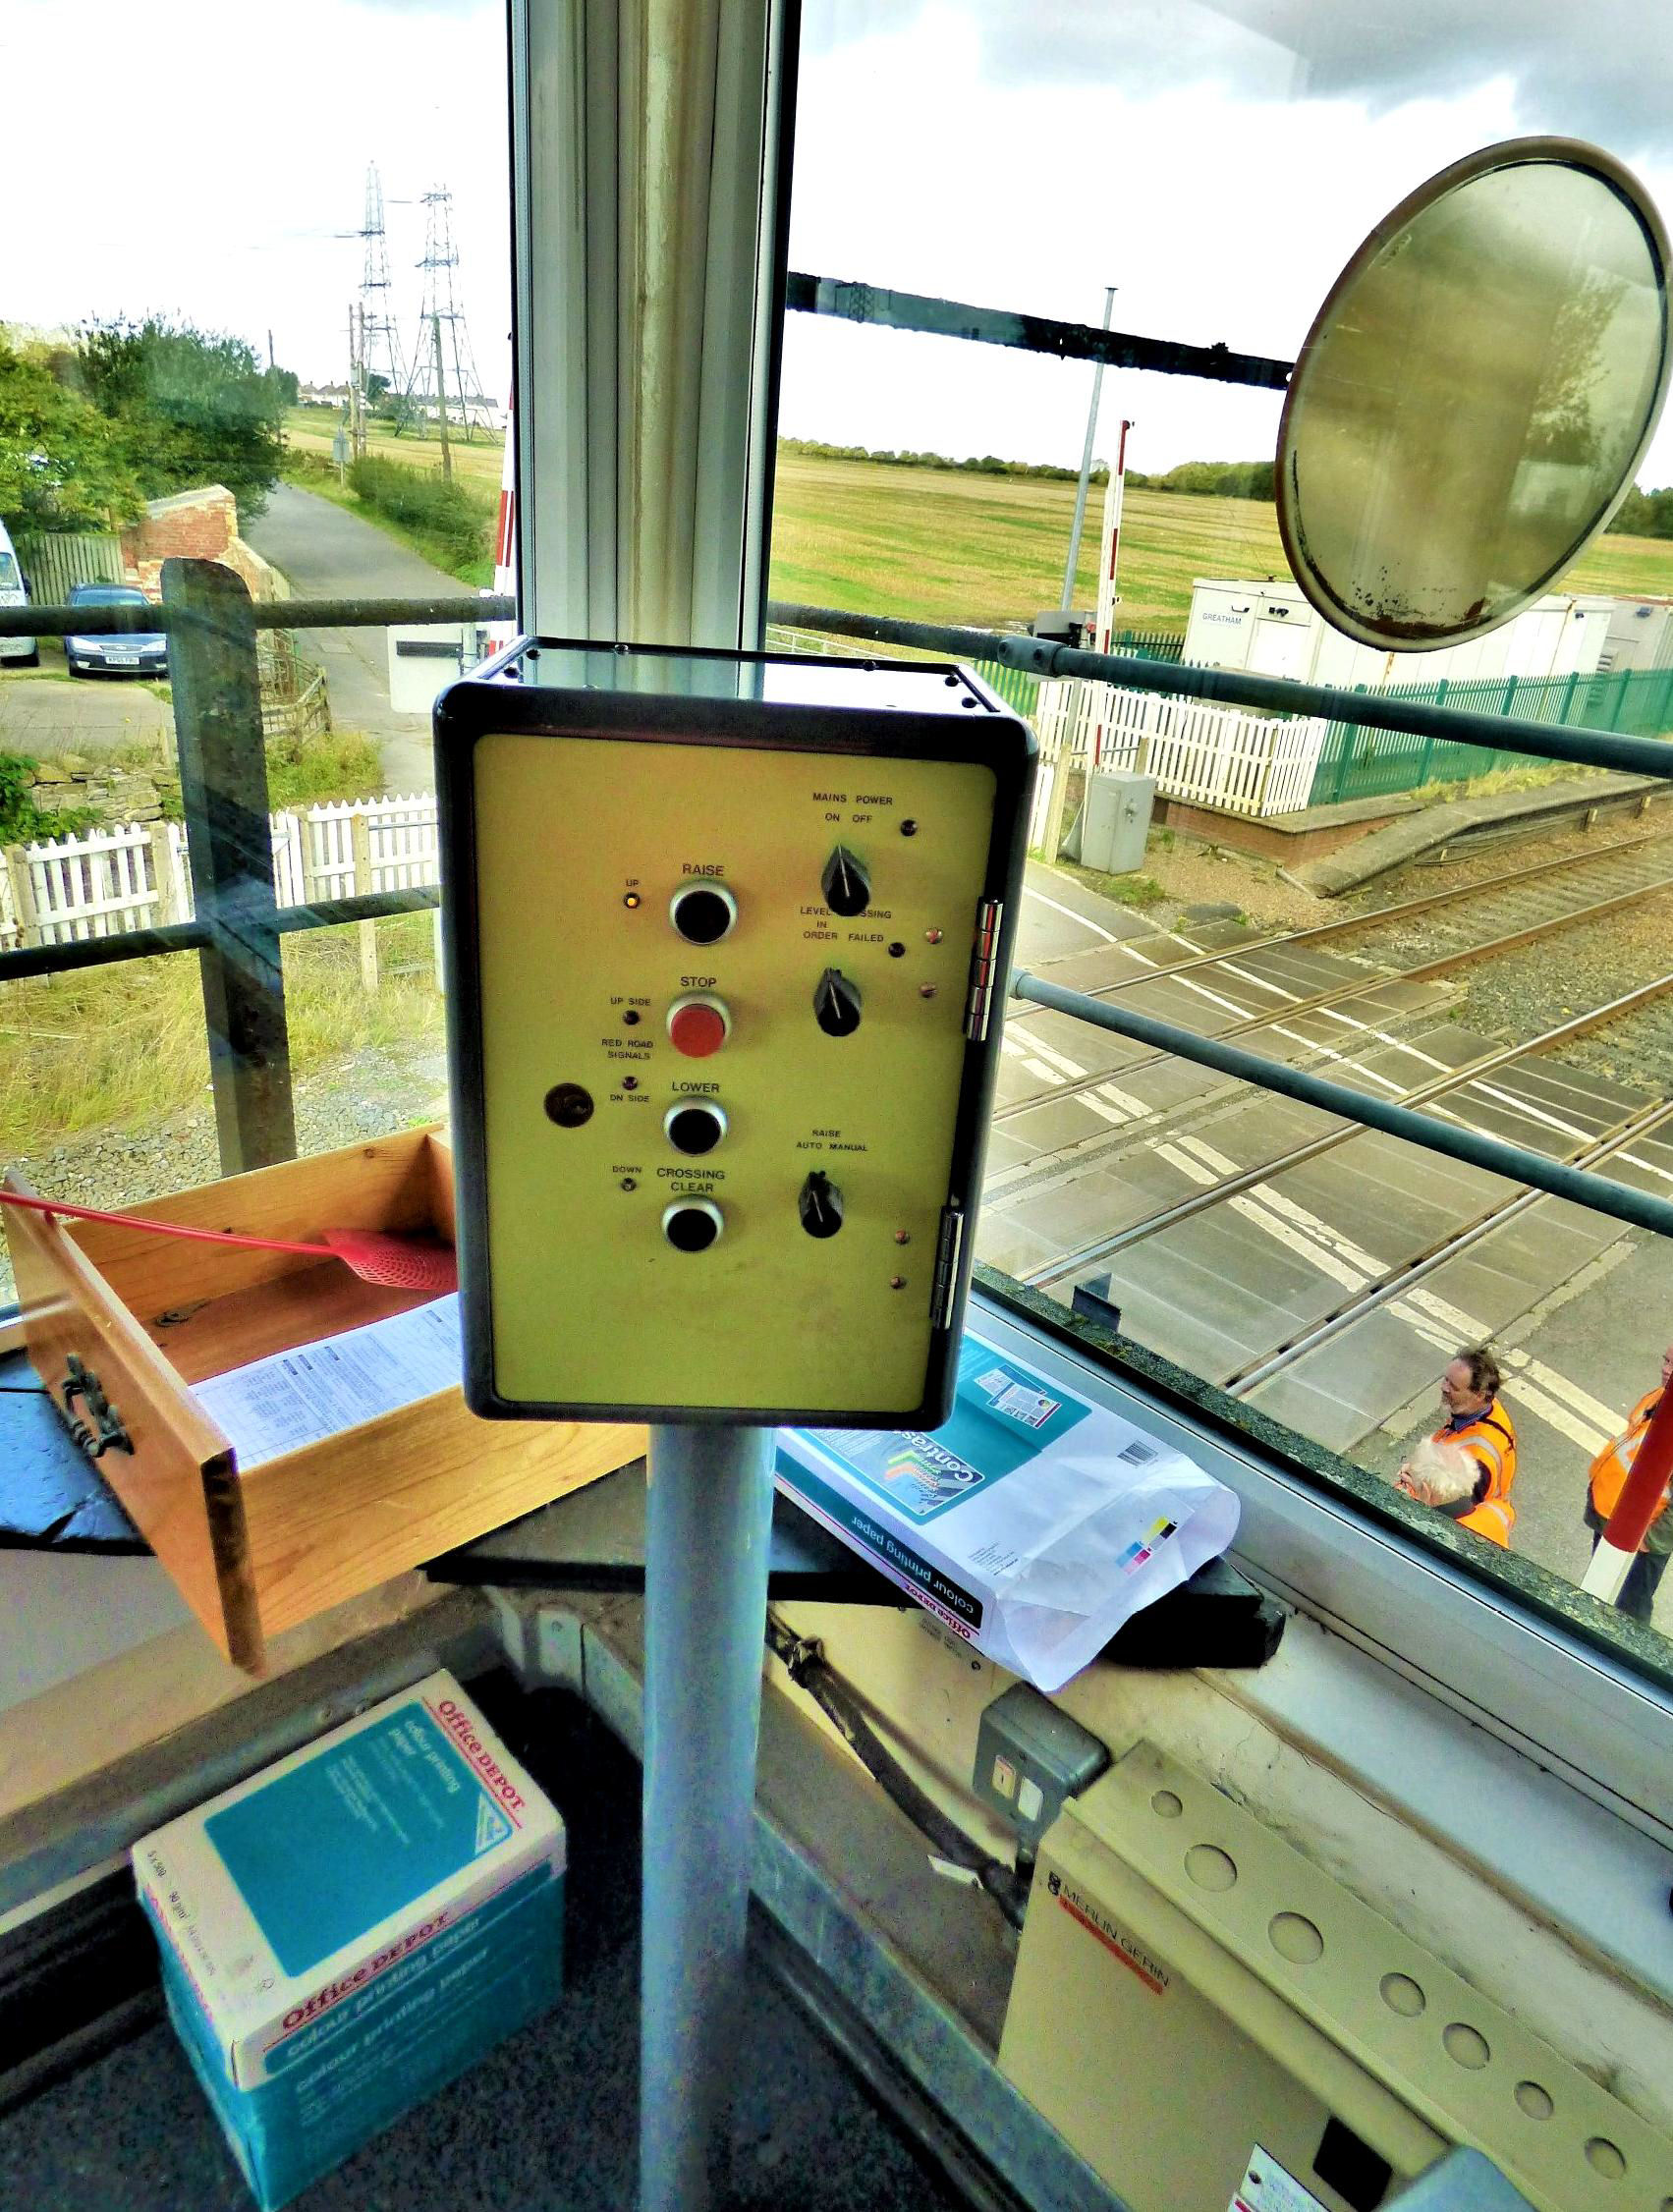
The crossing north of Greatham Box; the end of the former Down platform is middle right.
[© Nick Jones 2019] This was our final visit of the day. The 1905 built North Eastern Railway 'N3' style signal box controlled the junction with the Hendon Branch (to Sunderland South Dock), as well as Ryhope Grange Sidings. The latter are accessed off the remaining stub of the former branch to Murton/Hawthorn colliery, washery and coking plant (last train 1 Apr 1993). There are associated main line facing and trailing crossovers.
At the time of our visit Ryhope Grange box contained a 1950 reconditioned McKenzie & Holland Type 17 lever frame with tappet locking. There was also a WestCAD VDU workstation only commissioned on 15 Nov 2010 which controlled the line as far as Stranton Jn (just south of Hartlepool). This replaced Stranton, Clarence Road, Dawdon, Seaham, & Hall Dene boxes on the Hartlepool to Sunderland line.
The levers at Ryhope Grange were numbered 3 to 40 (with lever No19 missing) and 18 were still in use (40 originally). Levers 1 & 2 were removed in 2010 to make room for the workstation following closure of the other Durham Coast boxes. Ryhope Grange interfaced with Greatham box at about MP 71, just south of Hartlepool, and with Tyneside Integrated Electronic Control Centre to the north at about MP 88½, both Track Circuit Block. Hall Dene (north of Seaham) and Church Street (south of Hartlepool) level crossing barriers were also remotely controlled and monitored via CCTV from Ryhope Grange.
When we arrived, the first part of the Hendon Branch (to Londonderry Sidings) was under possession. This was then given up, allowing us a good look at the train staff - a piece of copper pipe with a bicycle handle attached (recycled?)! More very low-tech (but still highly safe and effective) equipment was a wooden road occupation board with slides to indicate which sidings were occupied. Many thanks to Local Operations Manager Katrina Lawson and her signalling staff for a very interesting and enjoyable day; £245 from participants was donated to Cancer Research UK.
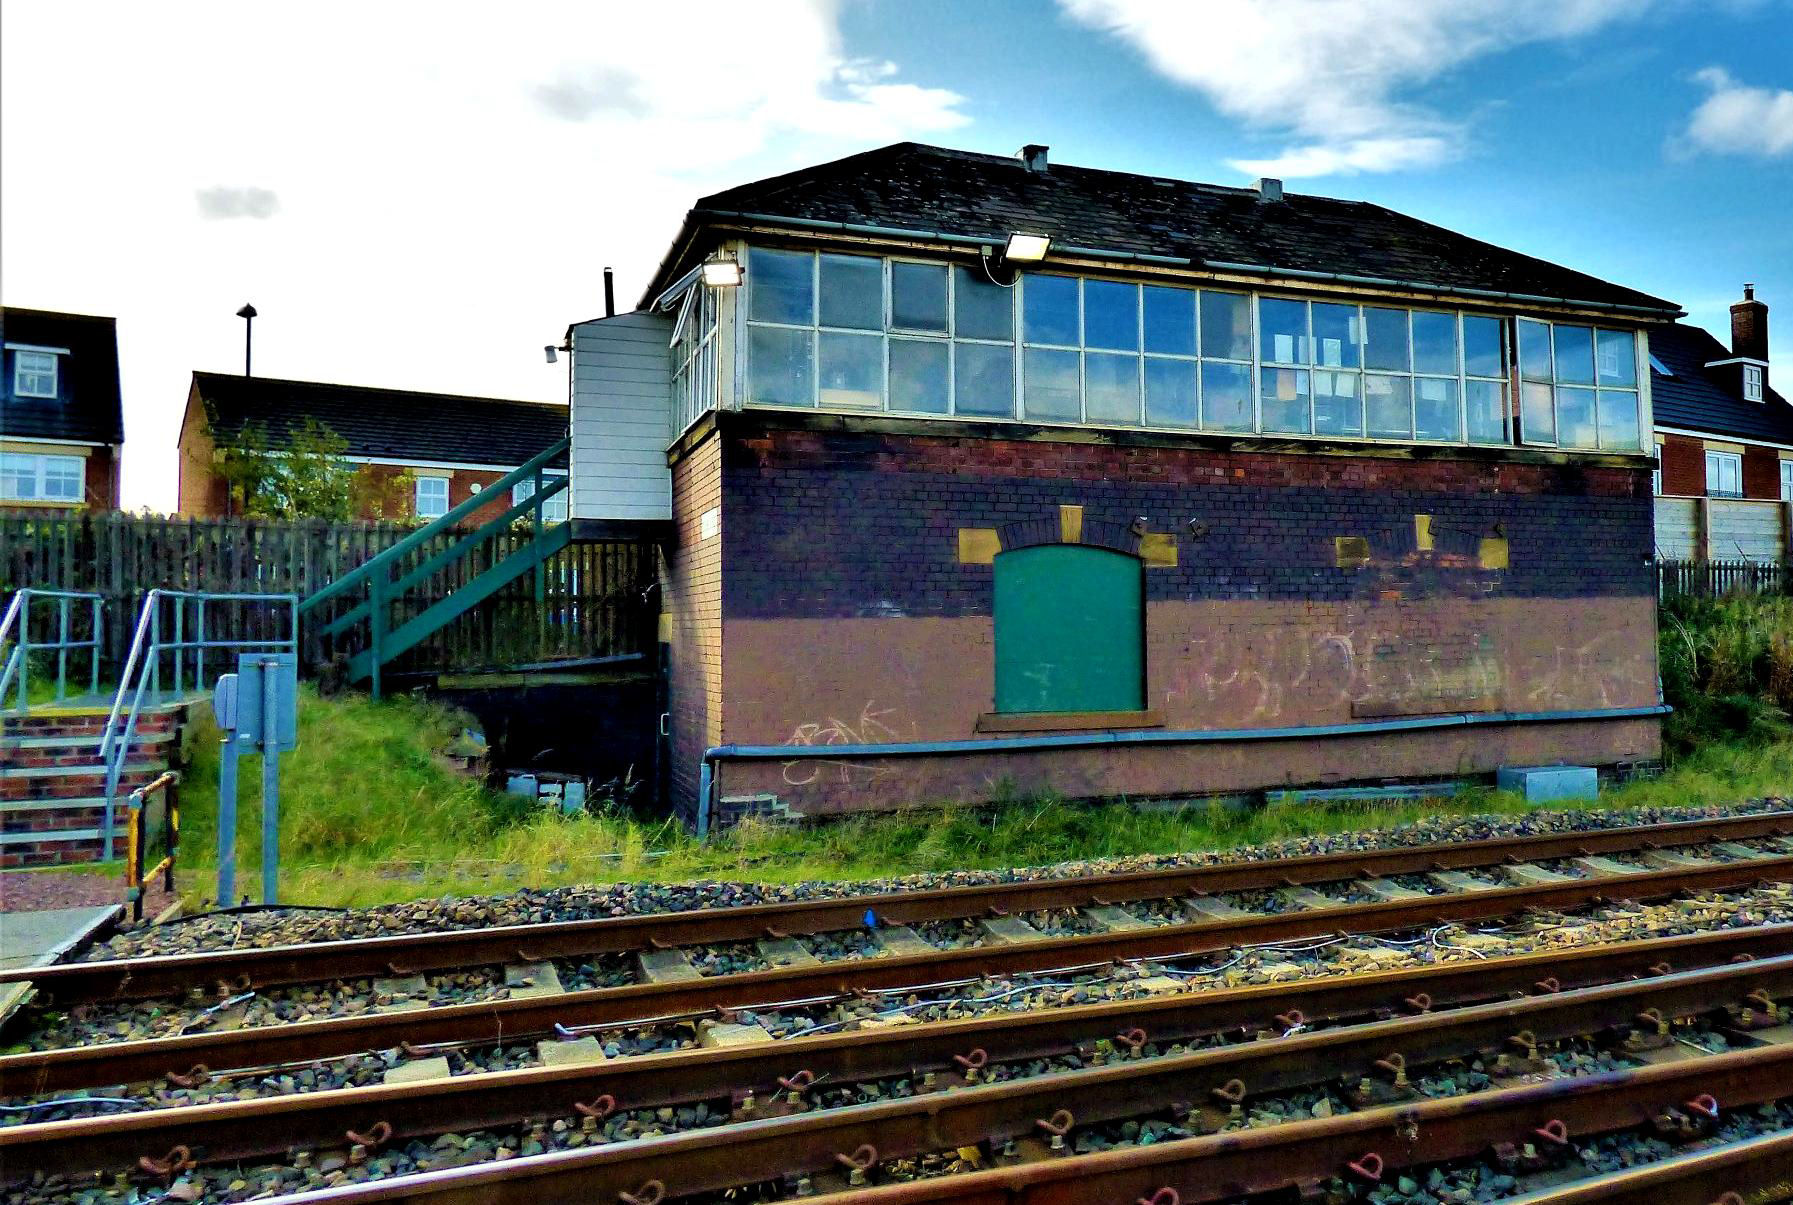
Ryhope Grange Signal Box
[© Nick Jones 2019]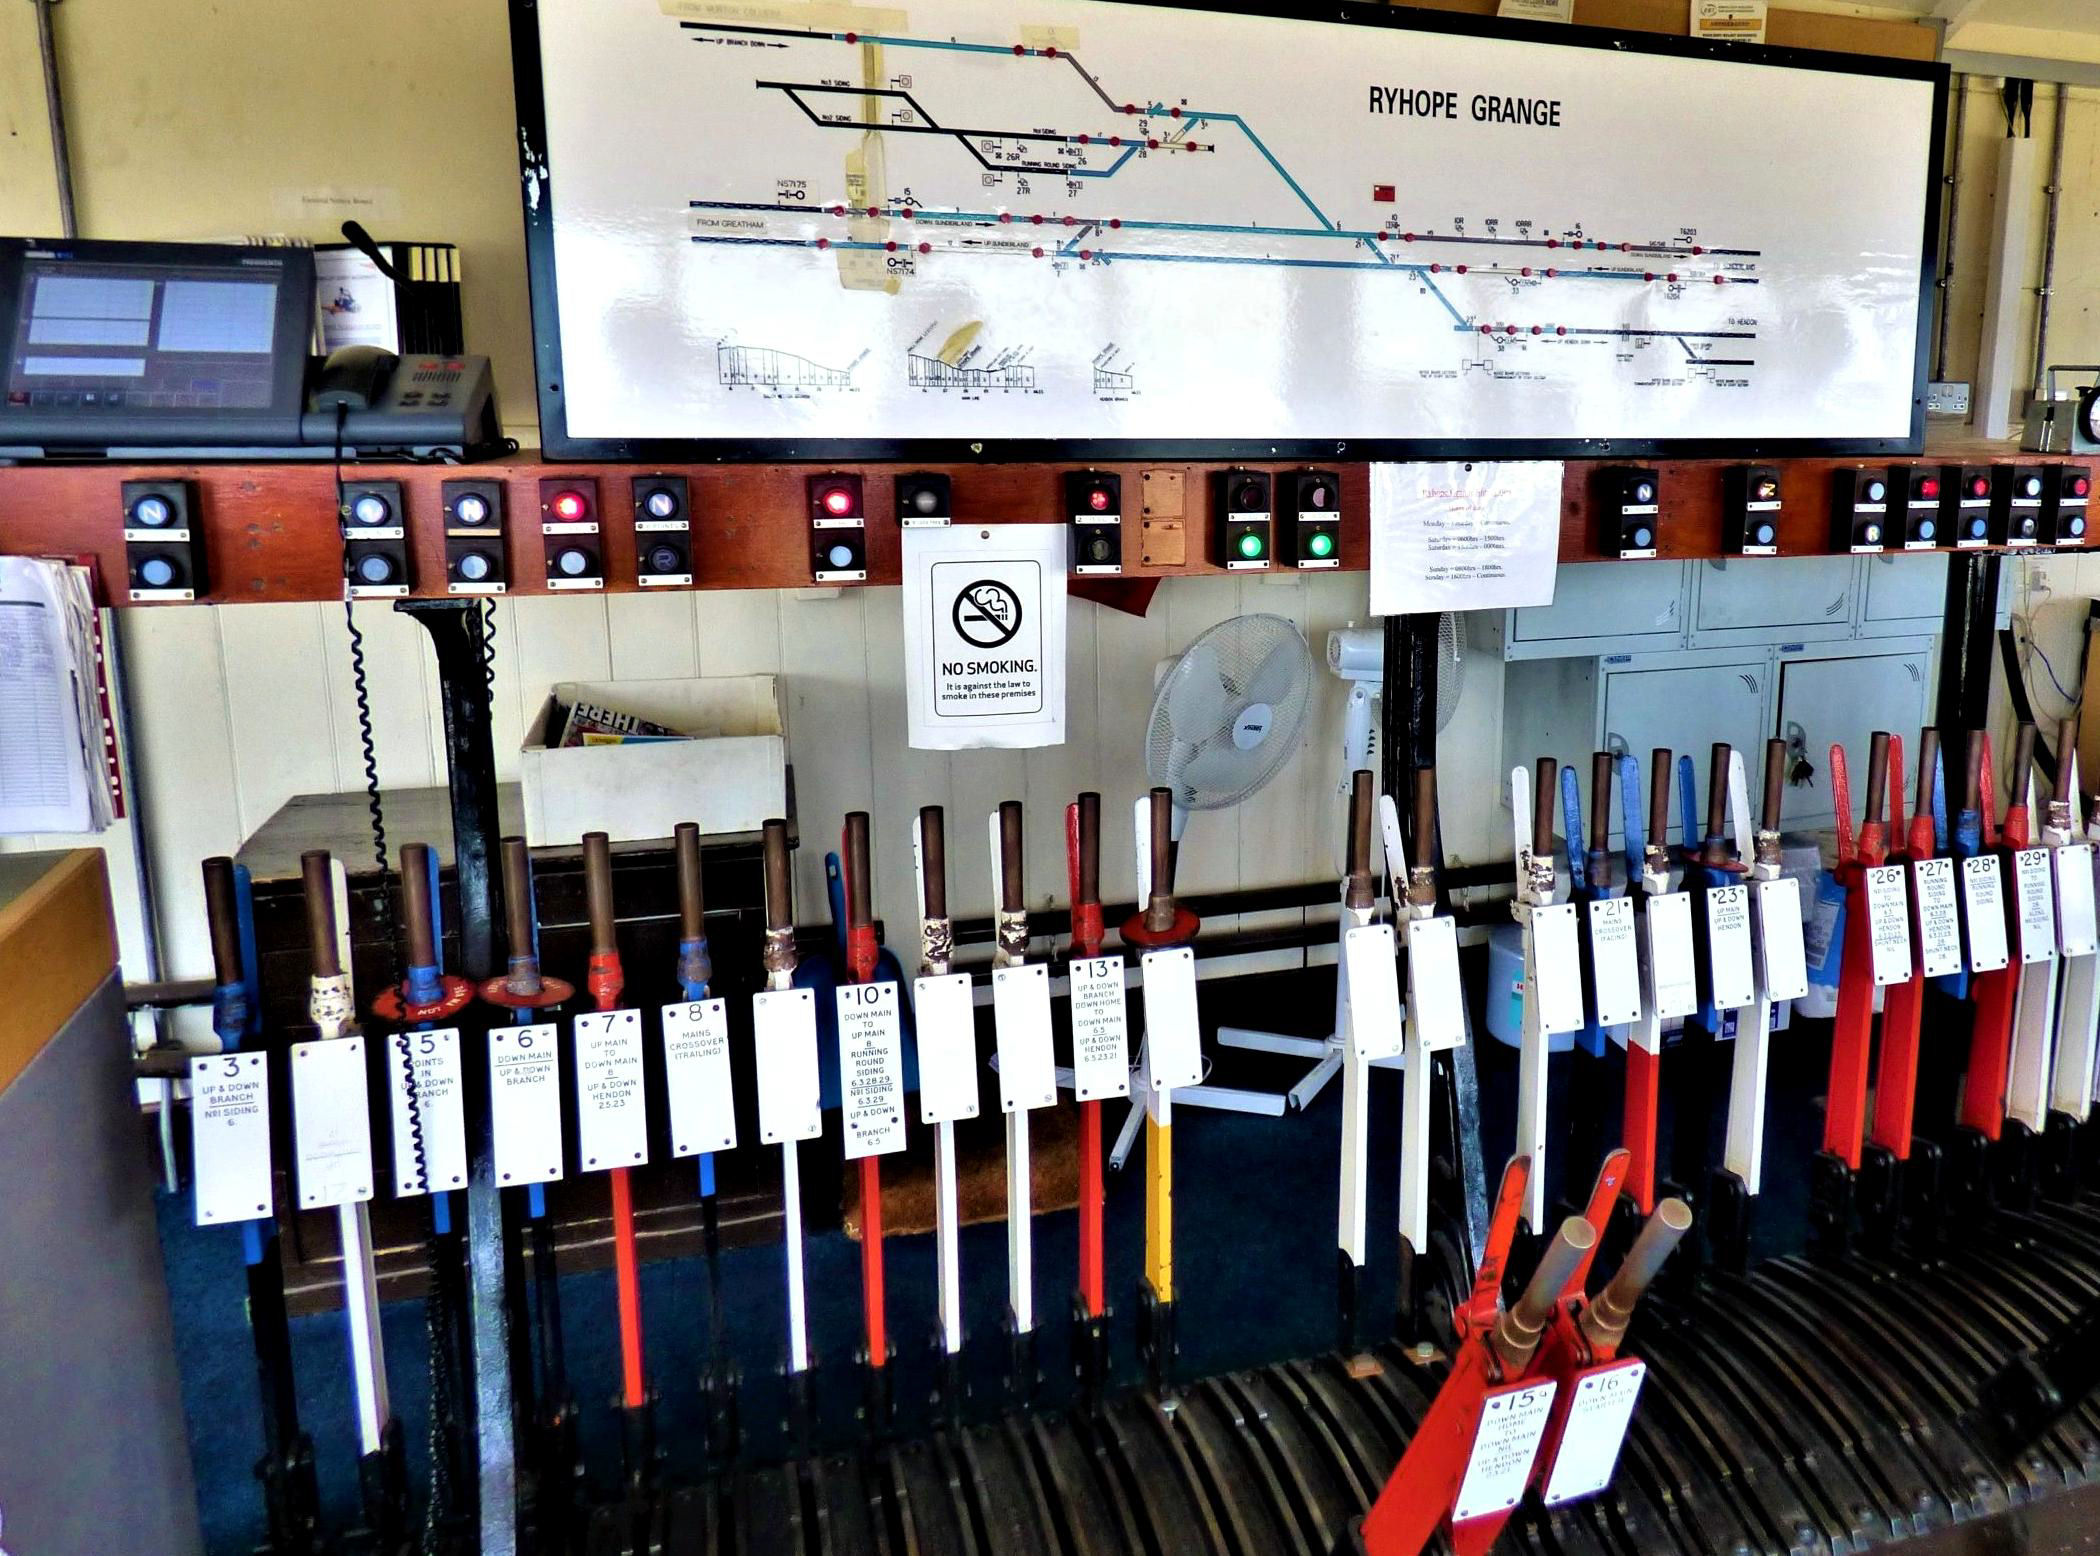
Ryhope Grange Signal Box diagram and lever frame.
[© Nick Jones 2019]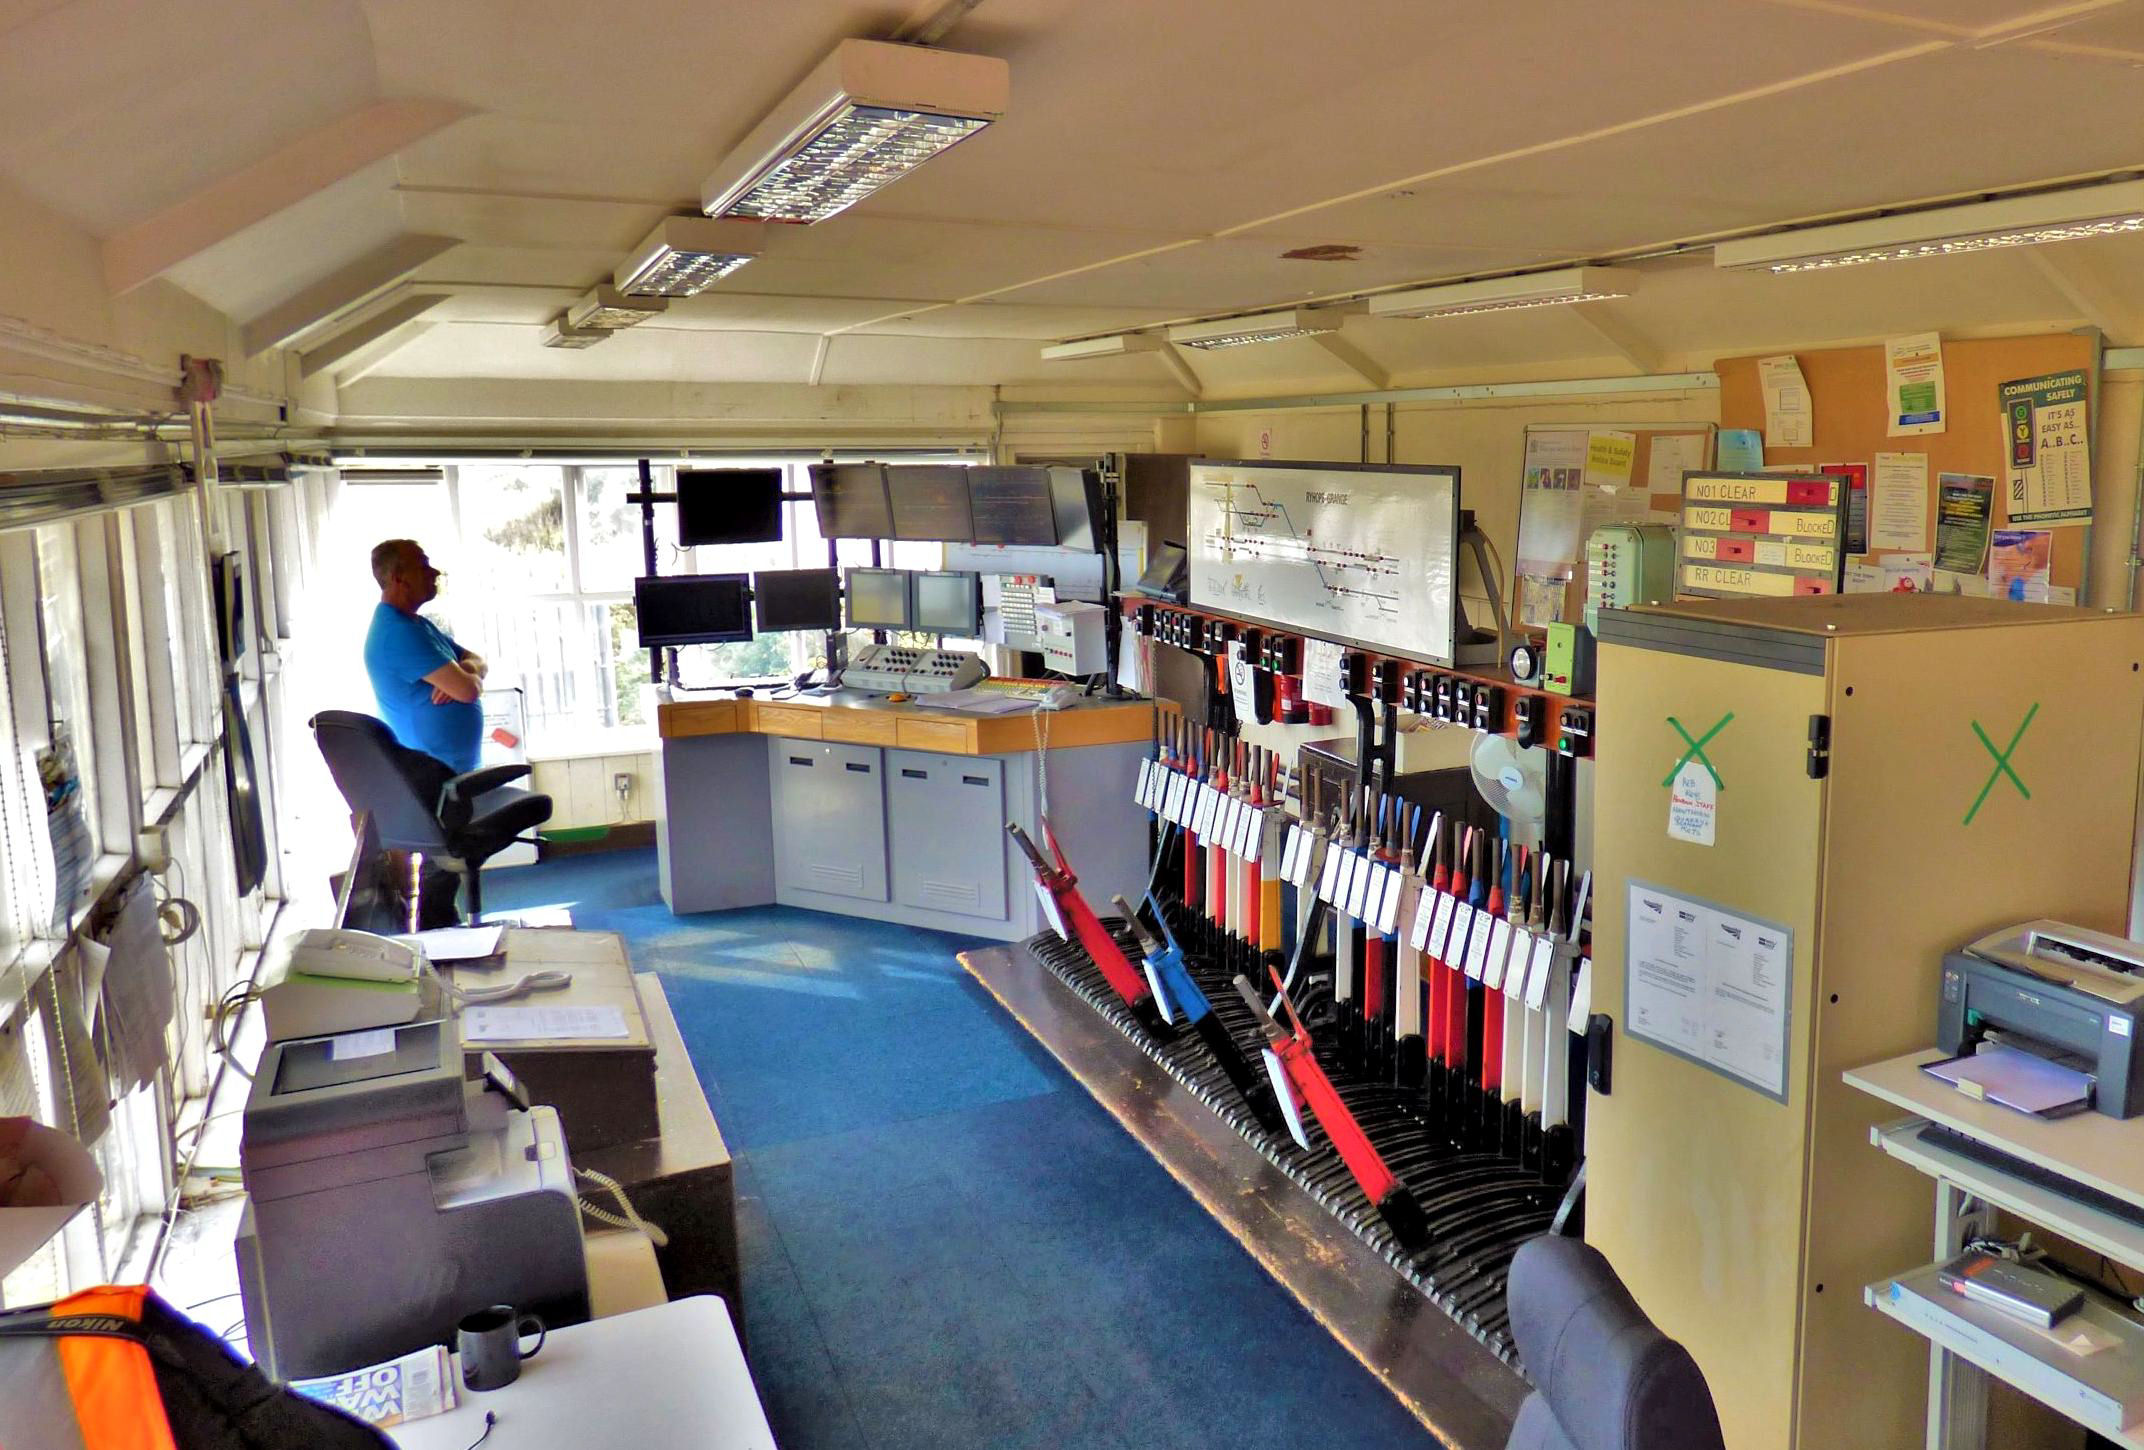
Ryhope Grange Signal Box diagram, lever frame and instruments.
[© Nick Jones 2019]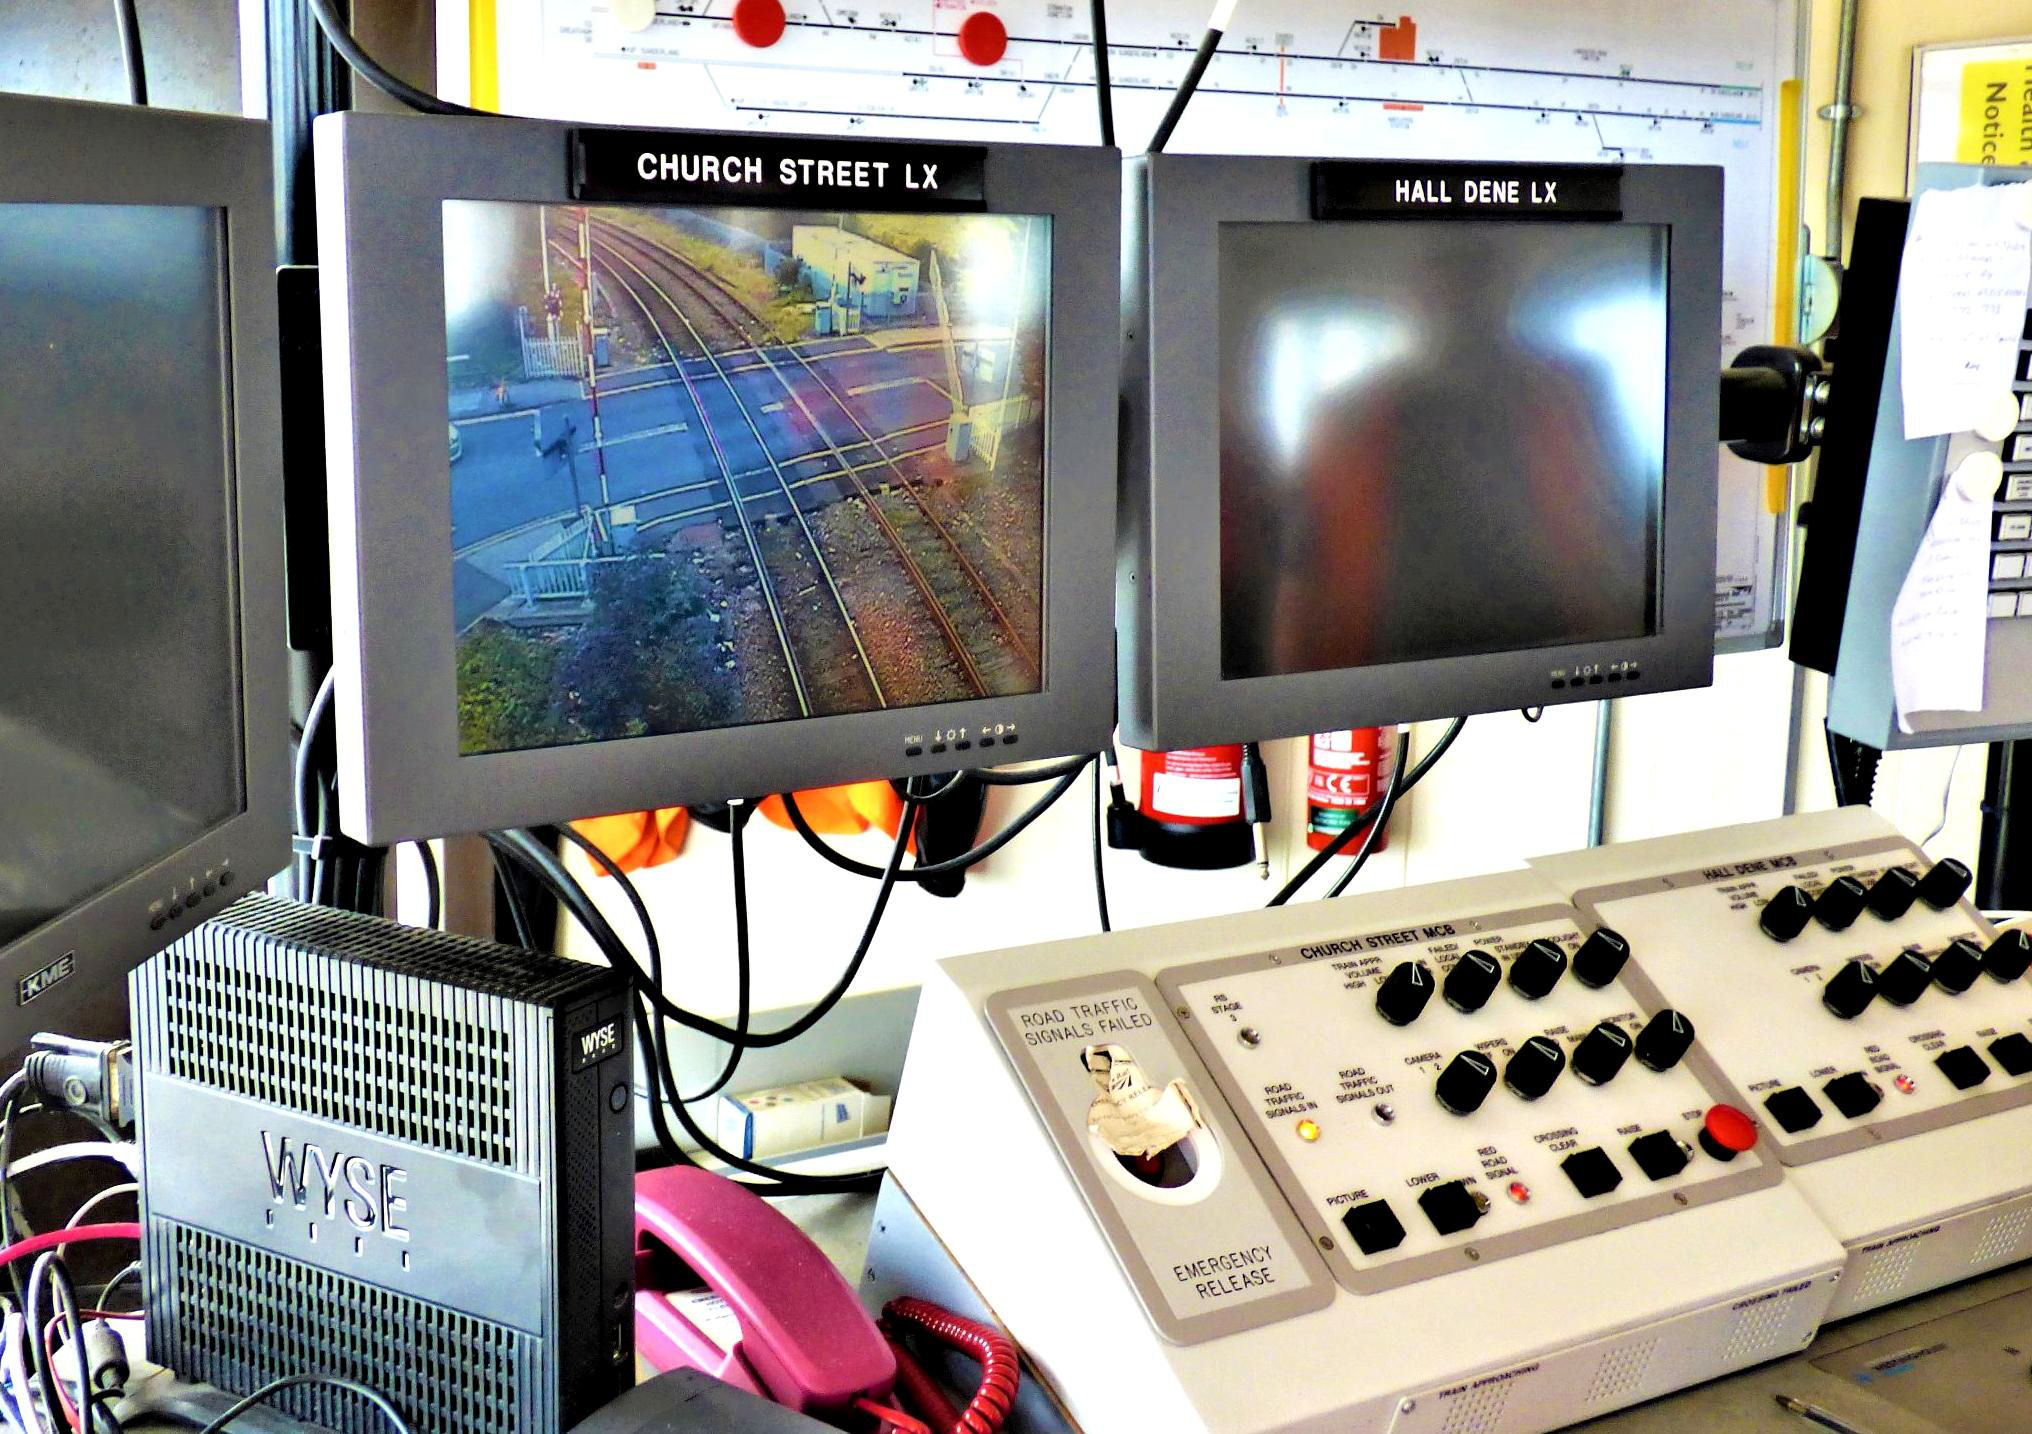
Ryhope Grange Signal Box Church Street and Hall Dene level crossing monitors and controls.
[© Nick Jones 2019]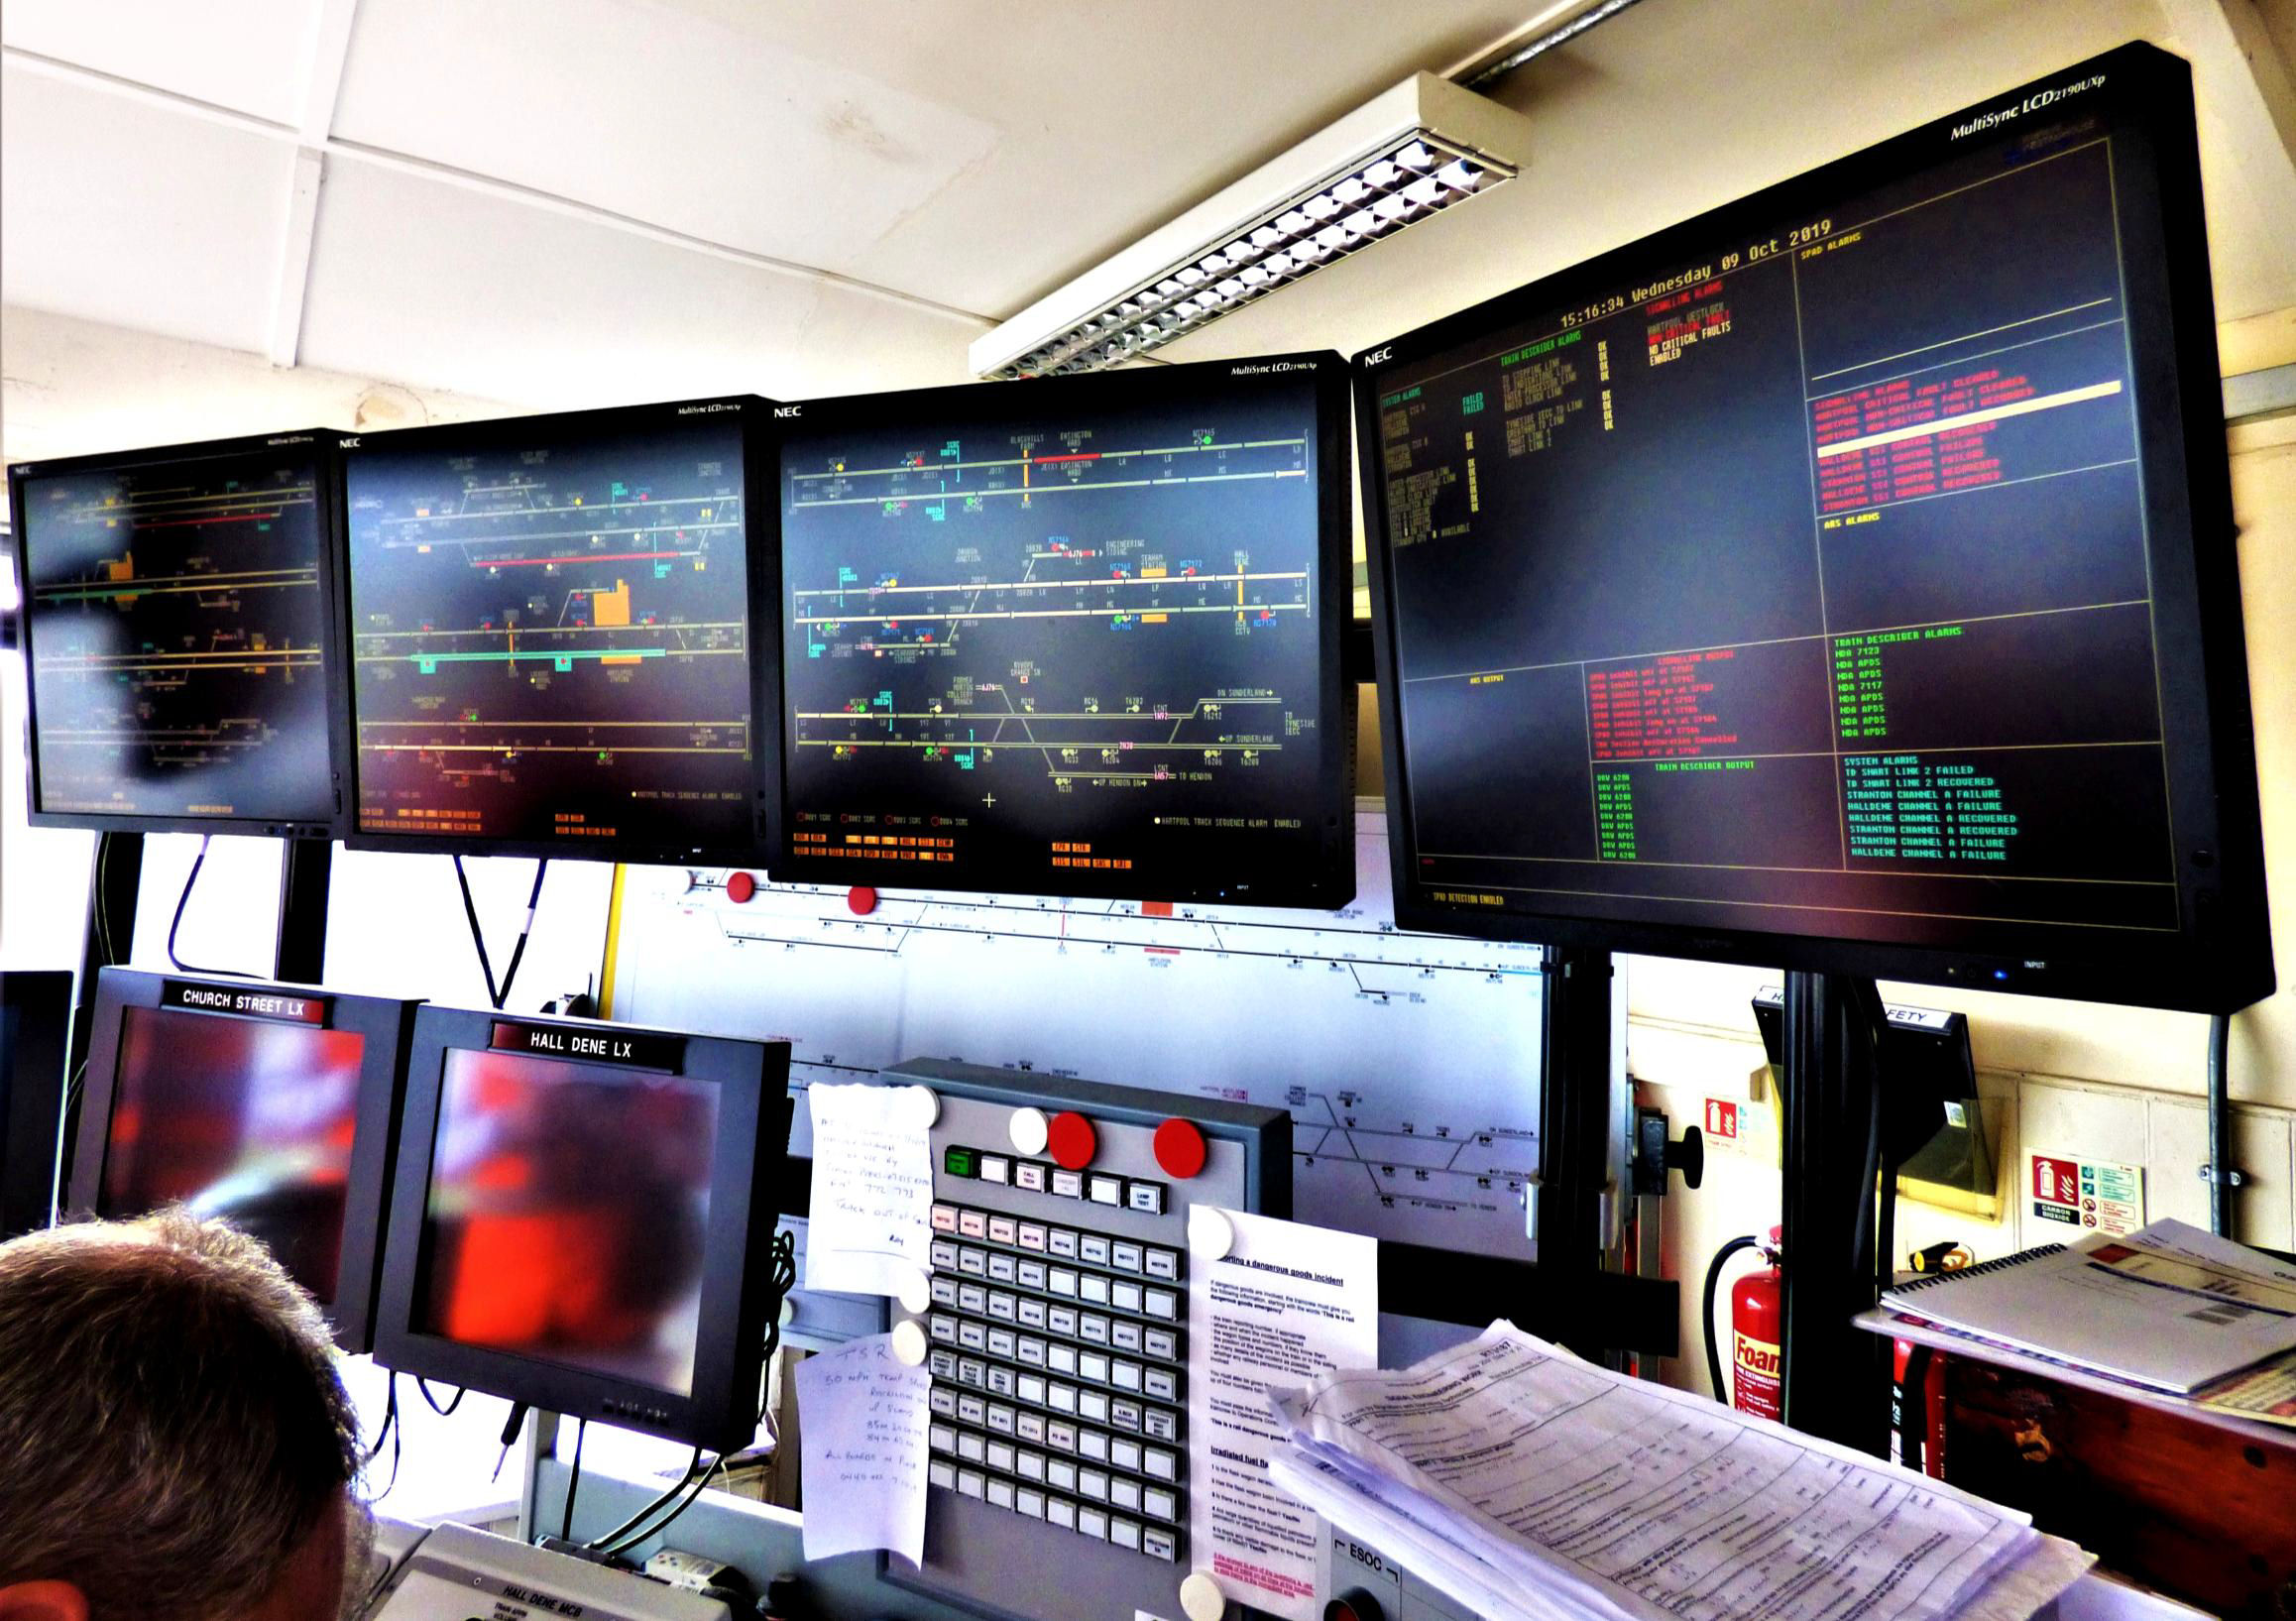
Ryhope Grange Signal Box WestCAD VDU workstation.
[© Nick Jones 2019]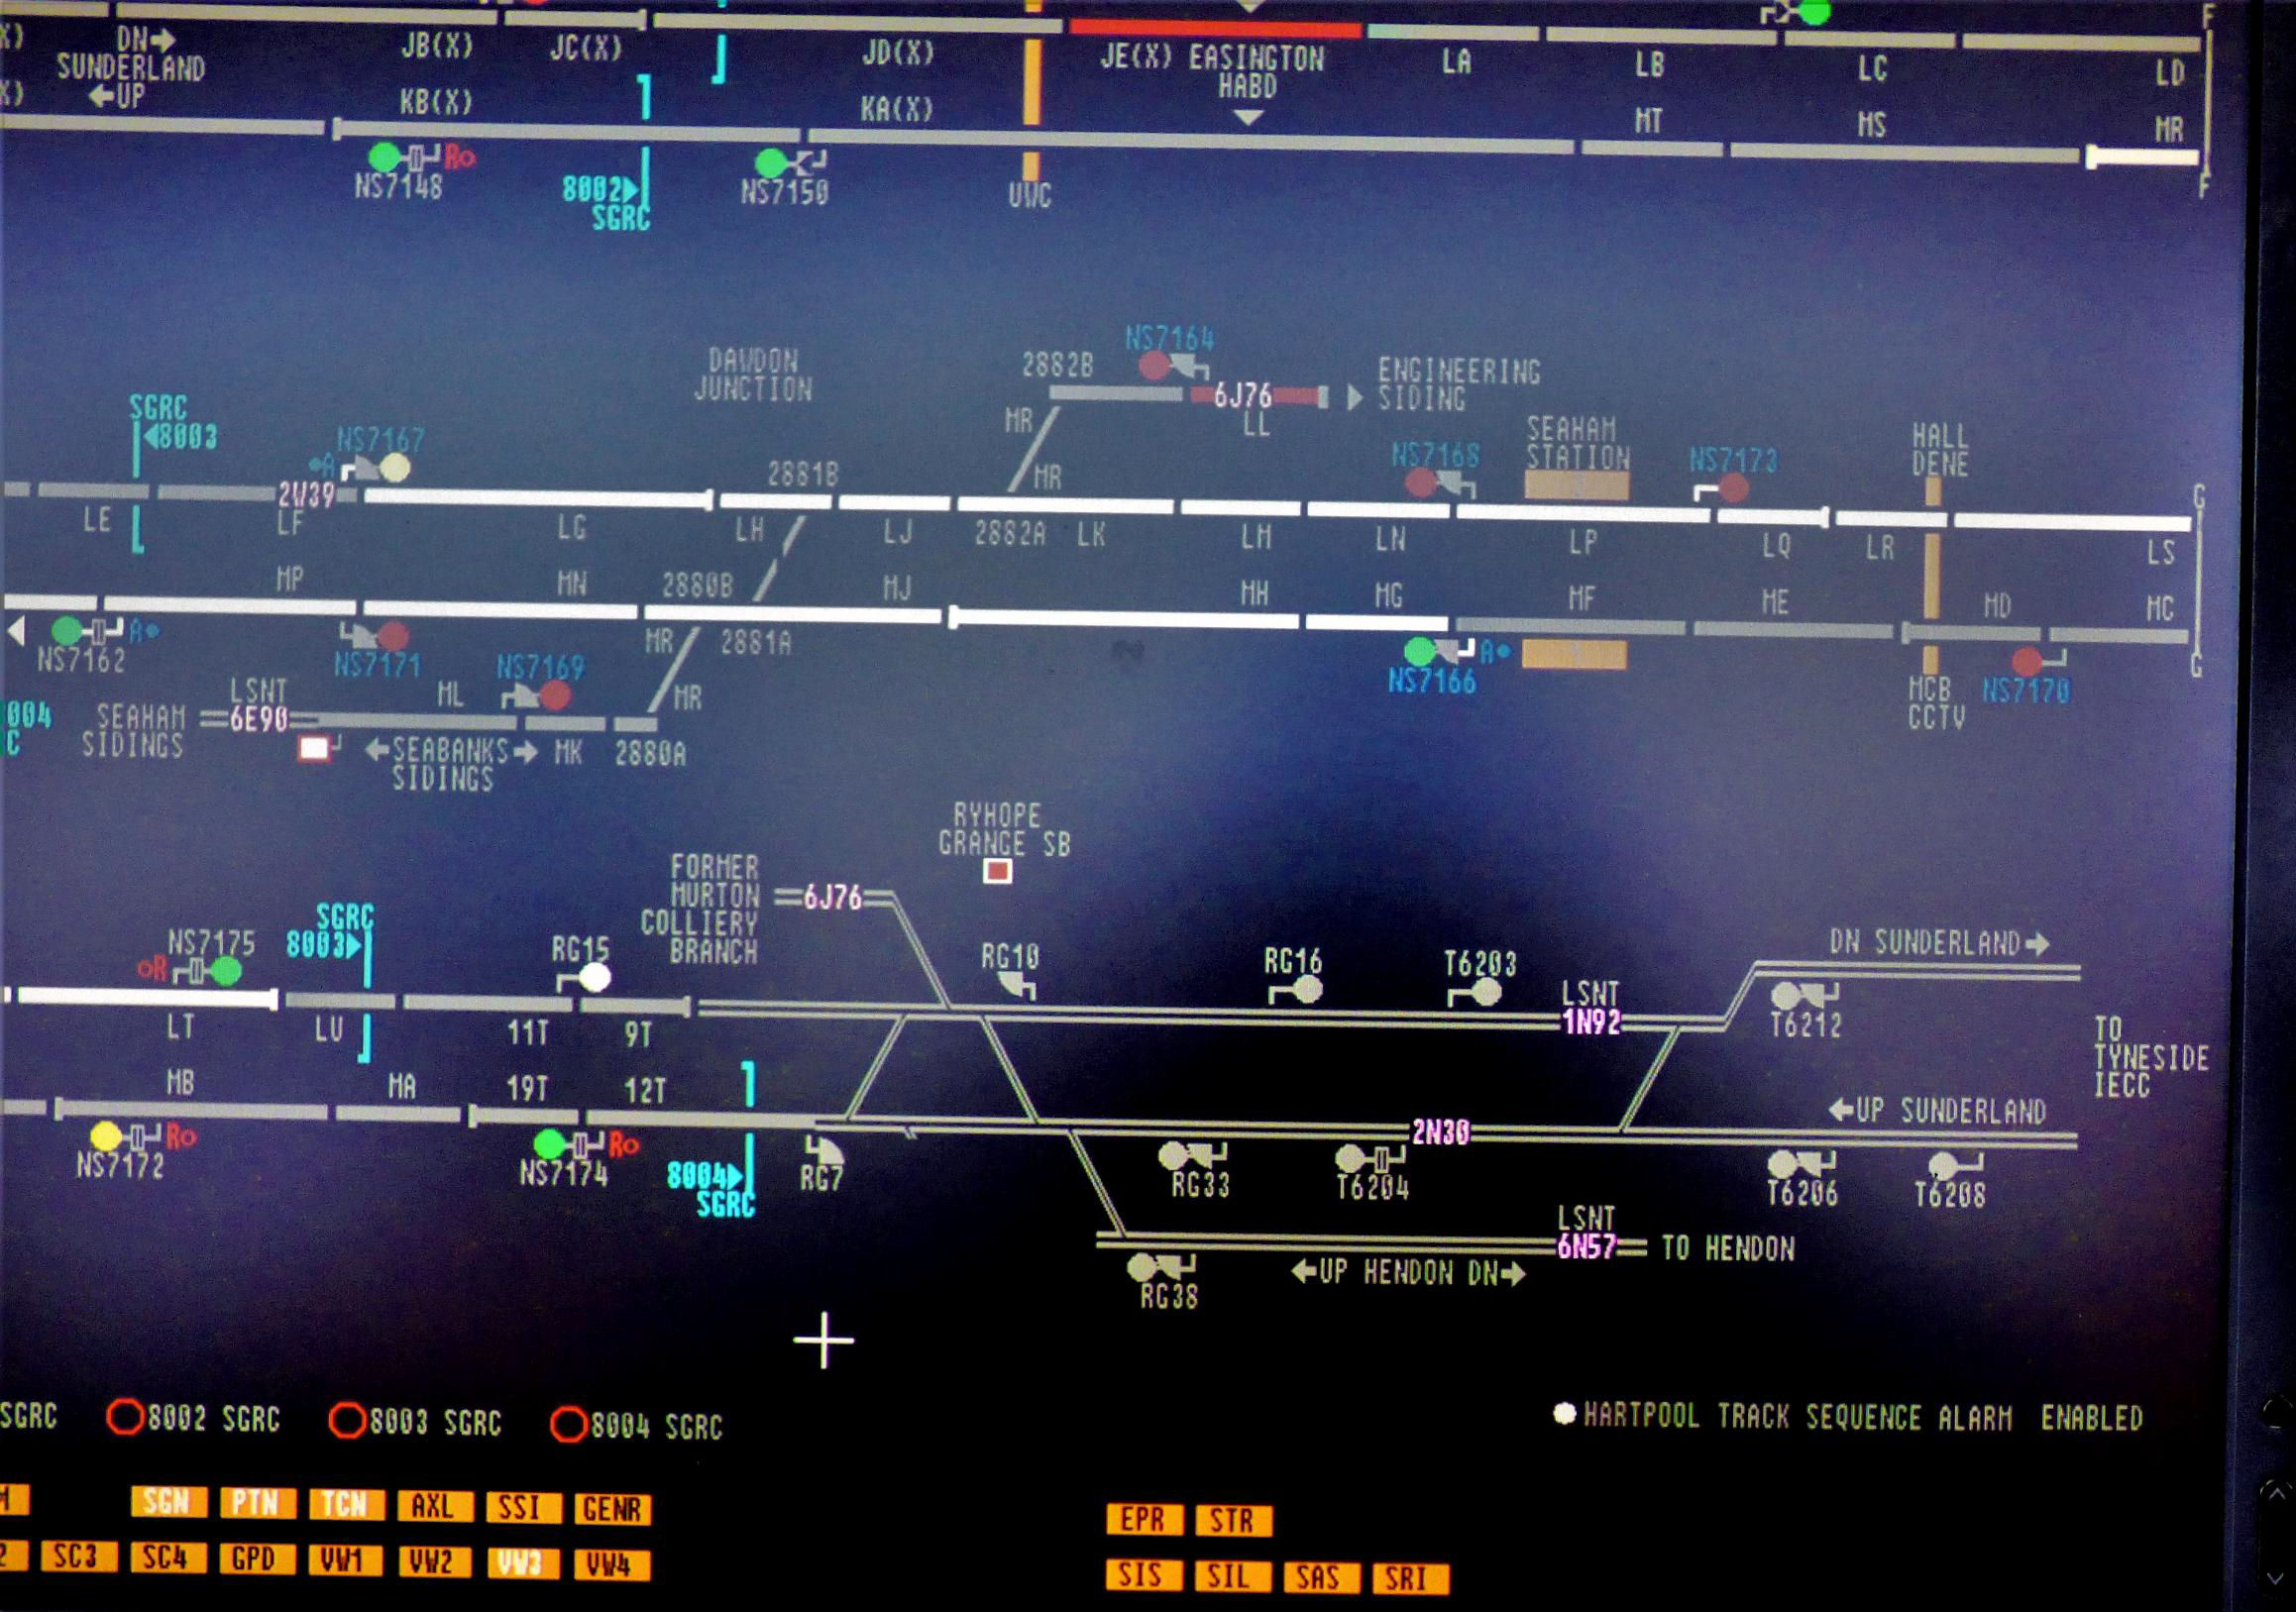
Ryhope Grange Signal Box WestCAD VDU workstation covering the Easington to Ryhope Grange area.
[© Nick Jones 2019]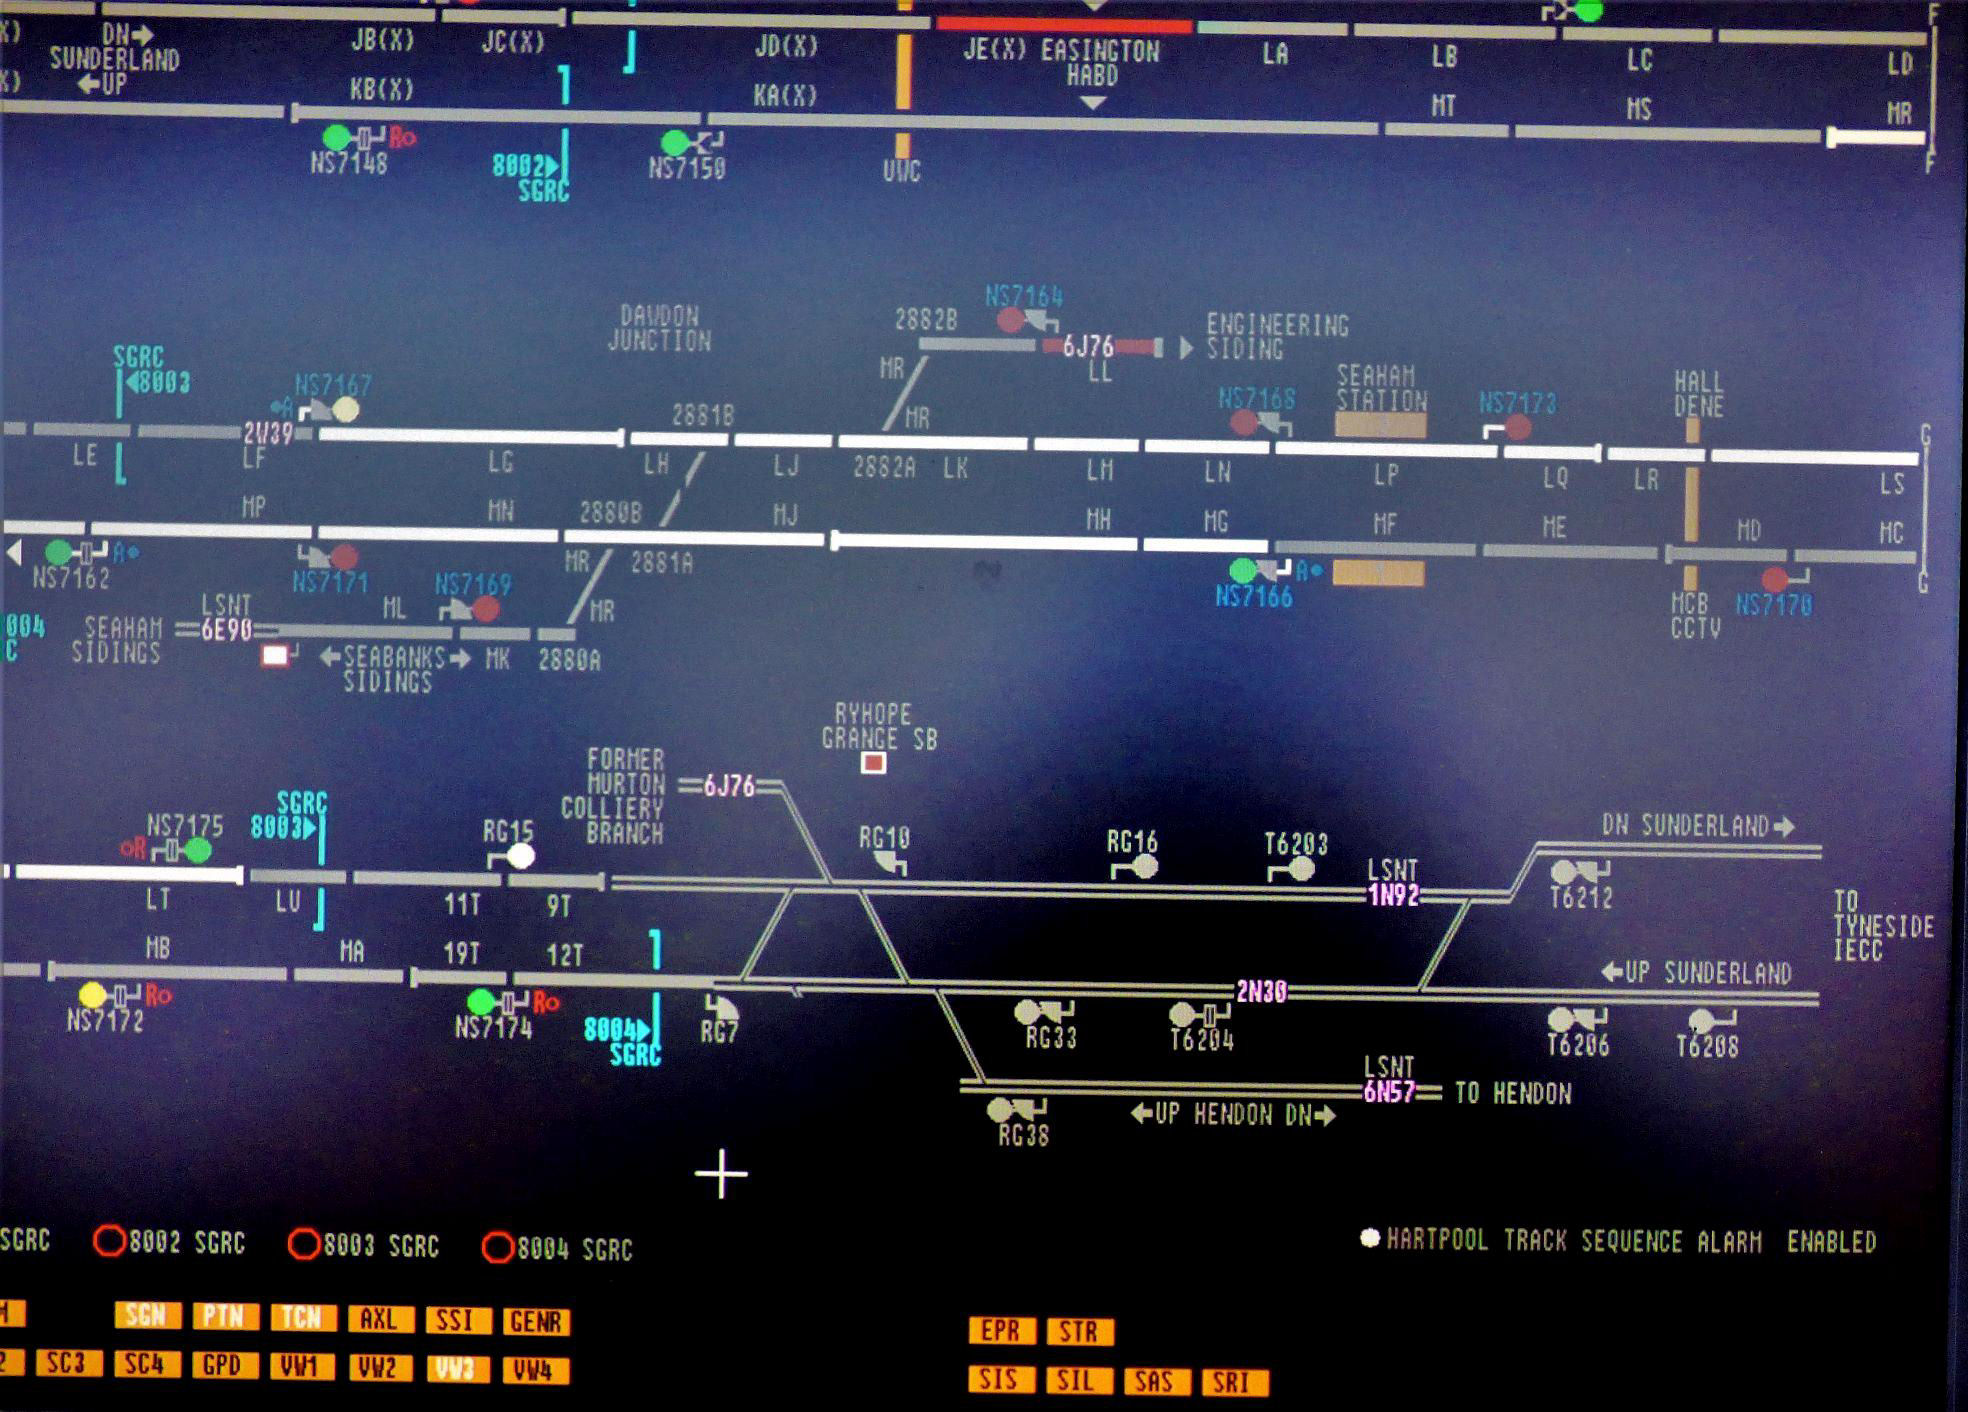
Ryhope Grange Signal Box WestCAD VDU workstation covering the Easington to Ryhope Grange area.
[© Nick Jones 2019]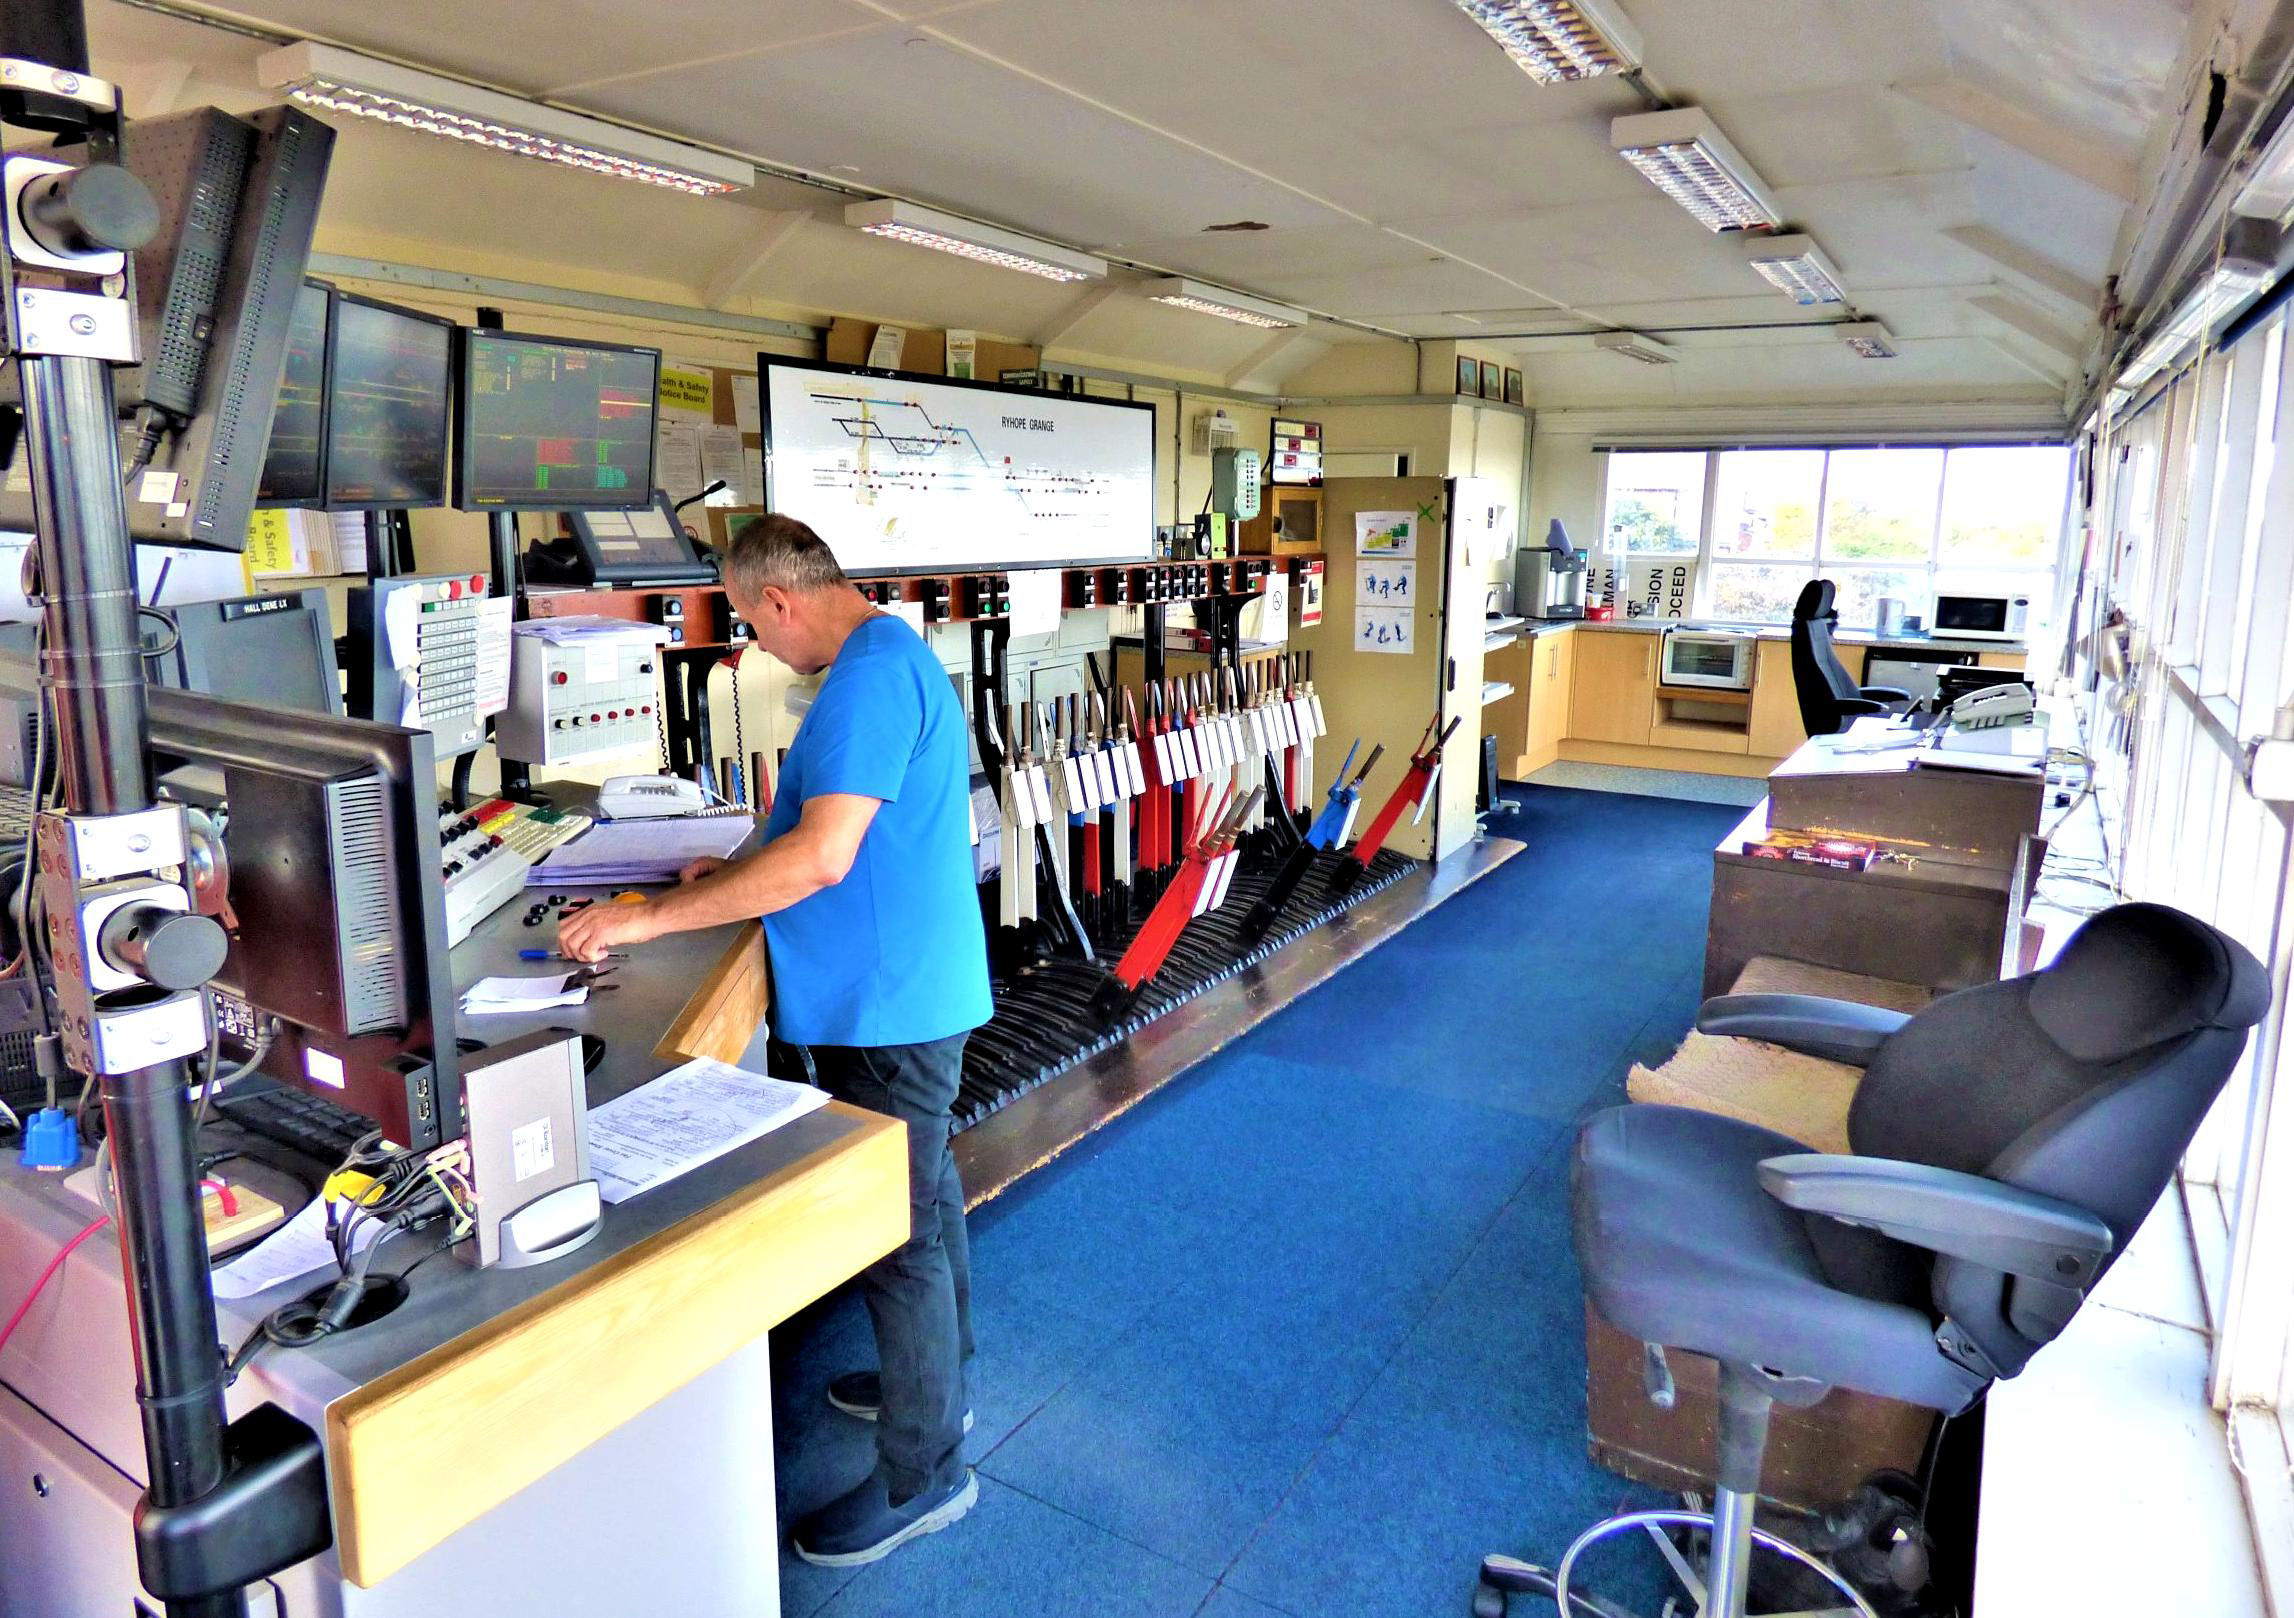
Ryhope Grange Signal Box WestCAD VDU workstation,diagram, lever frame and instruments.
[© Nick Jones 2019]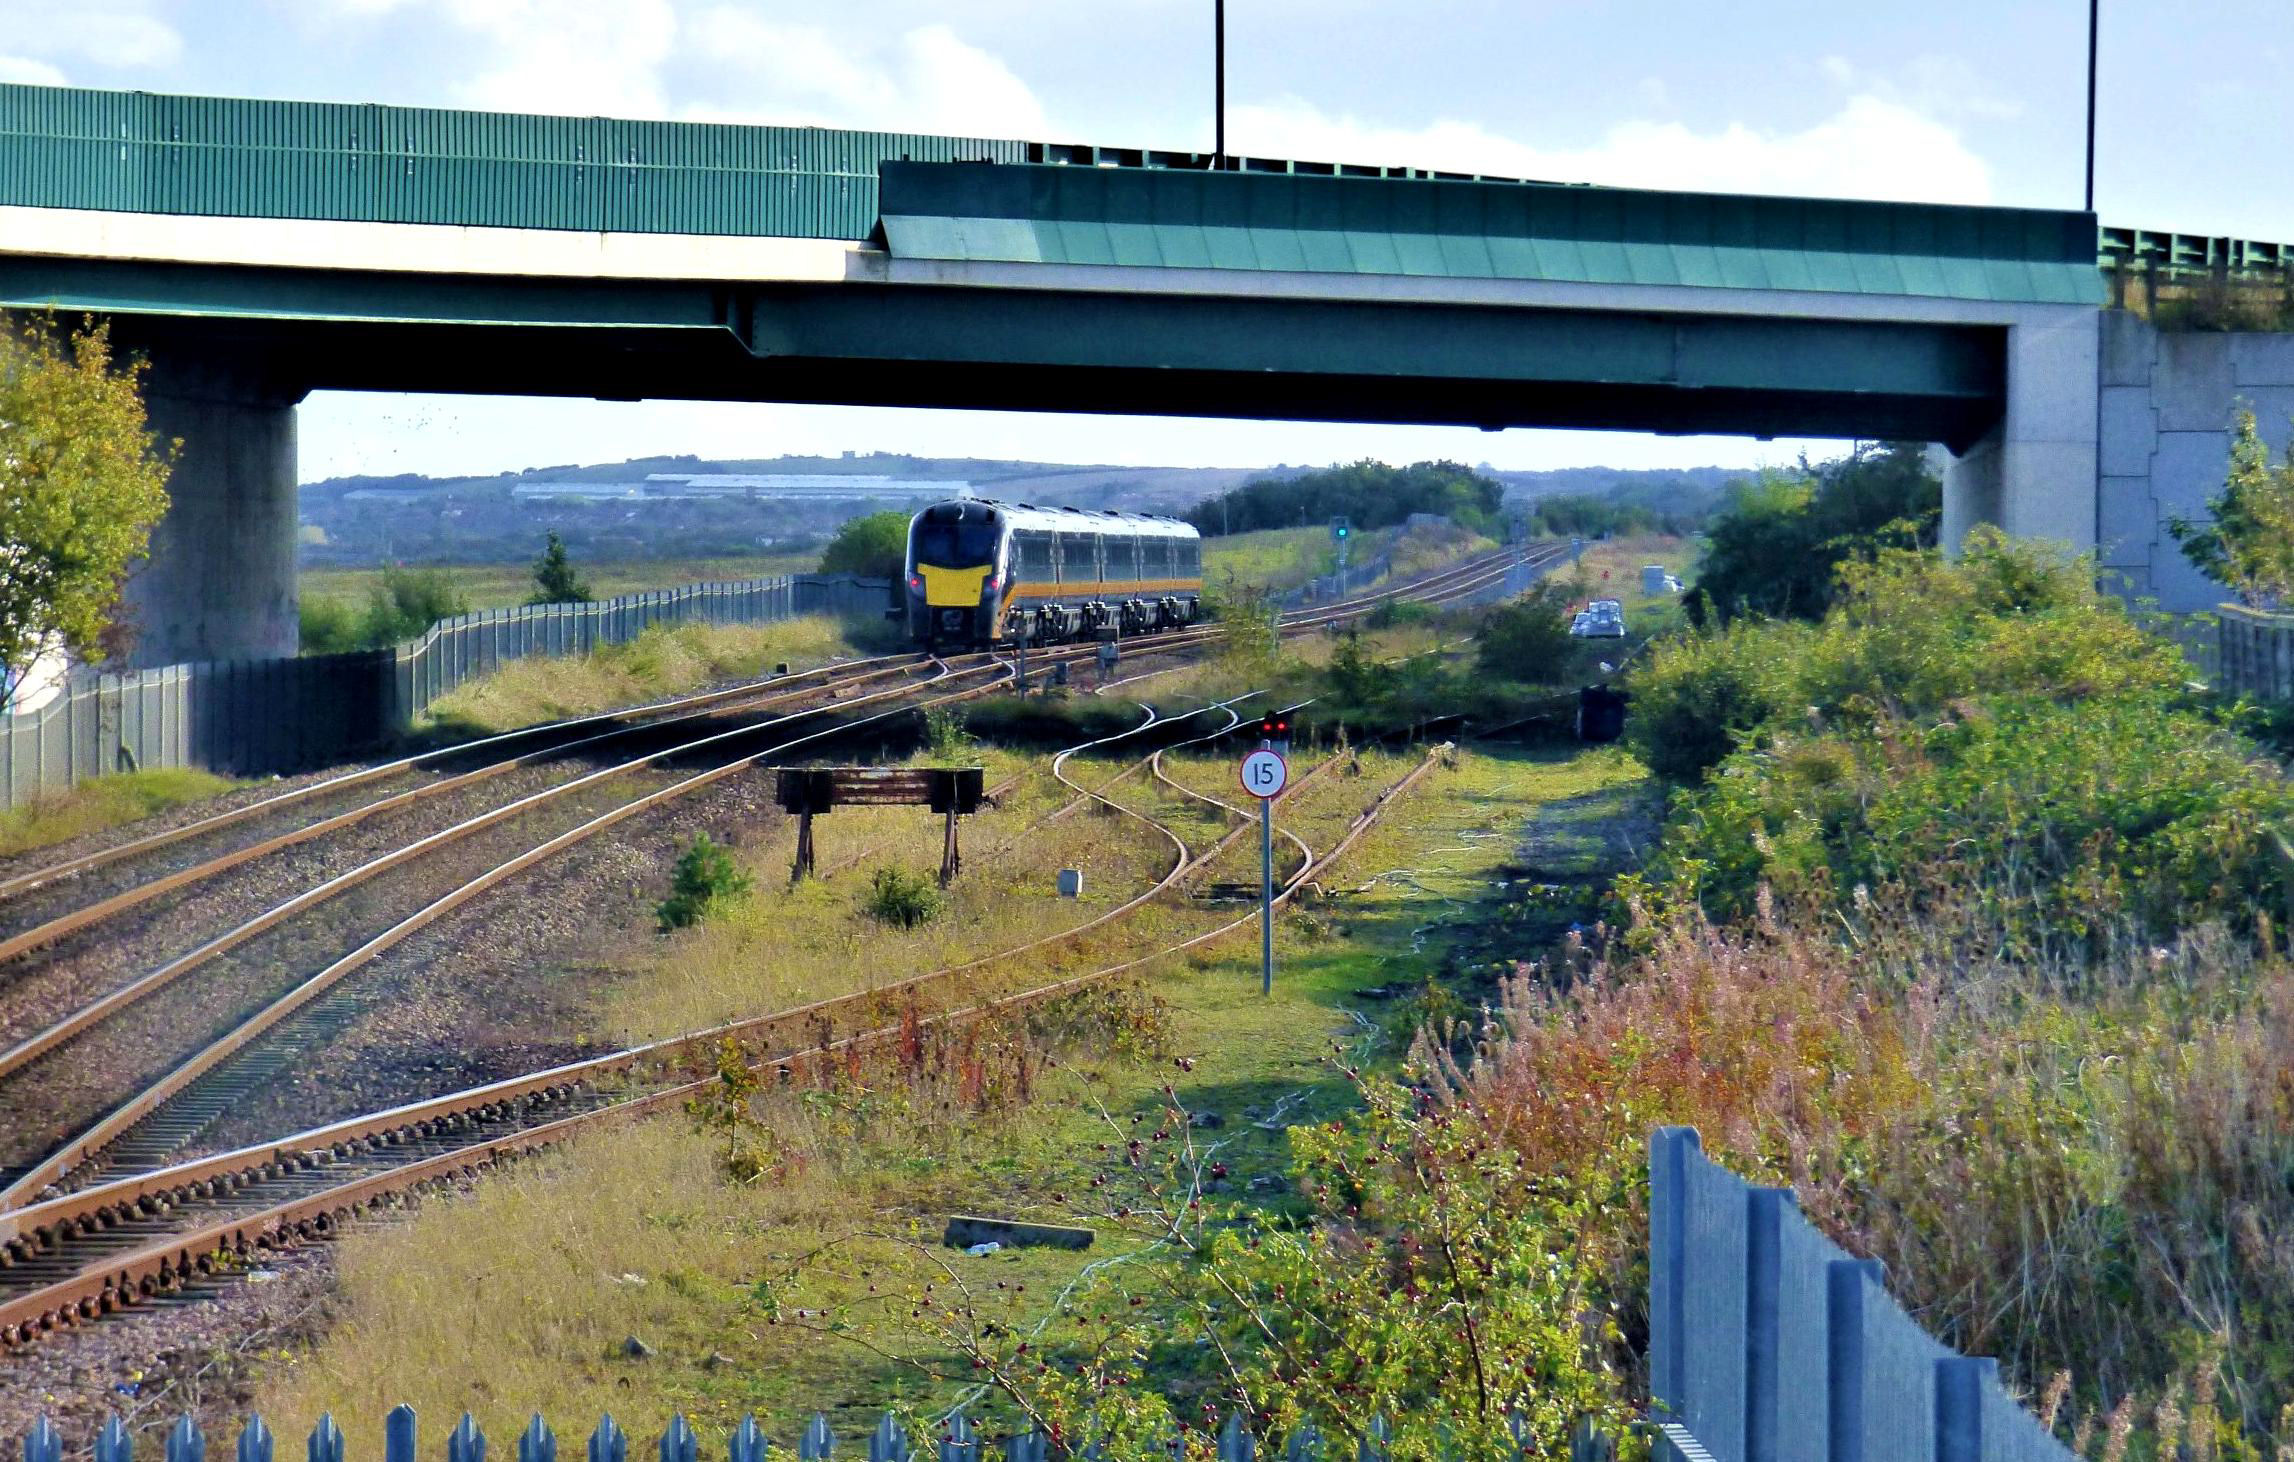
Looking south from the box, the former Murton/Hawthorn Colliery branch is far right with Ryhope Grange Sidings off it by the '15'.
[© Nick Jones 2019]
View from the box through glass of the Hendon Branch to Sunderland South Dock. Sunderland and Newcastle are to the left, Seaham right.
[© Nick Jones 2019]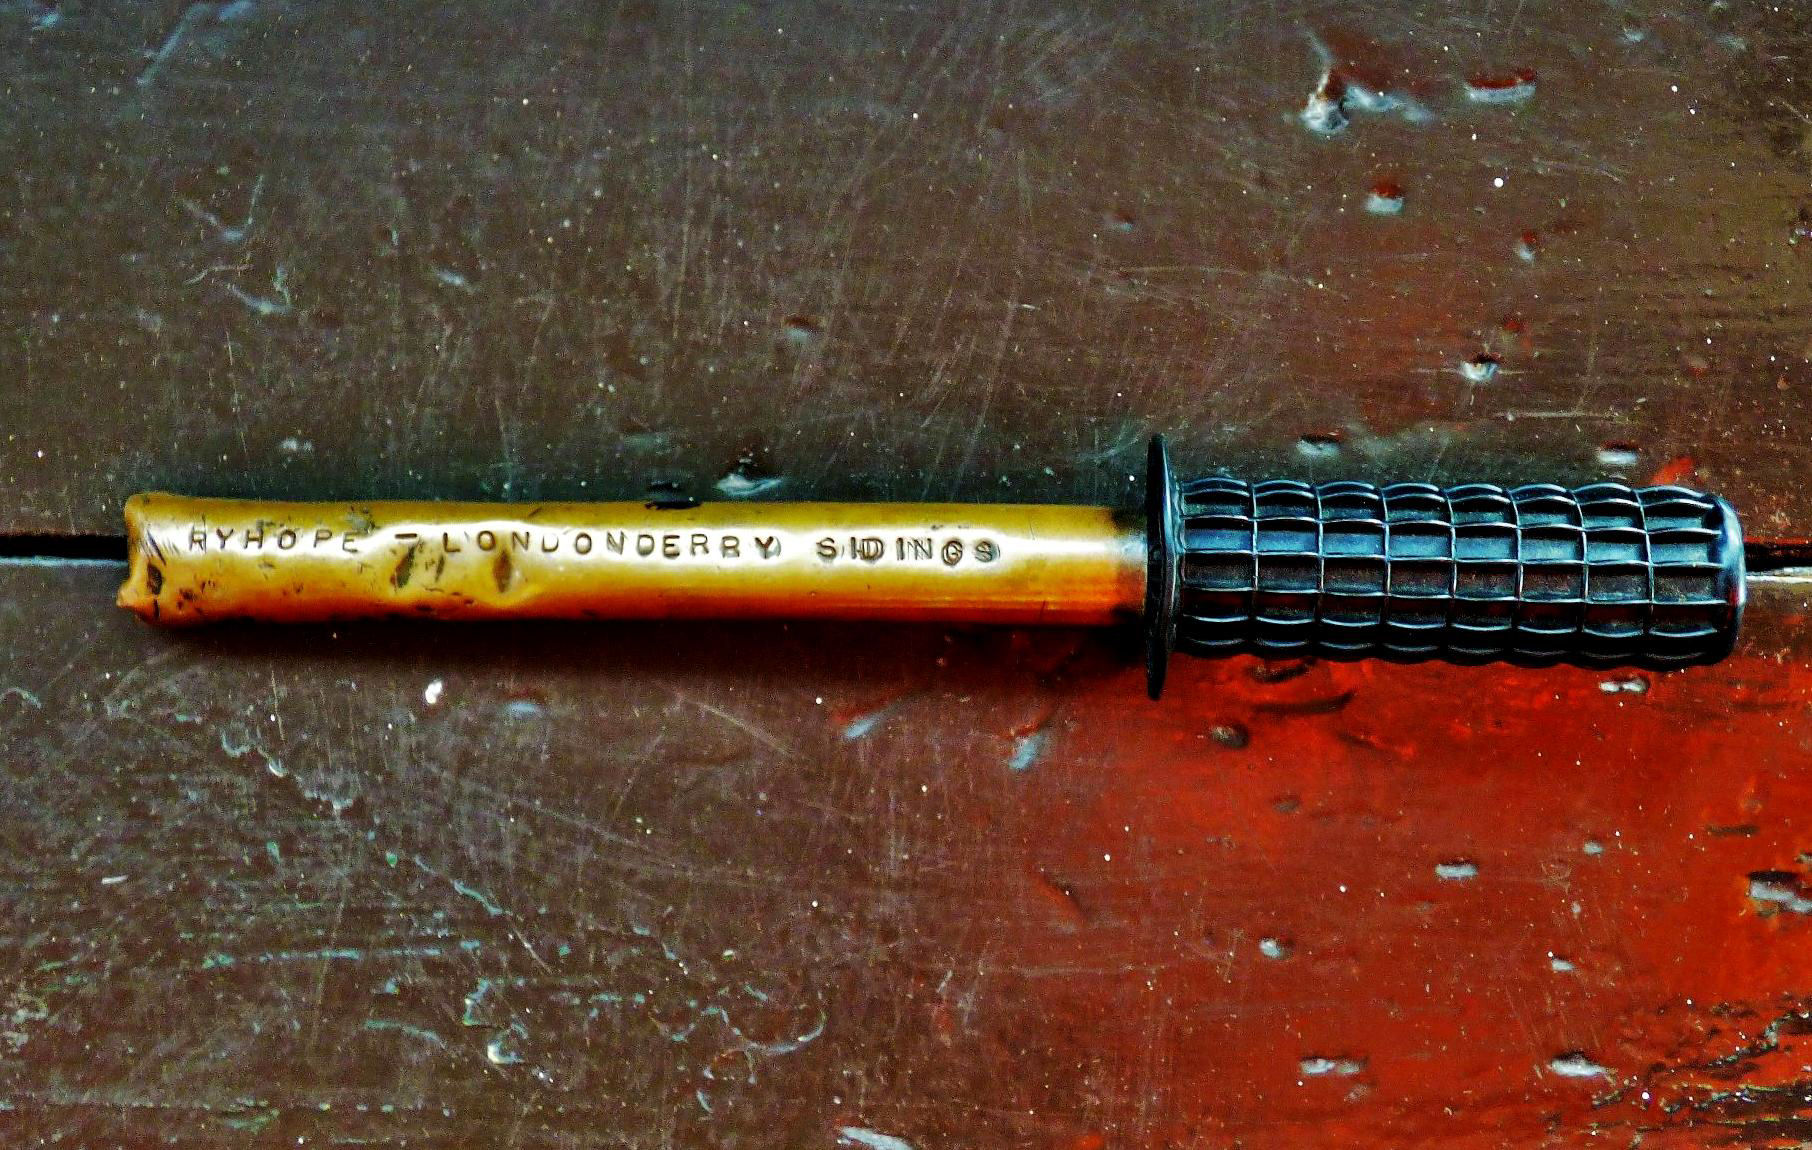
British Rail would have been proud of this economy measure … the Hendon Branch Staff.
[© Nick Jones 2019]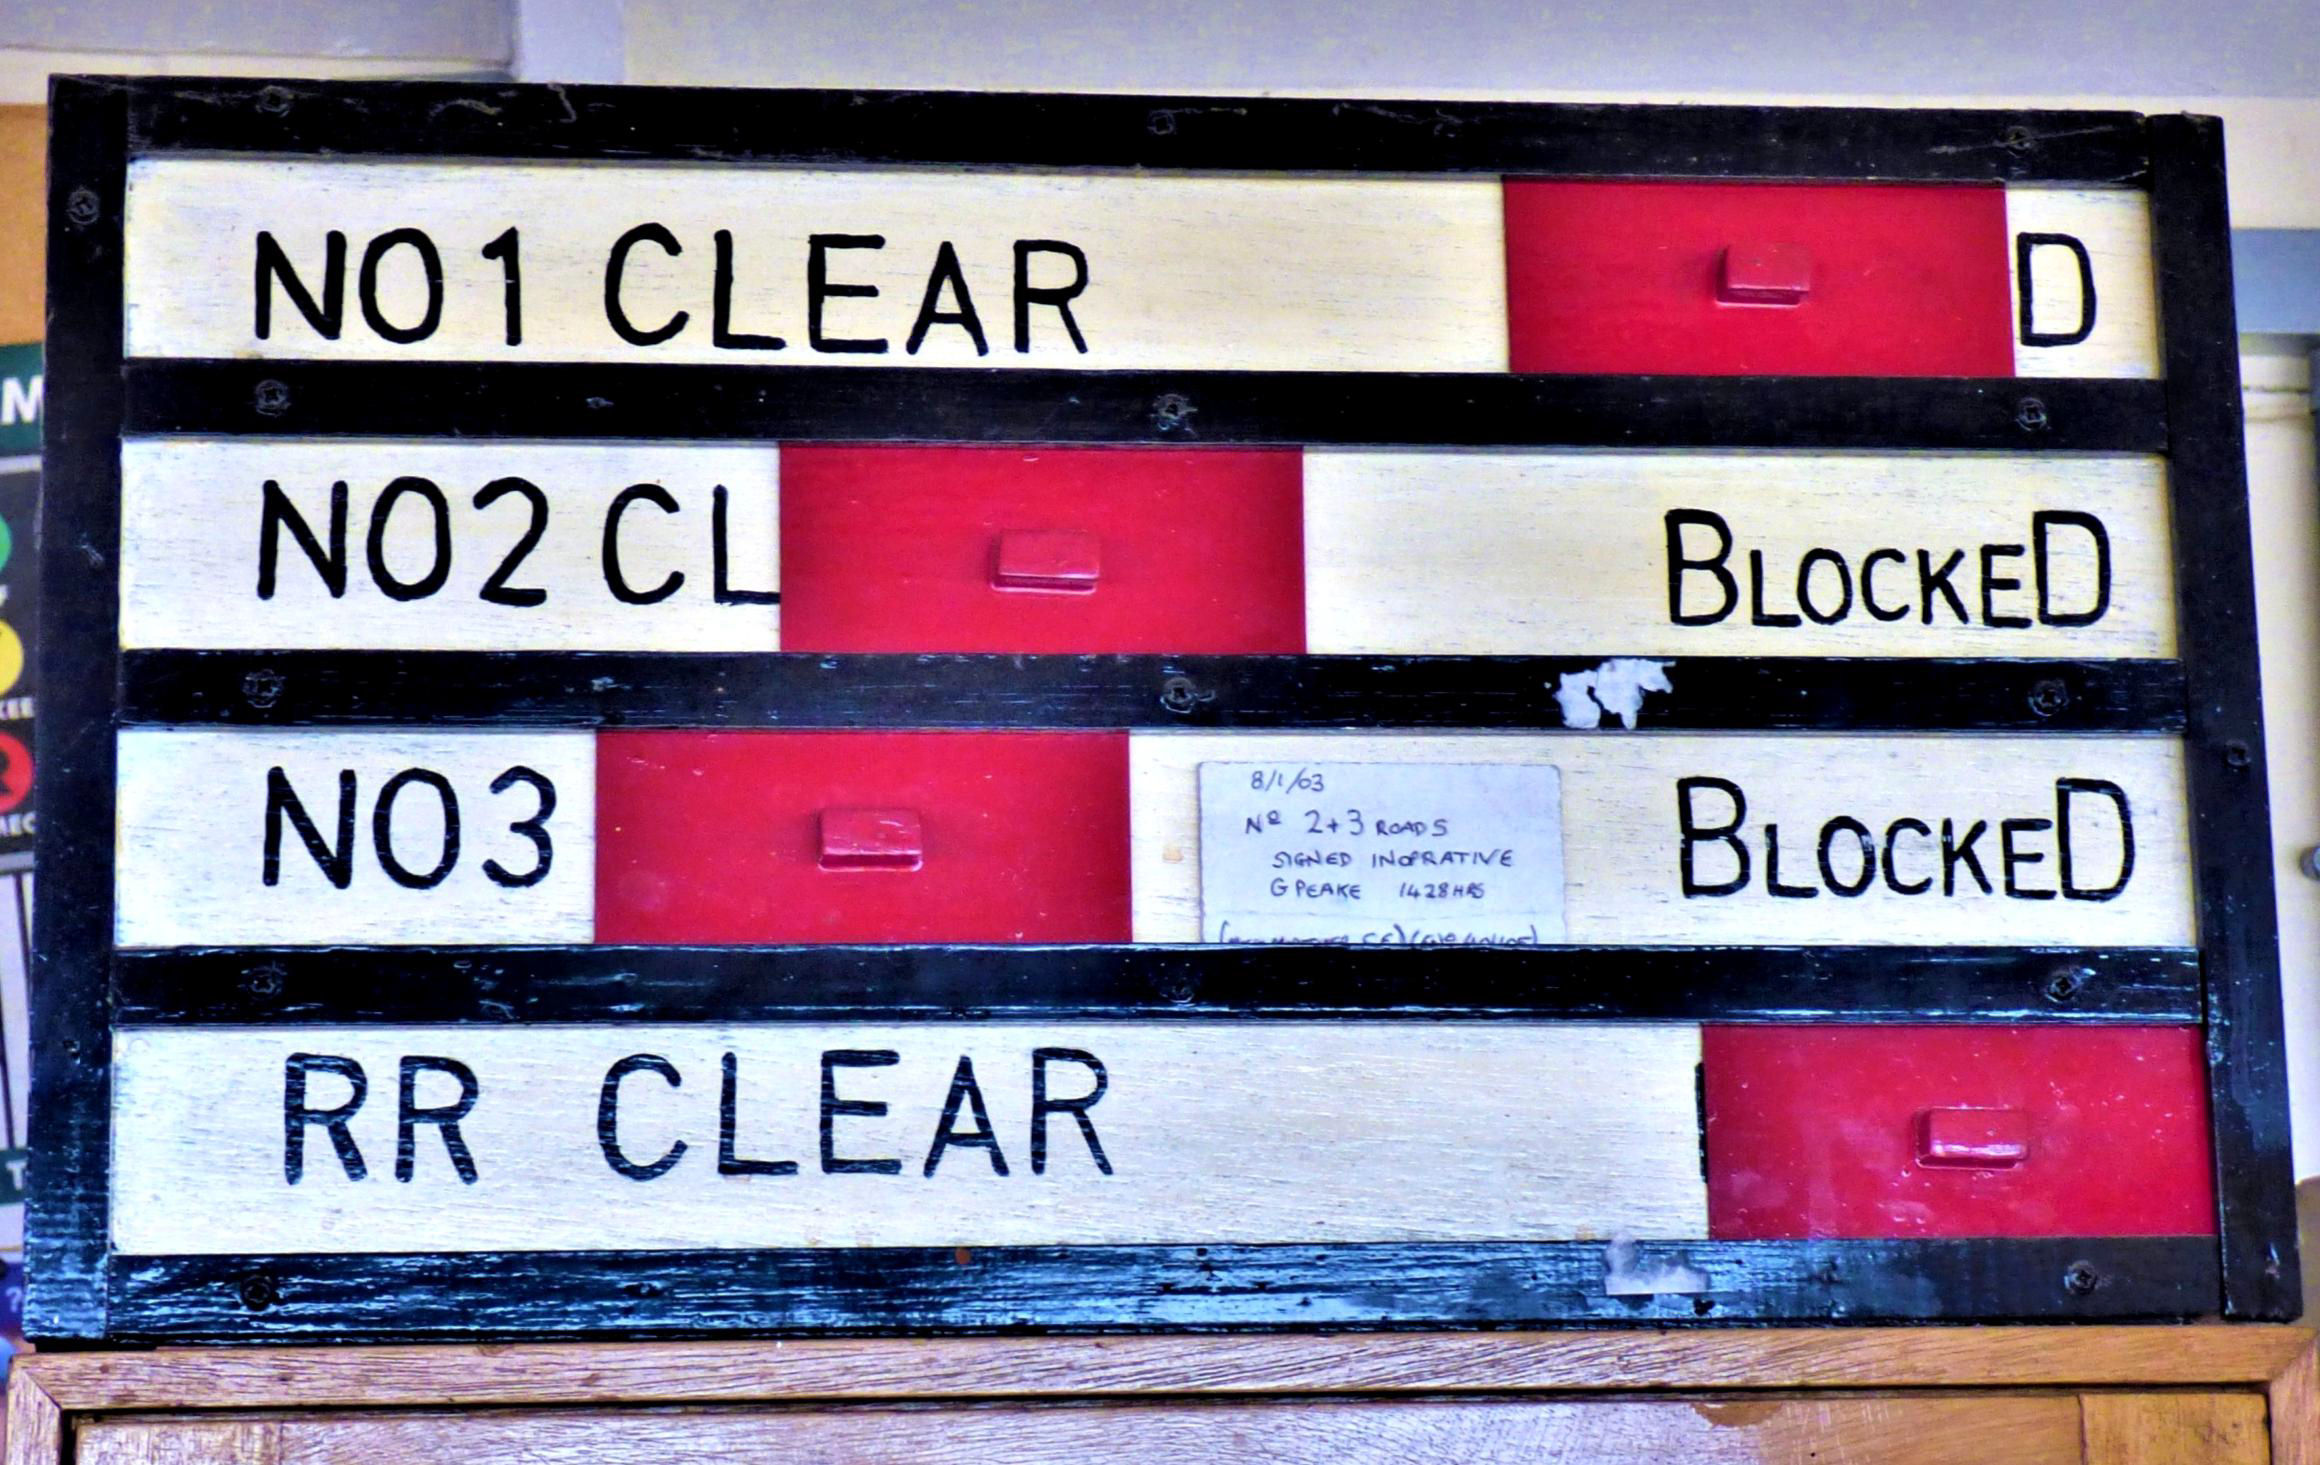
Londonderry Sidings occupancy board on the Hendon Branch in Ryhope Grange Signal Box - no risk of software failures with this…
[© Nick Jones 2019]