Eight members met at Newsham (pronounced 'News-Ham') signal box (12m 45ch). Our guide for the day was Local Operations Manager Derek Westhorpe, who has worked on the railways in the area since British Rail days and was a very knowledgeable guide and host. Although the Blyth & Tyne only normally sees freight traffic, Morpeth to Newcastle via Bedlington is maintained to passenger standards and can be used for short notice diversions if required. Once heavy freight traffic has dwindled over the years; the remaining regular traffic is biomass from Tyne Dock to Lynemouth Power Station (30,000 tonnes a week) but none on the day of our visit due to a planned maintenance shutdown! There is also alumina powder from North Blyth import terminal to Fort William.
They first run south to Newsham (to run round), retracing their route to Bedlington, then turn north at Morpeth. Coal, brought in by road from opencast sites, still goes out by rail regularly from Battleship Wharf. This DB Cargo worked traffic, staged at Tyne Yard, is for 'non-power station use'.
Technical Details: The Down direction (double track) towards Bedlington South Signal Box (15m 60ch) is worked Absolute Block using a standard British Railways block instrument. The Up direction, towards Benton Jn, (a seven mile single track section) interfaces with Tyneside Integrated Electronic Control Centre and is worked Track Circuit Block. Other than the Absolute Block sections north, the entire Newsham layout is track circuited. The Down line is track circuited to the overlap of the section signal to Bedlington South (No13) and the Up line from the approach to the outermost stop signal (No20).
The section signal (No13) towards Bedlington is released by block acceptance while the last Newsham-controlled signal towards Tyneside (T) (No17) can be cleared if the line is clear to the overlap of signal T638, and the slot (No101) on T635 reading onto the single line has not been cleared by Newsham.
14 of the 20 levers still control signals and points. Four operational levers are shortened as they work motorised equipment. The frame is stamped 'WB&S Co Ltd' (Westinghouse Brake & Signal Co) on the floor plates and dated LNER 1943. All running and shunt signals are semaphore except No101, a switch operated colour light signal from the Tyneside direction, and the slot on T635, the signal in rear of 101.
A through train from Tyneside towards Bedlington requires No 5 points normal, Facing Point Lock 4 reversed and, if the line ahead is clear, signals 1, 11, 12, 13 & 14 can be cleared in that order. No14 is a worked distant. Sequential locking ensures that, once any of the stop signals are returned, they cannot be reversed again until the section signal (No13) has been returned. Sequential locking also applies on the Up line. Up line running signals are cleared in the following order: 20, 19, 18 & 17; if any are then returned to danger they cannot be cleared again until No17 is returned. The Up distant is a fixed board.
The box also supervises level crossings at Seghill (Automatic Half Barrier - AHB) and Hartley (AHB) on the single line as well as Newsham (Barriers), Plessey Road (CCTV) & Bebside (AHB) on the double line. Trains can run-round at Newsham using No5 turnout and a trailing crossover (No9) at the north end. The motor operated crossover is protected by No12 and No19. Signals 13, 14 & 20 are motor operated.
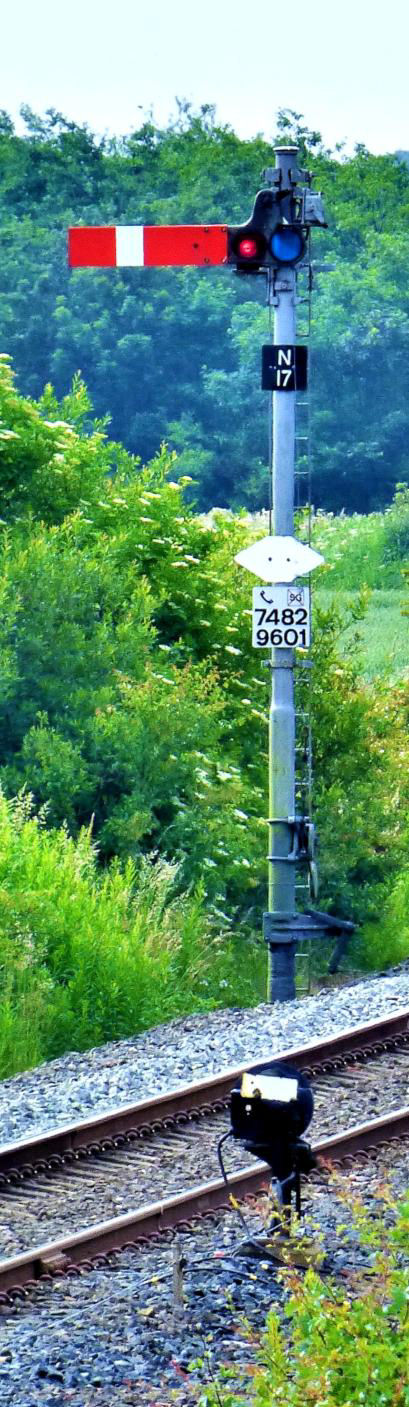
The last Newsham-controlled signal towards Tyneside (T) (No17).
[© Nick Jones 2019]
Newsham Signal Box where the double track starts heading north. The crossing is South Newsham Road (A 1061).
[© Nick Jones 2019]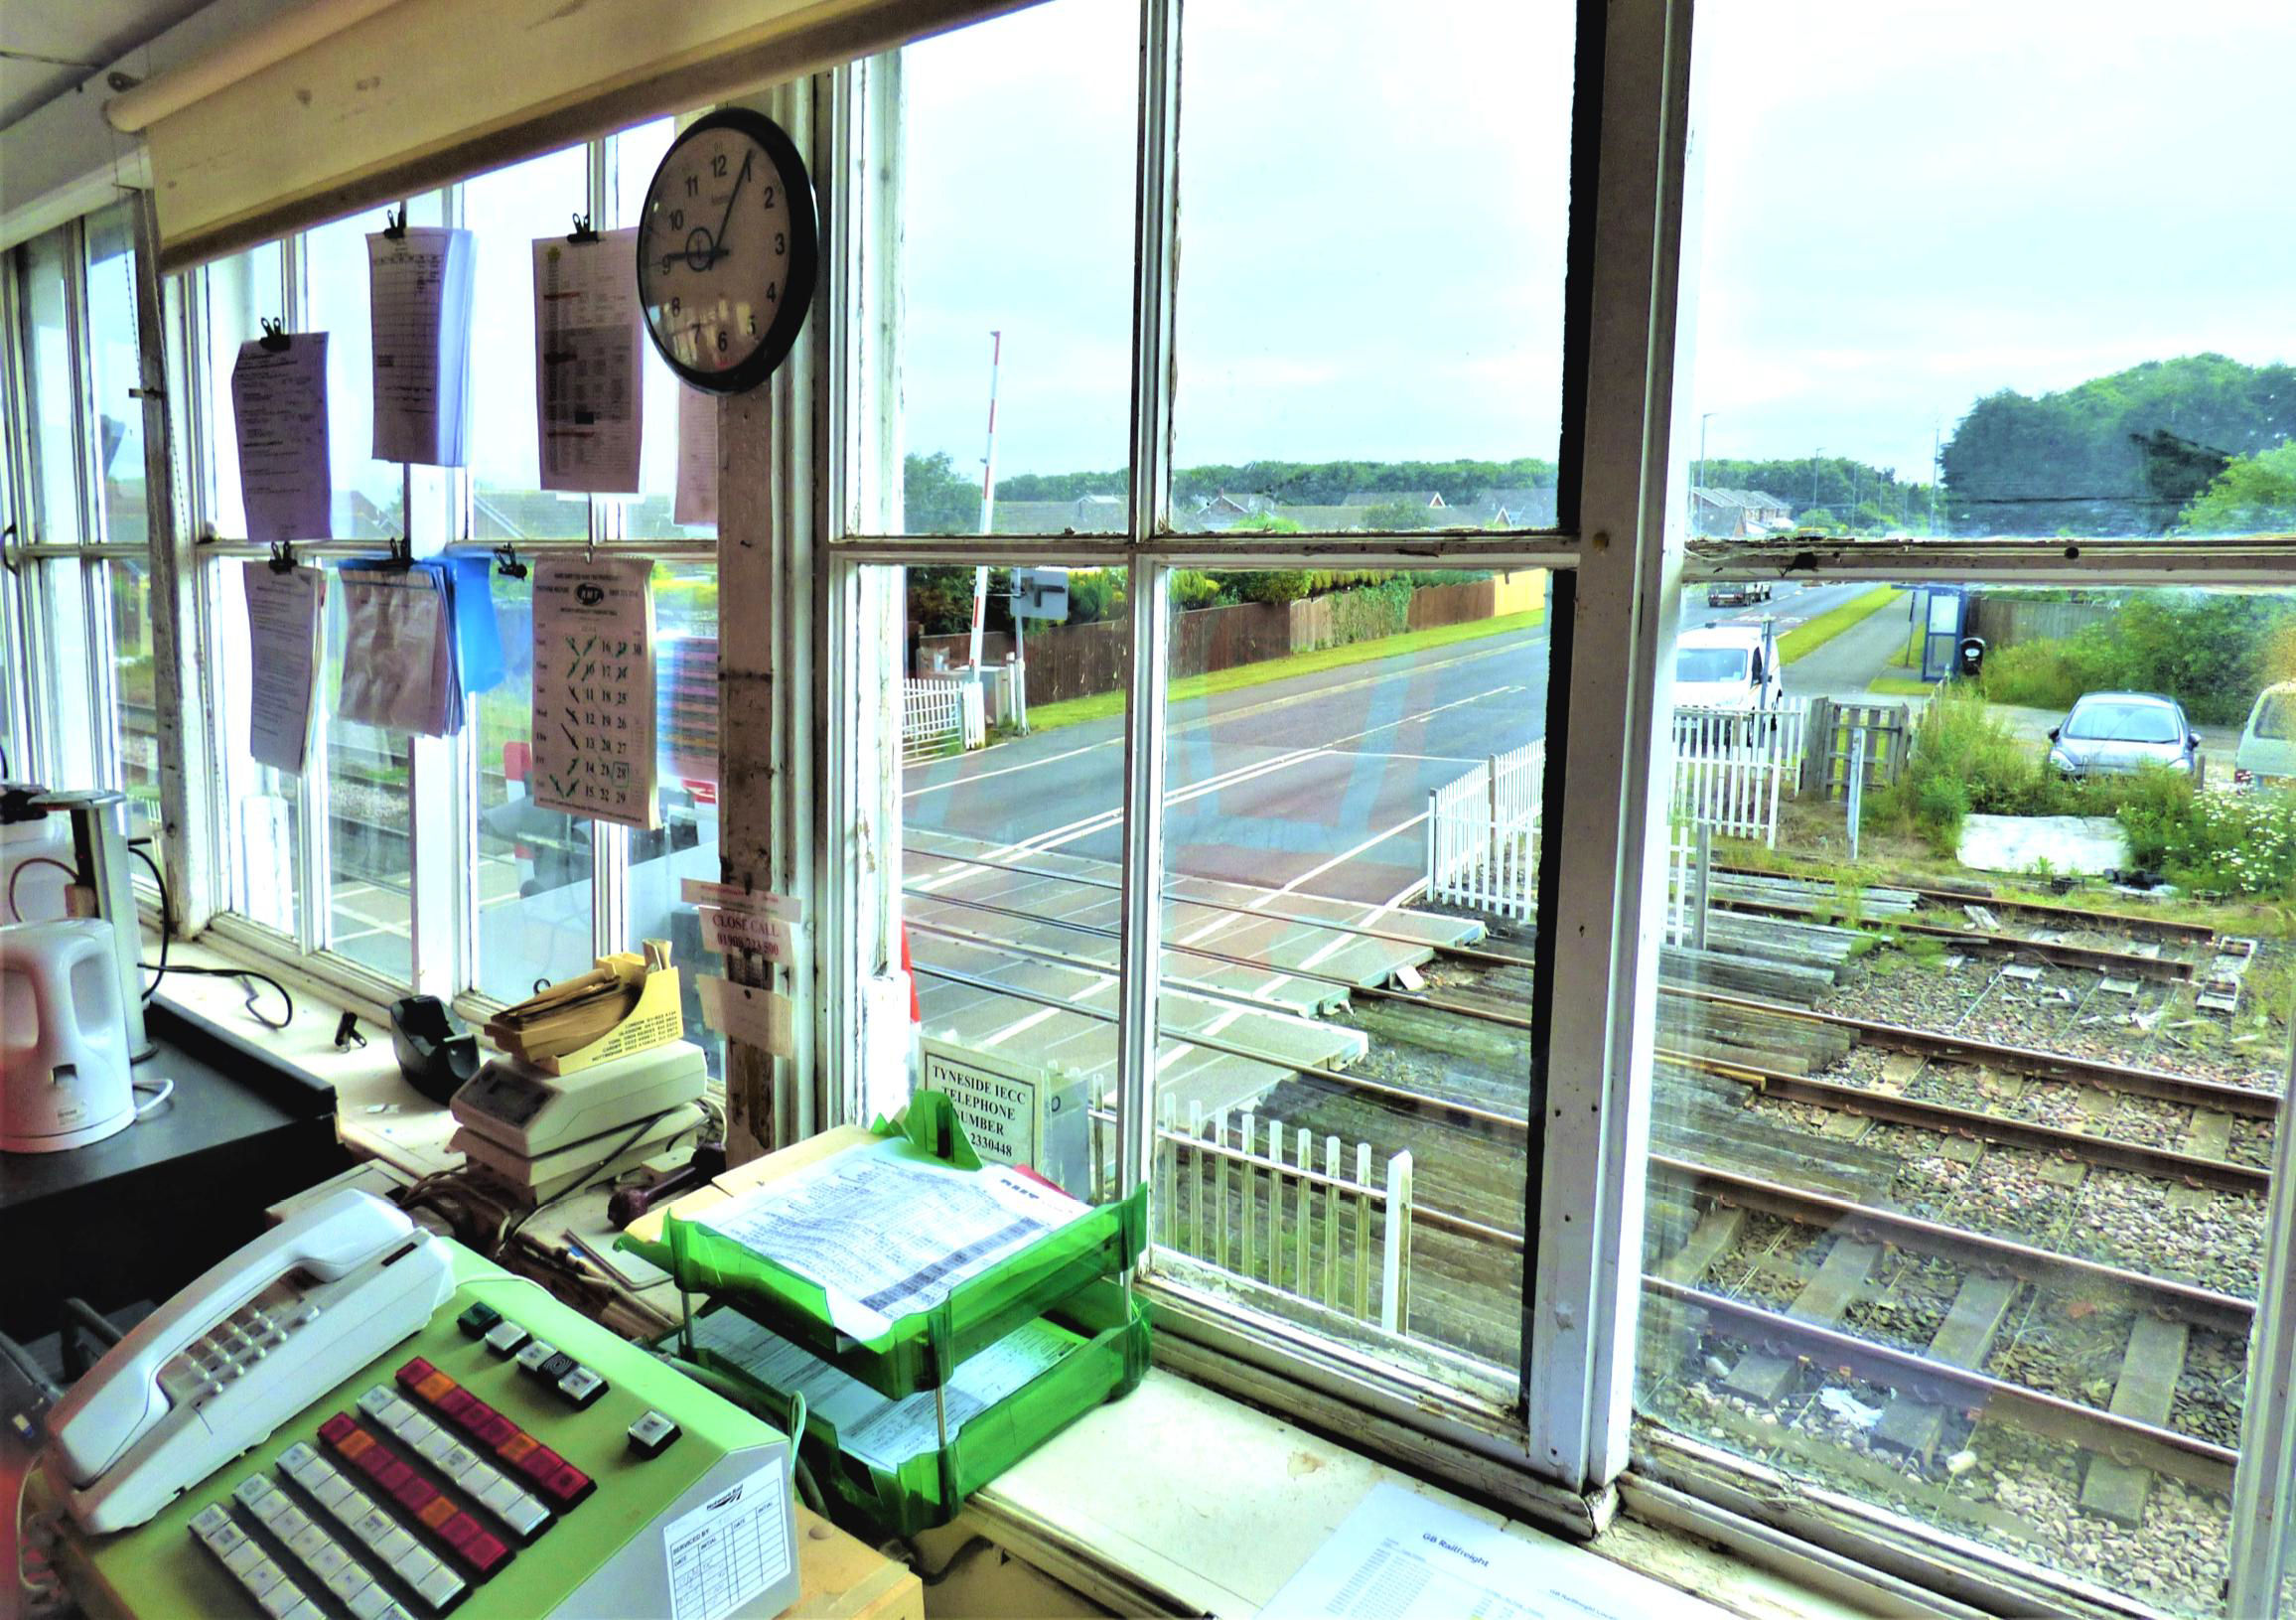
Newsham Signal Box looking out onto the crossing on South Newsham Road (A 1061).
[© Nick Jones 2019]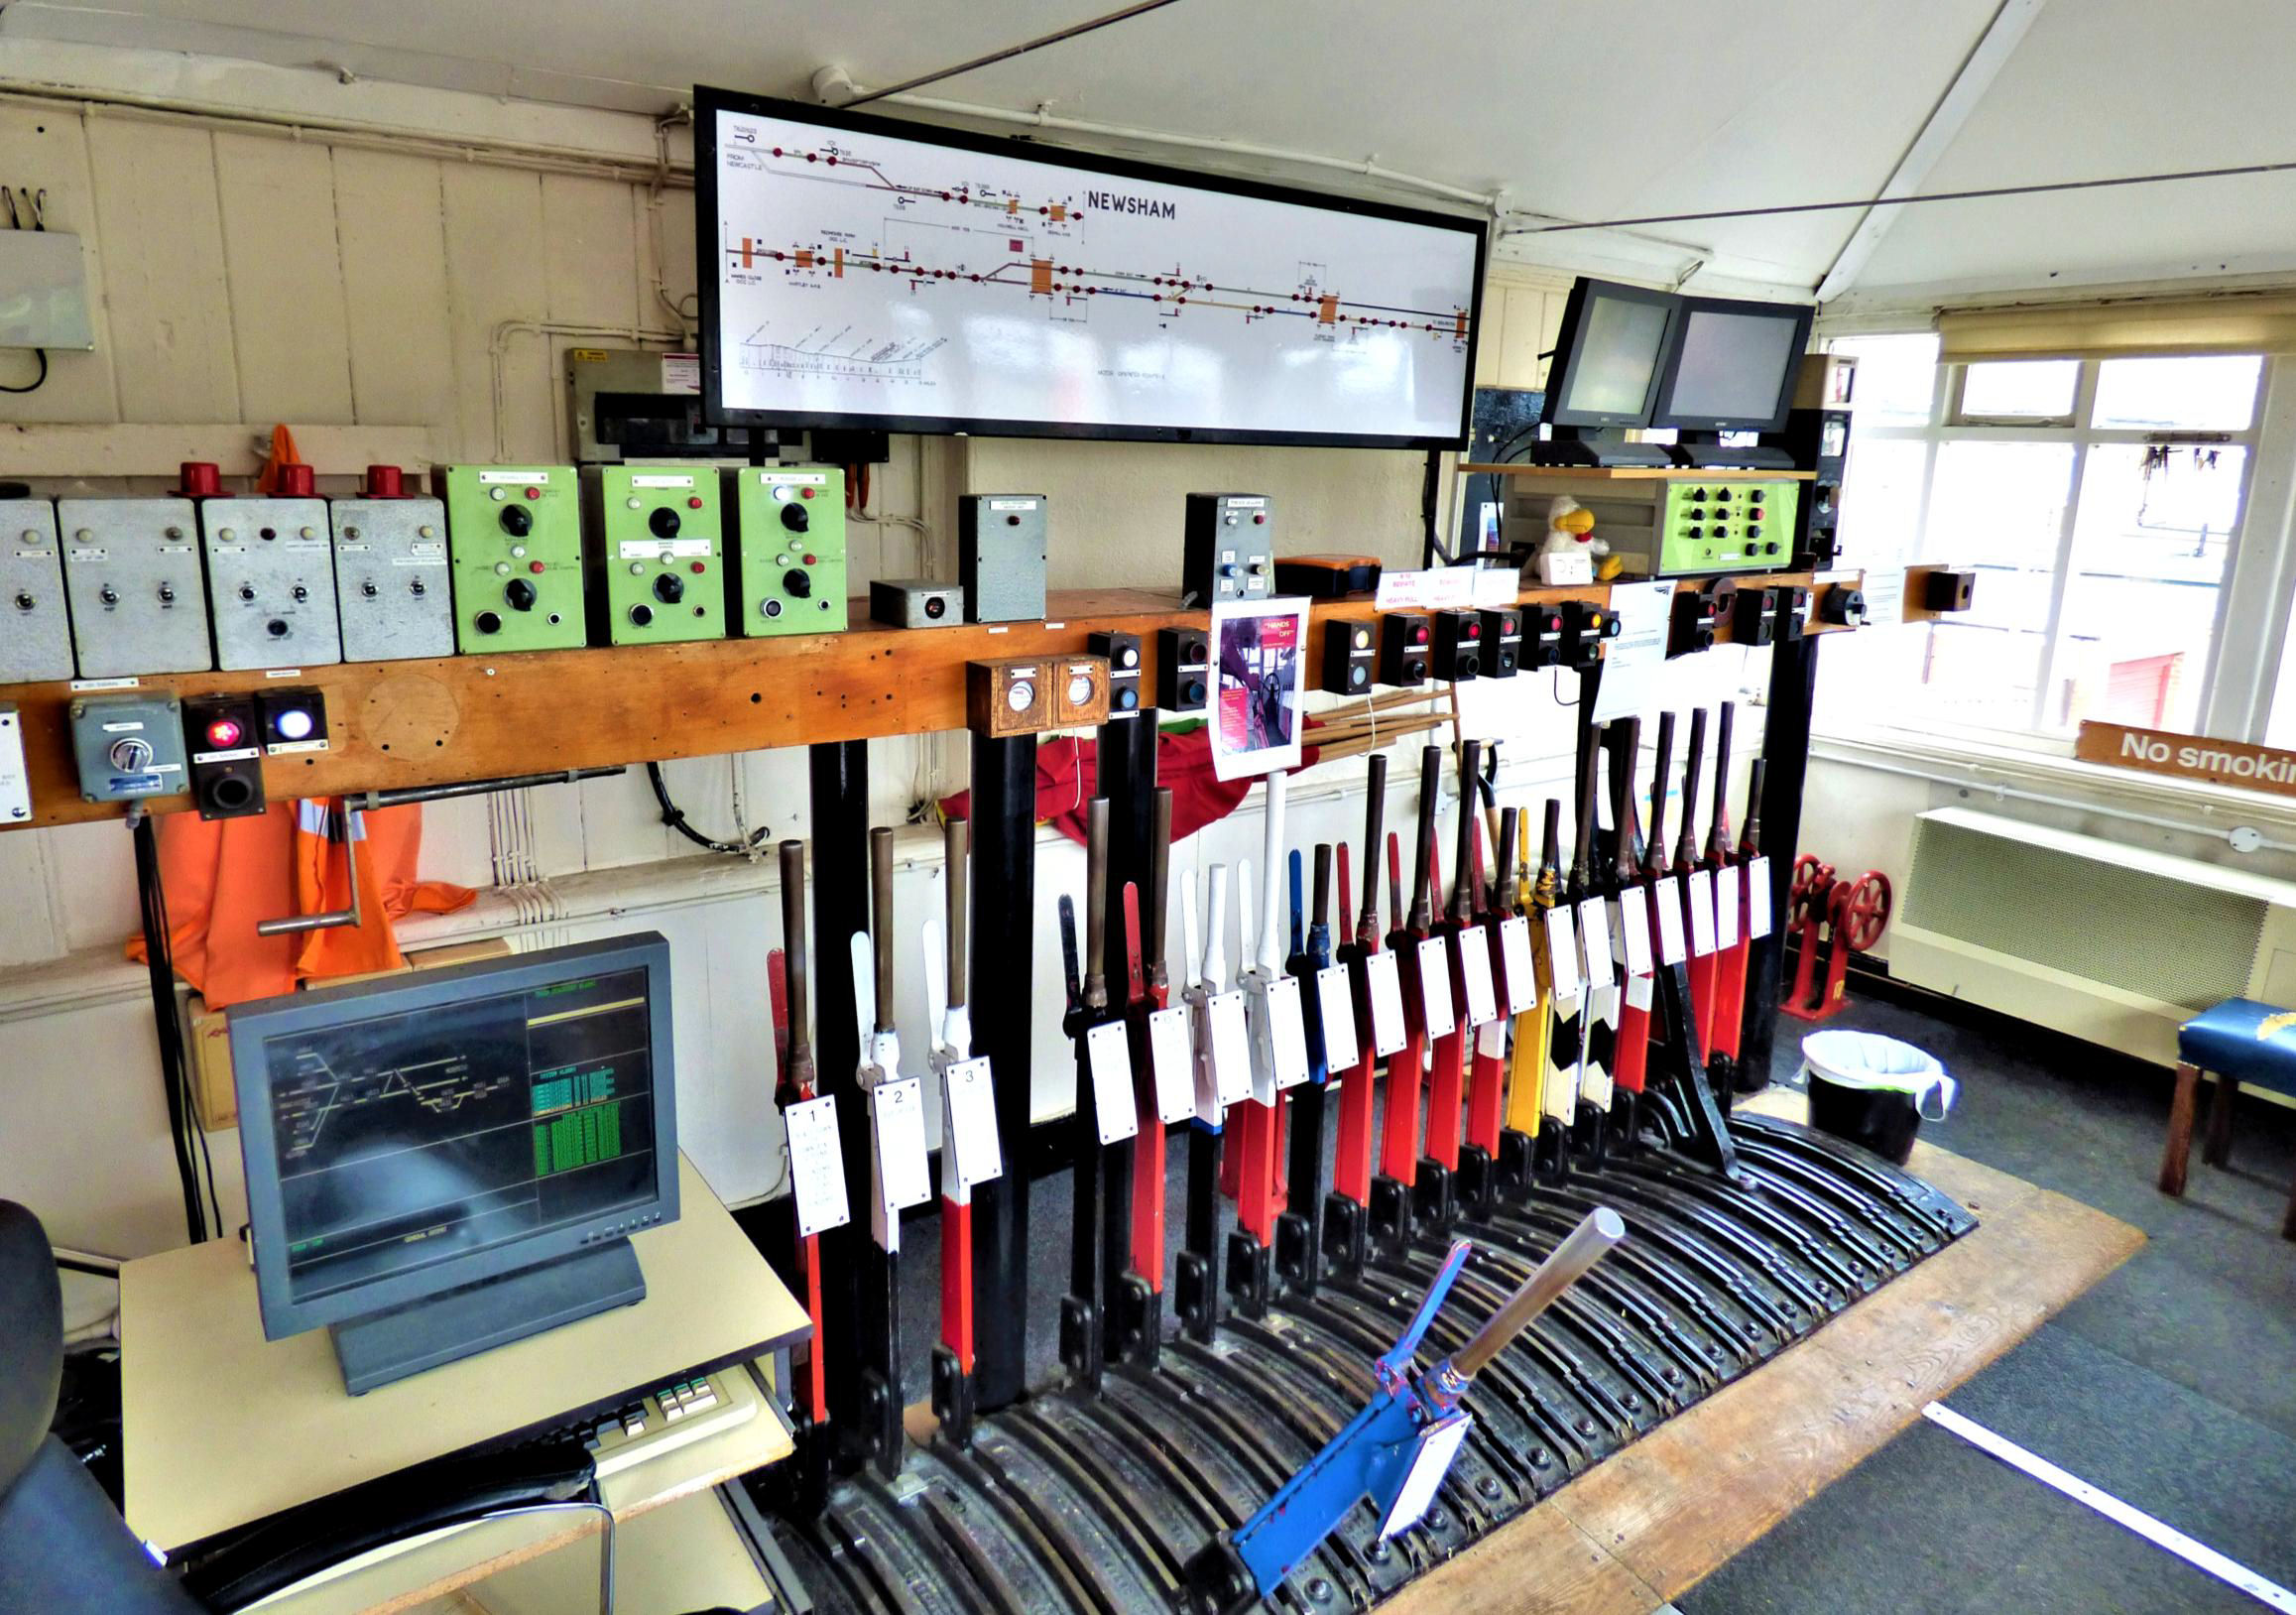
Newsham Signal Box.
[© Nick Jones 2019]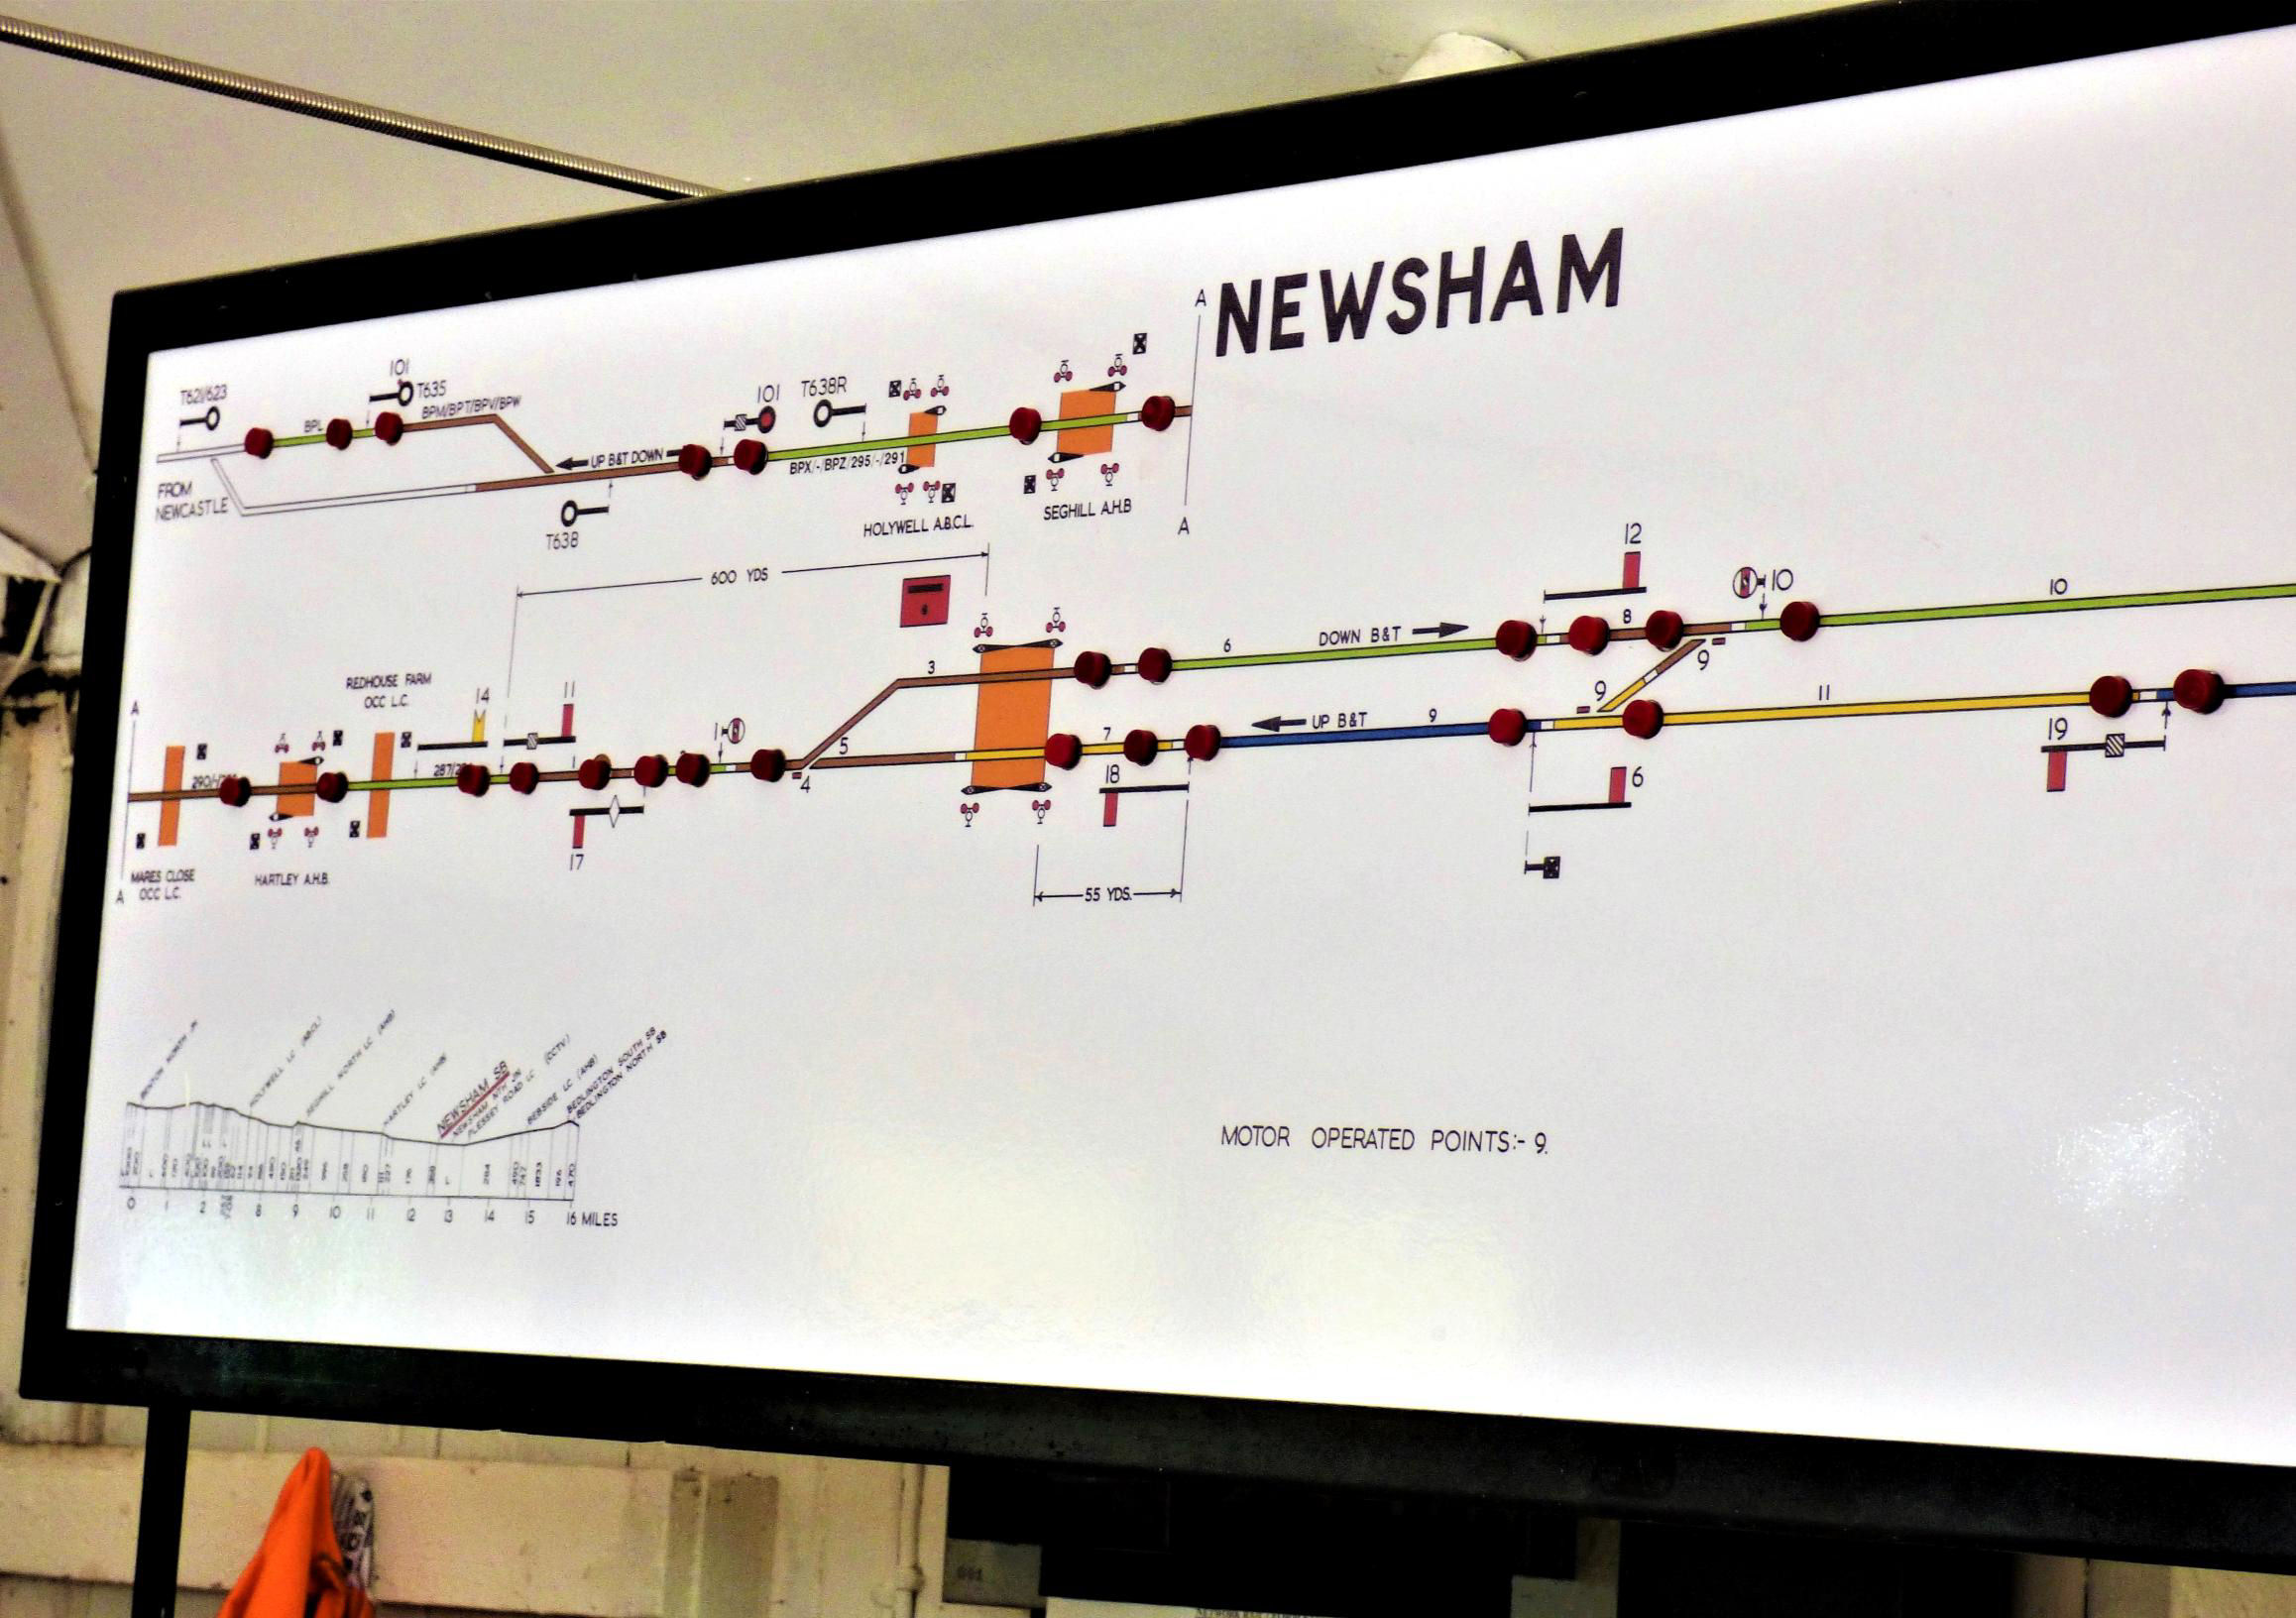
Newsham Signal Box diagram.
[© Nick Jones 2019]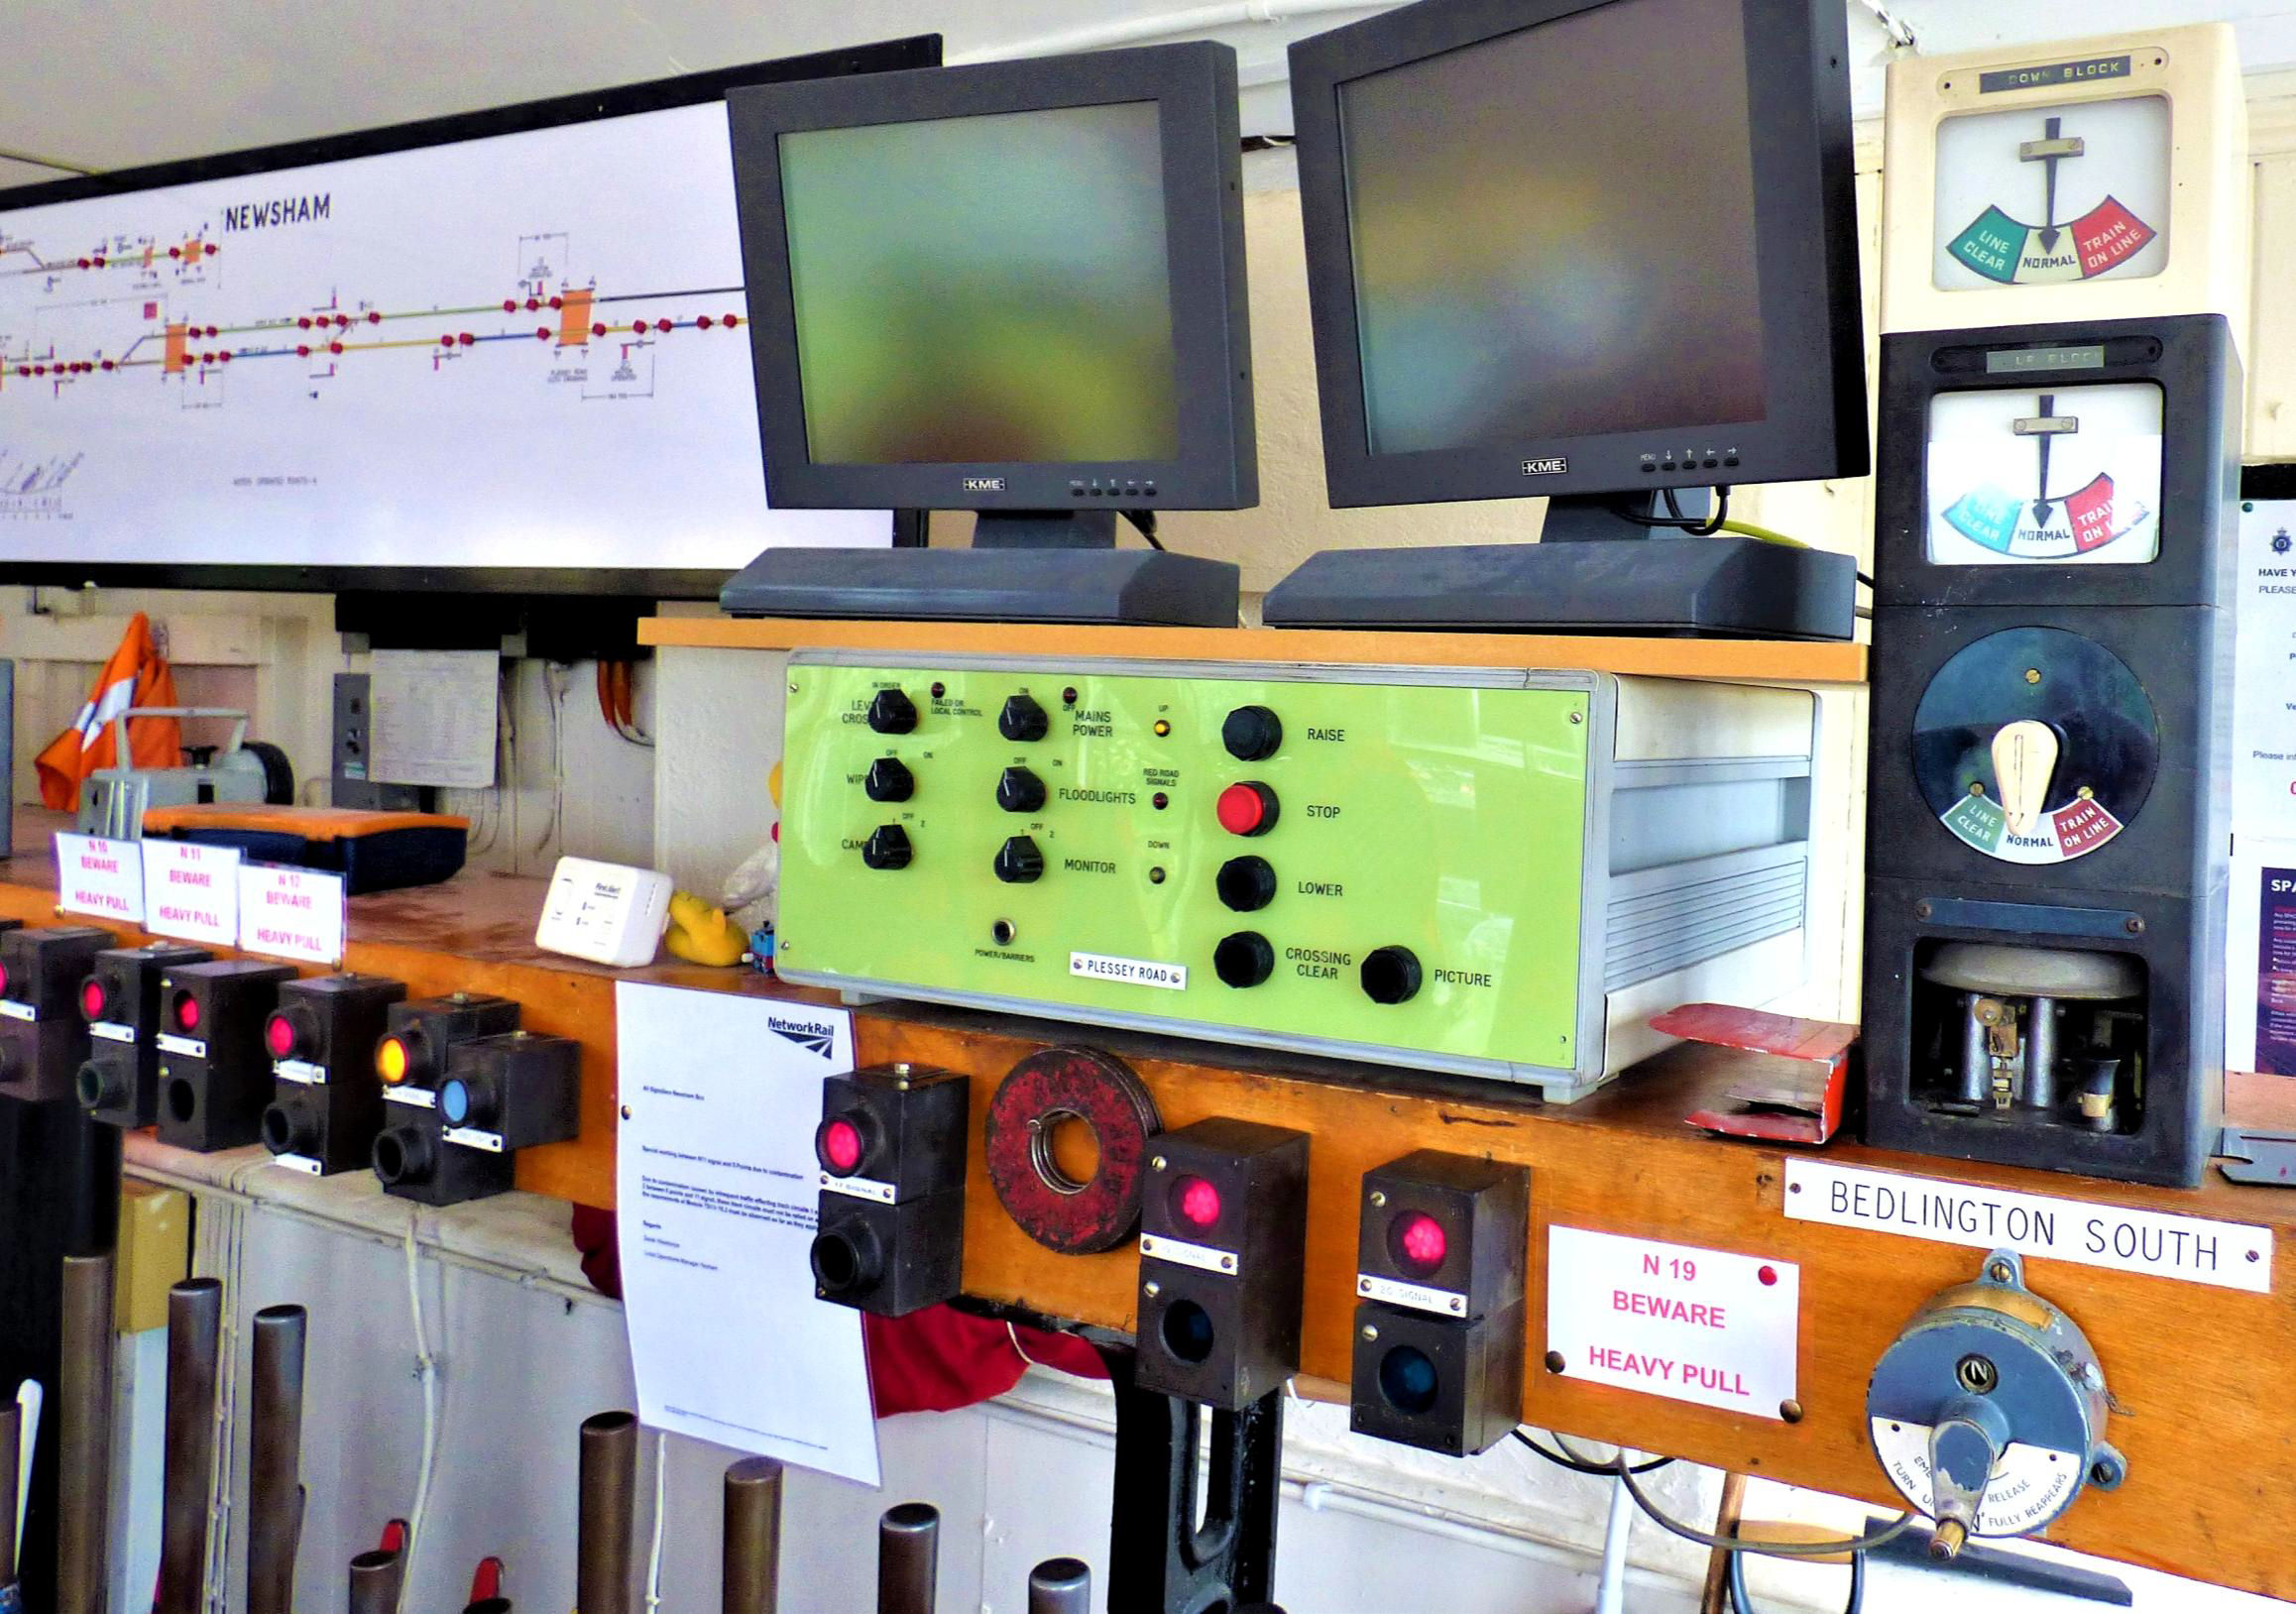
Newsham Signal Box crossing controls.
[© Nick Jones 2019] (15m 60ch) The Down direction is towards Bedlington North and Up is towards Newsham with double track both ways. To Bedlington North (15m 71ch) - just 11ch - is fully track circuited but has absolute block working in both directions. Bedlington South, which dates from 1940, works absolute block to/from Newsham (12m 45ch) without track circuiting. Levers 1 to 11 have been removed and only 15 of the 30 levers left are operational. The Up and Down distant signals are fixed, while No12 (Barrier Control Lever) is the only operational shortened lever in the frame. All signals are semaphores but BN12, the colour light Bedlington North section signal for up trains from the Morpeth direction also acts as the Bedlington South Up fixed distant for trains approaching from that direction.
There are two crossovers, facing (at the box) and trailing at the Newsham end south. They appear intended mainly to facilitate shunting in/out of the now disused (but still connected) Down side Furnaceway Sidings (Furnace Way on the box diagram). However, railtours have been known to reverse between Morpeth and North Blyth using the crossovers. The sidings may be revived for ECS passenger stock stabling at night and cleaning if/when the line reopens (BLN 1353.1568).
The instrument controlling the line towards Newsham is an LNER mahogany cased three position block, pegging on the Down line and indicating on the Up. The block instrument controlling the section to Bedlington North was absent (under repair) at the time of the visit. Due to the 11ch short block section from Bedlington North, when a train is accepted on the Up line it is immediately offered on to Newsham provided the section ahead is clear.
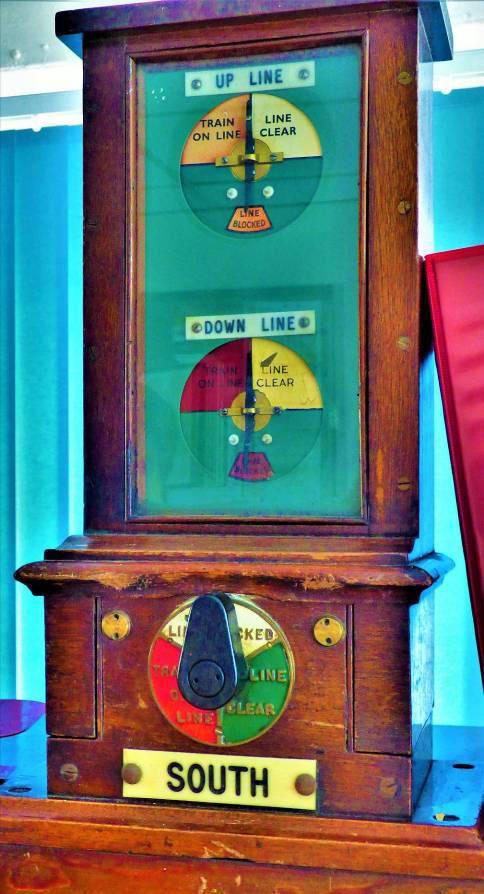
Bedlington South Signal Box instrument controlling the line towards Newsham.
[© Nick Jones 2019]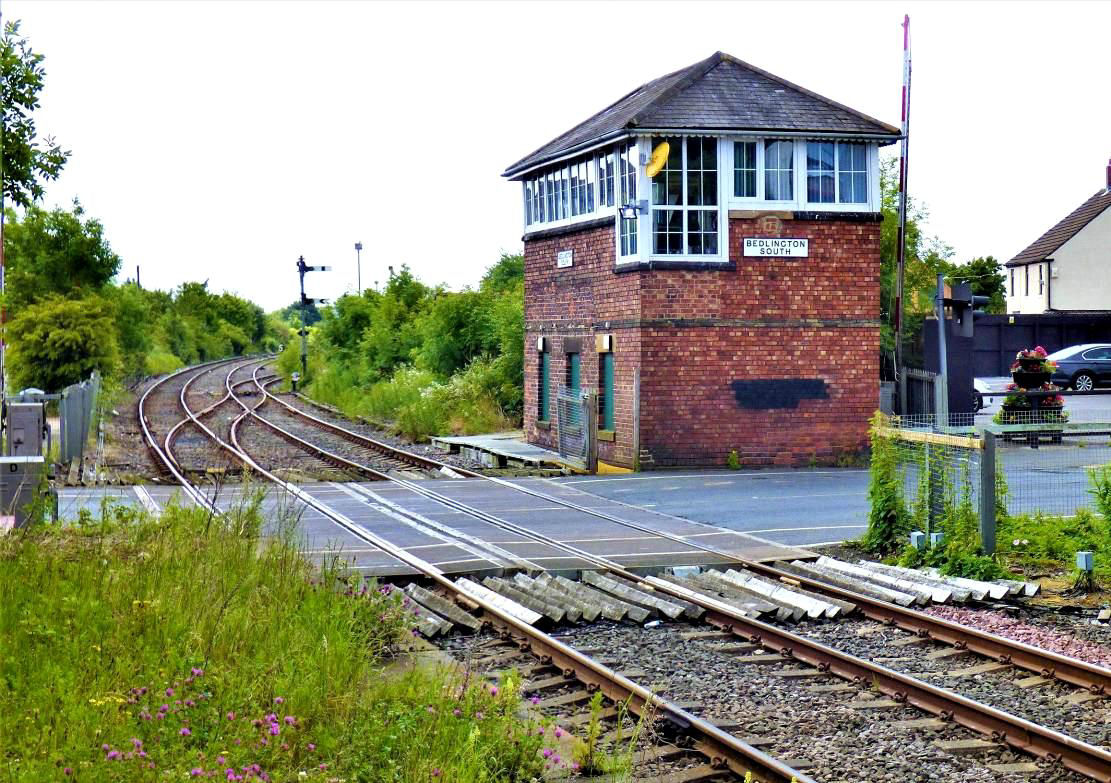
Bedlington South Signal Box.
[© Nick Jones 2019]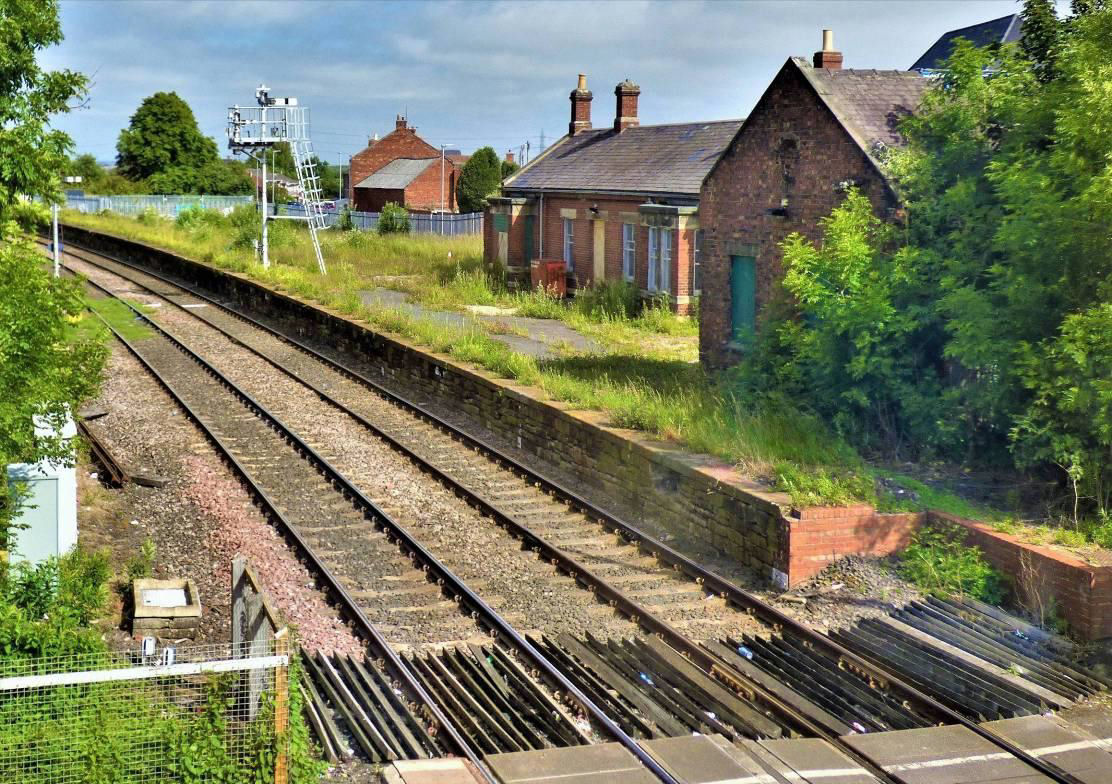
The former Bedlington station.
[© Nick Jones 2019]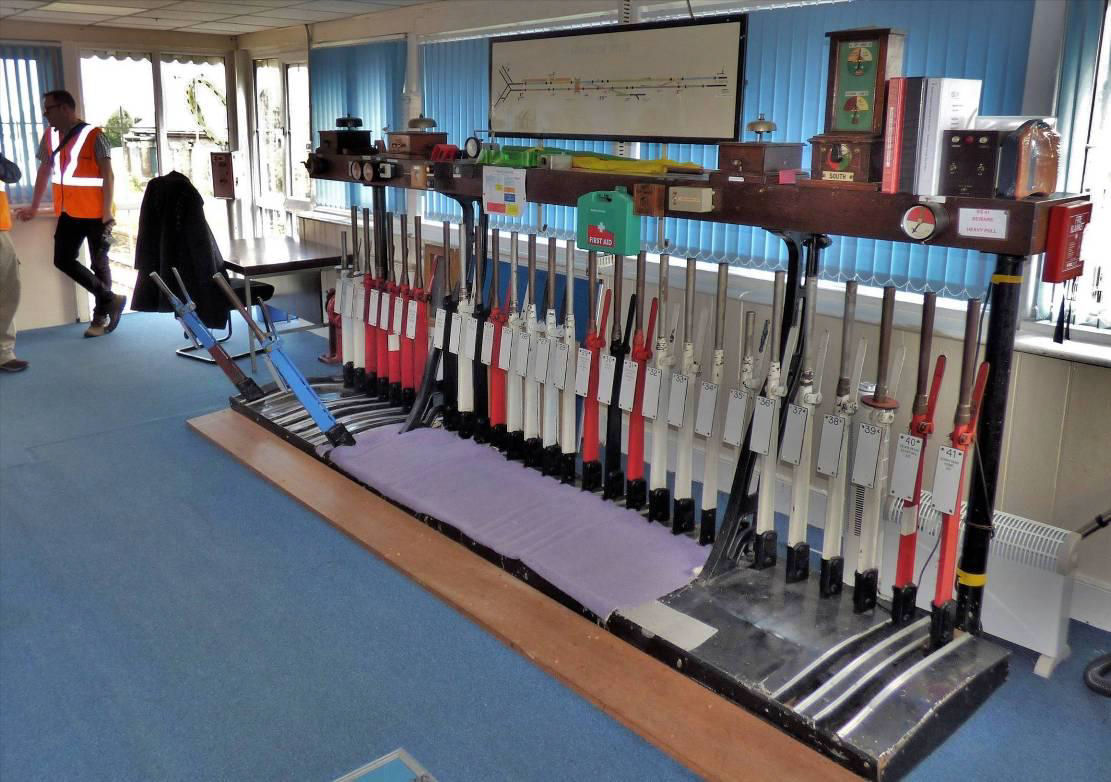
Bedlington South Signal Box.
[© Nick Jones 2019]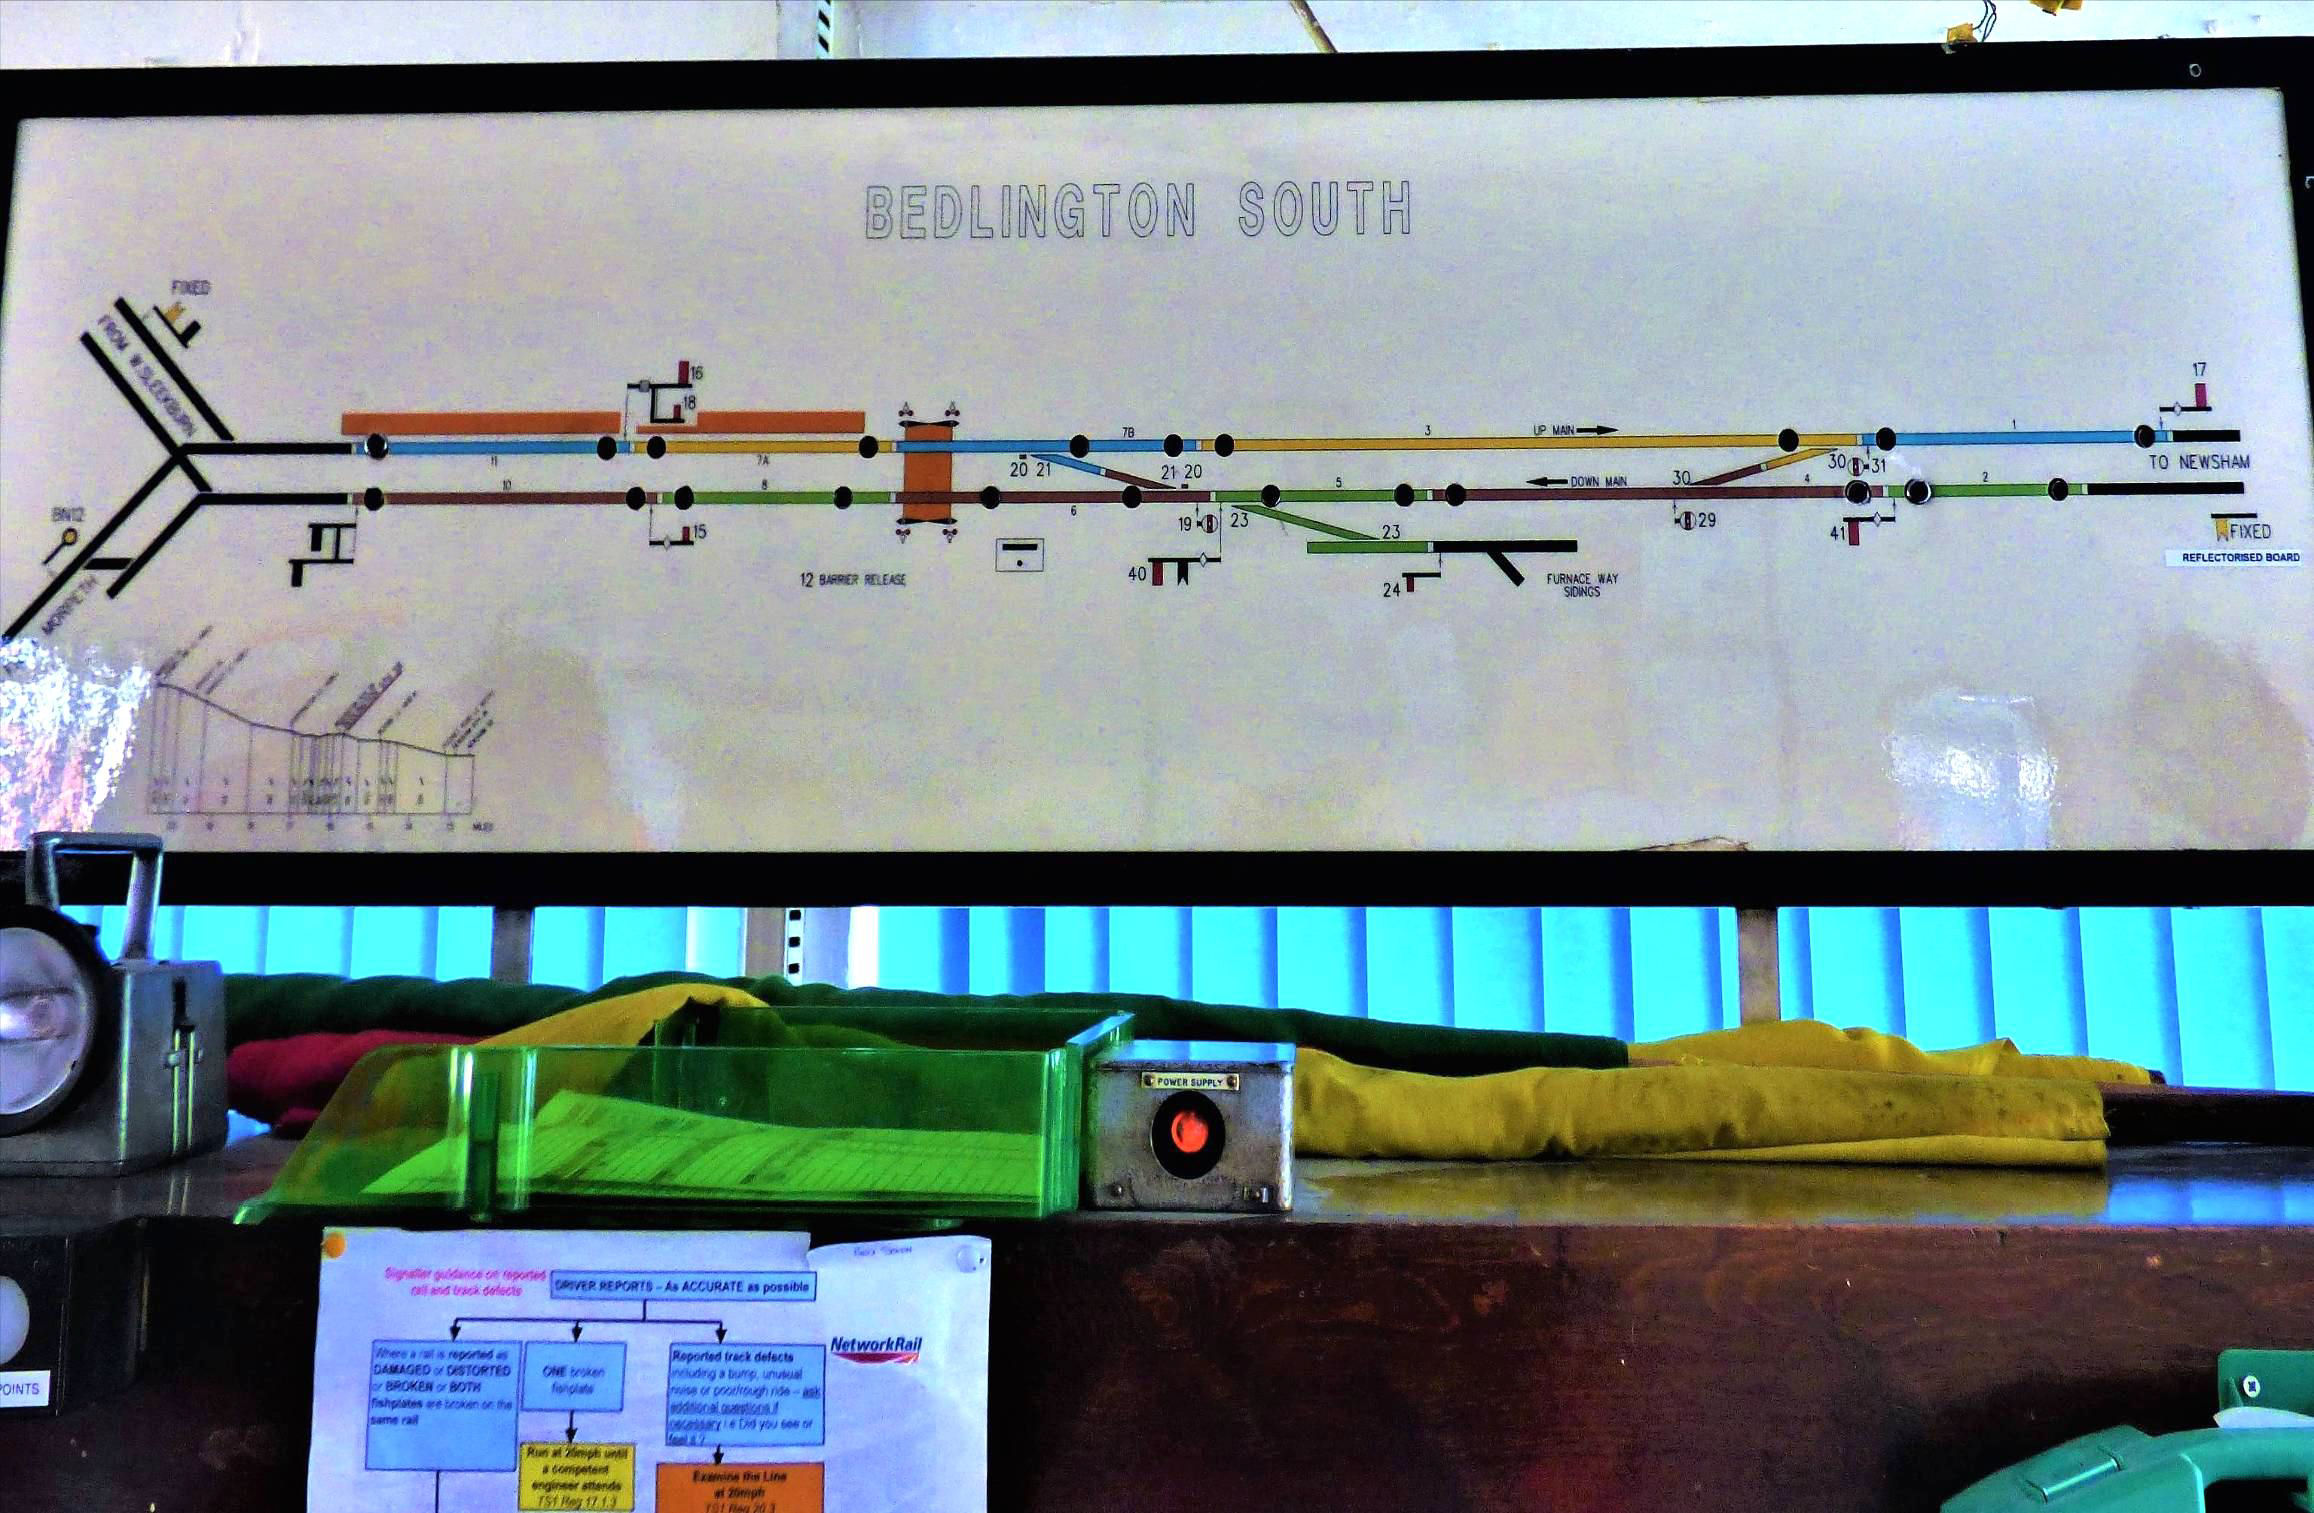
Bedlington South Signal Box diagram.
[© Nick Jones 2019]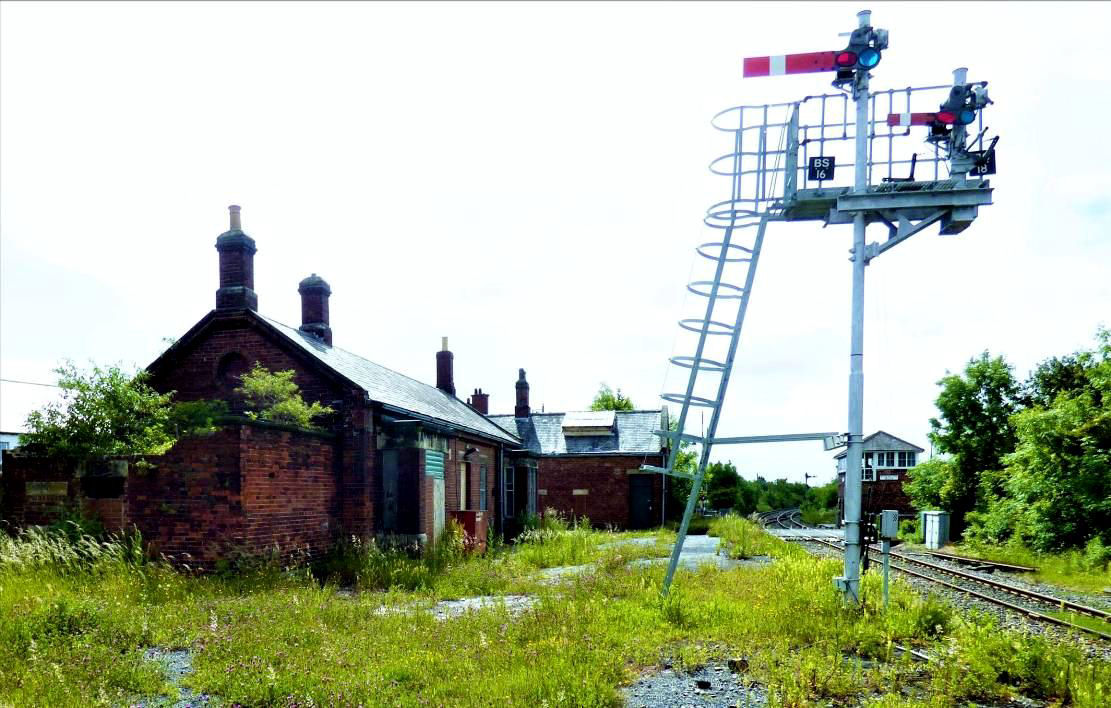
From the old platform looking south (South box on the right).
[© Nick Jones 2019]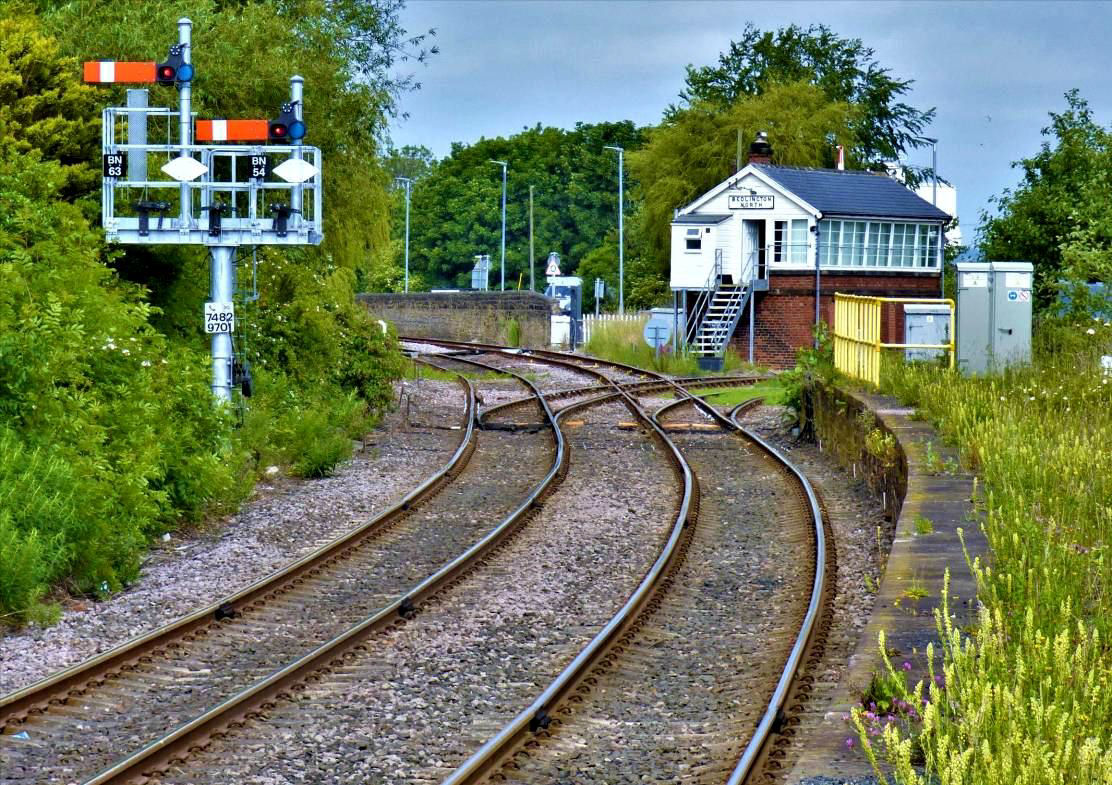
Looking north, Morpeth to the left, North Blyth and Lynemouth right.
[© Nick Jones 2019]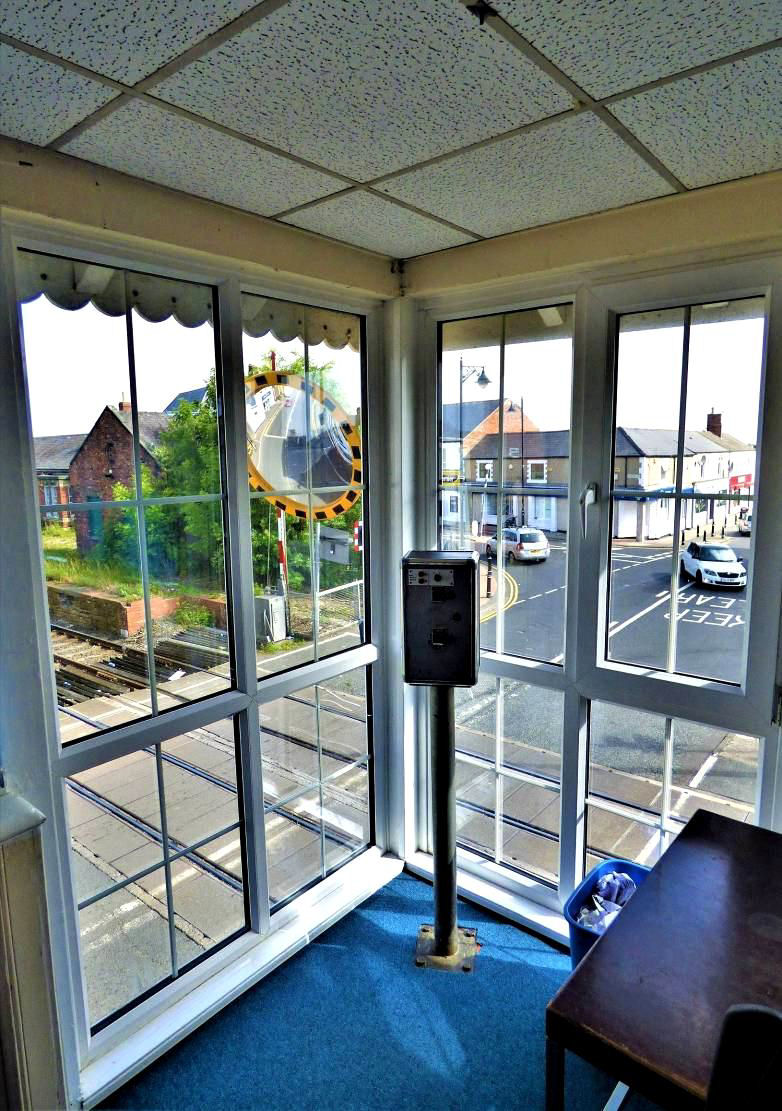
Bedlington South Signal Box crossing controls.
[© Nick Jones 2019] (15m 71ch) The box controls the adjacent double lead Bedlington Jn between the Morpeth line and the line to North Blyth and Lynemouth. The Morpeth line singles 17ch past the junction. This is one of three boxes controlling a double track triangle; the other two are Winning and Marchey's House. Bedlington North controls West Sleekburn Jn just under a mile from the box.
The frame, like the box, dates from 1912 and has been reduced to 55 levers with Nos1-4, 56-58 & 61-62 removed. Of the remainder 38 are spare and 17 operational. Of the 17 operational, 9 are shortened as they operate motorised points, colour light signals or the direction lever (No41) to/from Morpeth.
Track circuits are provided on both lines to Bedlington South and West Sleekburn Jn and from the Up section signals at Winning and Marchey's House. The Down line is track circuited for a short distance beyond Sleekburn Jn on both routes to cover the junction fouling points. The Morpeth line is track circuited from the berth for No12 Up colour light through the turnout from single to double track and then to the twin track junction at Bedlington South. There are three standard block instruments working to Bedlington South, Marchey's House & Winning. The Morpeth line is worked by Tokenless Block but unusually there is no Tokenless Block Instrument as such! Instead there is a direction lever (No41) and an 'Up Train Out of Section' plunger which the signalman presses after checking the tail lamp of a train arriving from the single line. The cabin also controls the adjacent barrier crossing on the line towards West Sleekburn Jn and adjacent wicket gates on the line to Morpeth. It also supervises the Automatic Half Barrier Level Crossing at Choppington on the Morpeth line.
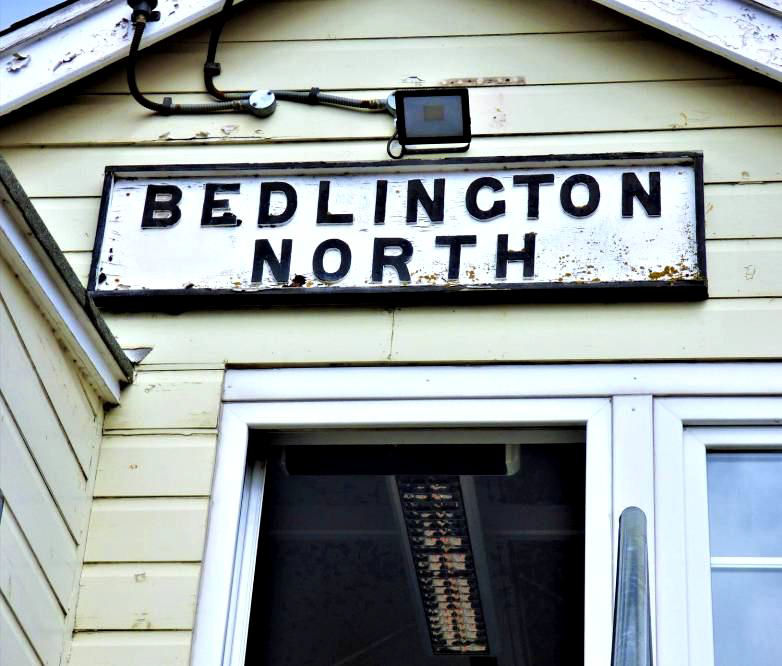
Bedlington North Signal Box.
[© Nick Jones 2019]
Bedlington North Signal Box.
[© Nick Jones 2019]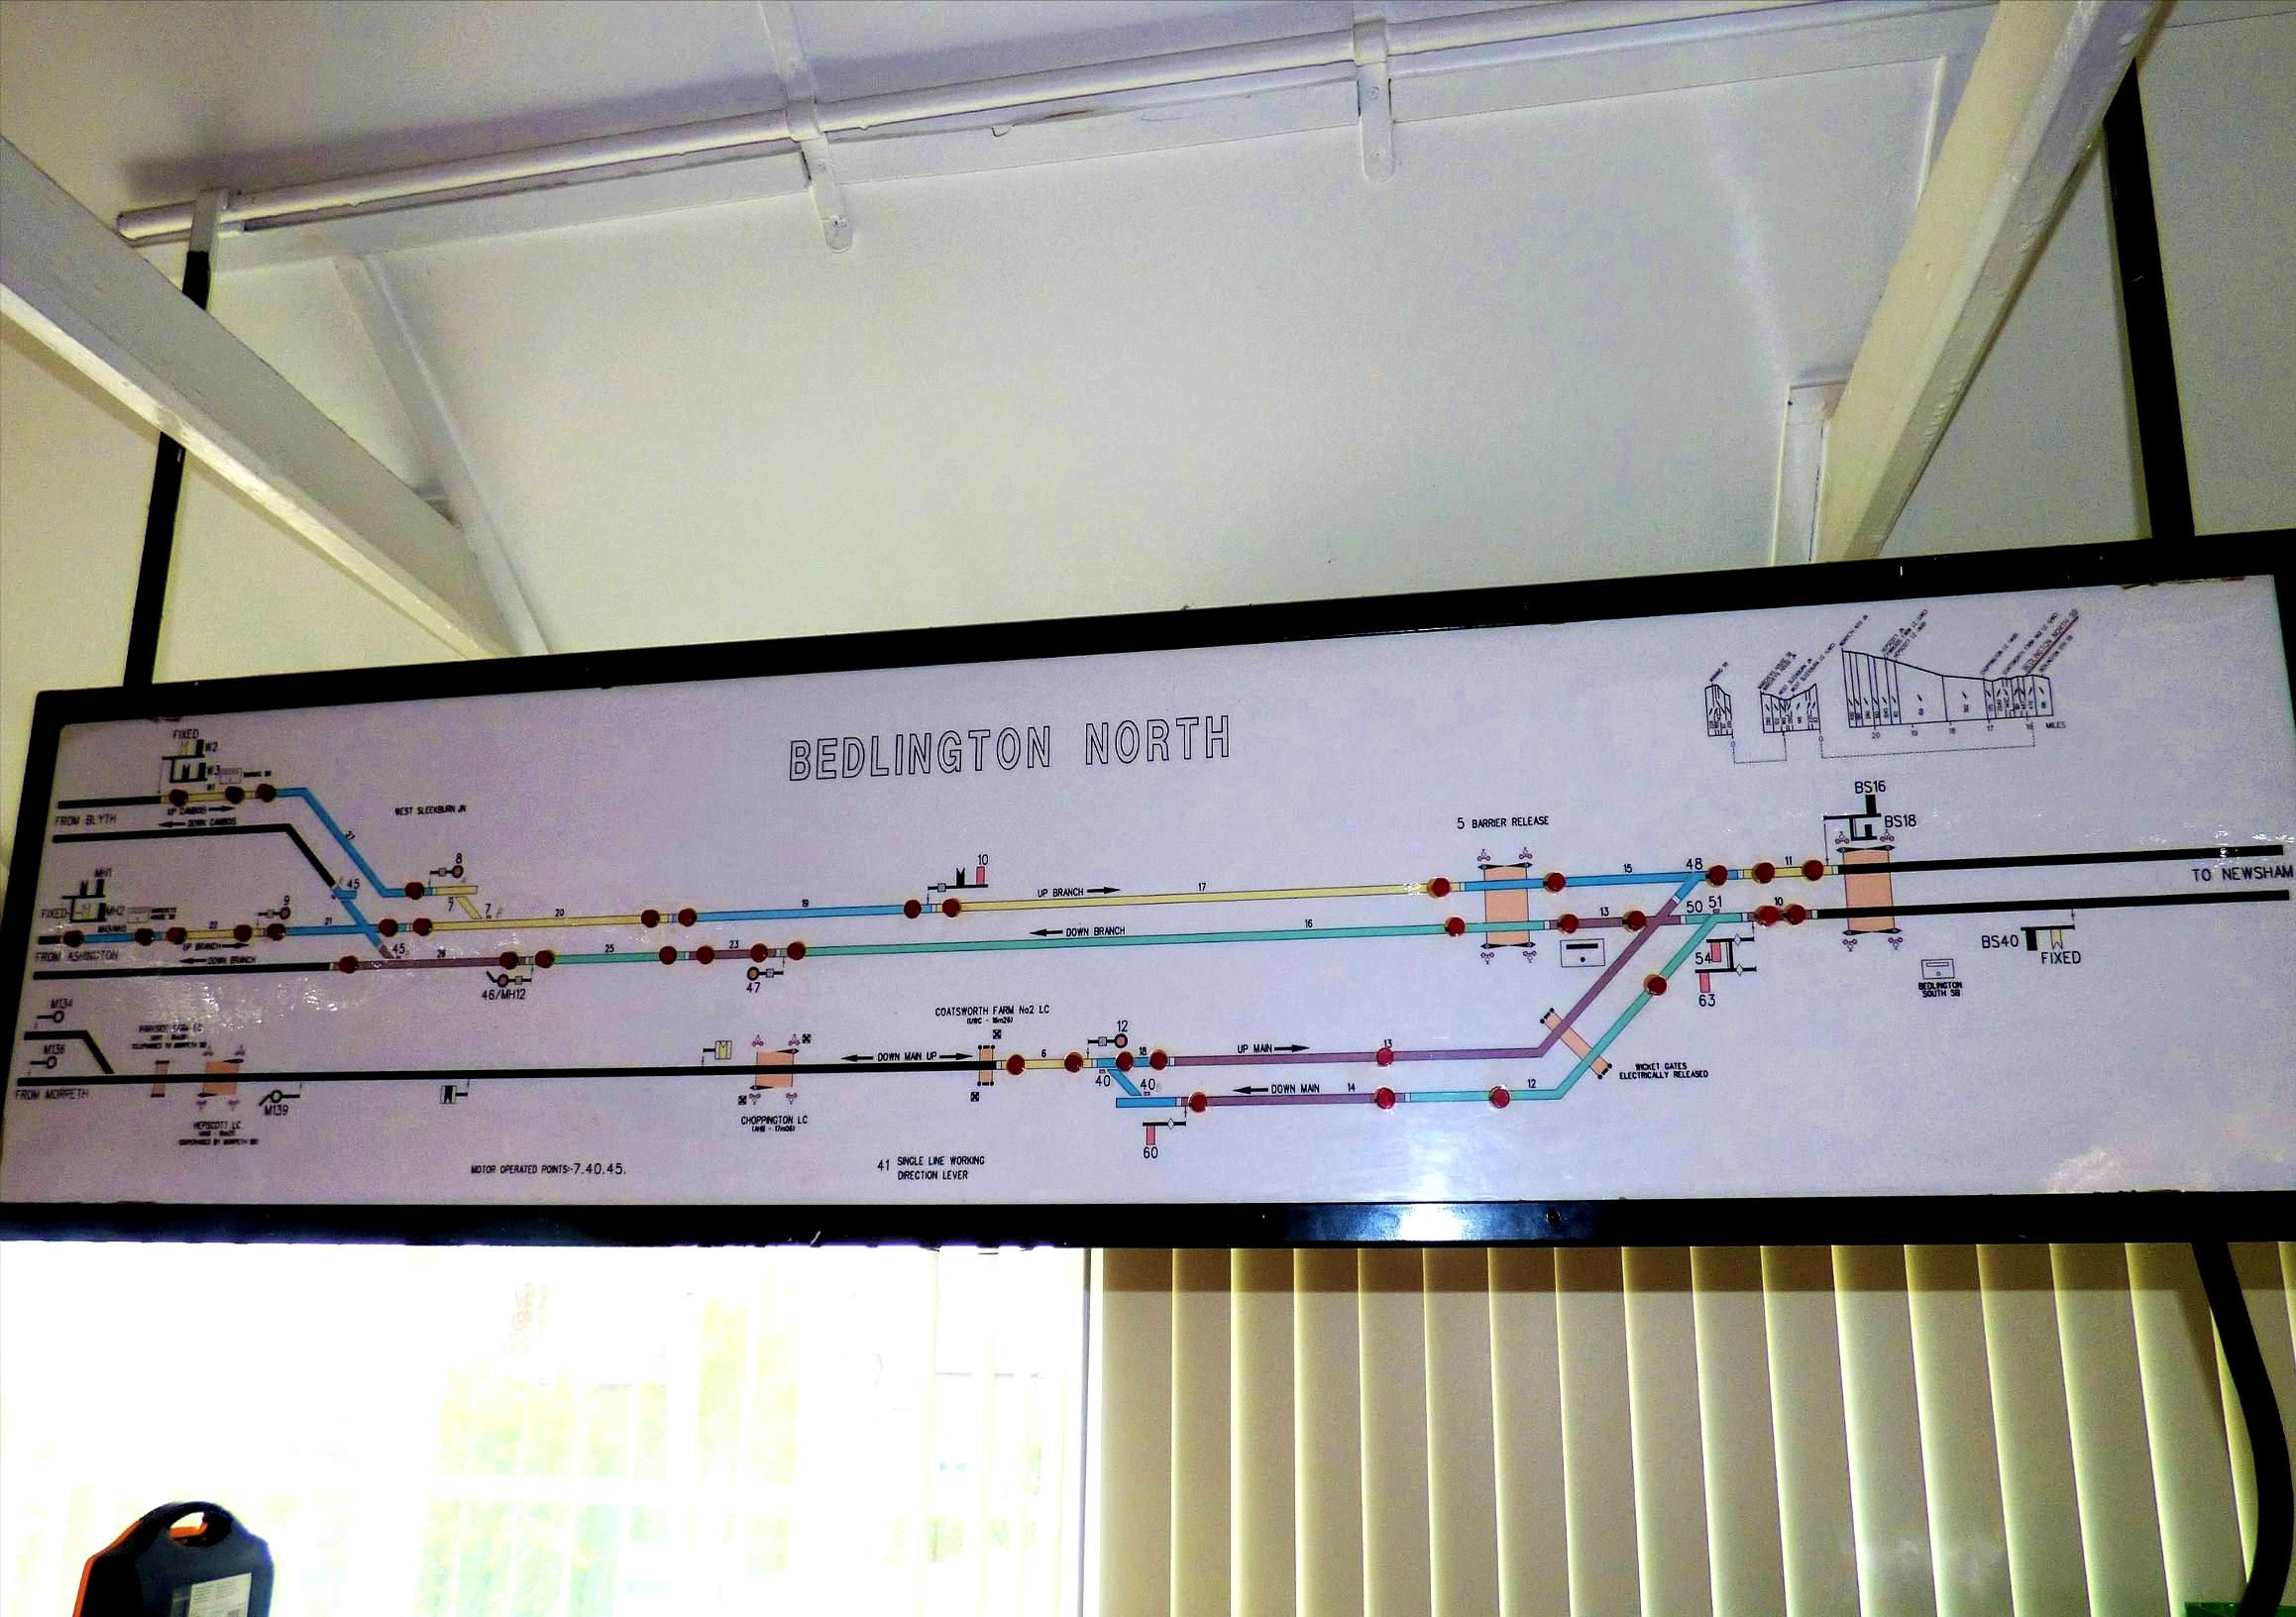
Bedlington North Signal Box diagram.
[© Nick Jones 2019]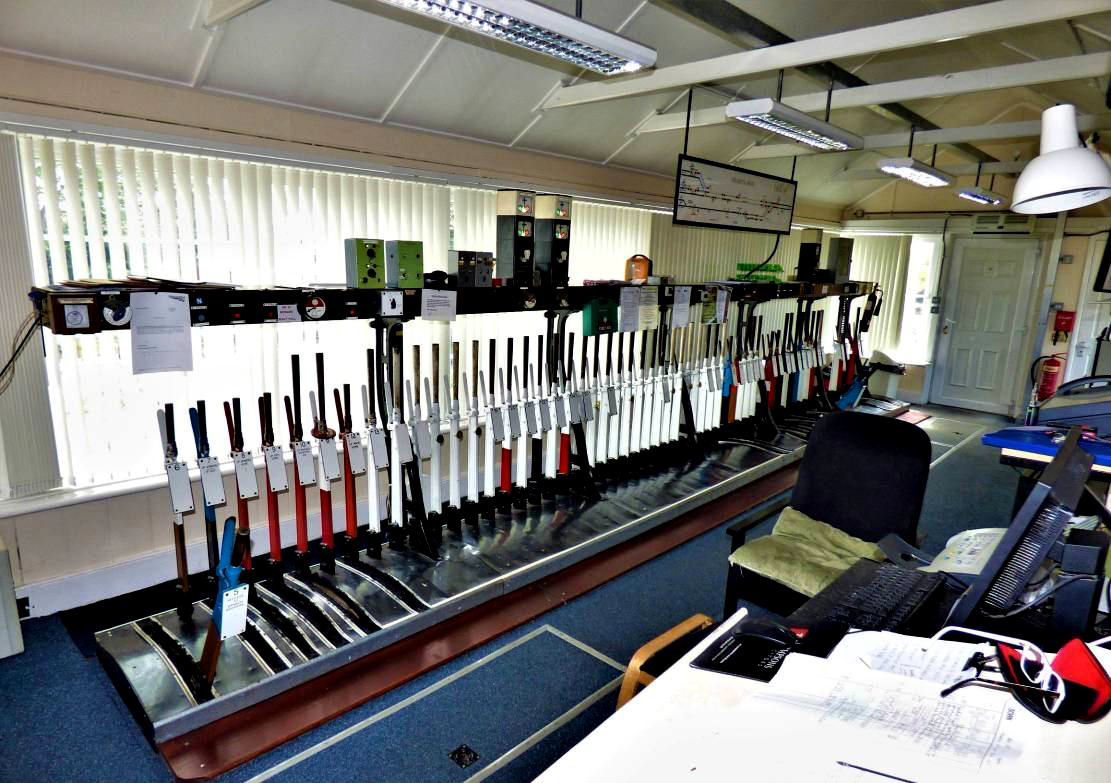
Bedlington North Signal Box.
[© Nick Jones 2019]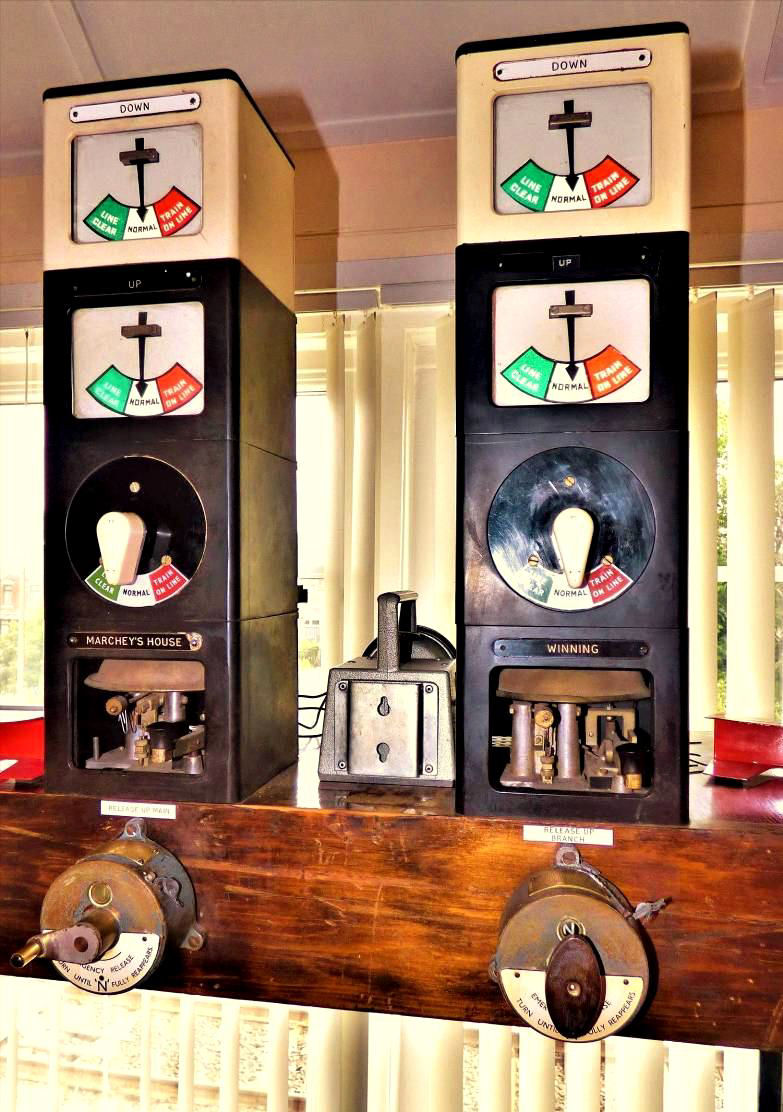
Bedlington North Signal Box instruments.
[© Nick Jones 2019] (1m 41ch from Bedlington Jn) A new signaller was being trained here by an experienced colleague, so we only had a short visit. The unusual name refers to a local farm house. [Note there is no apostrophe on the box, but it has one in the Sectional Appendix as does the junction!] The direct double track curve between here and Winning once carried regular alumina traffic from North Blyth to Lynemouth Alcan Smelter. Since the smelter closed in 2012 it is rarely used, but is maintained to operational standards and sees occasional track machines and railtours (if you needed the curve it would, of course, be a 'winning' tour).
The Down direction is from Bedlington Jn to Lynemouth. The box, dating from 1895, controls the adjacent full barrier crossing and the double track junction from Winning. It also monitors Green Lane Automatic Half Barrier Crossing (2m 43ch) towards Ashington, between North Seaton and Hirst Lane.
Absolute Block working applies to Bedlington North and Winning using standard British Railways block instruments. The double line to Lynemouth (via North Seaton & Hirst Lane crossings) is controlled by telephone. There are 15 levers; nine are operational, five of the latter being shortened levers. All signals are semaphores except No12, a colour light, which is the Marcheys House Down distant from Bedlington North as well as the section signal from Bedlington North (No46) to Marcheys House. Depending on conditions this signal can display a red, yellow or green aspect as required.
The Up lines are track circuited from the berth approach to No1 & 2 signals from Lynemouth to beyond the junction fouling points. The Down lines are track circuited from the Down homes (No10 from Winning, No13 from West Sleekburn Jn) to just beyond the crossing. The junction points (No7 & 8) are motor operated. There is a trailing crossover between the level crossing and the junction points. Unusually this crossover is operated by a single lever ground frame released by an Annetts key which normally resides in a lock attached to Lever 9. There is only one stop signal per line per direction, the distant signals are fixed semaphores except for the colour light distant from Bedlington (as above) a colour light capable of displaying a green aspect if, amongst other conditions, No12 lever is reversed. Line clear release is provided only on No2 signal to Bedlington North. The North Seaton Crossing Down fixed distants are mounted below signals 10 & 13. Relays controlling electrical locking are mounted in glass fronted wooden cabinets on the operating floor. The frame, stamped WB & S Co Ltd (1937) - Westinghouse Brake & Signal Co Ltd - is a reconditioned McKenzie & Holland frame.
North Seaton: (1m 76ch from Bedlington Jn) The drive here afforded an excellent view of the very impressive North Seaton Viaduct across the River Wansbeck. Originally a wooden trestle structure, built for the Blyth & Tyne Railway in 1859, the present bridge dates from 1926 according to the website of the Cleveland Bridge Company who built it. Known locally as 'The Black Bridge', it has 14 spans on steel trestles. Work began in 1925 for the L&NER; it is 1,042 feet long between abutments and cost £90,000. The Blyth & Tyne line was originally intended to run north to Ellington, Widdrington and Amble on the coast but only continued to Ashington with a sharp right turn round to the coast at Newbiggin-by-the-Sea. This town was originally to have been on a branch off the proposed main line.
North Seaton, a gate box (not a block post), is near the north end of the viaduct; the crossing keeper has a clear view across it to Marcheys House box, half a mile away. The building is thought to date from 1872. It controls the adjacent A196 barrier crossing (Lever No1) and the protecting signals, No17 on the Down line and No10 on the Up line. The distant signals in both directions are fixed. There are 21 levers (18 are spare!) in the McKenzie & Holland frame which dates from 1950. North Seaton station (CP 2 Nov 1964 with the line) - was immediately north of the crossing but nothing remains of it.
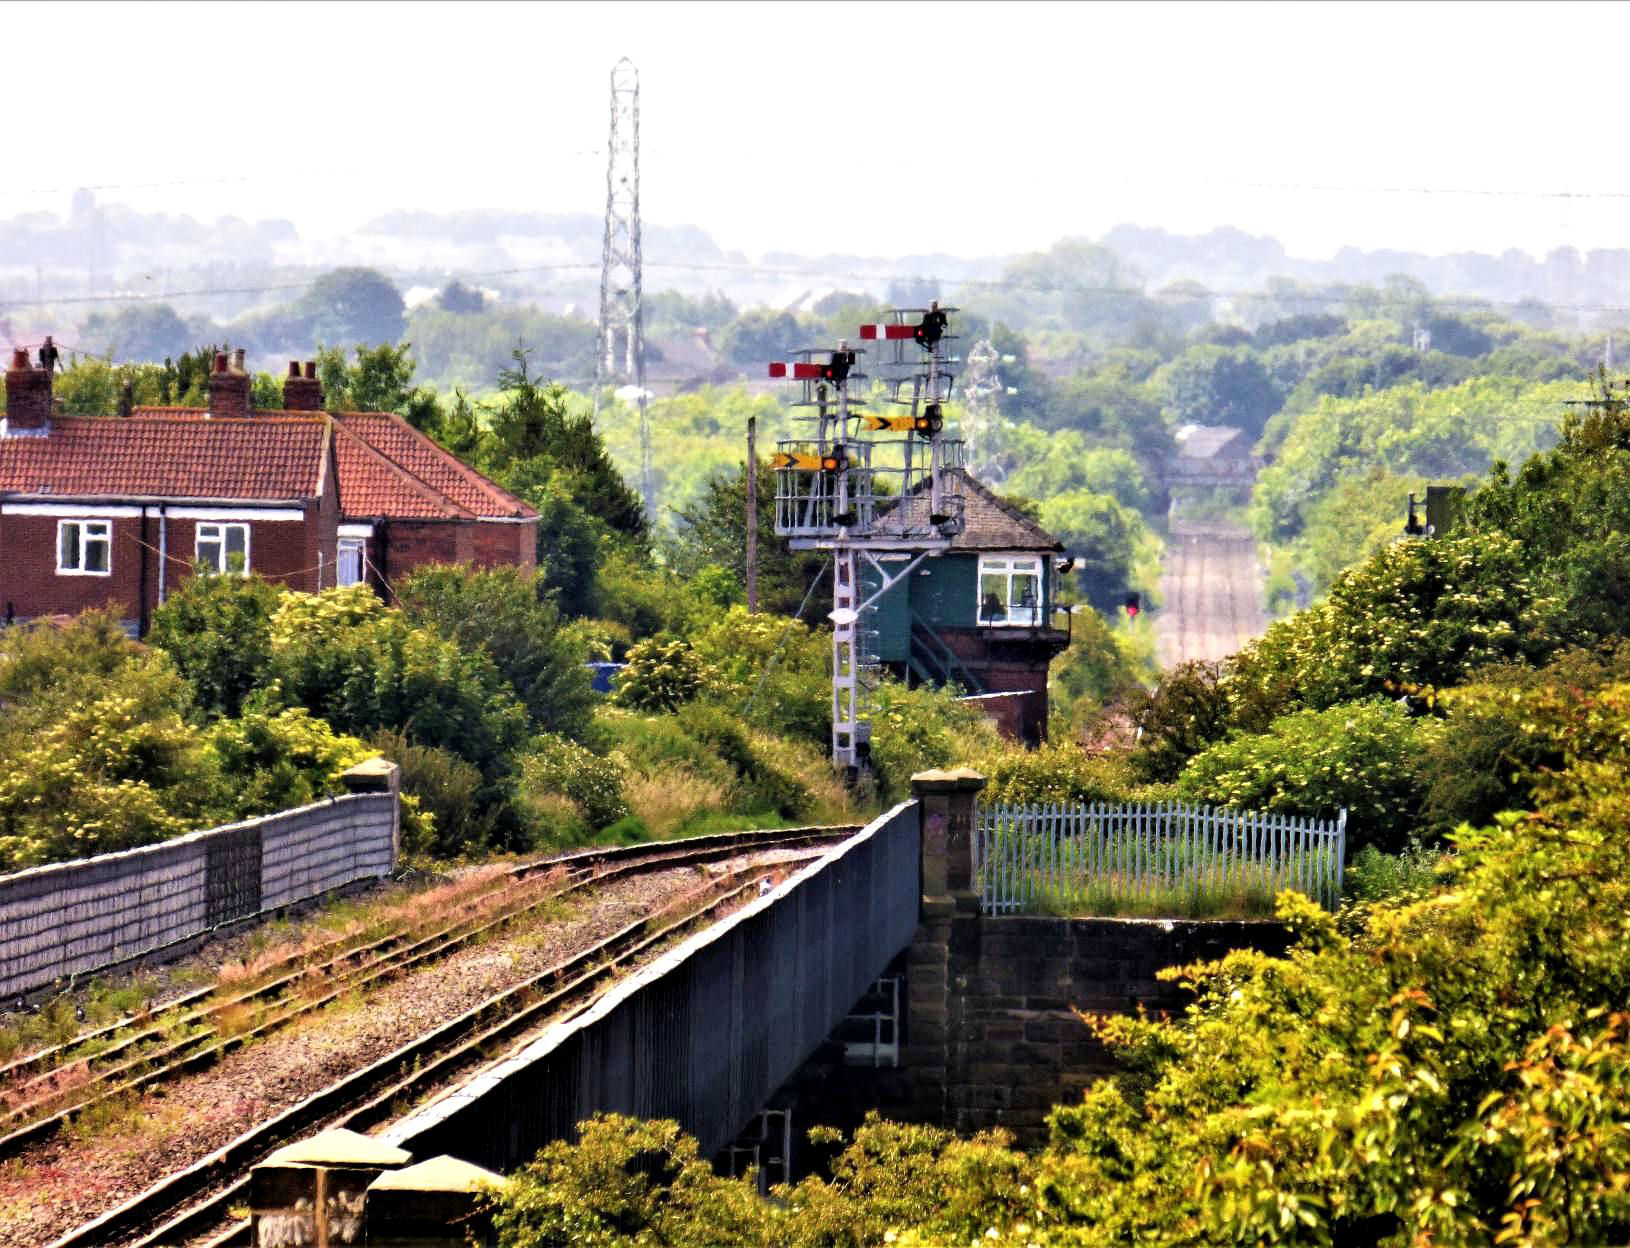
Telephoto view from North Seaton box over the viaduct to Marcheys House Signal Box.
[© Nick Jones 2019]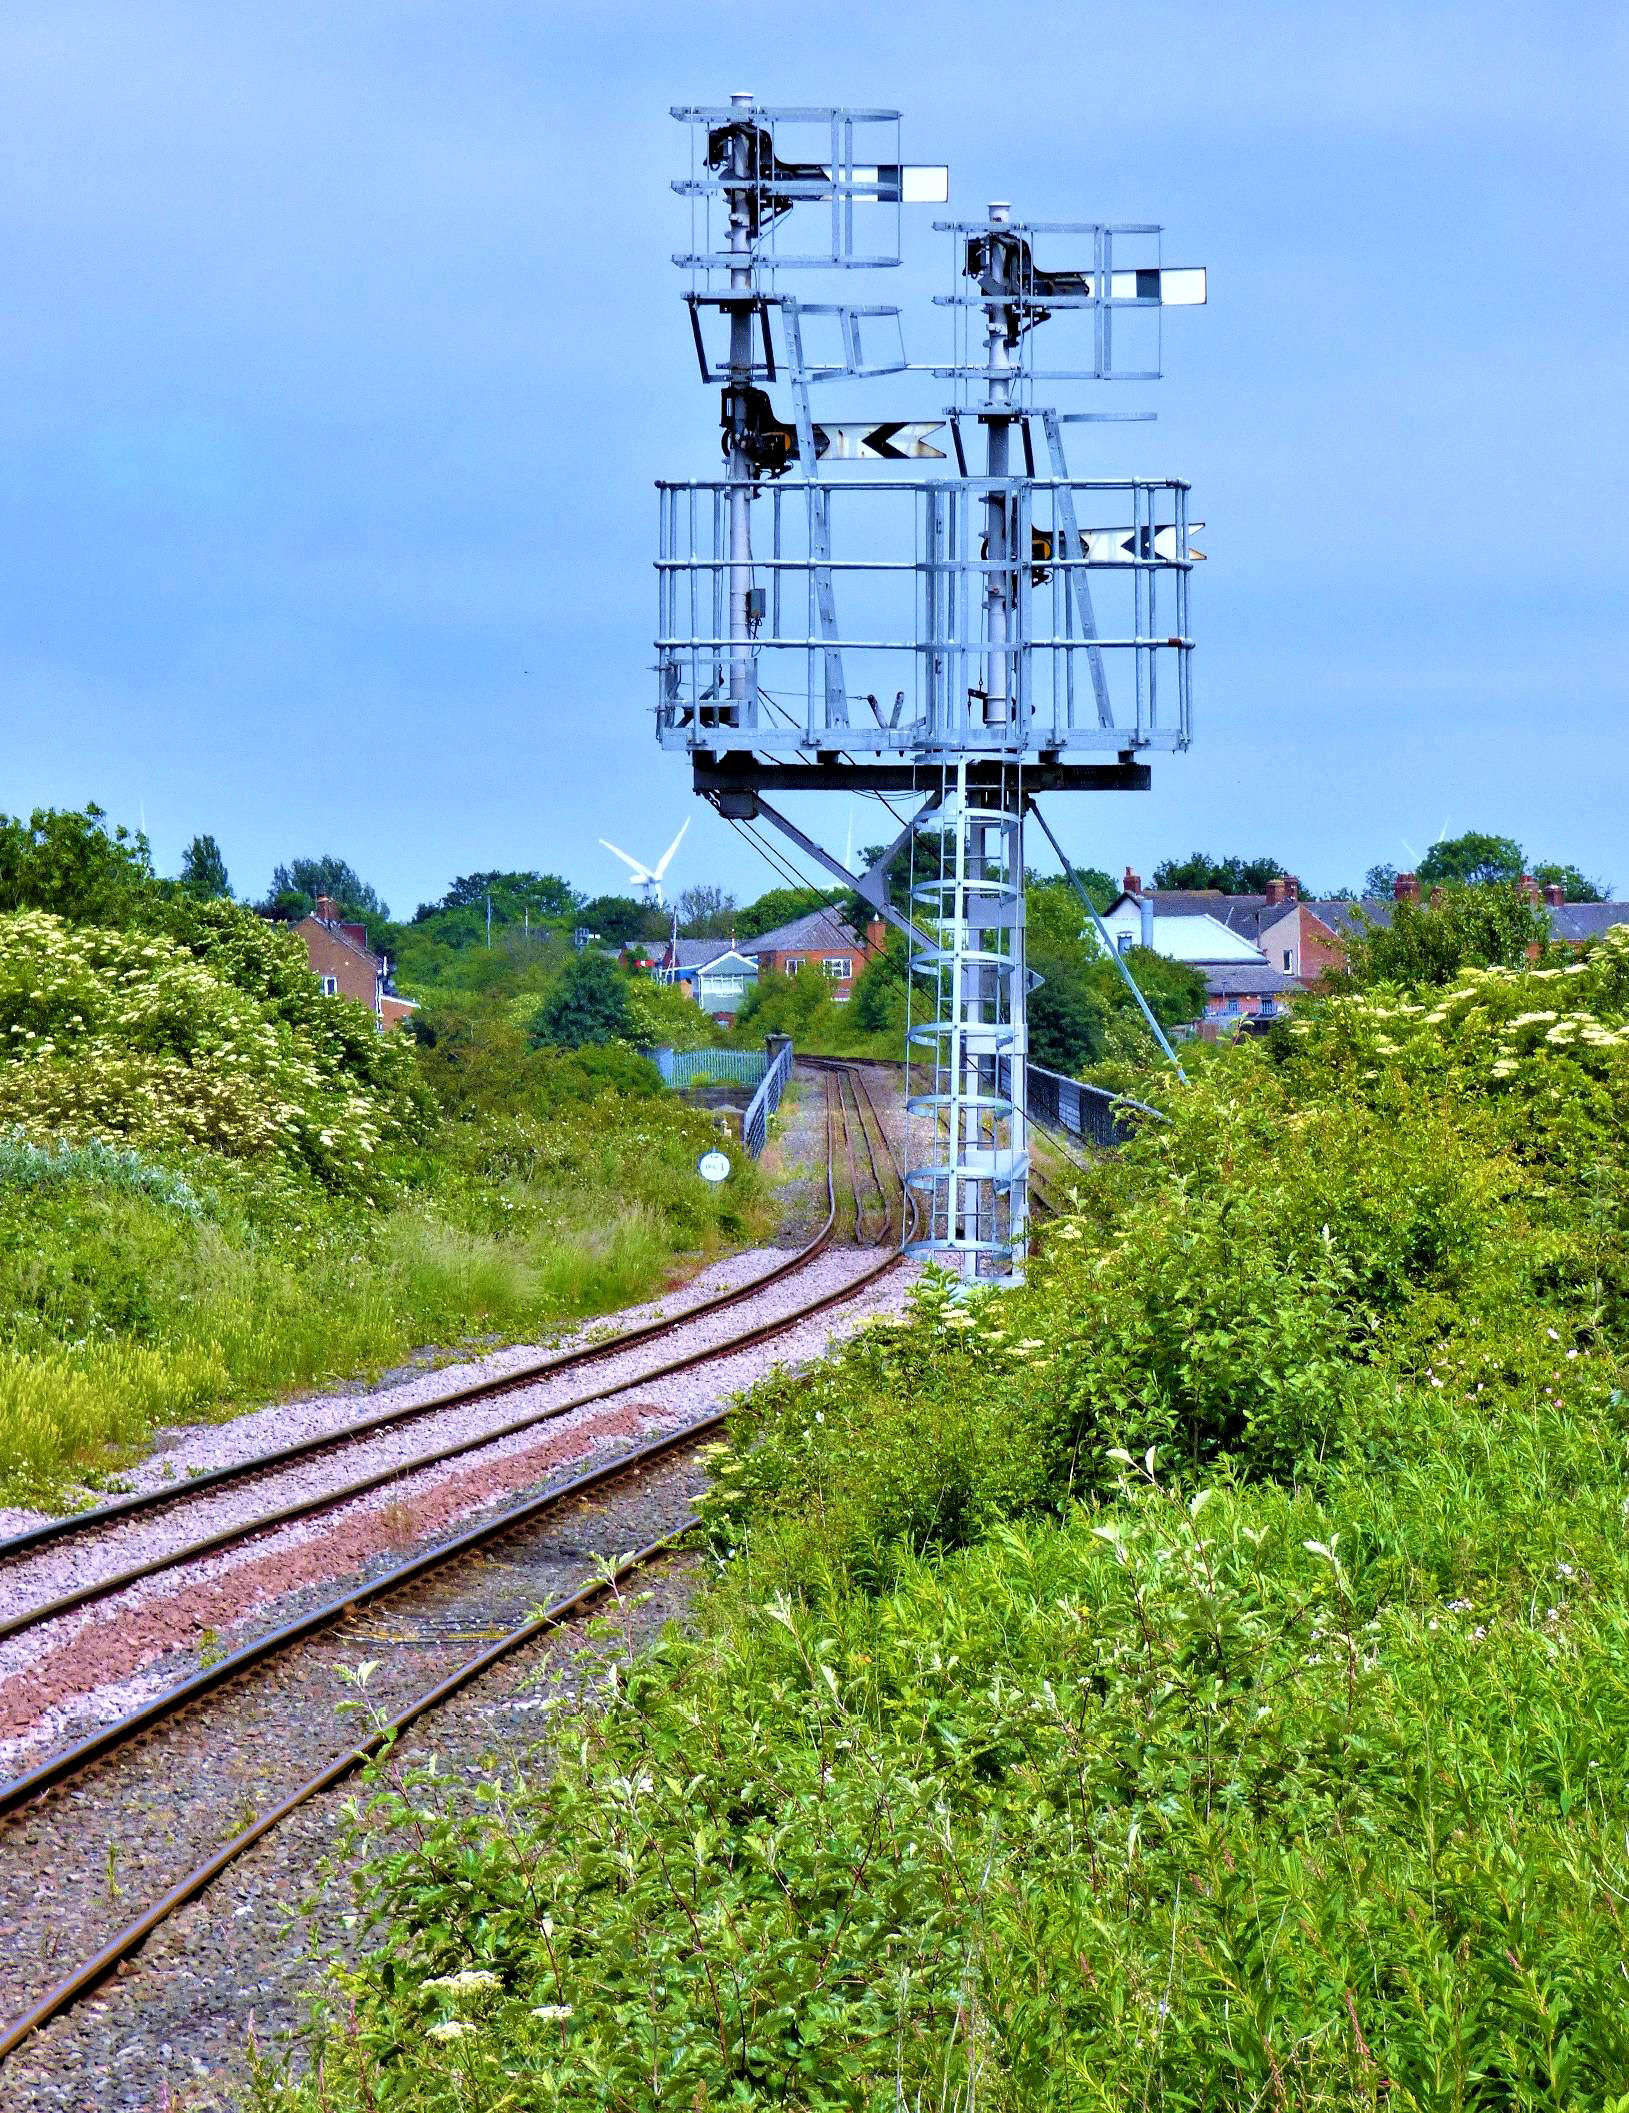
In the other direction, view north across the viaduct from Marcheys House Signal Box of North Seaton Gate Box (left of centre in the distance).
[© Nick Jones 2019]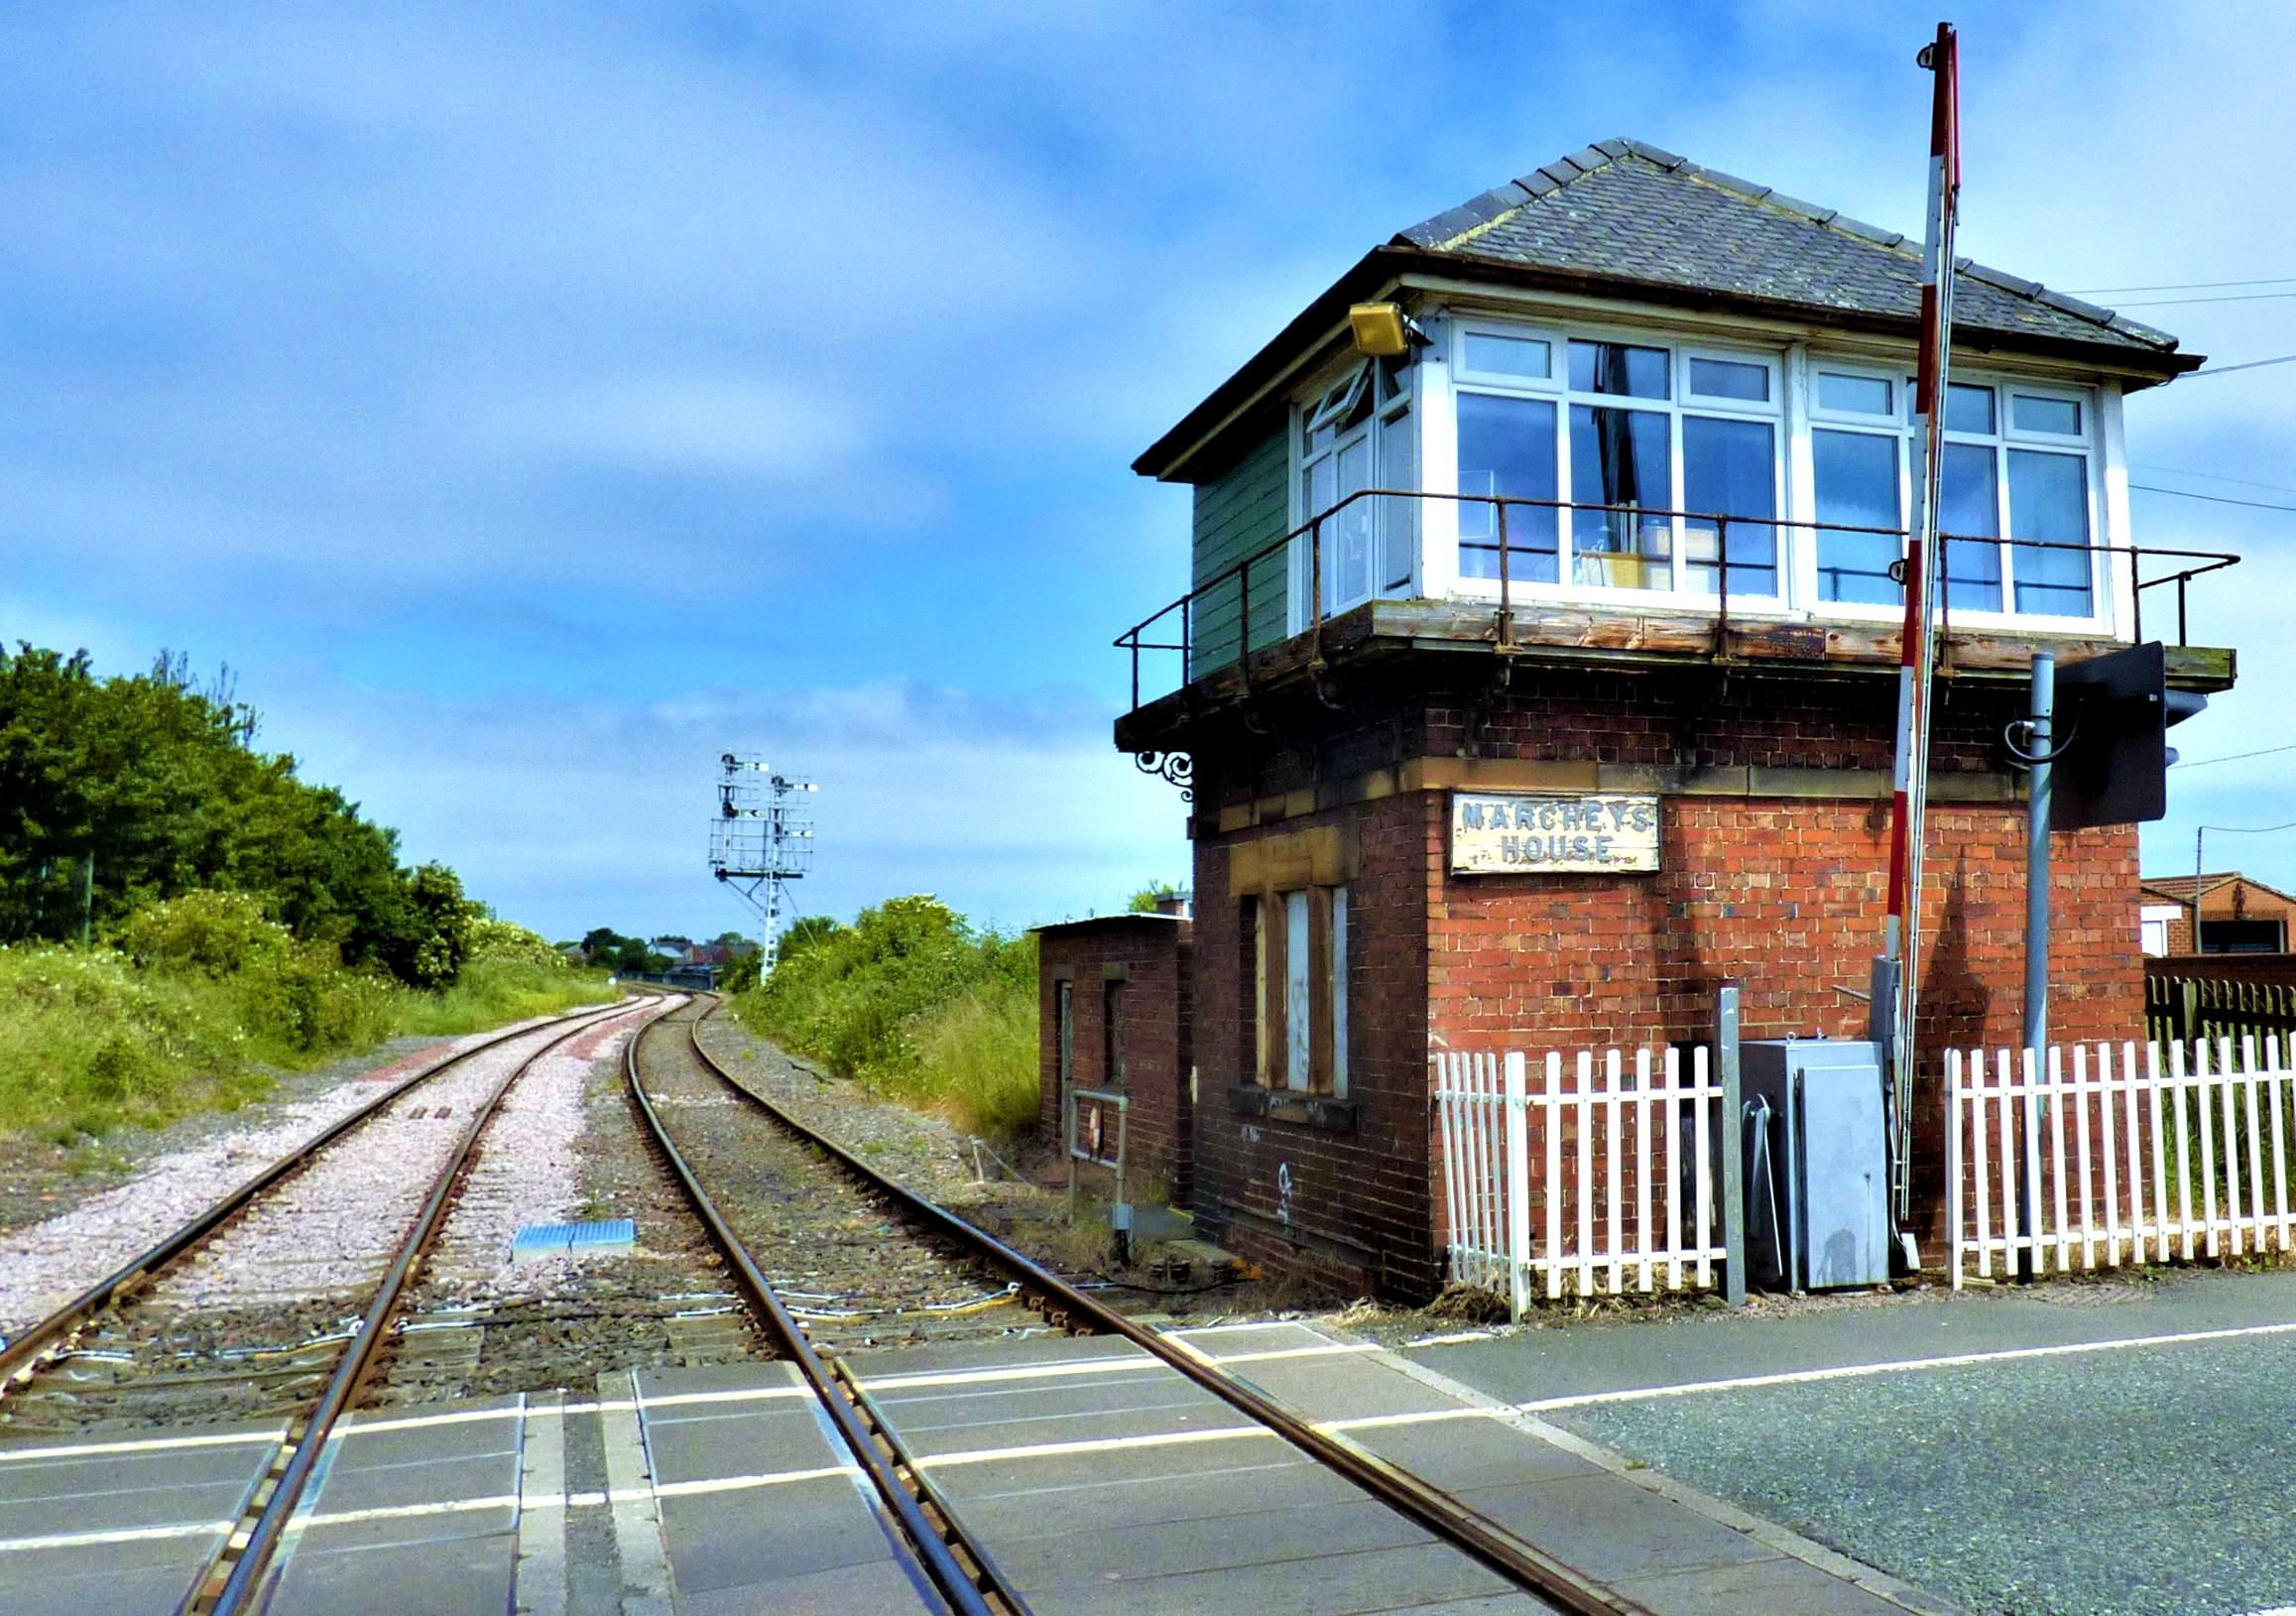
Marcheys House Signal Box.
[© Nick Jones 2019]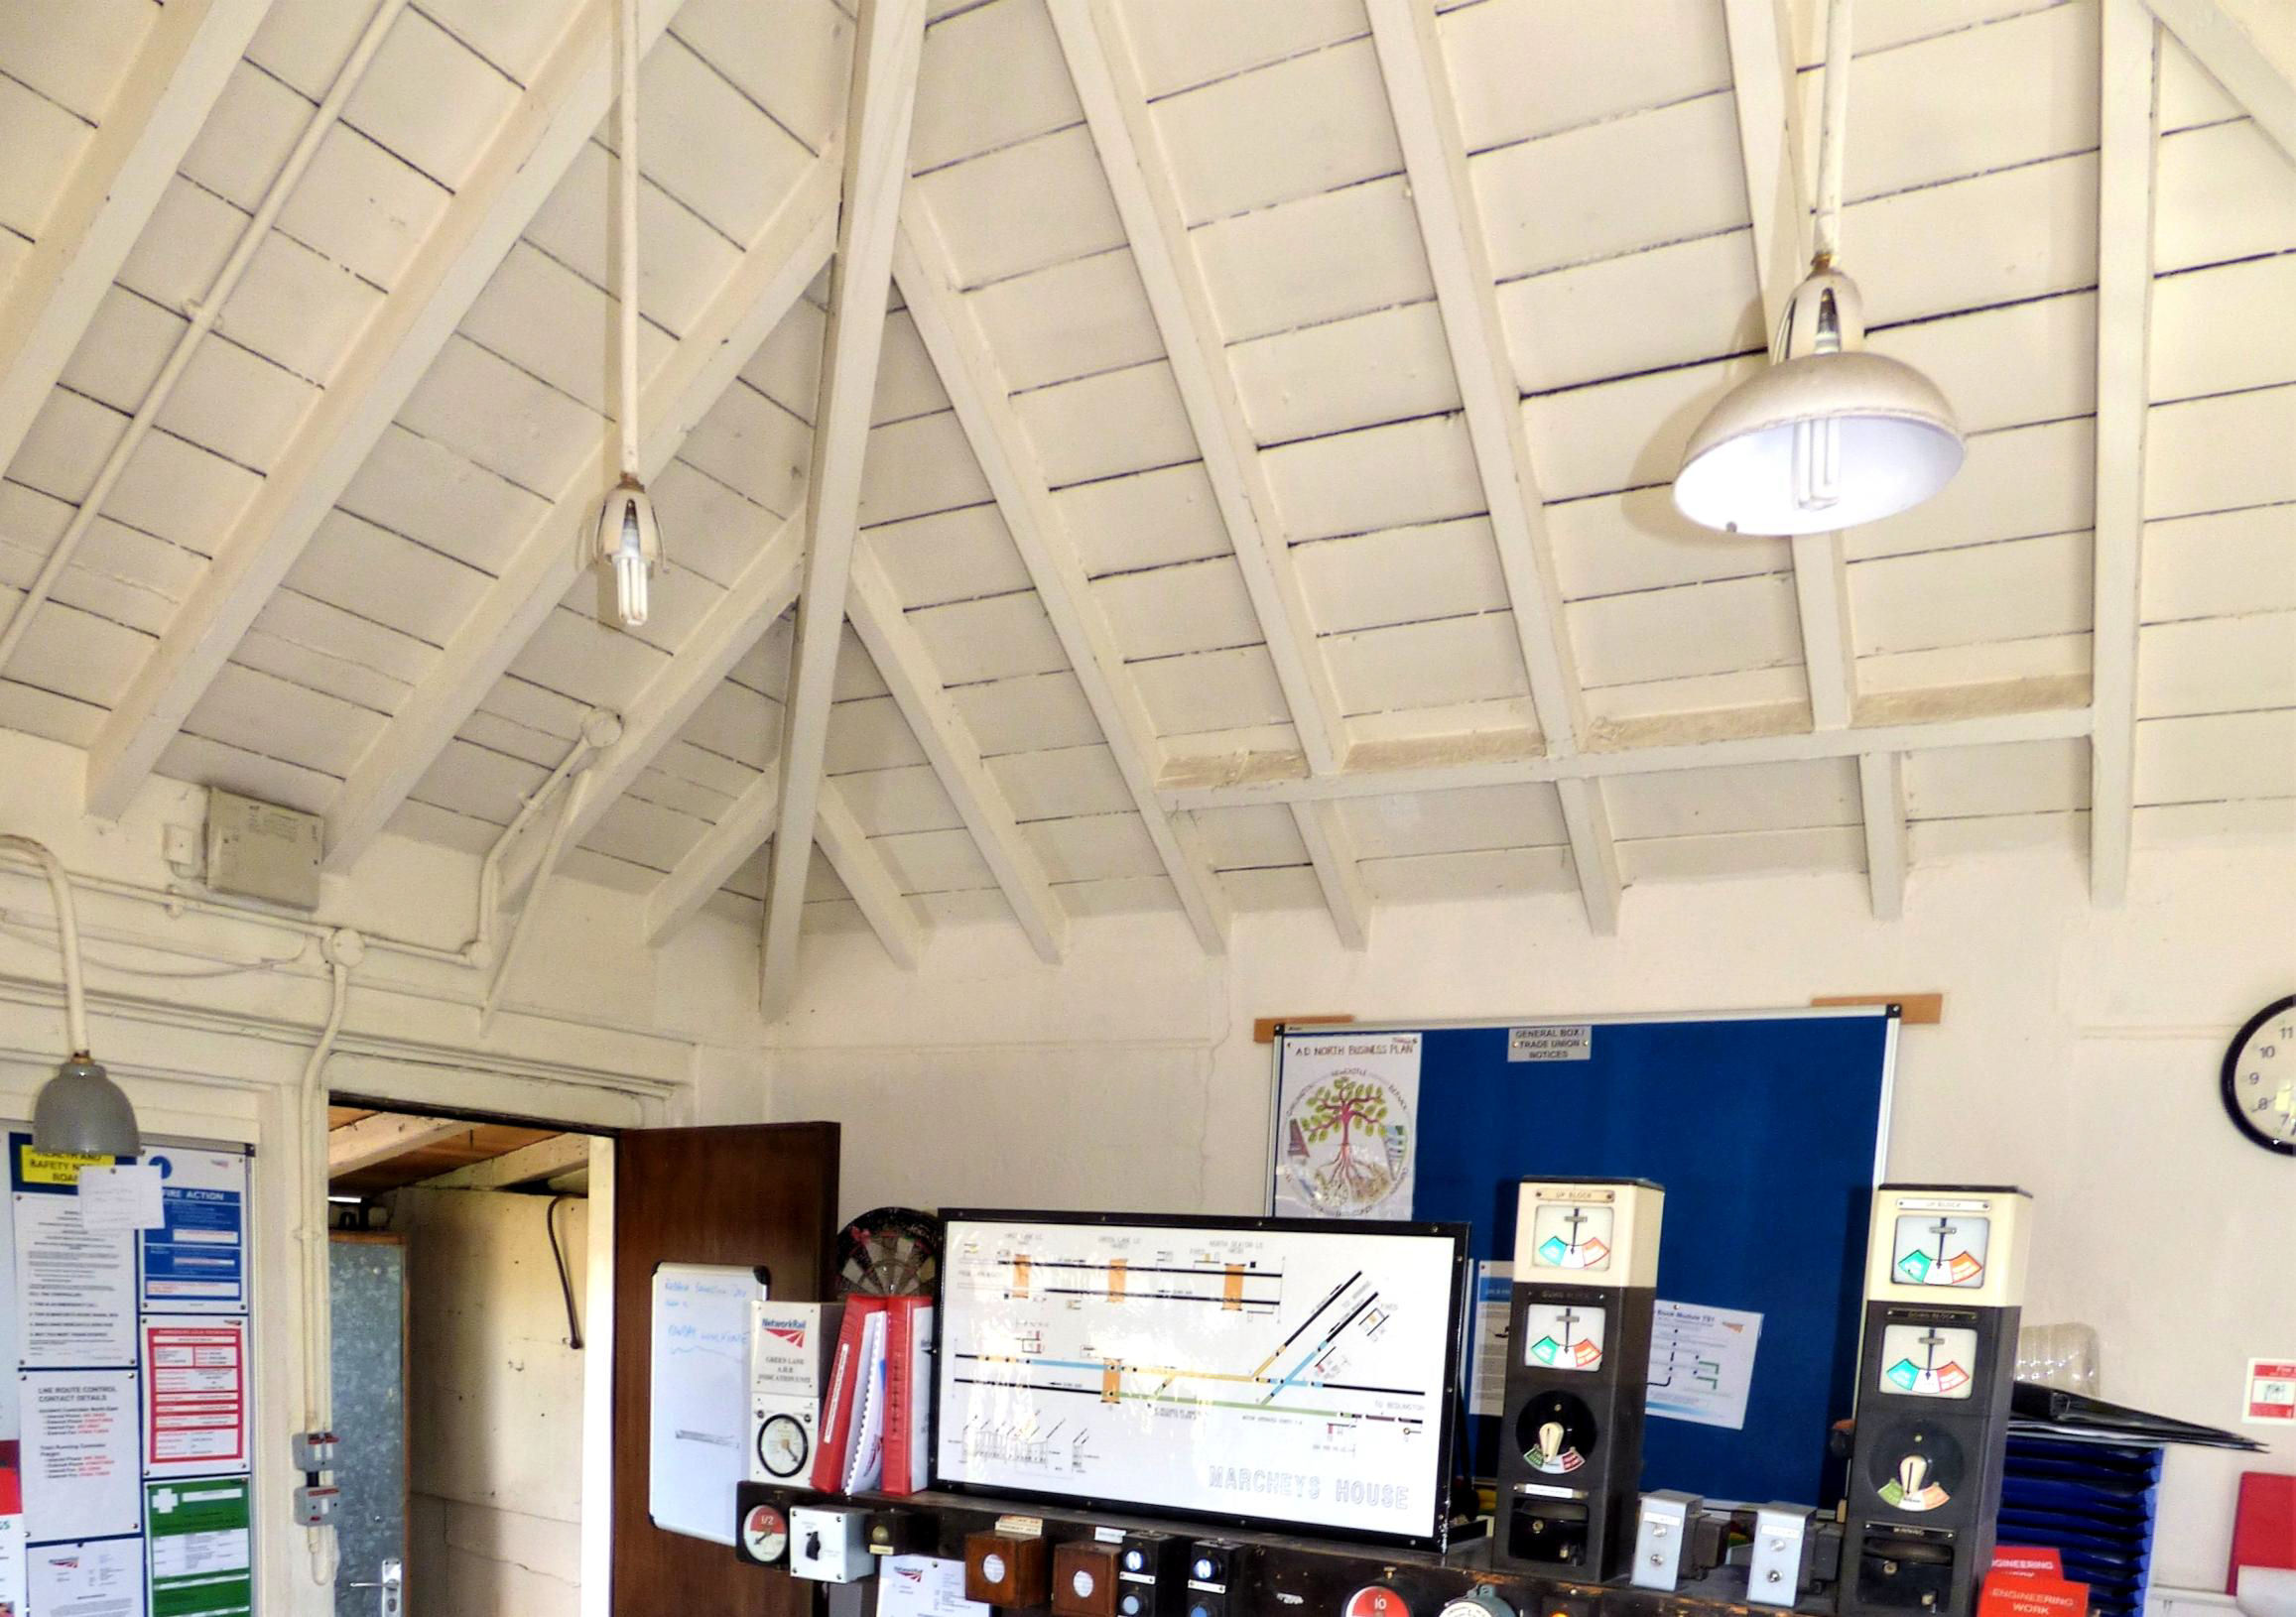
Marcheys House Signal Box diagram and instruments.
[© Nick Jones 2019]
Marcheys House Signal Box lever frame with a rather shy Henry in hiding.
[© Nick Jones 2019]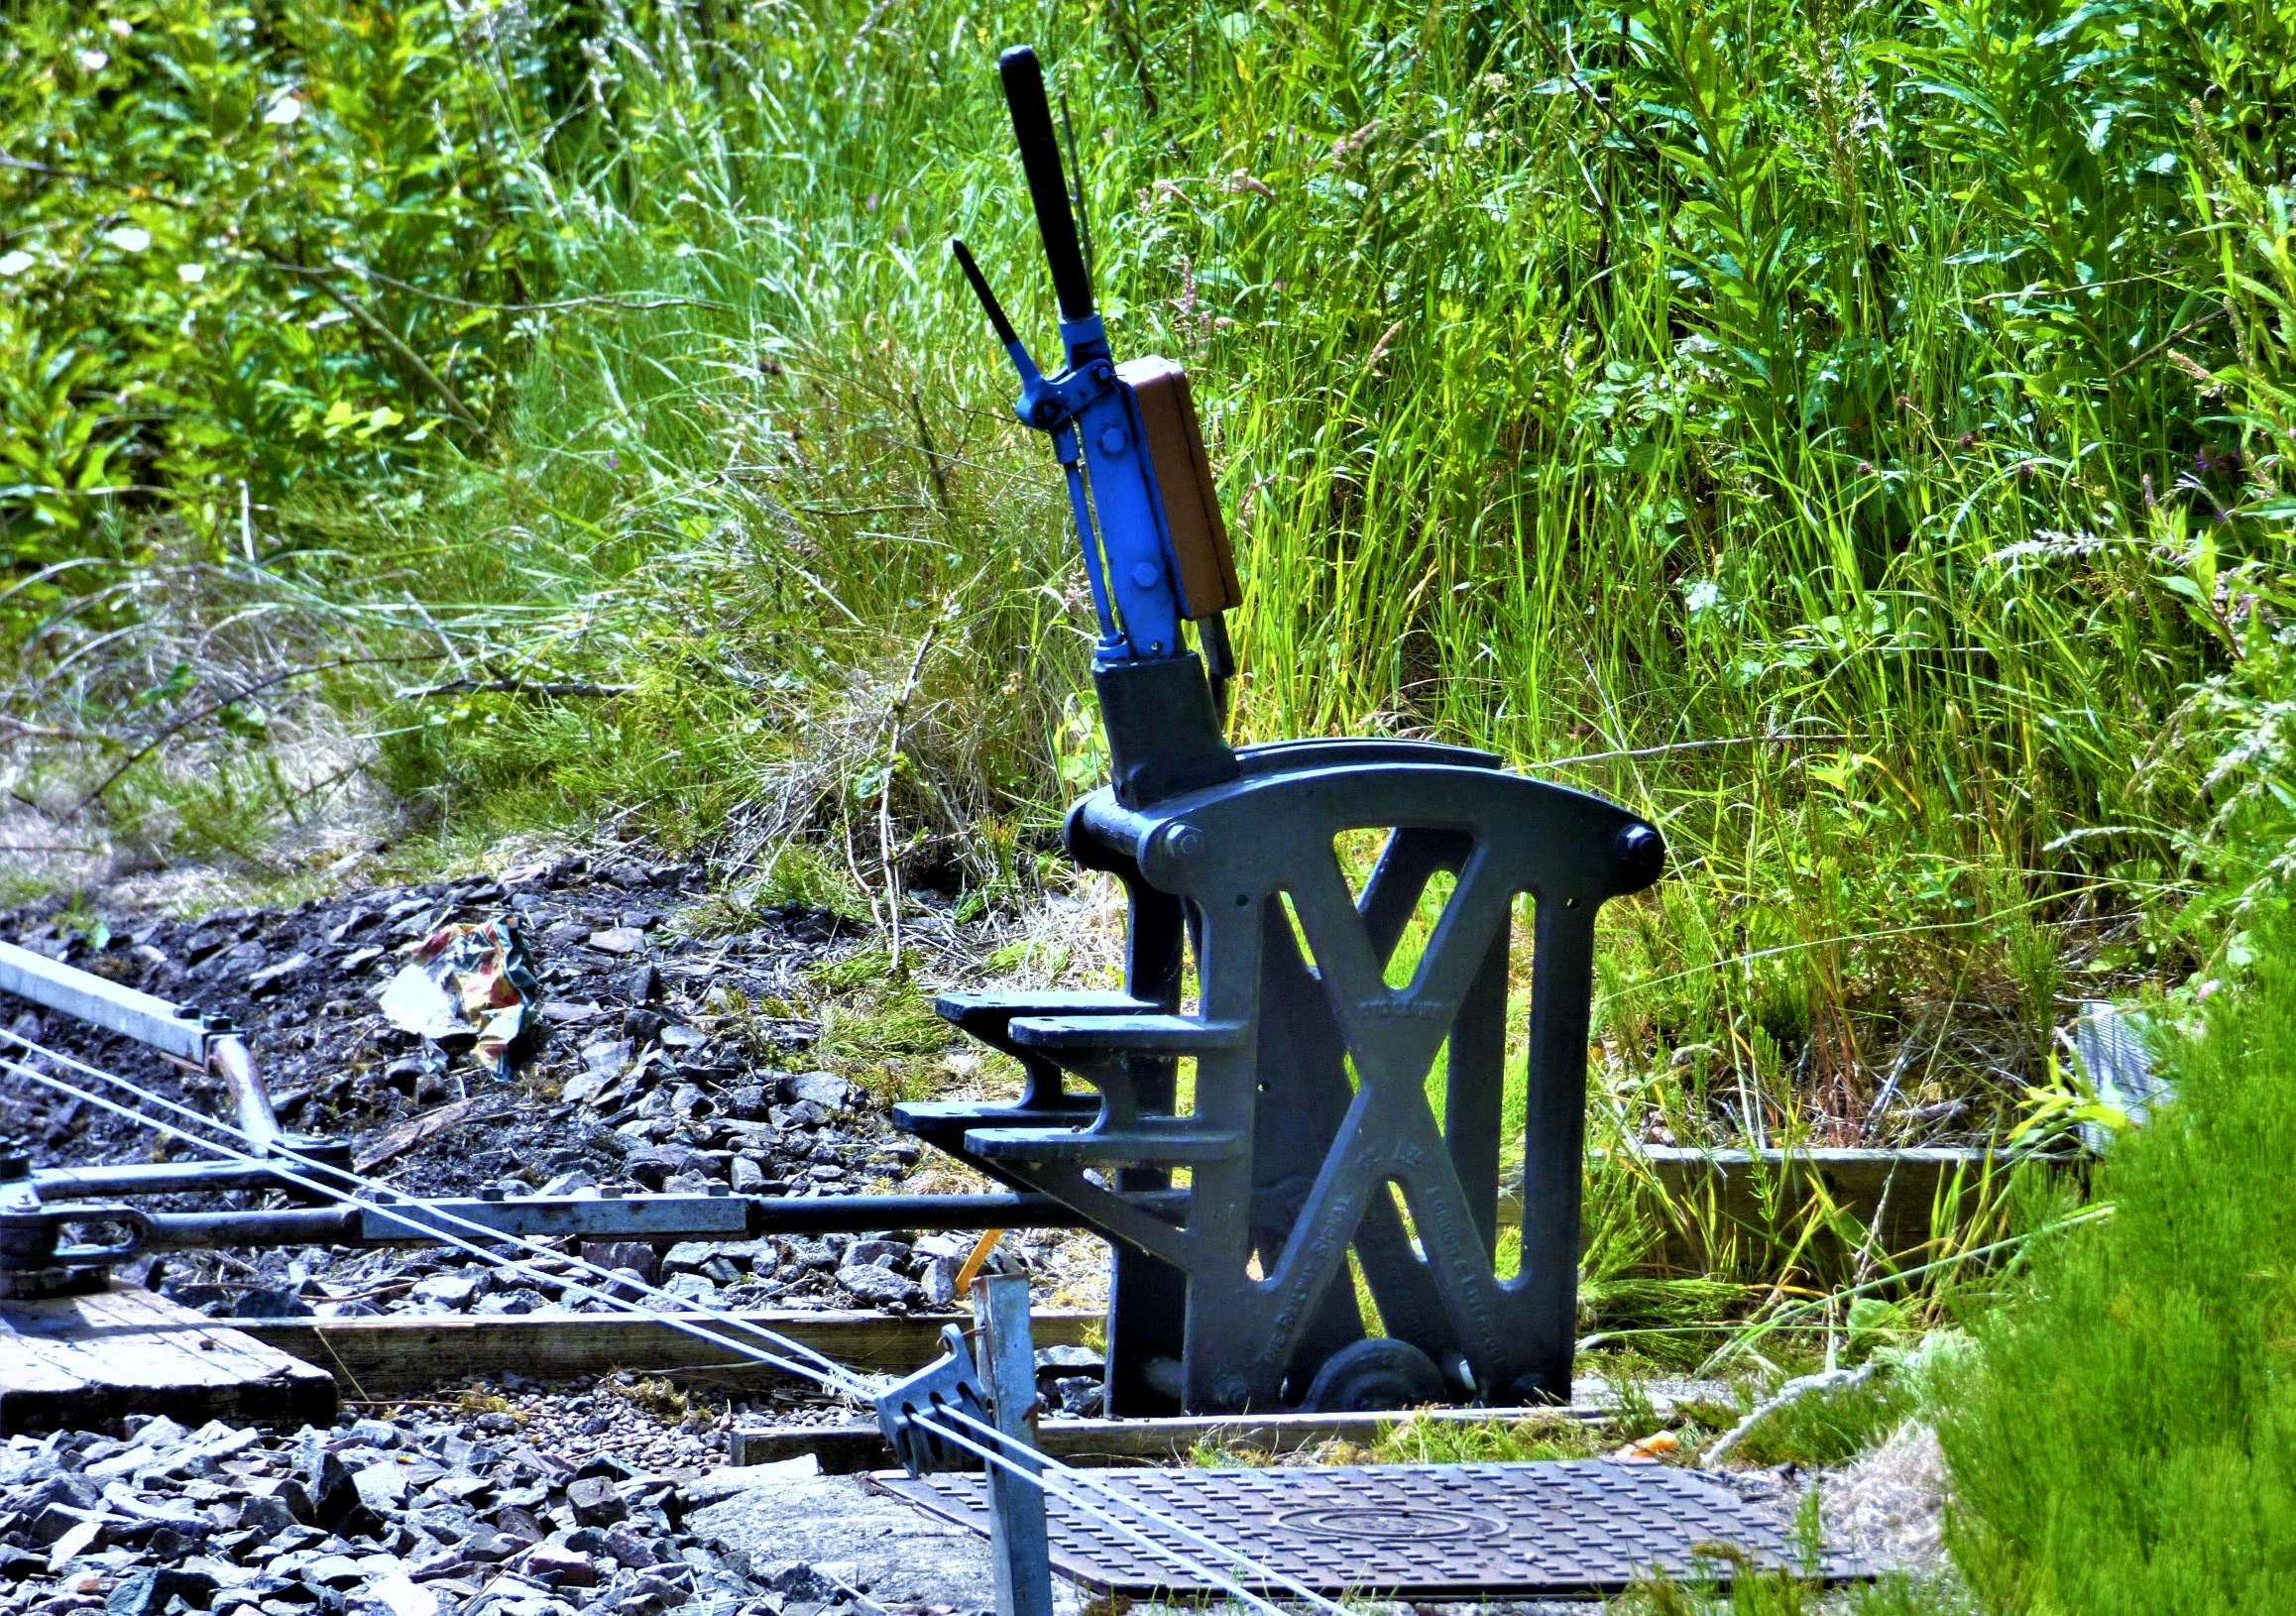
The single lever ground frame controlling the trailing crossover between Marcheys House level crossing and the junction points. This is released by an Annetts key which normally resides in a lock attached to Lever 9 in the Signal Box.
[© Nick Jones 2019]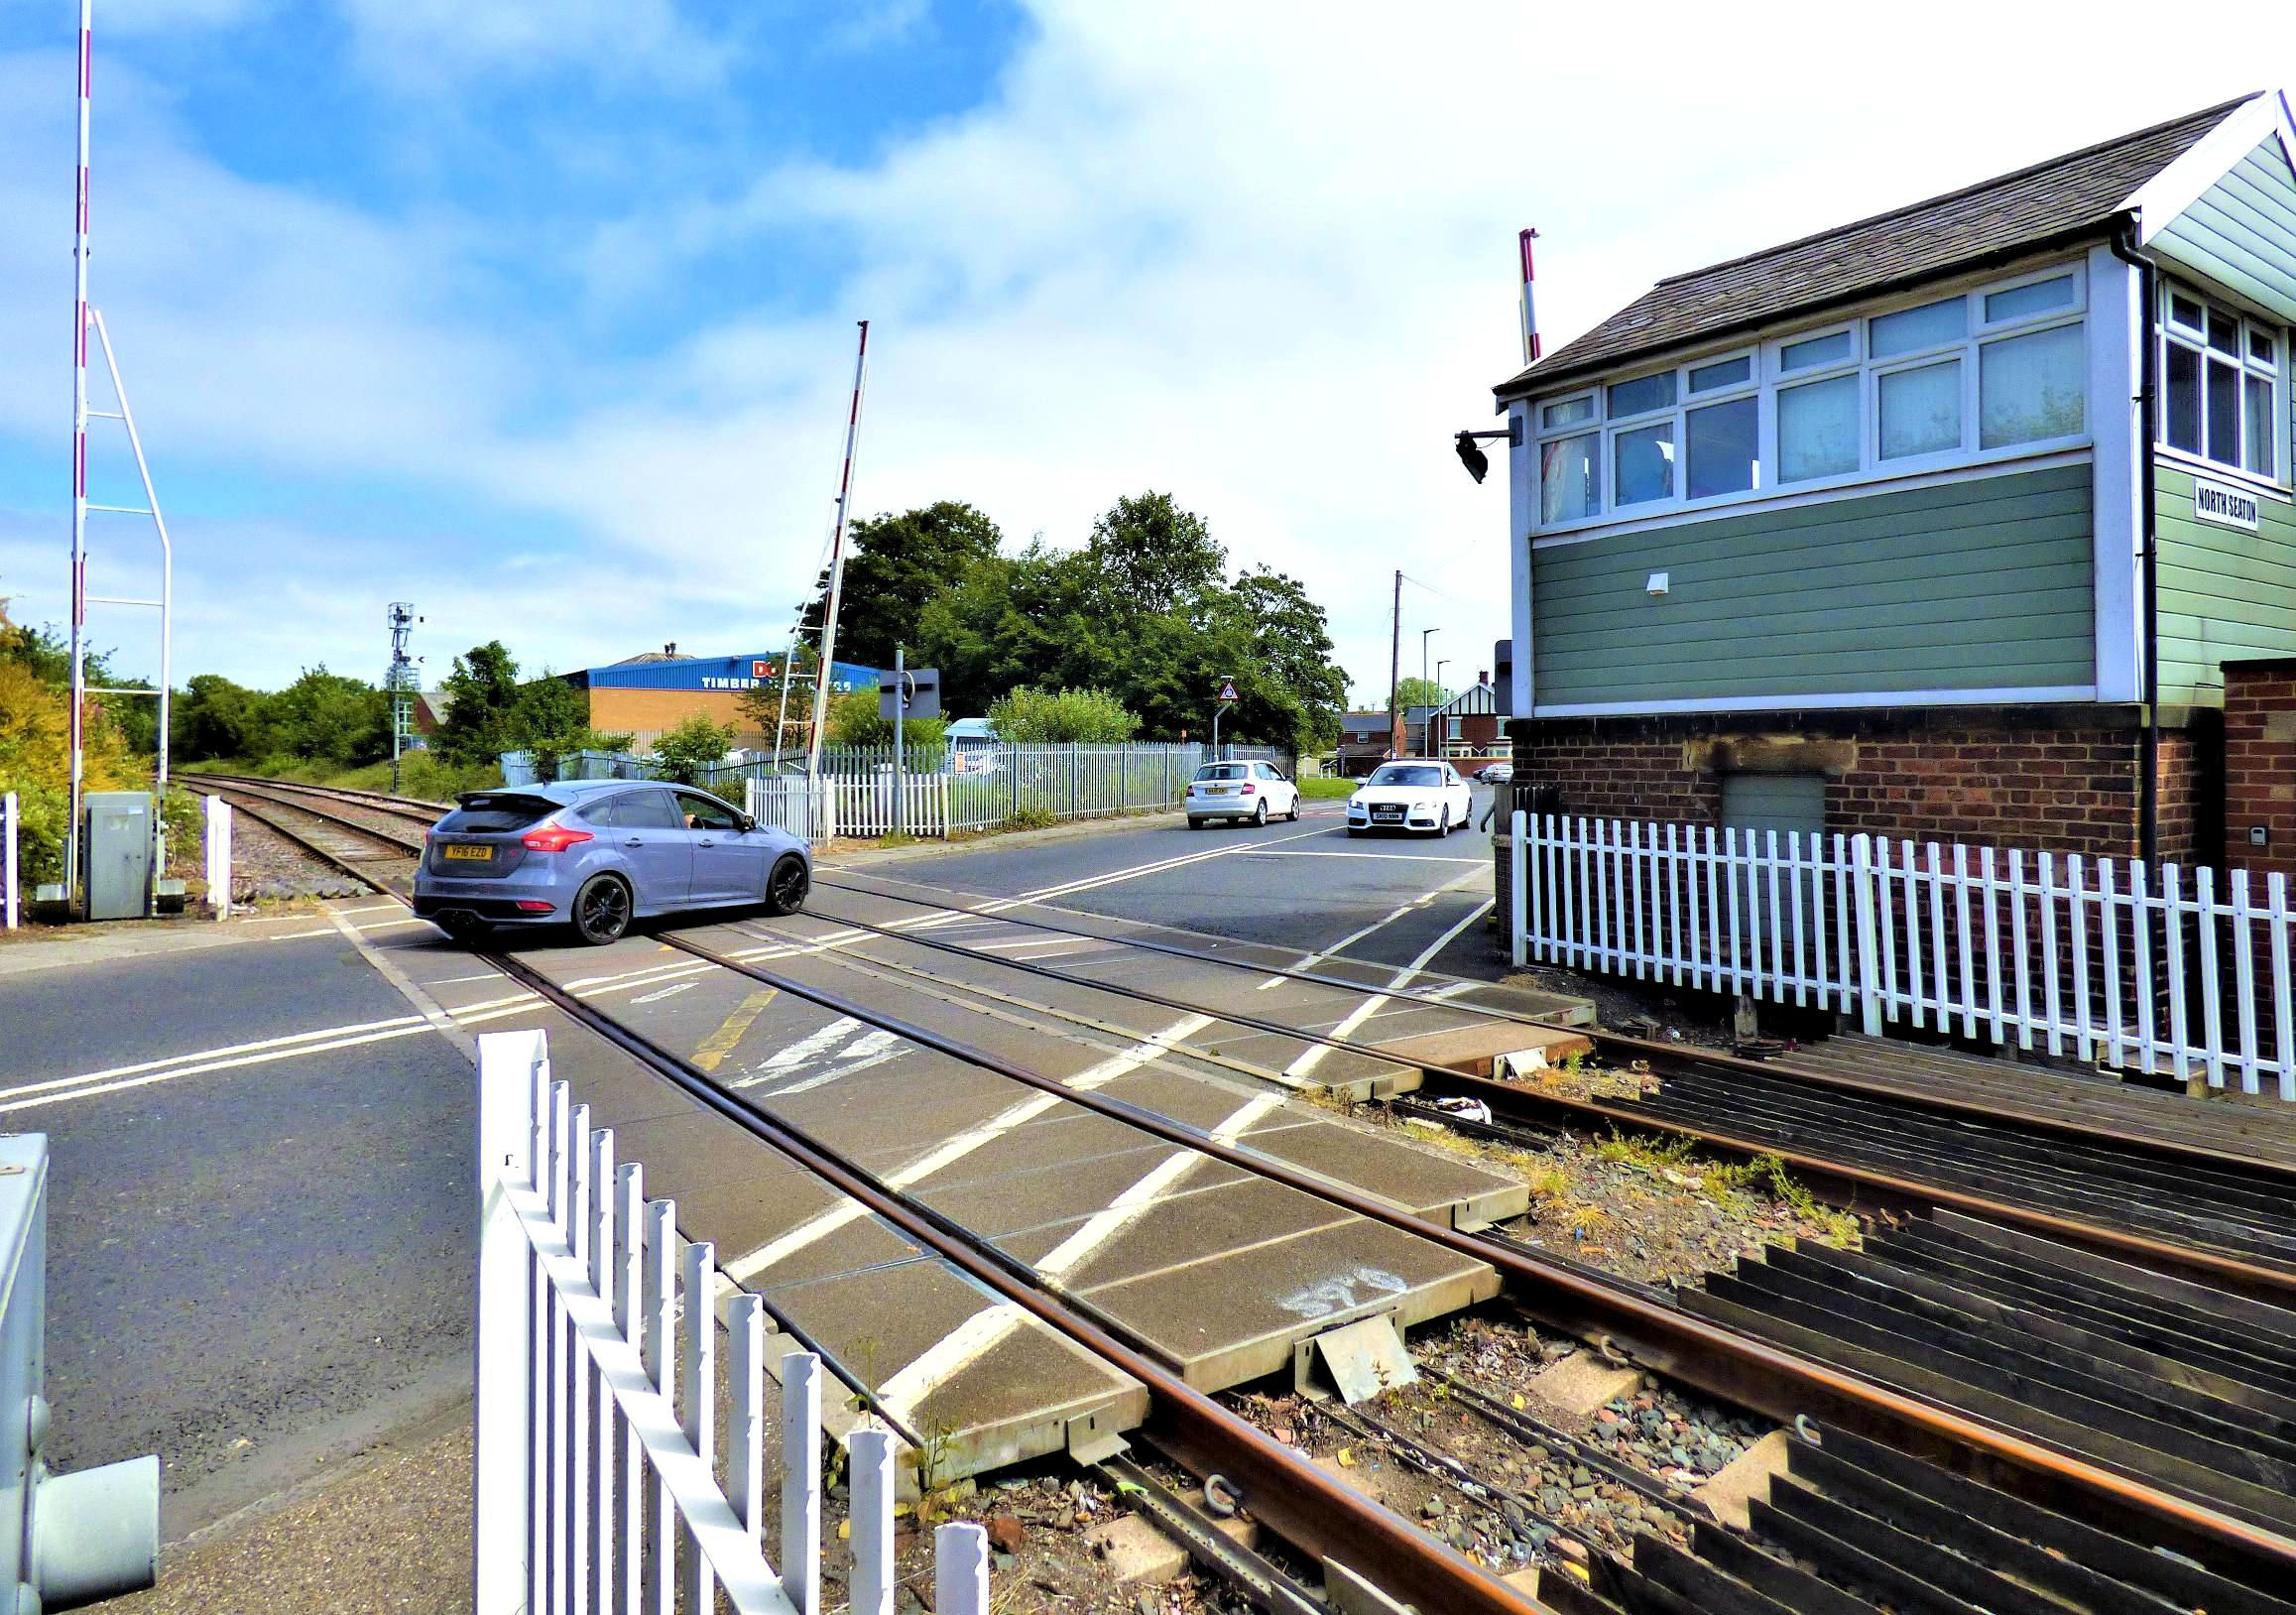
North Seaton Gate Box.
[© Nick Jones 2019]